Great job! Personally, I think the jacks are a great idea, and they look to be out of the way and not hindering anything. Every build is a reflection on the owner(s) priorities and requirements for use. At least it should be anyway! I think the way you thought through your needs versus just wants, in the end make the build better, and hopefully, more economical in the long run.
Get your tickets to THE BIG THING 2026!
You are using an out of date browser. It may not display this or other websites correctly.
You should upgrade or use an alternative browser.
You should upgrade or use an alternative browser.
Pan-Am Highway "Expedition" Build - 2015 TRD Tacoma
- Thread starter bootstobirks
- Start date
bootstobirks
New member
Part III: Capper and Tent Design
Goal: Being able to stand up inside the living space was one of the primary build constraints that we had from the start. The problem is that there are dozens of ways to do this, and all of them are quite expensive. Not to mention, if you screw up the functionality of your primary living space, life on the road is a lot less fun!
Build Time: Approx. 40hrs
Cost: Approx. $4050 (Tent $3300, Capper $500, Steel and Supplies $250)
Inspiration:
This is where Overland Expo and Expedition Portal becomes a smidge overwhelming… there are so many options on living spaces, rooftop tents and the like. You could go with a Fourwheel Camper but where’s the fun in not designing your own (if you’re a nerd like me). Rooftop tents are cool until you’re camping in rain/mud and end up dragging it all into your bedroom.
Lindsay also wanted the ability to be moderately incognito and have a quick setup/teardown process. I didn’t want to tow a trailer, as it just becomes a liability as soon as you need to back out of somewhere dicey.
Our first thought was a Tacoma Habitat, as it gives you standing room in the bed, a decent sized bed to sleep in, and the added benefit of an overhang/awning behind the truck when fully set up. Unfortunately, the $9,000 base price and $12,000 end price with insulation for winter camping, shipping, etc. put the Habitat out of our price range. If we had an extra $10,000 in the build budget, I’m pretty sure we would have one on the truck right now.
Fortunately, I was introduced to Alu-Cab and OK4WD on my last trip to Expo East in 2017. Alu-Cab’s Khaya insert system is the Rolls-Royce of Tacoma inserts (as in it’s luxurious, heavy, and expensive…).
The Khaya tent has everything we were looking for:
• Quick setup
• Standing room
• Onboard water, solar, and storage
• Relatively compact
If you think the Habitat was out of our price range, then the Khaya was going to require our firstborn child.
Concept:
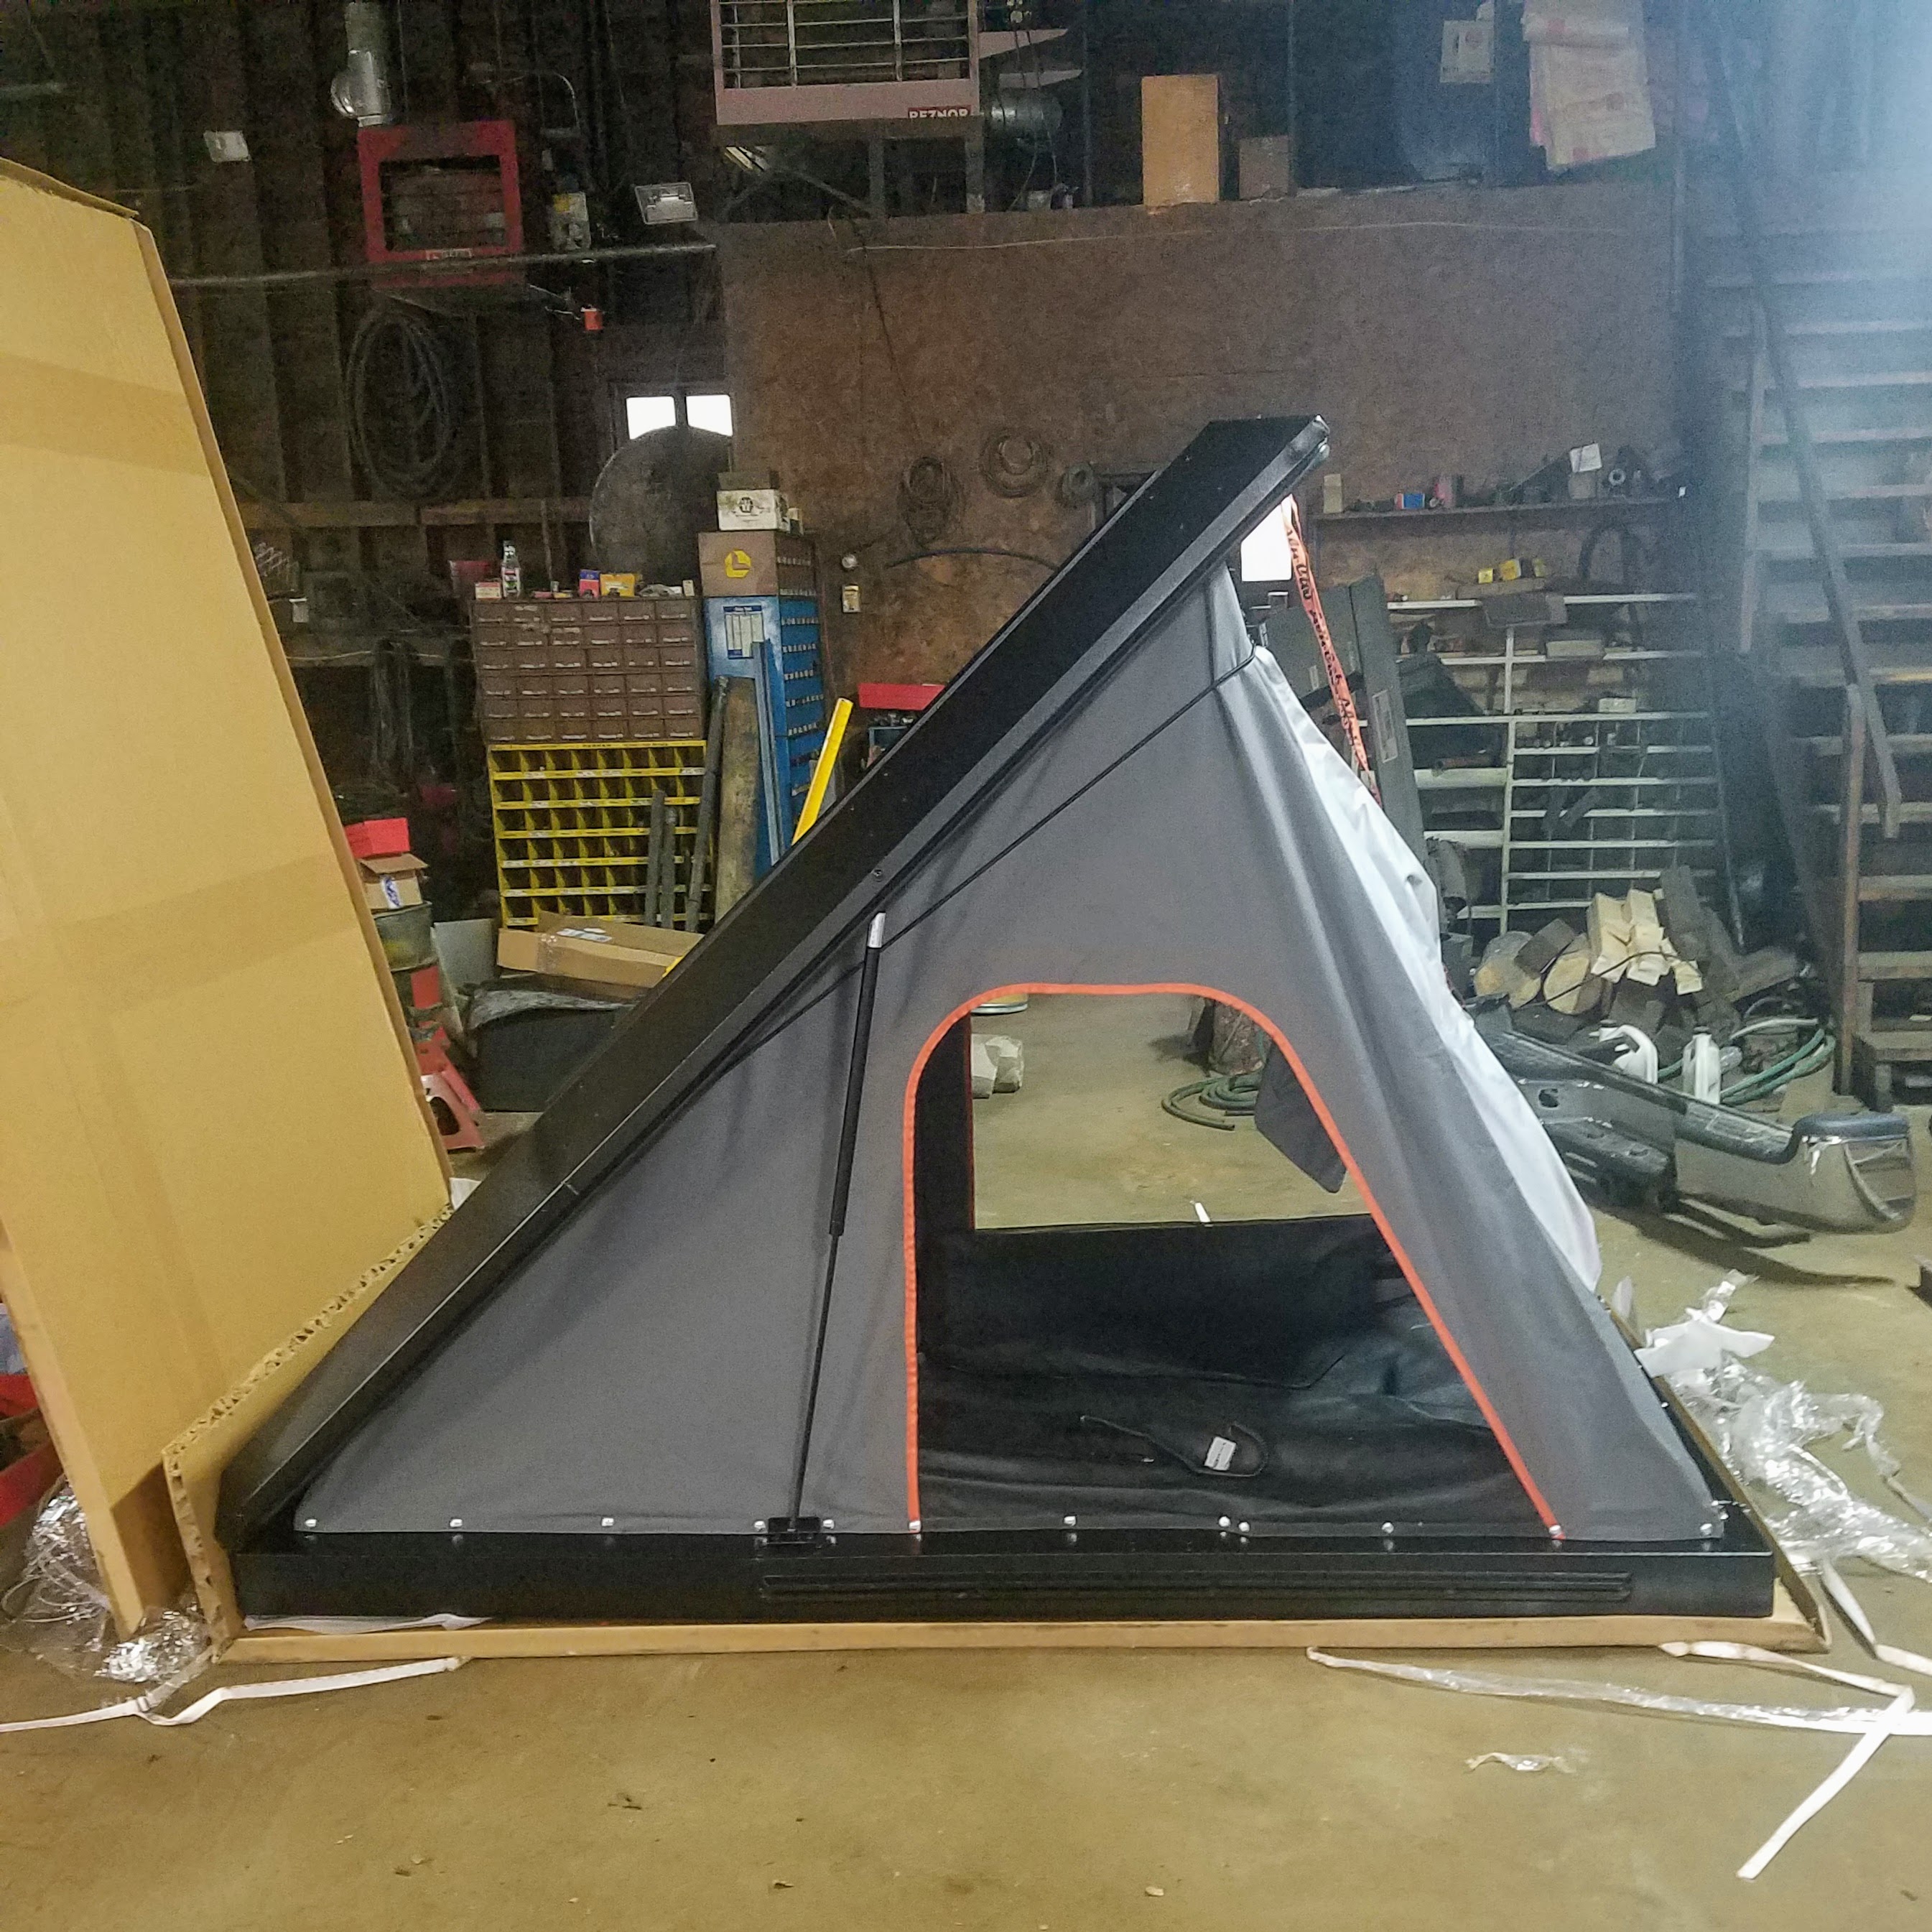
If we couldn’t buy something off the shelf, we were going to build our own prototype. The idea was to take a rooftop tent off the shelf and a truck capper, cut a hole in the bottom of the tent and the top of the capper, stick them together and figure out a way to cover the whole for sleeping. Easy Peasy.
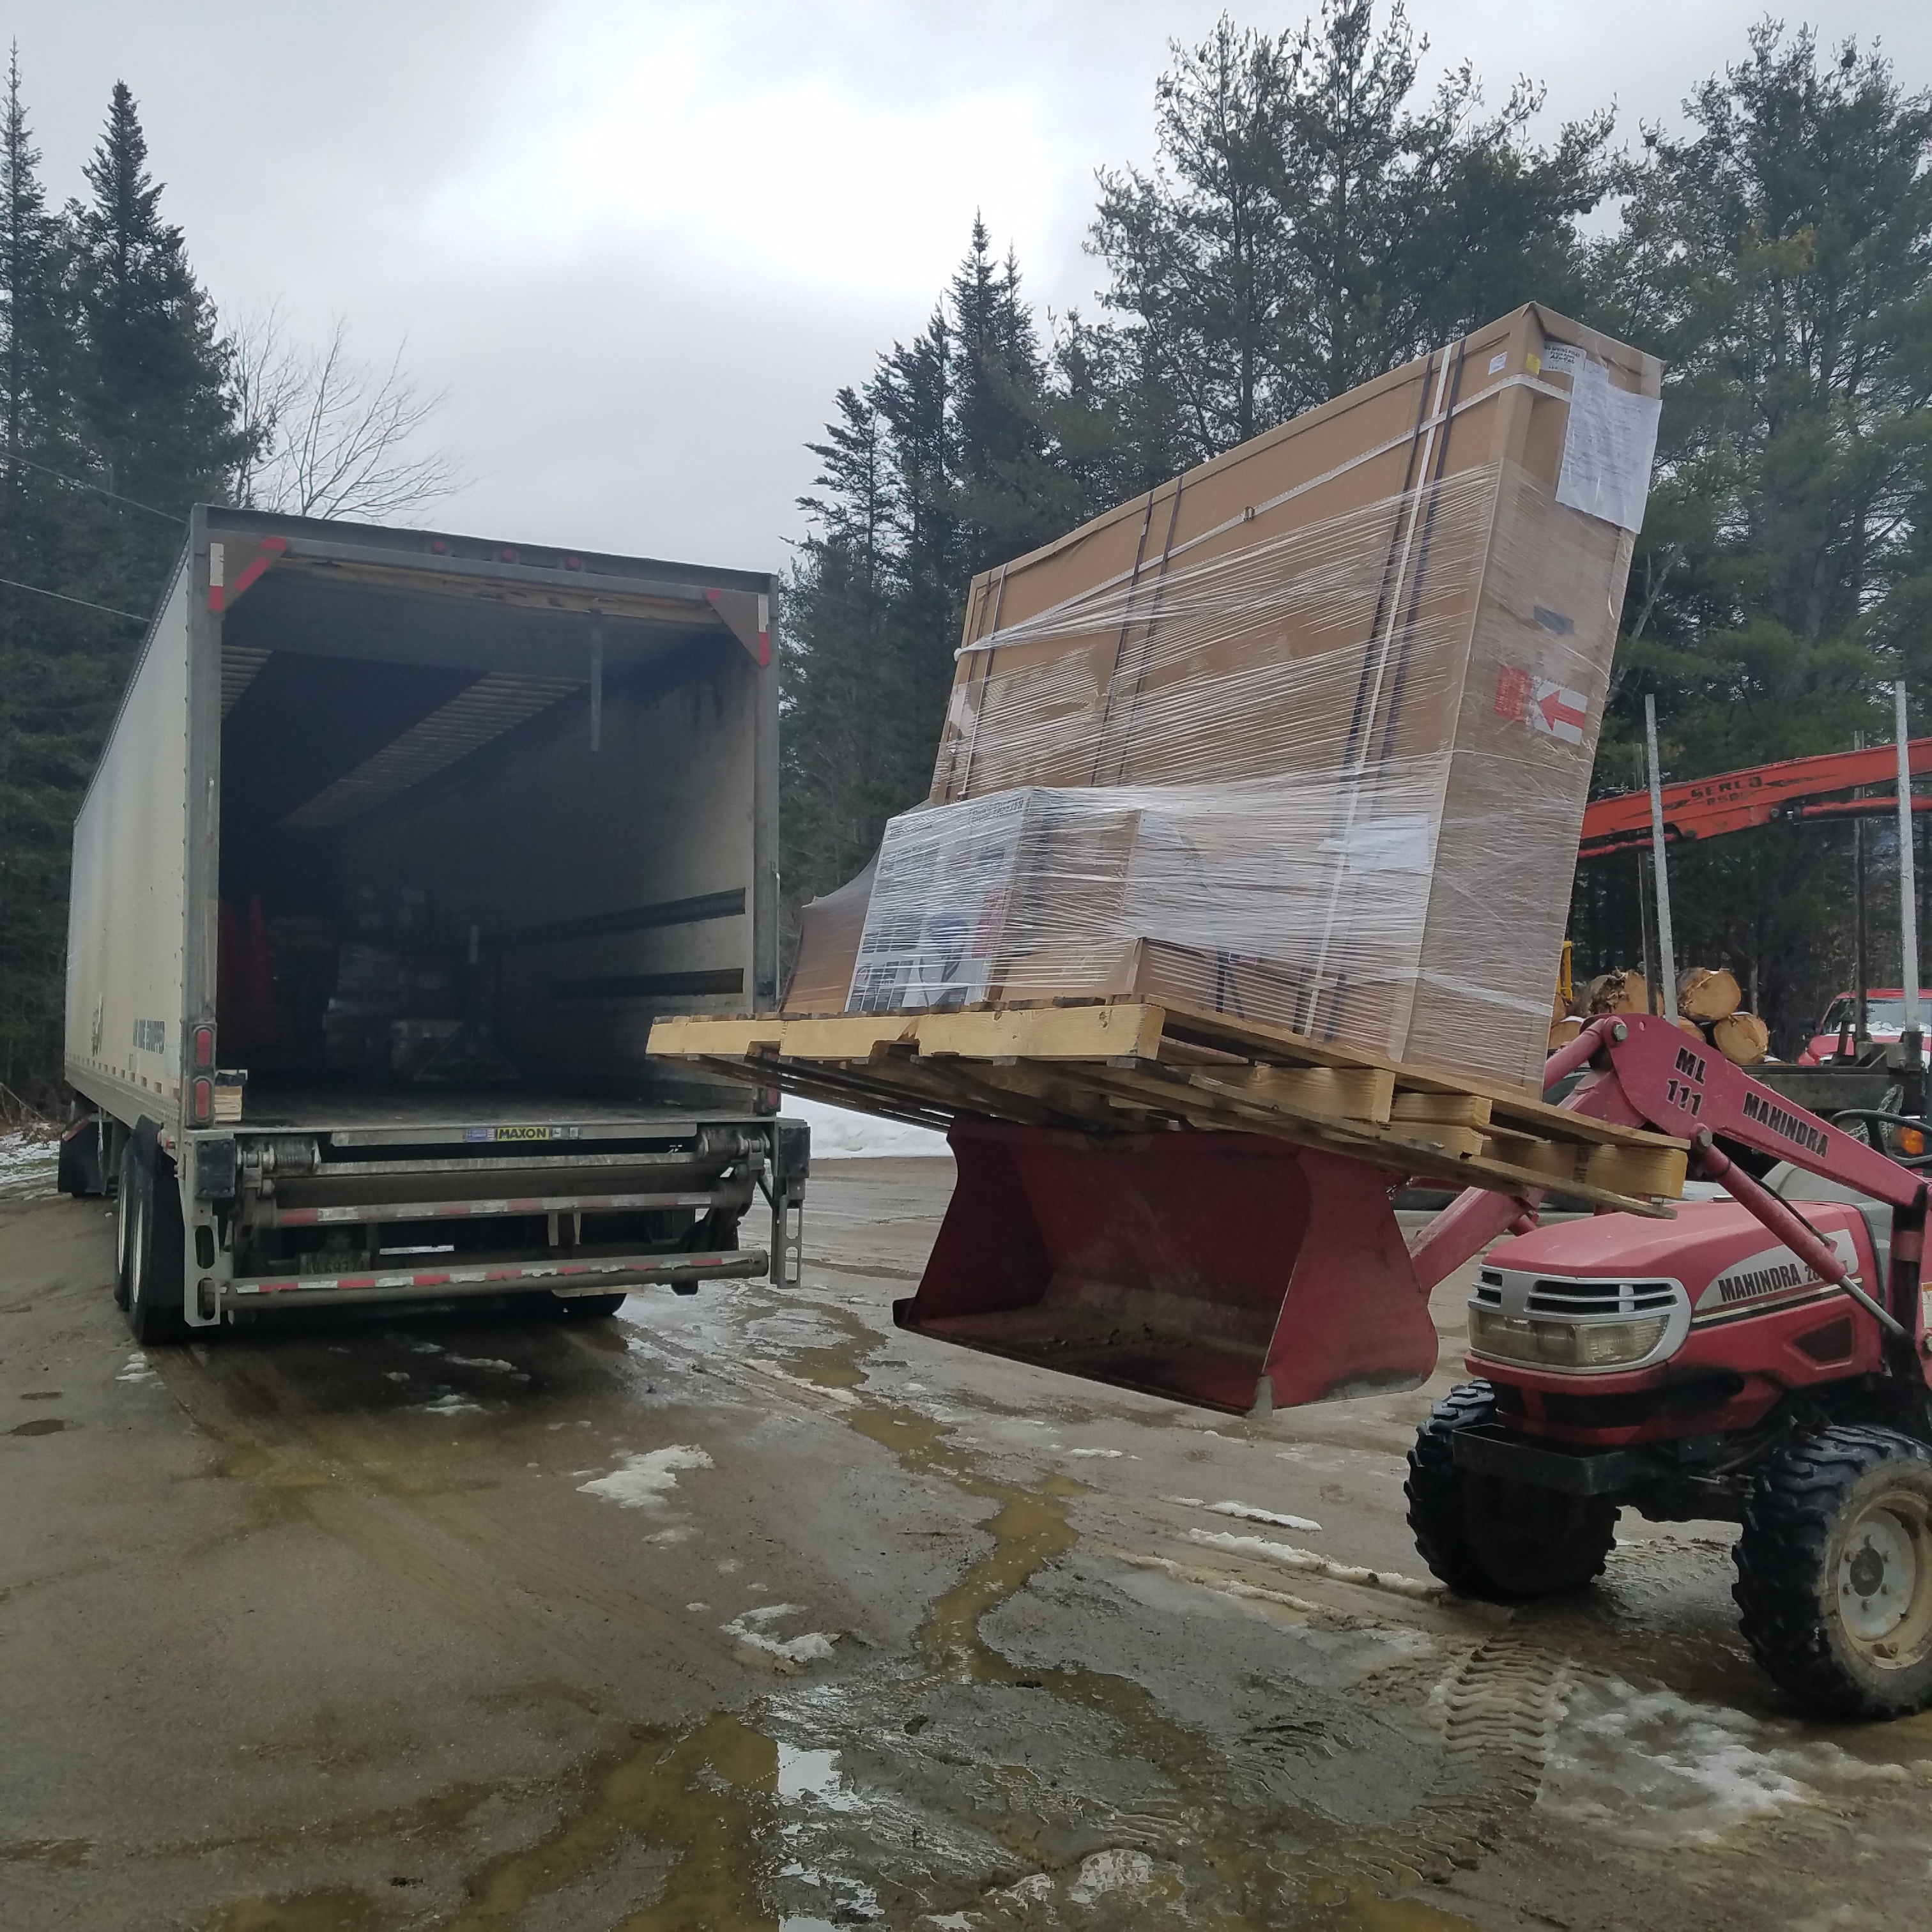
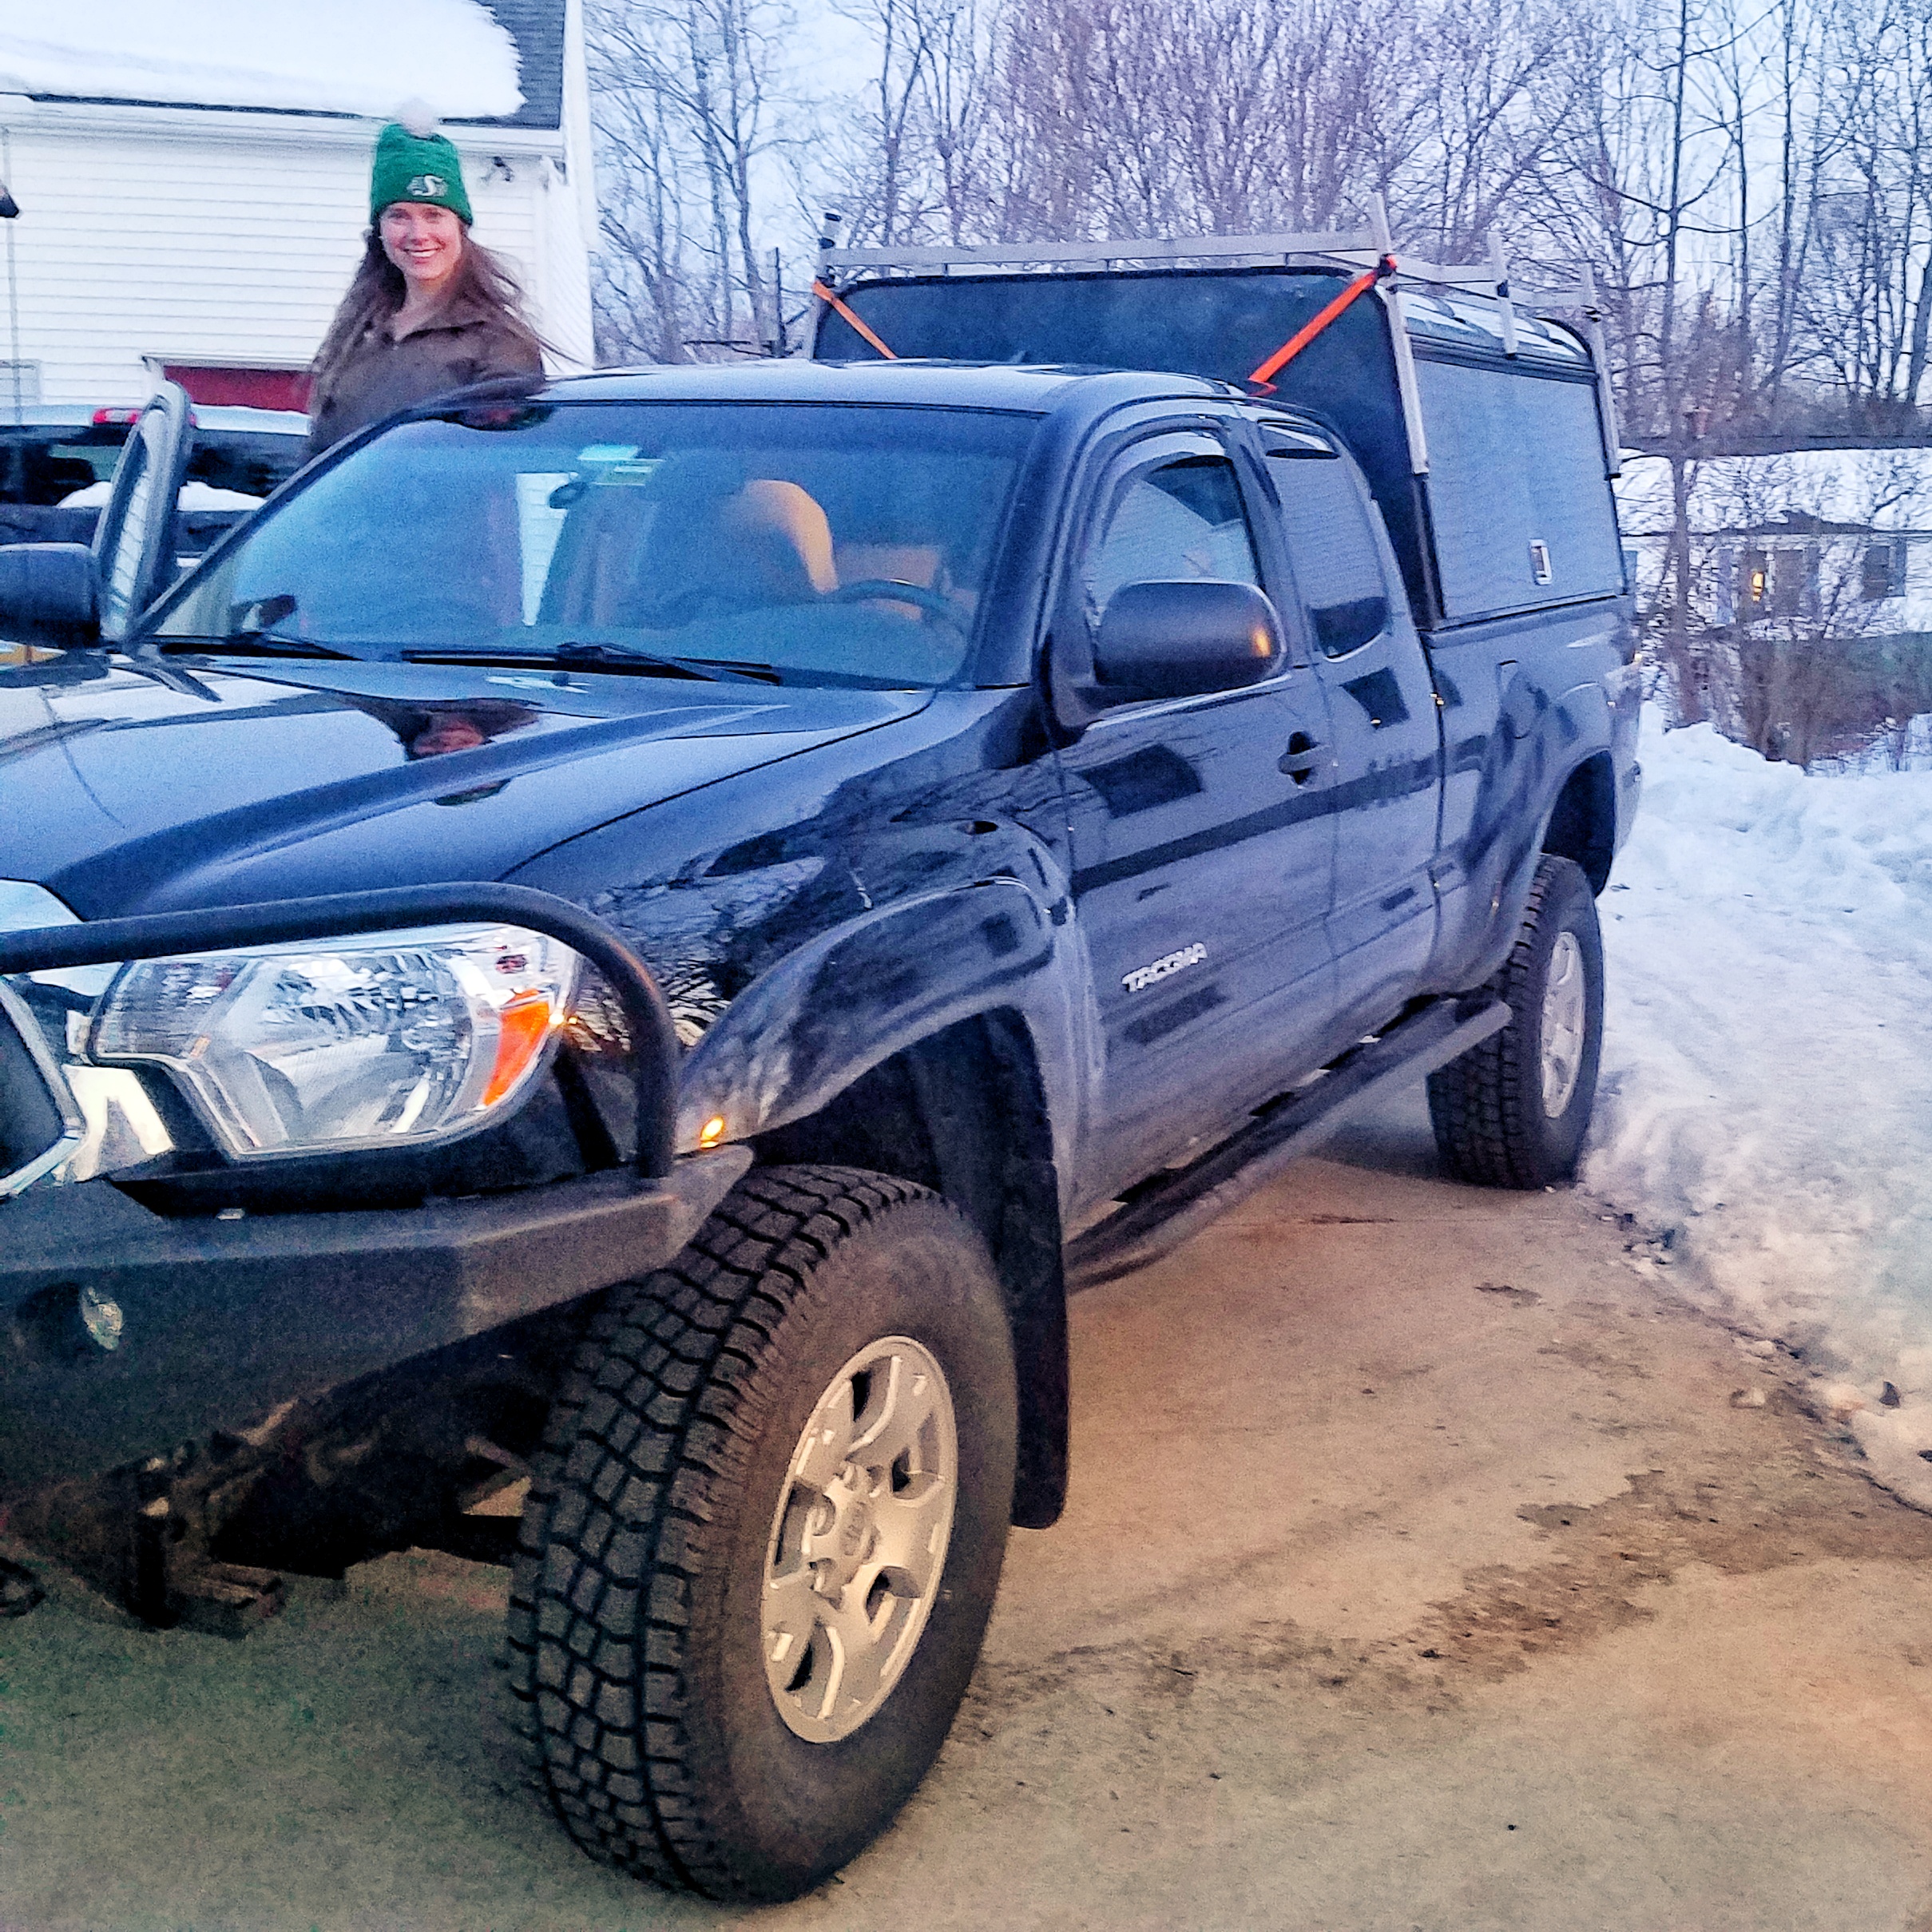
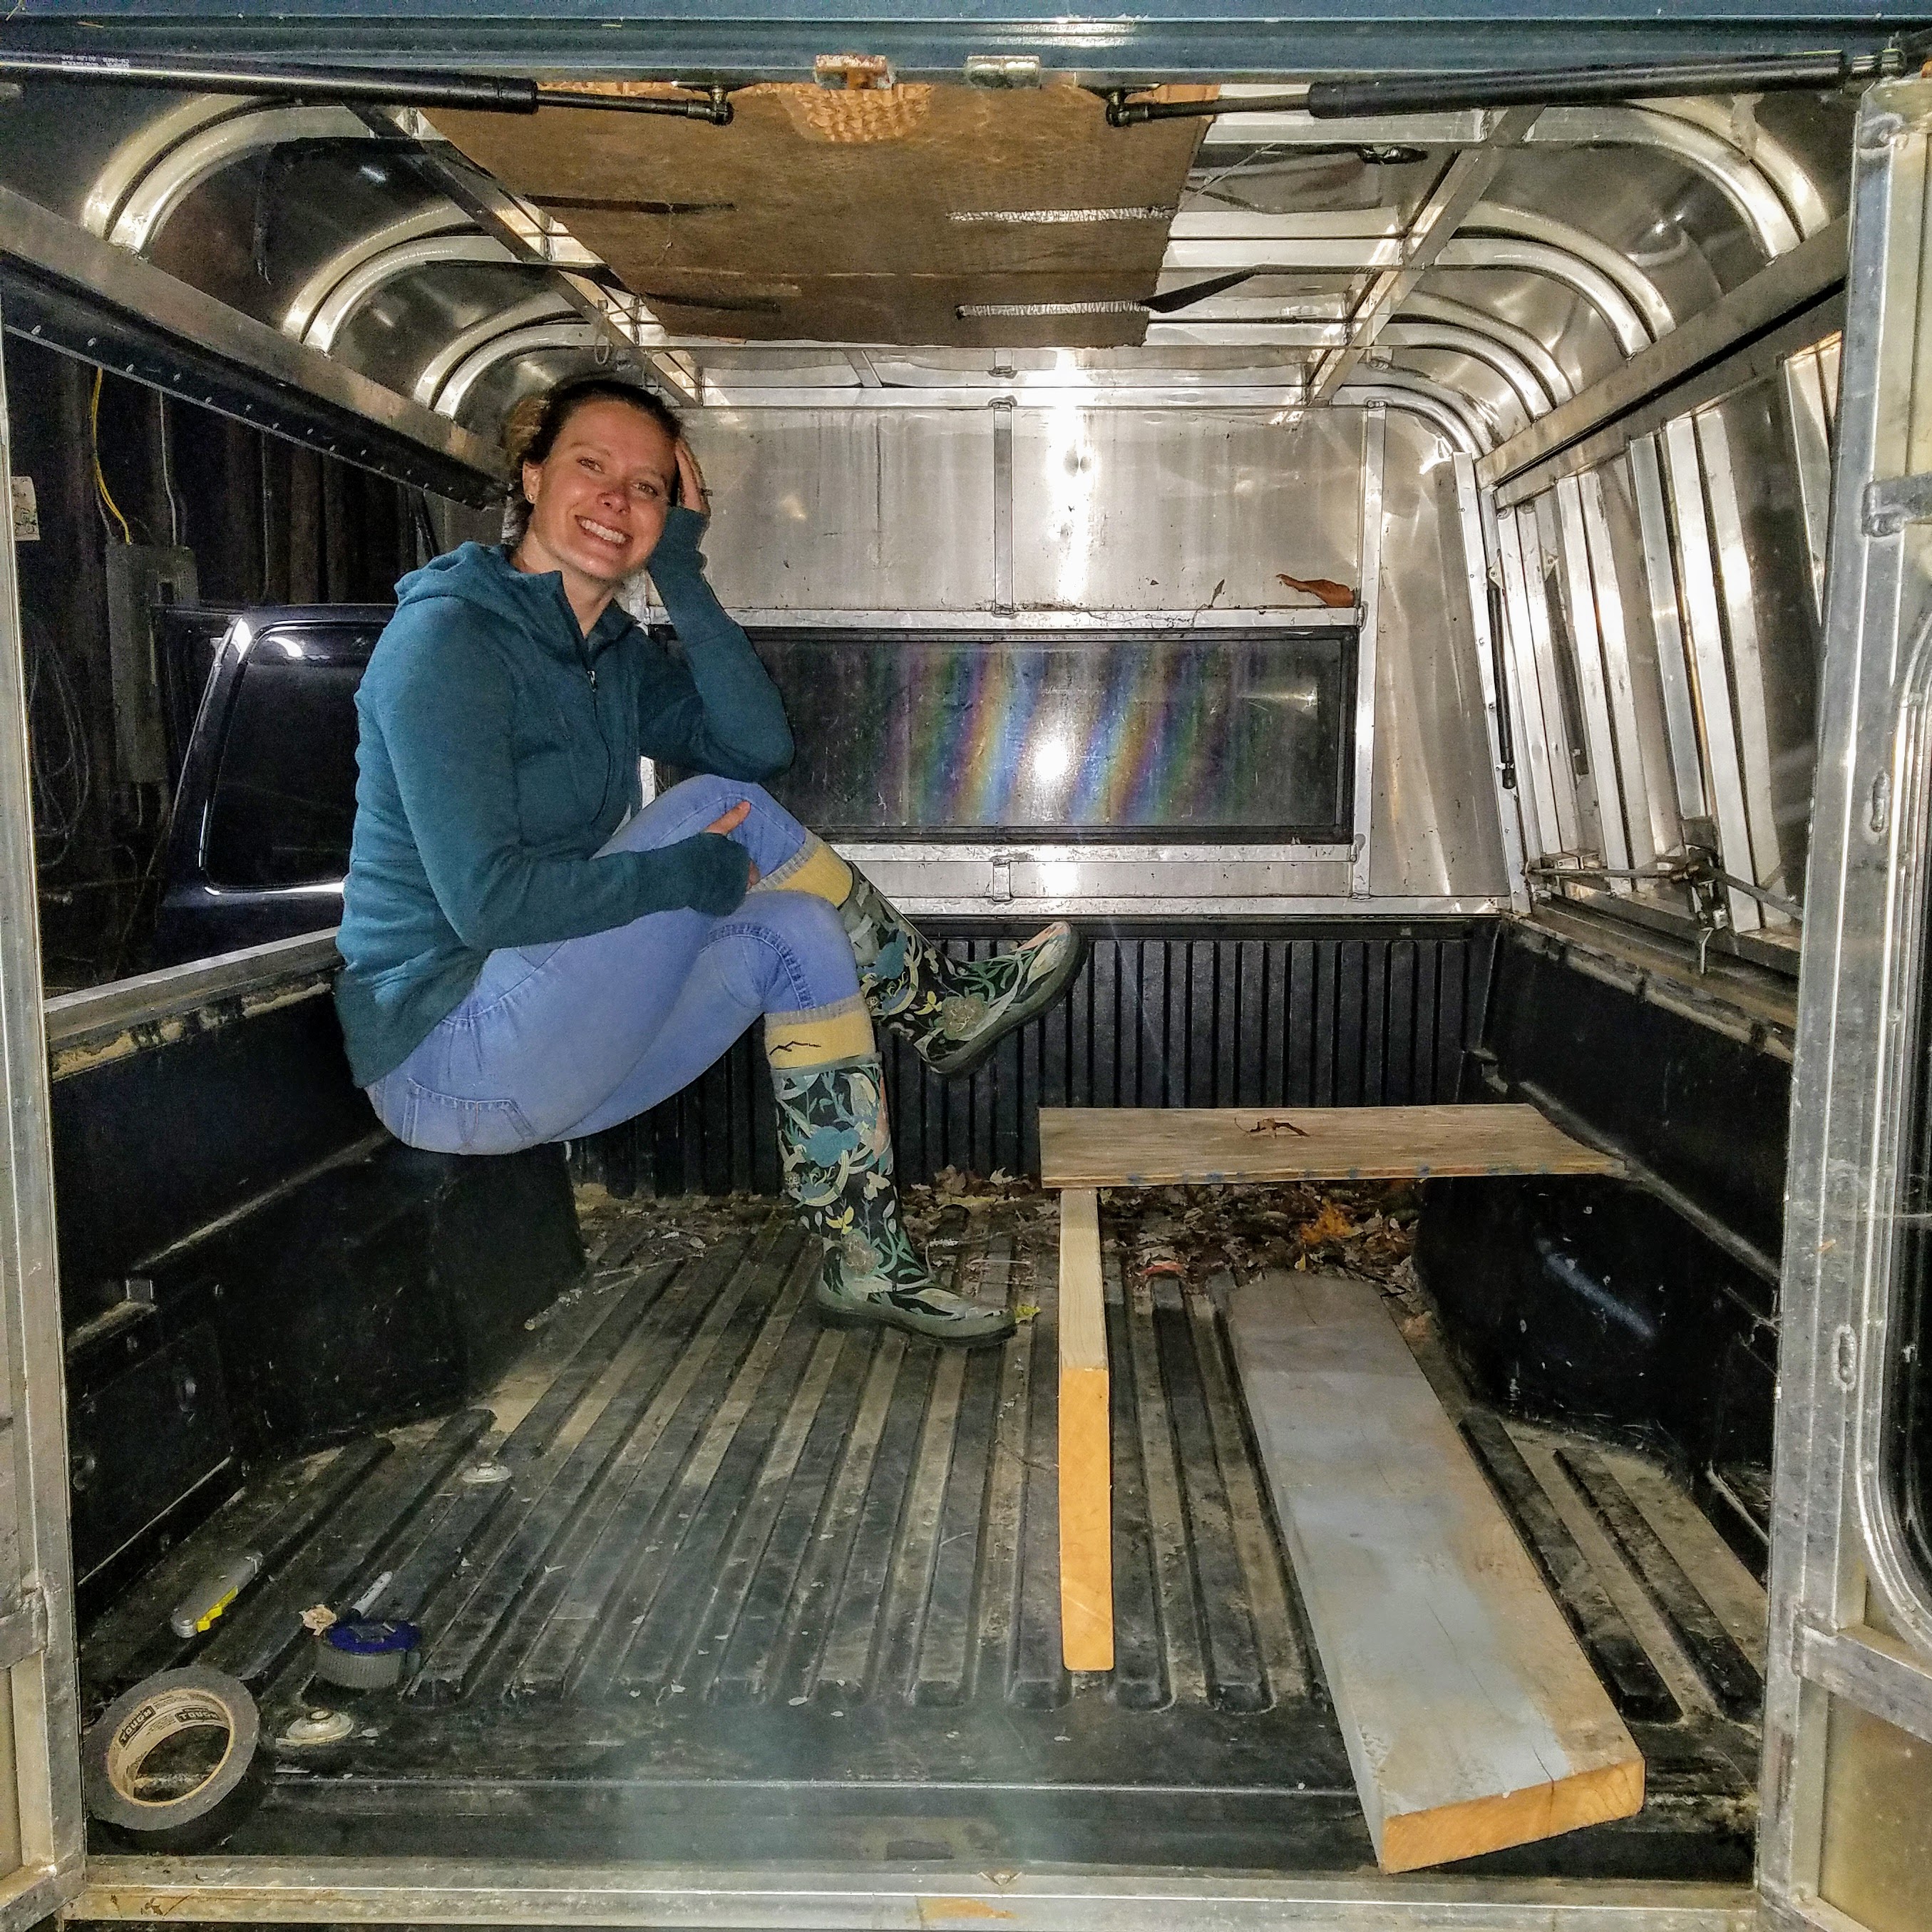
The Alu-Cab Expedition III tent made the ideal sleeping space, specifically because you could cut a hole in the aluminum shell. A lighter fiberglass tent would lose a lot of structural integrity as soon as you cut into it, so we went with a high-end rooftop tent. Then we found an old electrician’s contractor-style truck capper that came off a Chevy Colorado with a 6’ bed. It was a perfect fit for the Taco. The gullwing side doors, french doors in the back, and extra height were all “happy little accidents” that we are utterly grateful for. For $500 on Craigslist, this was the best deal of the entire build.
Structural Concerns:
Even though it was an “industrial” capper, the rated roof capacity for the 1×1 aluminum square tubing structure was only 300lbs. Not only would we be over twice that with the tent and occupants, but we were also cutting a hole in the middle of it. Reinforcing the capper and getting the force load of rooftop occupants down to the frame was the first concern.
We also had the issue of a large hole in our sleeping platform that needed to be easily covered when it’s time for sleep, and yet still has enough structural integrity that a 230lbs dude doesn’t fall through. Alu-Cab solves this with the Khaya by having their entire sleeping platform lift with hydraulic pistons, and when it is lowered, the platform is braced down onto the outer frame of the base unit. Since contractor toppers are not really designed for rooftop tents, it was a little more complicated than just copying their design.

Final Design:
We decided to offset the roof hole so that it fits into the “galley line.” Basically, one side of the bed would be water, kitchen, and storage, and the other side would be a walking/sitting/open area. The gas tank is on the driver’s side, and the stock inverter is on the passenger side. For convenience and weight distribution, the kitchen and storage would be on the passenger side. This meant that the hole in the roof would be offset a bit to the driver’s side so we could stand up in the “galley.”
The hole needed to be wide enough for Clay to stand up in, but small enough that we could still get two people and a dog into the living compartment with the access hole open. We planned to cut it about 20” x36” and preserve as much factory bracing/structure in the tent as possible.
The capper would be mounted to the truck with three 2” x2” pieces of steel angle iron that would run the full length of the bed and the headboard. We planned to reuse the mounting bolts for the sliding cargo system to tie the angle iron to the truck, as those are structural pieces. We bought steel 1” x3” tubing to tie the exterior of the tent to the top of the capper. That structural steel was bolted to four 1/8” wall 1” x1” braces which ran down to the angle iron bolted to the top of the bed. If everything went right, the weight from the tent would go from the lengthwise steel tubing to the four braces and eventually down to the bed and the aluminum structure of capper would be secondary.
Finally, a hinging “drawbridge” (designed on the fly) would cover the hole in the tent. In theory, it would brace down to the steel tubing running the length of the tent and hinge on the lateral side. Open the flap, climb up top, close the flap, go to sleep!
Note: If you care about the details of the design that I brush over here, let me know, and I can send you a bunch of photos. I didn’t want to ruin a 1,000-word article with going into monotonous details about attaching points, force loads, and the like.
This is the first of a 2-part post detailing the construction of our living space, I'll type up p2 in a few days!

Goal: Being able to stand up inside the living space was one of the primary build constraints that we had from the start. The problem is that there are dozens of ways to do this, and all of them are quite expensive. Not to mention, if you screw up the functionality of your primary living space, life on the road is a lot less fun!
Build Time: Approx. 40hrs
Cost: Approx. $4050 (Tent $3300, Capper $500, Steel and Supplies $250)
Inspiration:
This is where Overland Expo and Expedition Portal becomes a smidge overwhelming… there are so many options on living spaces, rooftop tents and the like. You could go with a Fourwheel Camper but where’s the fun in not designing your own (if you’re a nerd like me). Rooftop tents are cool until you’re camping in rain/mud and end up dragging it all into your bedroom.
Lindsay also wanted the ability to be moderately incognito and have a quick setup/teardown process. I didn’t want to tow a trailer, as it just becomes a liability as soon as you need to back out of somewhere dicey.
Our first thought was a Tacoma Habitat, as it gives you standing room in the bed, a decent sized bed to sleep in, and the added benefit of an overhang/awning behind the truck when fully set up. Unfortunately, the $9,000 base price and $12,000 end price with insulation for winter camping, shipping, etc. put the Habitat out of our price range. If we had an extra $10,000 in the build budget, I’m pretty sure we would have one on the truck right now.
Fortunately, I was introduced to Alu-Cab and OK4WD on my last trip to Expo East in 2017. Alu-Cab’s Khaya insert system is the Rolls-Royce of Tacoma inserts (as in it’s luxurious, heavy, and expensive…).
The Khaya tent has everything we were looking for:
• Quick setup
• Standing room
• Onboard water, solar, and storage
• Relatively compact
If you think the Habitat was out of our price range, then the Khaya was going to require our firstborn child.
BUT – why couldn’t we build our own?!

Concept:
If we couldn’t buy something off the shelf, we were going to build our own prototype. The idea was to take a rooftop tent off the shelf and a truck capper, cut a hole in the bottom of the tent and the top of the capper, stick them together and figure out a way to cover the whole for sleeping. Easy Peasy.
The Alu-Cab Expedition III tent made the ideal sleeping space, specifically because you could cut a hole in the aluminum shell. A lighter fiberglass tent would lose a lot of structural integrity as soon as you cut into it, so we went with a high-end rooftop tent. Then we found an old electrician’s contractor-style truck capper that came off a Chevy Colorado with a 6’ bed. It was a perfect fit for the Taco. The gullwing side doors, french doors in the back, and extra height were all “happy little accidents” that we are utterly grateful for. For $500 on Craigslist, this was the best deal of the entire build.


Structural Concerns:
Even though it was an “industrial” capper, the rated roof capacity for the 1×1 aluminum square tubing structure was only 300lbs. Not only would we be over twice that with the tent and occupants, but we were also cutting a hole in the middle of it. Reinforcing the capper and getting the force load of rooftop occupants down to the frame was the first concern.
We also had the issue of a large hole in our sleeping platform that needed to be easily covered when it’s time for sleep, and yet still has enough structural integrity that a 230lbs dude doesn’t fall through. Alu-Cab solves this with the Khaya by having their entire sleeping platform lift with hydraulic pistons, and when it is lowered, the platform is braced down onto the outer frame of the base unit. Since contractor toppers are not really designed for rooftop tents, it was a little more complicated than just copying their design.


Final Design:
We decided to offset the roof hole so that it fits into the “galley line.” Basically, one side of the bed would be water, kitchen, and storage, and the other side would be a walking/sitting/open area. The gas tank is on the driver’s side, and the stock inverter is on the passenger side. For convenience and weight distribution, the kitchen and storage would be on the passenger side. This meant that the hole in the roof would be offset a bit to the driver’s side so we could stand up in the “galley.”
The hole needed to be wide enough for Clay to stand up in, but small enough that we could still get two people and a dog into the living compartment with the access hole open. We planned to cut it about 20” x36” and preserve as much factory bracing/structure in the tent as possible.
The capper would be mounted to the truck with three 2” x2” pieces of steel angle iron that would run the full length of the bed and the headboard. We planned to reuse the mounting bolts for the sliding cargo system to tie the angle iron to the truck, as those are structural pieces. We bought steel 1” x3” tubing to tie the exterior of the tent to the top of the capper. That structural steel was bolted to four 1/8” wall 1” x1” braces which ran down to the angle iron bolted to the top of the bed. If everything went right, the weight from the tent would go from the lengthwise steel tubing to the four braces and eventually down to the bed and the aluminum structure of capper would be secondary.
Finally, a hinging “drawbridge” (designed on the fly) would cover the hole in the tent. In theory, it would brace down to the steel tubing running the length of the tent and hinge on the lateral side. Open the flap, climb up top, close the flap, go to sleep!
Note: If you care about the details of the design that I brush over here, let me know, and I can send you a bunch of photos. I didn’t want to ruin a 1,000-word article with going into monotonous details about attaching points, force loads, and the like.
This is the first of a 2-part post detailing the construction of our living space, I'll type up p2 in a few days!


bootstobirks
New member
Part IV: Capper/Tent Build and Assembly
Goal: Being able to stand up inside the living space was one of the primary build constraints that we had from the start. The problem is that there are dozens of ways to do this, and all of them are quite expensive. Not to mention, if you screw up the functionality of your primary living space, life on the road is a lot less fun!
Build Time: Approx. 40hrs
Cost: Approx. $4050 (Tent $3300, Capper $500, Steel and Supplies $250)
This is the second of a 2-part post detailing the construction of our living space.
Cutting and Painting:
Cutting a hole into the bottom of a $2300 tent was by far the scariest part of the build. I think I measured, and re-measured, at least a dozen times before making the first cut. It also didn’t help that we had no idea how a carbide-cutting disk was going to go through the aluminum shell and what we would end up with. However, that’s what you get with a DIY project!
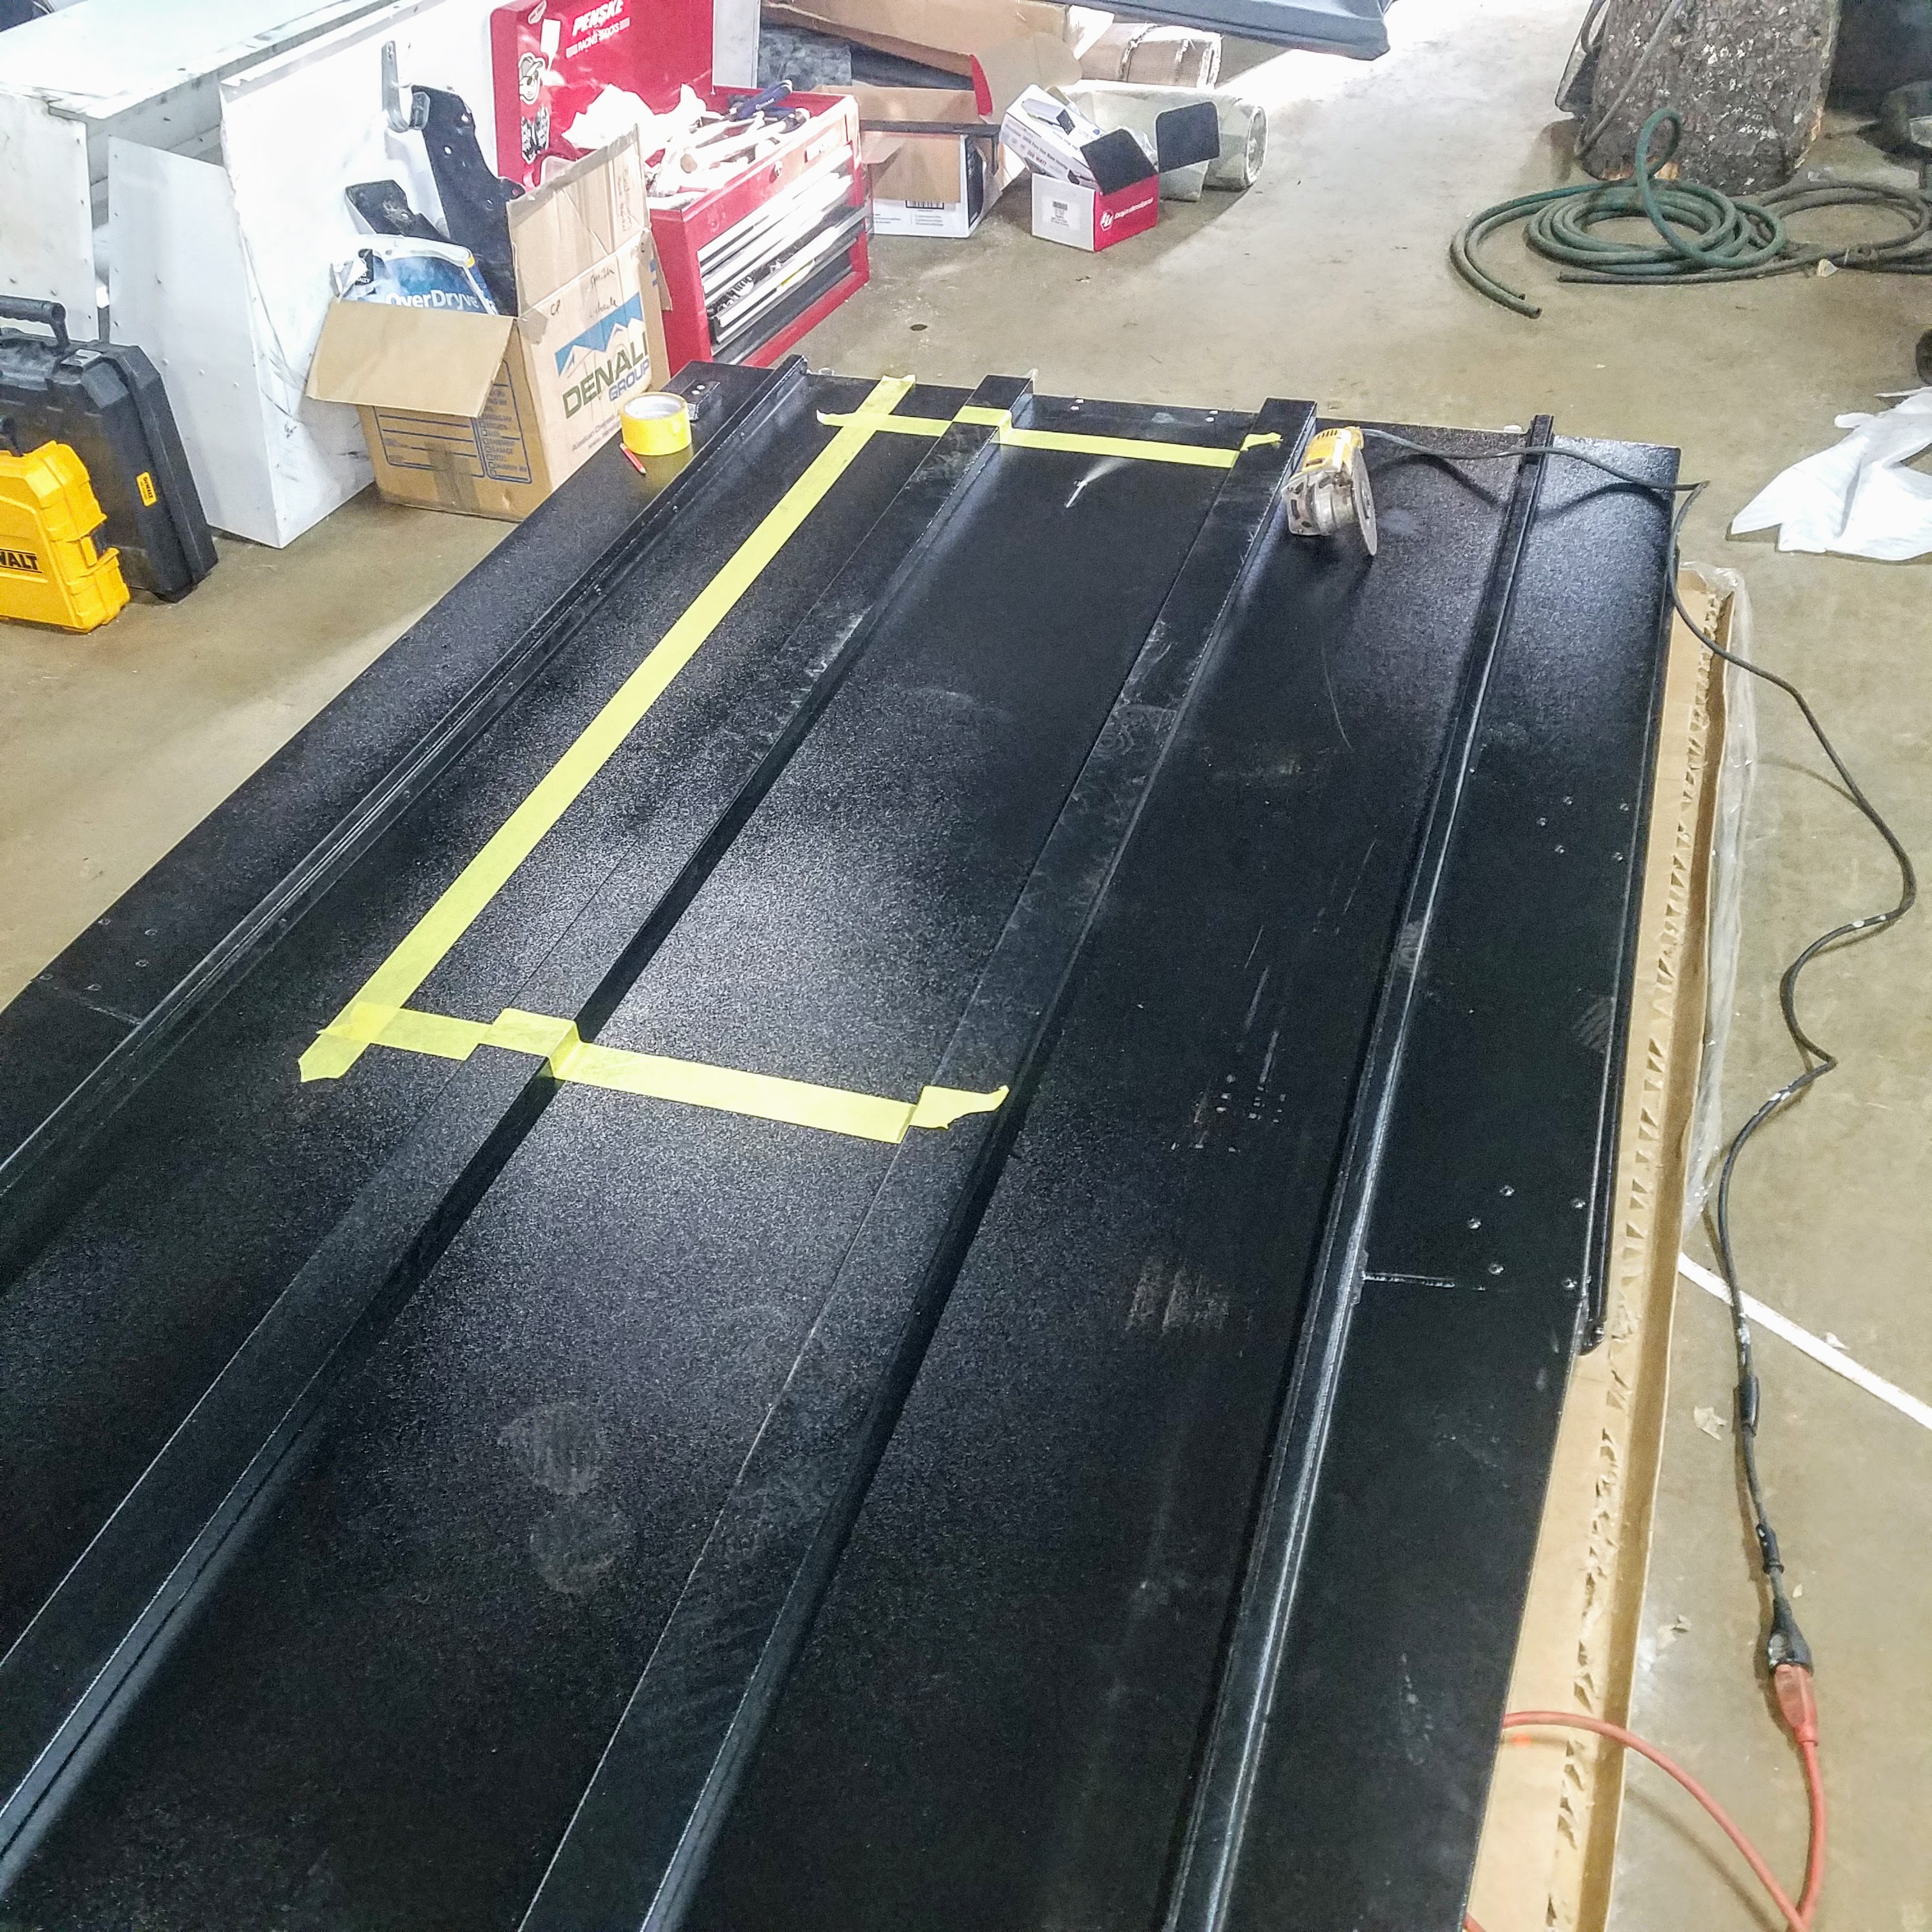
In reality, cutting a hatch into both the tent and the capper was pretty easy. If you don’t have a set of electric shears, definitely wear a full grinding mask, long sleeves, and gloves, as the aluminum shards from a cutting disk go everywhere. The cut from the disk is a little messy too, so we spent an hour or two with a flat file cleaning up the cuts and putting a rubber-edging strip on all of the cut edges.


Painting the beat up capper turned out to be much more cumbersome than cutting or assembly. This was one of the few times that I REALLY wish we had access to more than a mechanic’s garage. Despite our best efforts to tape, sand, and prep the surface, the paint job turned out to be fair – at best. It didn’t help that the building we used was not well insulated, so maintaining a constant temperature for curing turned out to be easier said than done. We ended up painting it with spray cans twice, and to do it again, I would have definitely recruited someone with some auto body painting experience and tools.


Assembly:
Tent-Capper assembly was an exercise in mental gymnastics to get everything bolted together in the proper order with limited resources. Fully assembled the tent and capper weighed in at approximately 500lbs, and with it being top heavy, the assembly would be too cumbersome for three or four people to the position in the truck with any accuracy. A crane would have simplified the process, but all we had access to was an engine lift.
To save 2,500 words and help give someone who might do this in the future a loose guide to the process, here are the steps we followed:
Step 1: Remove the plastic bed molding and sliding rail system.
Step 2: Bolt 2″ x2″ angle iron to the top of the truck bed
Step 3: Bolt 1″ x1″ square vertical braces inside of capper
Step 4: Pre-drill 1″ x3″ rectangular tubing to capper and tent
Step 5: Mount capper to the truck bed and bolt bottom to 2″ x2″ angle iron
Step 6: Attach 1″ x3″ rectangular tubing to capper with window weld and bolts that tie the structural supports to the truck frame
Step 7: Lift tent onto the roof using an engine lift and redneck ingenuity
Step 8: Bolt tent to 1×3 tubing using the same pre-drilled holes from Step 6
Step 9: Glue ½” foam insulation and ½” carpet pad to the tent floor
Step 10: Figure out how to cover the giant rectangle you cut into the floor of the tent


End Result: Working from the top down – the bottom of the tent is bolted and pop riveted to the 1″ x3″ steel tubing running lengthwise. The steel tubing is bolted to the heavy 1″ x1″ square tubing vertical structural supports in the capper. The capper and support posts are bolted to the truck bed and subsequently frame. We went with bolts because they don’t crack when the frame twists, but welds do!


Testing and Modifications:
Before we could test the tent design, we had to build an easily removable cover for the hatch. I took the piece that we originally cut out of the tent and mounted angle iron to the sides to make a “tongue” that braced down to the frame when closed. The hinges went on the back (tailgate) edge so that it would open up until it’s flush with the back wall of the tent. Lindsay cut the mattress into an “L” and sewed the mattress cover so that the hatch could lift open without interfering with the larger portion of the mattress. We mounted a cheap dog-run pulley to the back wall of the tent and ran a line of paracord from the leading (cab side) edge of the hatch cover, up through the pulley, and down to a mini-boat cleat that we pop riveted to the tent frame. We basically built a drawbridge in our tent using scrap steel, three hinges, and a dog run.
Testing was terrifying – as in, I slowly rolled over onto the hatch and waited for it to collapse and dump me three feet down to the truck bed. Luckily, it ended up being able to hold both of us with only a little bit of deflection. The light piano hinges are pretty maxed out with both of us on the hatch at the same time, so I try to sleep with at least half of my body on the original part of the tent. Lindsay’s considerably lighter than me, so she gets the hatch!
The most significant modification we made after using the capper/tent for eight weeks was to flip the doors around. The first time we tried to close the back doors with both of us inside the “house” was our first night on the road. That’s when we learned that, because of the kitchen blocking the latch mechanism; it was almost impossible to shut the doors from the inside. Fortunately, the rear doors were mounted on simple piano hinges with self-tapping screws. It’s a little homeless, but we took an afternoon and popped the doors off, rotated 180 degrees, and slapped them back on. 3 months later, it still works like a charm!


Thoughts Looking Back:
For a “prototype”, we’re stoked with the end result for this part of the build. There are really only two things we would have done differently in retrospect – 1. Put a wider lengthwise gap in the support posts, so climbing into the back of the truck is more comfortable and 2. Build a stronger hatch cover using a new piece of aluminum instead of trying to use the recycled piece we cut out.
At the end of the day, we built something pretty unique and accomplished it with a third of the budget of a Tacoma Habitat. I’ll call it a win.
Goal: Being able to stand up inside the living space was one of the primary build constraints that we had from the start. The problem is that there are dozens of ways to do this, and all of them are quite expensive. Not to mention, if you screw up the functionality of your primary living space, life on the road is a lot less fun!
Build Time: Approx. 40hrs
Cost: Approx. $4050 (Tent $3300, Capper $500, Steel and Supplies $250)
This is the second of a 2-part post detailing the construction of our living space.
Cutting and Painting:
Cutting a hole into the bottom of a $2300 tent was by far the scariest part of the build. I think I measured, and re-measured, at least a dozen times before making the first cut. It also didn’t help that we had no idea how a carbide-cutting disk was going to go through the aluminum shell and what we would end up with. However, that’s what you get with a DIY project!
In reality, cutting a hatch into both the tent and the capper was pretty easy. If you don’t have a set of electric shears, definitely wear a full grinding mask, long sleeves, and gloves, as the aluminum shards from a cutting disk go everywhere. The cut from the disk is a little messy too, so we spent an hour or two with a flat file cleaning up the cuts and putting a rubber-edging strip on all of the cut edges.


Painting the beat up capper turned out to be much more cumbersome than cutting or assembly. This was one of the few times that I REALLY wish we had access to more than a mechanic’s garage. Despite our best efforts to tape, sand, and prep the surface, the paint job turned out to be fair – at best. It didn’t help that the building we used was not well insulated, so maintaining a constant temperature for curing turned out to be easier said than done. We ended up painting it with spray cans twice, and to do it again, I would have definitely recruited someone with some auto body painting experience and tools.


Assembly:
Tent-Capper assembly was an exercise in mental gymnastics to get everything bolted together in the proper order with limited resources. Fully assembled the tent and capper weighed in at approximately 500lbs, and with it being top heavy, the assembly would be too cumbersome for three or four people to the position in the truck with any accuracy. A crane would have simplified the process, but all we had access to was an engine lift.
To save 2,500 words and help give someone who might do this in the future a loose guide to the process, here are the steps we followed:
Step 1: Remove the plastic bed molding and sliding rail system.
Step 2: Bolt 2″ x2″ angle iron to the top of the truck bed
Step 3: Bolt 1″ x1″ square vertical braces inside of capper
Step 4: Pre-drill 1″ x3″ rectangular tubing to capper and tent
Step 5: Mount capper to the truck bed and bolt bottom to 2″ x2″ angle iron
Step 6: Attach 1″ x3″ rectangular tubing to capper with window weld and bolts that tie the structural supports to the truck frame
Step 7: Lift tent onto the roof using an engine lift and redneck ingenuity
Step 8: Bolt tent to 1×3 tubing using the same pre-drilled holes from Step 6
Step 9: Glue ½” foam insulation and ½” carpet pad to the tent floor
Step 10: Figure out how to cover the giant rectangle you cut into the floor of the tent


End Result: Working from the top down – the bottom of the tent is bolted and pop riveted to the 1″ x3″ steel tubing running lengthwise. The steel tubing is bolted to the heavy 1″ x1″ square tubing vertical structural supports in the capper. The capper and support posts are bolted to the truck bed and subsequently frame. We went with bolts because they don’t crack when the frame twists, but welds do!


Testing and Modifications:
Before we could test the tent design, we had to build an easily removable cover for the hatch. I took the piece that we originally cut out of the tent and mounted angle iron to the sides to make a “tongue” that braced down to the frame when closed. The hinges went on the back (tailgate) edge so that it would open up until it’s flush with the back wall of the tent. Lindsay cut the mattress into an “L” and sewed the mattress cover so that the hatch could lift open without interfering with the larger portion of the mattress. We mounted a cheap dog-run pulley to the back wall of the tent and ran a line of paracord from the leading (cab side) edge of the hatch cover, up through the pulley, and down to a mini-boat cleat that we pop riveted to the tent frame. We basically built a drawbridge in our tent using scrap steel, three hinges, and a dog run.
Testing was terrifying – as in, I slowly rolled over onto the hatch and waited for it to collapse and dump me three feet down to the truck bed. Luckily, it ended up being able to hold both of us with only a little bit of deflection. The light piano hinges are pretty maxed out with both of us on the hatch at the same time, so I try to sleep with at least half of my body on the original part of the tent. Lindsay’s considerably lighter than me, so she gets the hatch!
The most significant modification we made after using the capper/tent for eight weeks was to flip the doors around. The first time we tried to close the back doors with both of us inside the “house” was our first night on the road. That’s when we learned that, because of the kitchen blocking the latch mechanism; it was almost impossible to shut the doors from the inside. Fortunately, the rear doors were mounted on simple piano hinges with self-tapping screws. It’s a little homeless, but we took an afternoon and popped the doors off, rotated 180 degrees, and slapped them back on. 3 months later, it still works like a charm!


Thoughts Looking Back:
For a “prototype”, we’re stoked with the end result for this part of the build. There are really only two things we would have done differently in retrospect – 1. Put a wider lengthwise gap in the support posts, so climbing into the back of the truck is more comfortable and 2. Build a stronger hatch cover using a new piece of aluminum instead of trying to use the recycled piece we cut out.
At the end of the day, we built something pretty unique and accomplished it with a third of the budget of a Tacoma Habitat. I’ll call it a win.
Kors Camps
Innate Outdoor Co
Dude, nice work!
roving1
Well-known member
People say this but really no one knows. OEMs use off the shelf hardware from higher GVWRs all the time. No one, including you, knows what the brakes were designed for or what kind of safety factor went into the design. We all know through history particular marques of brakes on x model may or may not equal the brakes on some other model even though they are "designed for" x lbs.Your Toyotas brakes are engineered to stop 5500#. 6900 is a lot of extra stress. And 50K miles will be more like 75K miles with that much weight. Something might break just from hitting a pothole. I think you will regret being over weight.
I kind of wish this platitude would go away. It's over simplified at best.
Commercial brakes on trucks are "designed for" x lbs and if driven improperly will fail spectacularly in amazing little time. By improperly I mean just a bit too fast for too long at too much application pressure. That's all it takes. I have a manual transmission small truck and in mountainous roads or in 4 lo trails I almost never even touch the brakes even at or over GVWR. Everyone in autos, even empty, is always cranking on their brakes in the same condition. See empty or under GVWR vehicles with smoking brakes fairly often. Which is more "safe"?
So much goes into what is safe and what isn't. Blanket statements one say or the other are kind of silly.
shade
Well-known member
While there is some truth to what you've said, OEM ratings aren't pulled out of thin air. Using abuse cases to justify exceeding OEM ratings doesn't mean much to me. Anything can be abused to the point of failure. Btw, automatic transmissions can be manually shifted to use engine braking, and it's regularly done by many.People say this but really no one knows. OEMs use off the shelf hardware from higher GVWRs all the time. No one, including you, knows what the brakes were designed for or what kind of safety factor went into the design. We all know through history particular marques of brakes on x model may or may not equal the brakes on some other model even though they are "designed for" x lbs.
I kind of wish this platitude would go away. It's over simplified at best.
Commercial brakes on trucks are "designed for" x lbs and if driven improperly will fail spectacularly in amazing little time. By improperly I mean just a bit too fast for too long at too much application pressure. That's all it takes. I have a manual transmission small truck and in mountainous roads or in 4 lo trails I almost never even touch the brakes even at or over GVWR. Everyone in autos, even empty, is always cranking on their brakes in the same condition. See empty or under GVWR vehicles with smoking brakes fairly often. Which is more "safe"?
So much goes into what is safe and what isn't. Blanket statements one say or the other are kind of silly.
Given your vehicle's weight, you should expect more wear than a lighter vehicle would experience; nothing controversial there. If you equip it to minimize some of those effects (better brake pads/rotors, higher rated tyres, check bushings for wear, leave the front stabilizer bar installed), and drive accordingly (use engine braking, don't set speed records, no extreme rock crawling), it's not such a big deal, but it still should be a consideration in how you use the truck.
Last edited:
BajaSurfRig
Well-known member
@bootstobirks epic camper idea and well executed! Out of curiosity do you have any spreading at the back of the truck bed? How did you transfer the weight of the camper down to the frame?
billiebob
Well-known member
One of the biggest factors in GVWR is the intended use. A Dodge 2500 Tradesman is rated to a much higher GVWR than the Power Wagon because the Power Wagon is built to follow a Jeep Wrangler Rubicon. Even if all the components were identical the end use, or abuse the Power Wagon is designed for determine a much lighter GVWR than the Tradesman which is intended to be used on the road.
Same thing with commercial dump trucks. Sit a highway unit beside an off road unit, both rated to haul the same weight, side by side that off road dump truck will dwarf the highway unit. And while the payload capacity is the same, the GVWR of the off highway unit will be considerably higher than the highway hauler.
Same thing with commercial dump trucks. Sit a highway unit beside an off road unit, both rated to haul the same weight, side by side that off road dump truck will dwarf the highway unit. And while the payload capacity is the same, the GVWR of the off highway unit will be considerably higher than the highway hauler.
Last edited:
chadwicksavage
Adventurer
Out of curiosity why did you choose a Tacoma over some of the other options with higher payload? Cool truck - any plans for a re-gear?
2000 over is sketchy no matter how you slice it.
I'm curious on this point as well. The tacoma only has like 1100 lbs of payload so frankly I'm always curious why it's chosen as an overland platform. That payload alone keeps me from getting one. It seems everyone is always running so far over payload once they've simply added armor. Why not choose a tundra, f-150, ram, or anything else? Looking back now would you choose the newer ranger with 1840 in payload or the chevy colorado that can be had with 1805?
bootstobirks
New member
I'm curious on this point as well. The tacoma only has like 1100 lbs of payload so frankly I'm always curious why it's chosen as an overland platform. That payload alone keeps me from getting one. It seems everyone is always running so far over payload once they've simply added armor. Why not choose a tundra, f-150, ram, or anything else? Looking back now would you choose the newer ranger with 1840 in payload or the chevy colorado that can be had with 1805?
You and @nickw both have a great question - and there are a few parts to the answer so without going too long on why we went with a Tacoma:
We went with the Tacoma because of the size and the brand. Our plan for the truck was to spend time in Central and South America, and from any of our other international travels, a full-size American pickup is so wide and long it can be quite cumbersome. It was a balance between living comforts and driveability. Secondly, we are going to be down south for about 18mo, and if we don't blow the current budget with incidentals, try to see about shipping to Southeast Asia or Africa. Toyotas are such a common platform worldwide and when things inevitably break I wanted to be able to make do with salvaged parts from a Hilux or a 4 Runner, rather than trying to source late-model Ford or Chevy. The Tundra could have also worked in this case, but the thought was that it was bigger than we needed.
Cost is also a part of it. We purposefully bought our truck right when the Gen III's were coming out and ended up with it for about $30k (The Gen IIIs from the same dealer are $40k...). To get a full-size truck for the same budget would have had us buying something used with 50k miles and a couple of years of road salt.
Also, it would be misleading to say that we had this entire thing figured out from when we purchased the truck 3 years before we started the build. I planned out the budget to a meticulous level, but I only planned the weights out as a "back of the napkin" exercise. The truck evolved as a prototype and it wasn't until we drove it onto a scale and were about 500lbs heavier than expected that we had to react to having a heavier truck than we ever planned. If (or when) we do this again, the weight will be just as big of a factor as cost of components.
As far as the regear goes - we looked into it but talked to the guys at OK4WD for a second opinion and decided the cost wasn't worth it. We don't do a lot of "off-roading" and the only time we've ever had a torque/power problem was getting in and out of a few campsites with soft ground. We have just learned to preventatively kick it into 4LO and drive 1/4 mile a little slower than normal. No problems at highway speeds - at 45mph we can be in 6th gear and still accelerate at a reasonable rate.
bootstobirks
New member
@bootstobirks epic camper idea and well executed! Out of curiosity do you have any spreading at the back of the truck bed? How did you transfer the weight of the camper down to the frame?
@BajaSurfRig no spreading at all, which is one of those times that it's better to be lucky than good. We had backup plans in place in case it did spread, but it's all good!
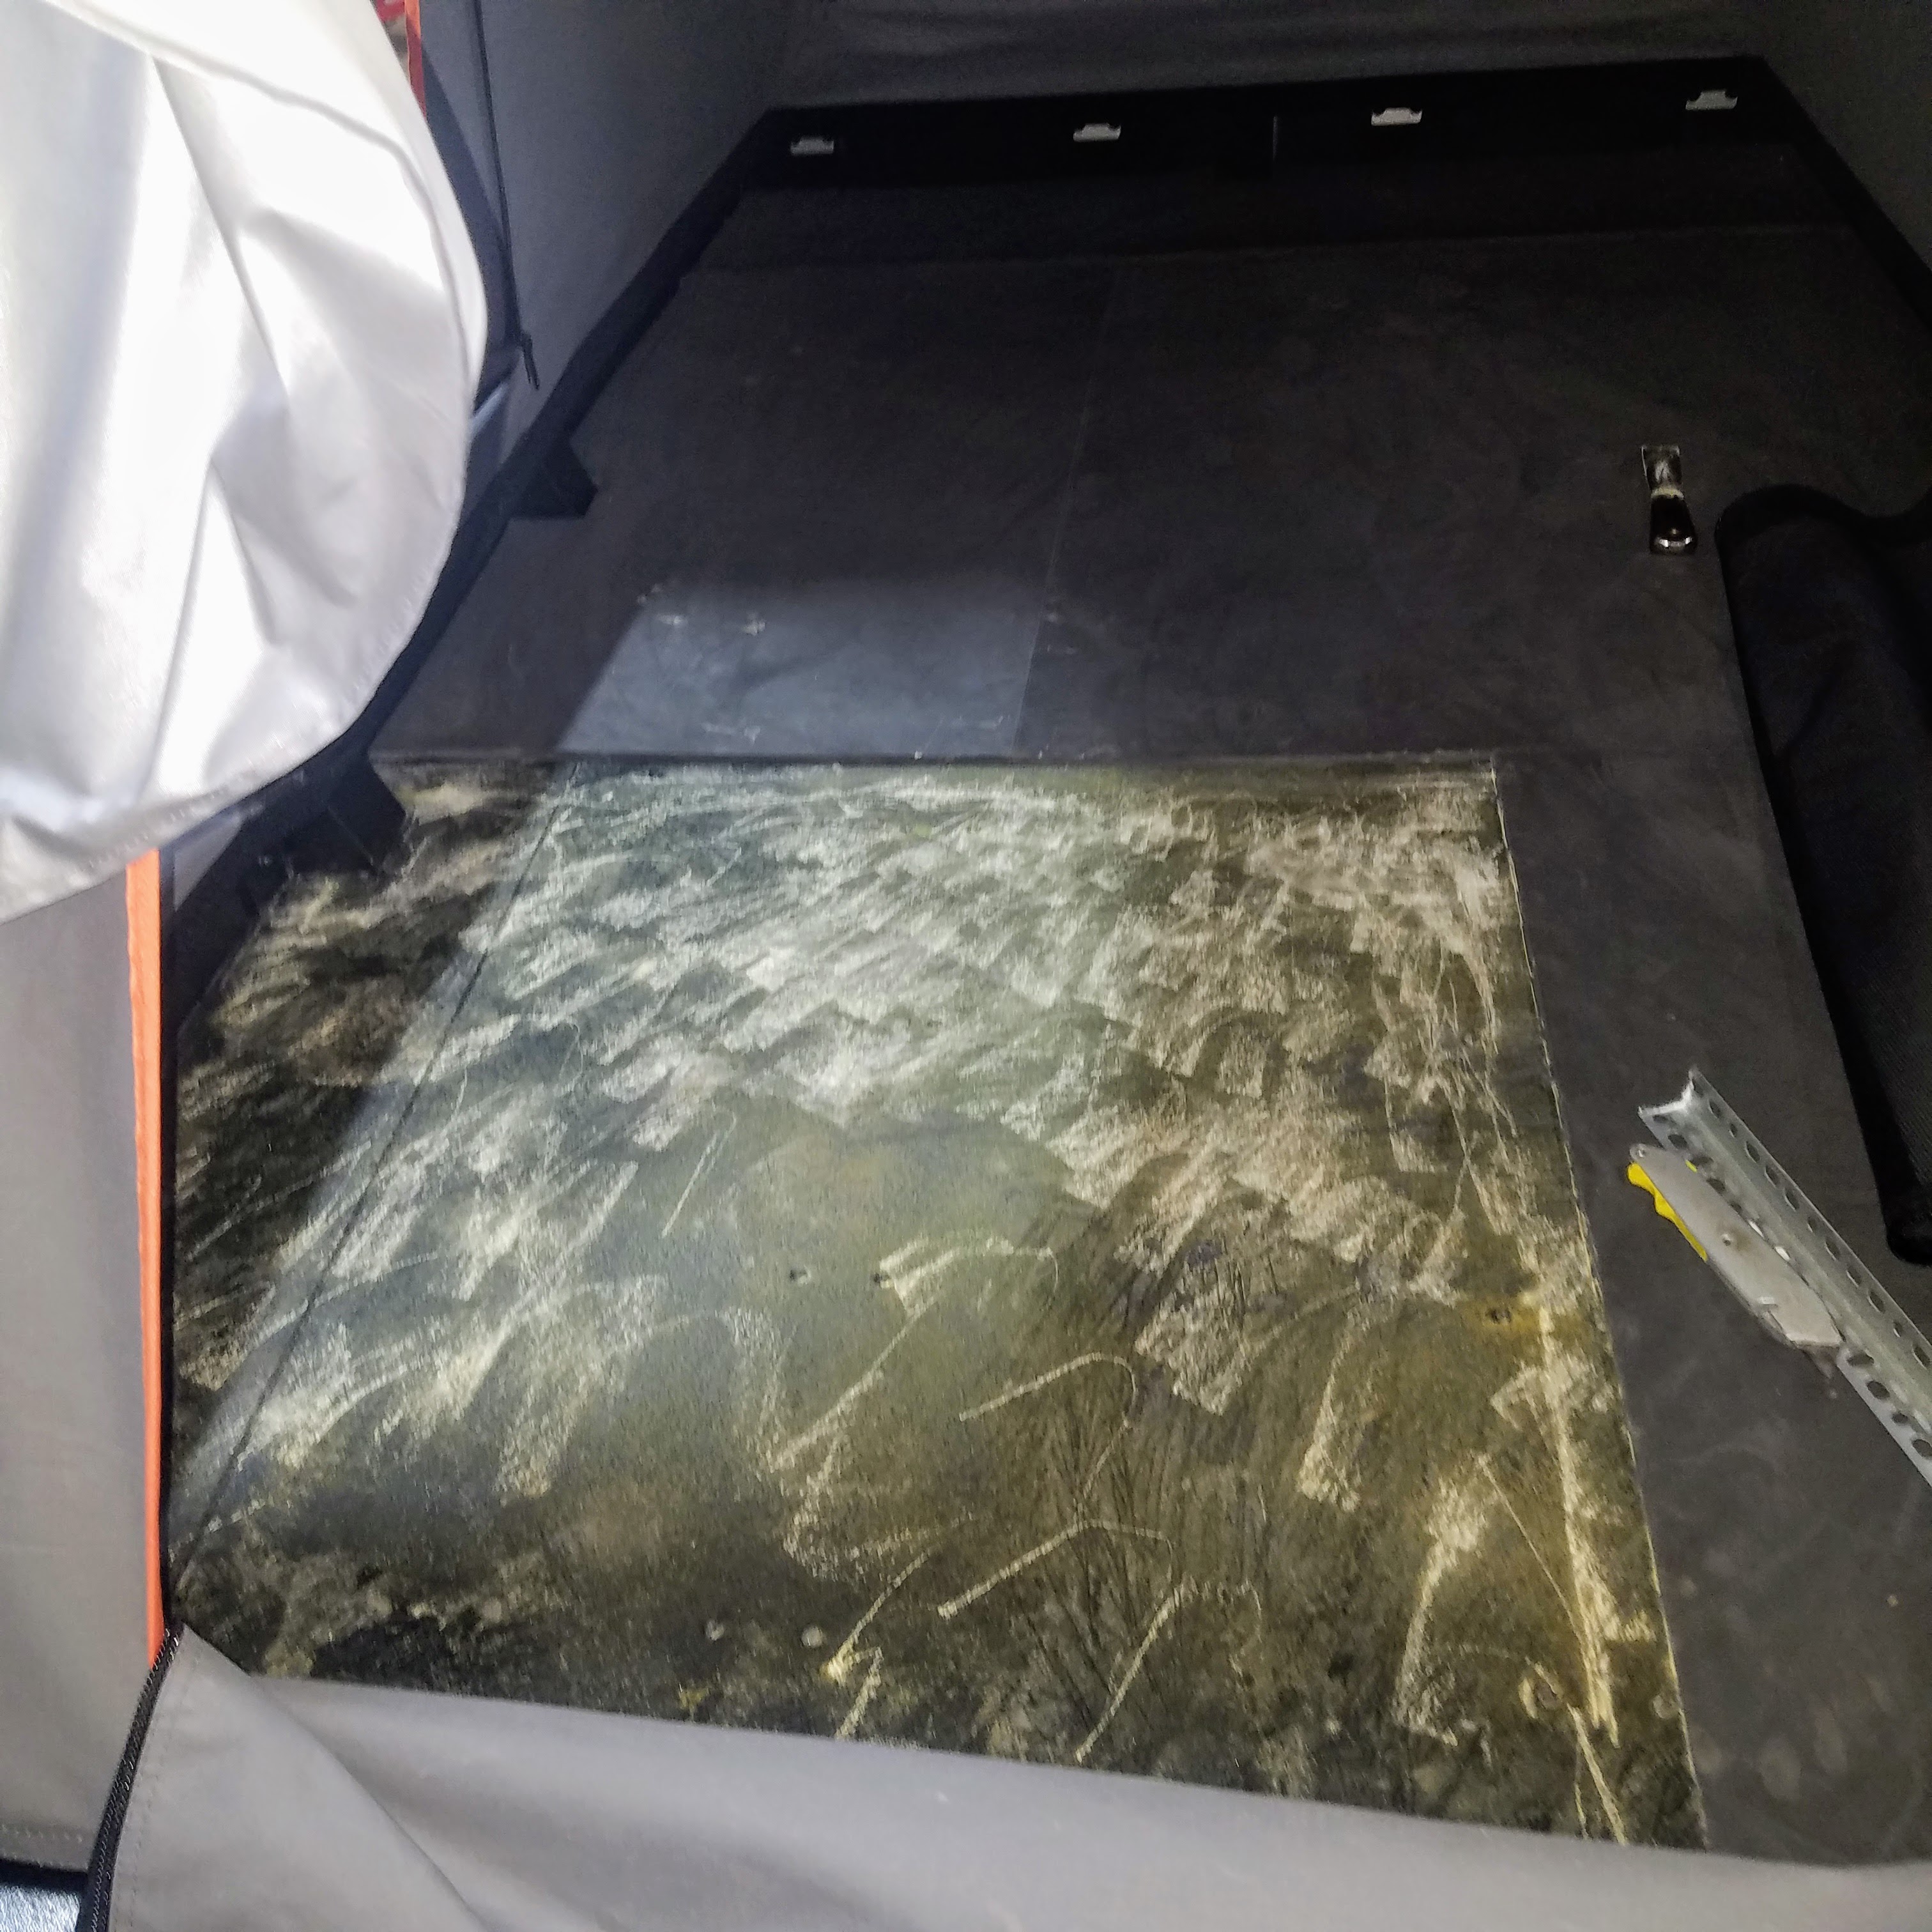
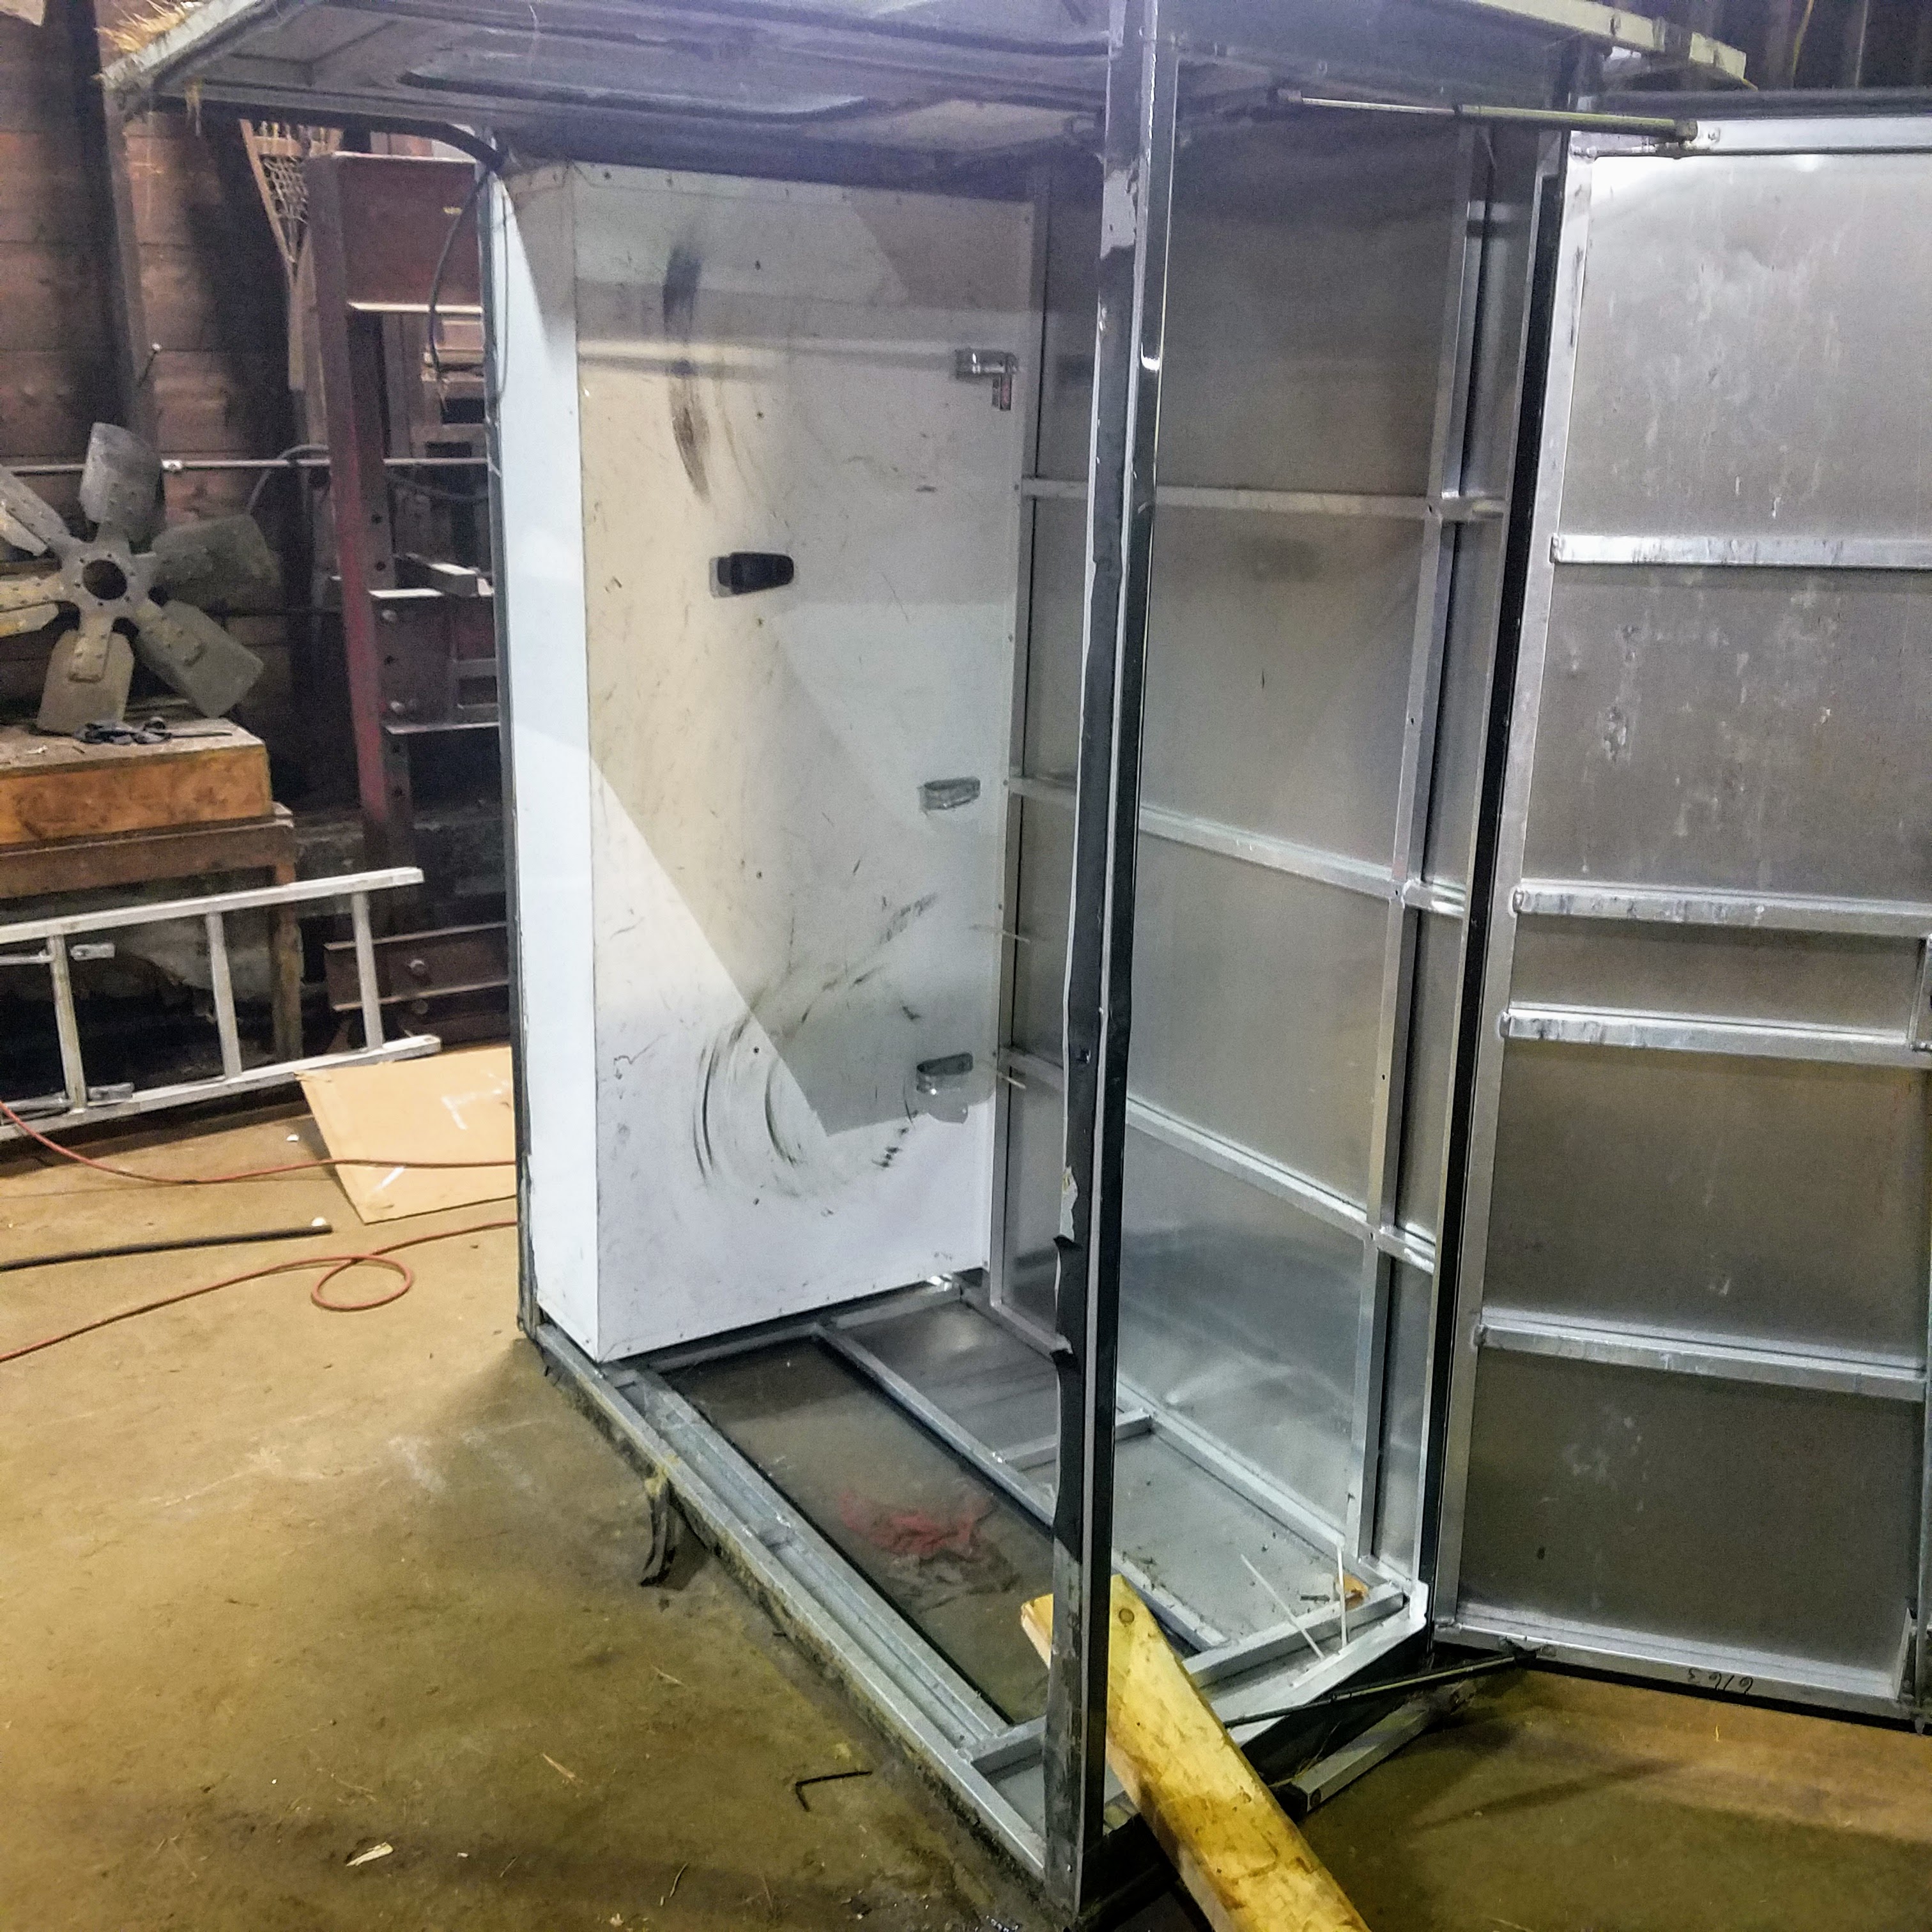
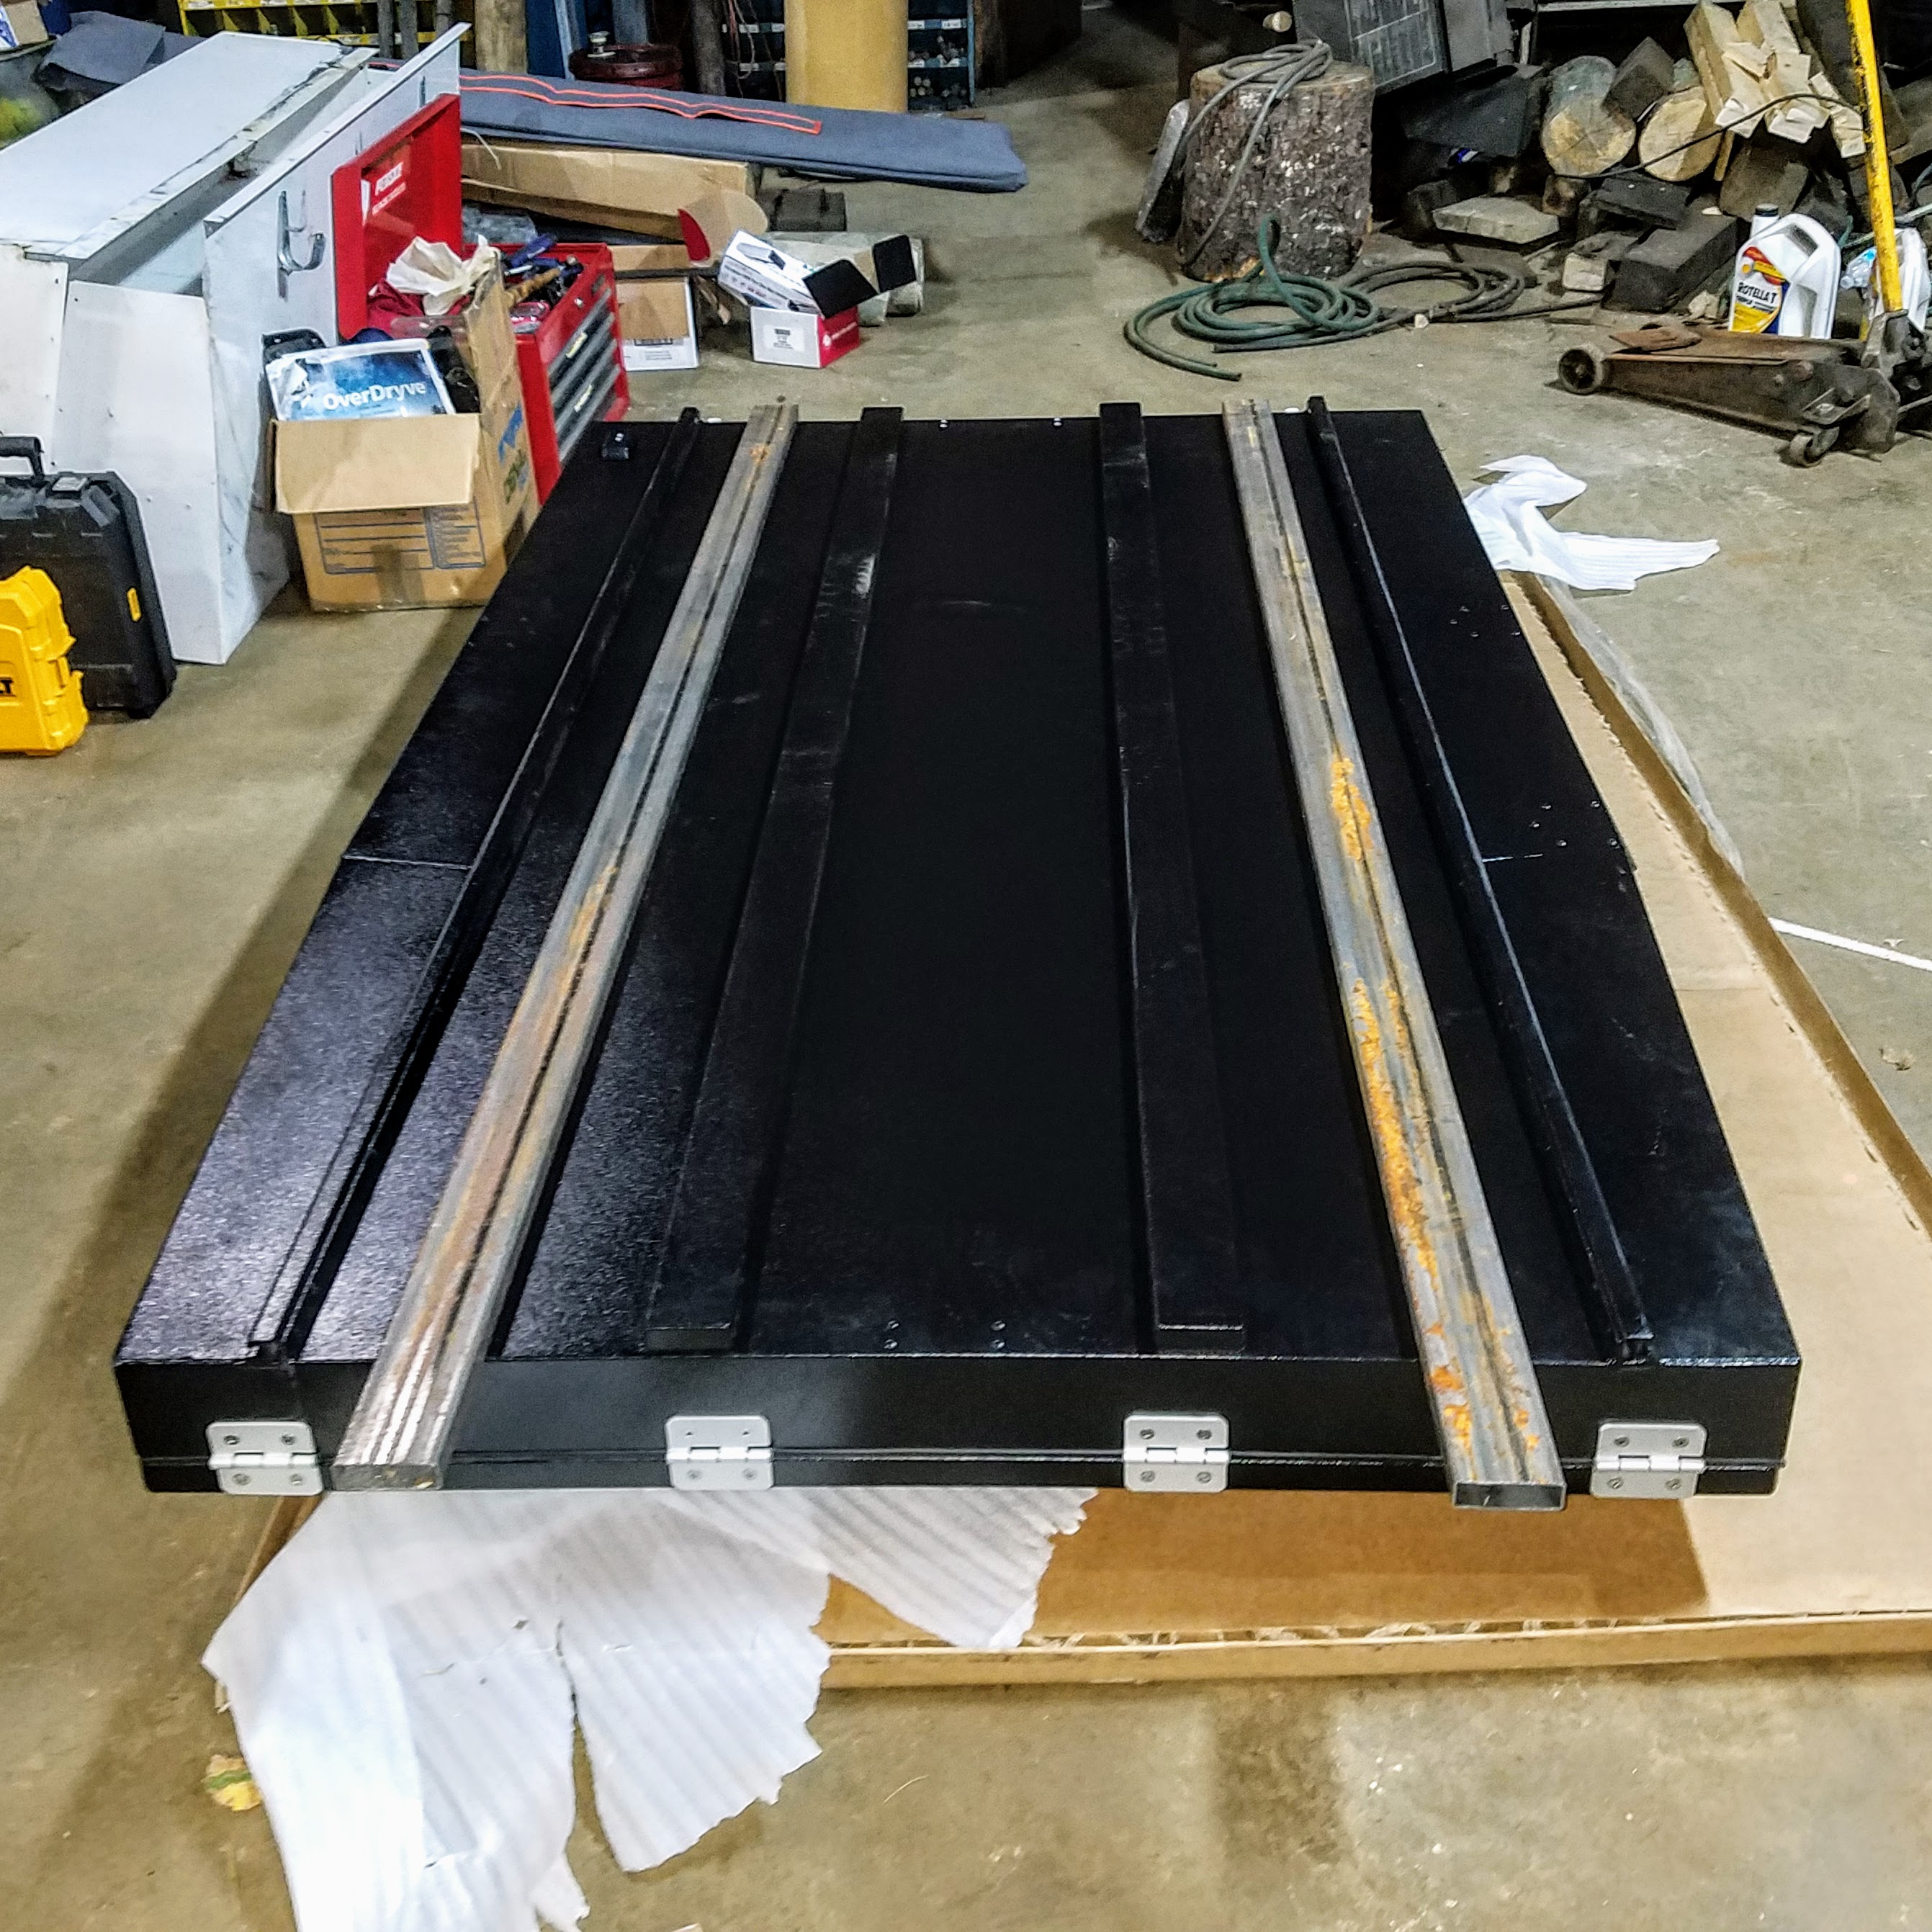
We took the sliding cargo anchor bed rails off, which left countersuck, pre-welded 8mm nuts that allowed us to bolt the 2x2 angle iron (that the capper was mounted to) to the composite bed tub and steel bedrail.
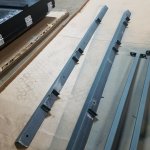
Picture 1 - the 2x2 angle iron is on the far left. You can see the holes drilled where it mounts to bed. The tabs that are welded on are to bolt the bottom mount of the vertical supports that take the weight of the tent from the roof.
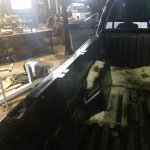
Picture 2 - angle iron is bolted to the truck, where the plastic bed cappers/payload anchors are on the stock truck
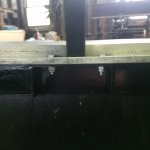
Picture 3: A nice blurry photo the vertical posts bolting to the tabs
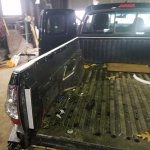
Picture 4 - Ready to mount the capper to the bed
shade
Well-known member
I agree that there are many ExPo'd up Tacomas that are overweight.I'm curious on this point as well. The tacoma only has like 1100 lbs of payload so frankly I'm always curious why it's chosen as an overland platform. That payload alone keeps me from getting one. It seems everyone is always running so far over payload once they've simply added armor. Why not choose a tundra, f-150, ram, or anything else? Looking back now would you choose the newer ranger with 1840 in payload or the chevy colorado that can be had with 1805?
Careful weight management and upgrades can keep a Tacoma under weight and still deliver a capable vehicle that's small enough to maneuver through tight places. Iirc, B2B skipped full (steel) armor and saved a big chunk of weight in one go. It's more of a challenge to be mindful of weight, but it's worth the effort on any vehicle, IMO.
Similar threads
- Replies
- 0
- Views
- 823
- Replies
- 2
- Views
- 649
- Replies
- 0
- Views
- 554
