PBColt M101A2 Basecamp Build

cs0430

Member
Thought it was about time I make myself a build thread.

My fiancée and I picked up a 1984 M101A2 off of Craigslist. Didn't get a steal of a deal, but for $900 considering the trailer came in great condition, was already plated/registered and the seller included a nice Curt hitch, a lunette and temp lights, it wasn't a bad deal either.

Before getting started, I'd like to thank members Mark Harley, Dstock and Shack who have all been extremely helpful and have answered any questions I have thrown their way.

I'm going to try to tackle the job in three phases.

Phase I - Make it usable
1. Weight watchers: Replace axle/wheels/tires, surge/pintle assembly, front stand.
2. Electrical: 7 Pin Adapter, junction box, side marker lights, license plate light, wire electric brakes Keep OE brake lights (for now) to save some $.

Phase II - Get my glamp on:
1. Telescoping rack to hold a Tepui Autana RTT (ordered), Awning (haven't decided what brand, want a 6' awning).
2. Custom bi-folding lid to weather"proof"/secure trailer contents.
3. Removable dividers inside trailer bed.
4. Slide out kitchen.
5. Tongue mount for propane tank/gas cans.

Phase III - Finishing components:
1. 2nd Battery for accessories
2. LED camp lights added to rack
3. Rear hitch for clay pigeon thrower
4. Paint

Phase "In my dreams":
1. On-board water w. instant hot water heater.
2. Second awning off the side
3. Goal Zero Yeti 400
4. ARB/Engel Fridge
5. Solar to power it all

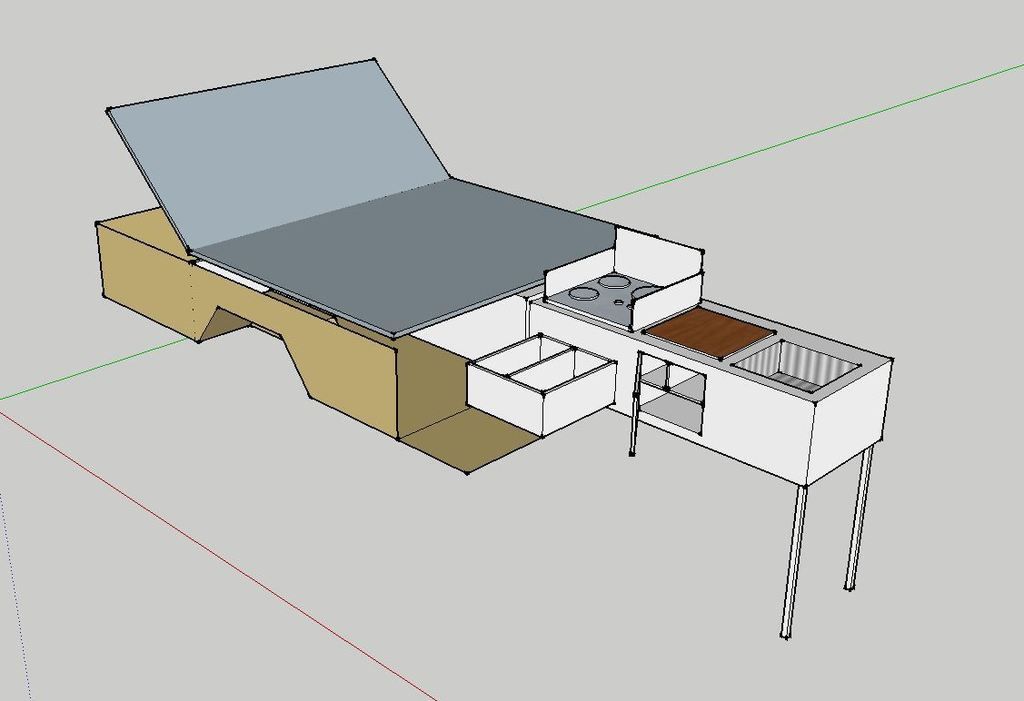
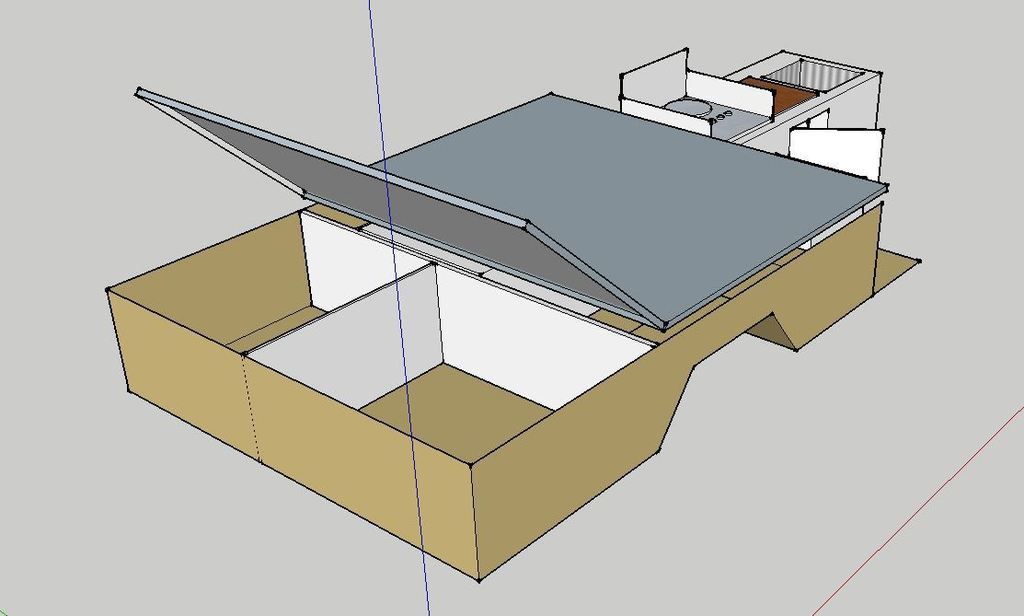
Without the rack, here's what it could look like as far as the interior of the trailer goes:

 
Last edited:

cs0430

Member
Here's what it looked like the day we brought it home and the tow vehicle - my 3rd 4Runner:


..after removing the top/bows so it would fit in our garage:


Used some metal wire from HD to turn the drop-gate into a tail-gate


Wiring began. Ordered a 7 way trailer connector, a 7 pin junction box, followed this video and had the lights working.


Last weekend I swapped the axle/wheels/tires. Ordered a new axle from Redneck Trailer Supply . Specs for my axle were: 59" Hub face to hub face, 5200lb 3" axle tube, 6x5.5, electric brakes and the Dexter parking brake plates. For wheels I ordered 2 hi-spec wheels from Trailer Tires and Wheels. Great prices and super fast shipping. Tires are Cooper Discover AT3 in LT215/85/16(E). I went with this tire and size because 1. I run AT3's on the 4Runner and love them. 2. It was the smallest load range E tire I could find. 3. With this size tire the trailer still has gobs more ground clearance than my 4Runner, the trailer should sit more level with my 4Runner and it should be easier to tow/brake with less rolling mass.

Old axle coming out:


New axle under:


I decided not to cut off the shock mounts from the OE axle in case someone wants to buy the axle whole. I plan on ordering new shock tabs to fit a set of Rancho shocks (or another inexpensive shock). The one thing I didn't read is that not only are the shock mounts welded to the axle, but SO ARE THE UBOLT PLATES! New plates are on their way so right now the axle is ratchet strapped in place.
 
Last edited:

dstock

Explorer
Looking forward to this build, and always happy to help!

Save those parking brake cables and levers, with a little fiddling you should be able to reuse them with the Dexter parking brakes. Mine were a wreck and finding reasonably priced replacements has been difficult.
 

cs0430

Member
Looking forward to this build, and always happy to help!

Save those parking brake cables and levers, with a little fiddling you should be able to reuse them with the Dexter parking brakes. Mine were a wreck and finding reasonably priced replacements has been difficult.

Thank you. I will be re-using the parking brake cables, it's a great feature to have on the trailer - especially with a RTT up top.

Looking good. Clean platform to build on.

How do you close the tailgate?

The hole pictured is drilled wide enough that you can hold the steel cable off to one side and still put the pin to lock the tailgate through. I will eventually weld on a separate tab to make it that much easier to close the tailgate.
 

shack

Adventurer
Looking good man. Thats pretty much the same axle I went with. 5200lb, 3", 12" brakes and parking brake backing plates. We chose to cut off the shock and perch mount and reuse them on the new axle. In my experience, nobody wants the old axle because of the offsize wheel bearing issue.
 

cs0430

Member
What were you planing to use as a stove?

I bought an Atwood DV30-s ('s' just meaning the stainless model). I liked the 3 burners, stainless construction and definitely the low profile. I ended up buying it off Ebay brand new with the matching wind screen for significantly less than Amazon is selling just the stove for.

The only thing that has stumped me so far is how to connect it to a standard propane tank. This is the fitting I am working with on the inside of the stove:


The other stove I considered was the Camp Chef Ranger III, but its length would have made it difficult to get both a cutting surface and a sink in my 5' kitchen.
 

Titanpat57

Expedition Leader
I use a unit very similar to what you purchased. I find it struggles in the wind (I have it protected on two sides) but it does ok. The Camp Chef burners put out over double the btu's as the Atwood. It has been very reliable, and not having a huge flame sometimes does have it's advantages.

I 'll try to get you a picture of how I ended up connecting mine. I'm not thrilled with it, but it works. I'm trying to find something that will accommodate a quick disconnect.
 

cs0430

Member
I use a unit very similar to what you purchased. I find it struggles in the wind (I have it protected on two sides) but it does ok. The Camp Chef burners put out over double the btu's as the Atwood. It has been very reliable, and not having a huge flame sometimes does have it's advantages.

The wind factor does concern me a little bit. This is the cover that I got with the Atwood: http://www.rvpartsnation.com/assets...wood-dv2-slr-2-burner-cooktop-cover_138_1.jpg
 

Titanpat57

Expedition Leader
Here's what I started with....

and what I ended up with..

I disconnected the copper flare fitting and went with the brass directly connected.
 

cs0430

Member
Great, thanks Titan. I'll take these pictures with me next time I go to the hardware store.

Got the surge assembly/front stand off this weekend. Also disassembled the OE brakes to remove the parking brake cable. Next up is to weld in the receiver tube and hook up the parking brake levers/cables to the Dexter axle.

 
Last edited:

Forum statistics

Threads
188,471
Messages
2,905,523
Members
230,428
Latest member
jacob_lashell
Top