Plywood platform for a 2010 JKU

caspice

New member
First and foremost, my thanks to @SBSYNCRO for the excellent and detailed post about his platform build.

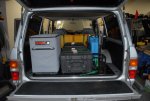
I had a previous platform in my 2010 JKU that was originally built for my LR Disco 2 shown in the photo below.
fine Pix 2016 005 edit.JPG

That box platform was heavily modified to make it fit in the back of the JKU. Unfortunately I did not take any photos prior to taking it apart.

The half width had some benefits, but I wanted to make the entire back of the JKU one level.
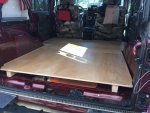
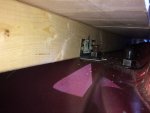
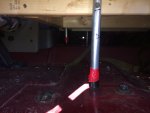
Bought a nice 4' x 8' sheet of birch plywood, three 8' x 2" x 3" studs, a stick of 1/2" EMT conduit, two 3" angle brackets, a pack of plastic end caps for the conduit, a few furniture bolts, and a 48" x 72" rubber backed rug.

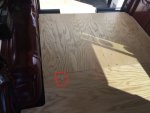
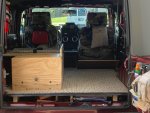
This is the end result:
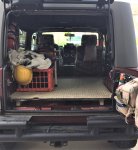
IMG_2717.JPG

What it looks like without the rug:
IMG_2703.JPG


ffine Pix 2016 005 edit.JPGIMG_2717.JPGIMG_2703.JPG
 

SBSYNCRO

Well-known member
Well done! That looks really good. You went all the way and stripped out the interior. I’d have liked to do that as well but too many wire bundles all over the place that I didn’t want exposed.

Looks like it turned out really nicely!


Sent from my iPhone using Tapatalk
 

LowKeyOverland

New member
This is awesome, nice work! That thing looks solid.

I did something kind of similar in my '11 JKU, but left the rear seat in place, and made the front section removable so the rear seats can fold up. I have a full write-up here: https://lowkeyoverland.com/frame-platform-storage-for-sleeping-in-the-car/

7Kd-4KT0Hkc2zhKNo2Tq8lhnPM17xZFPUT79LwriFvrpfIH_1GfqodO_CLvIItNUSna3L61W0zG5WMjplEyxO6wRs4wbES2DP6op1TropV5x8PcNjVYz6Syc-HX_IgjBhNjCS3kR8YCcRYHTgJ_JmB7547GD53df1AiC7J-Ru4GKbU_lgJ5PrRhQGb6yhKSNa1wia7n9JtY9JFpXBzKPPyzUiMaBOziajBNYT1y-LRZGMPz5-rIwrqNy4DYkT1fY00fROMPB6qVu8EWV3opA3ONNoiC5tun_o6Nrccmdg5cJiwPbPtYXbjH_dWc1kWVeljN_b2ONiygUti_oyiDgd0J9TCmW3fwqP1B-PL1uVN_pxSt17j6sYOFMp-nkjBPGdVXhmfRGGztrDmzhBQFMyzPTceaqcFj2feVzBn8swnhoEIQg-BgiYOPVyG5rPXecmuY0HxPOj7RZSJueGtG_SgE_MLyoEjoOk_AMLX0K2DVV56h359NIuVq3o22tq_1iXF2EIr9Ir1UF-XFNRYT7SMxSF3YYTjR2NneeQ88wd6XZN4MzcLAPgDBjC85VwknXFERsNVo7TKMsCuZRFtpg0IwbppcmGPacBy1Ox1wPa9cn_VZ_LEAue9e4ttDtYeS1gvenKr6YRAnu8NwBG2XXclJRD2MN-YfHhe935oqkK3qUw25n9Ujjj2D-LbZ9WXkIhPZVP5HUMq5-THdgsSe8-zmpdmah_O2Gq3cRbrcg6s4CyrUj8HUtbFRA=w1346-h1009-no
S3XXE9cCDm2nlxa1ntH9kr9r82pL-jlUKFDD_t0Ivy3L5hezsgTaL0LhPvug9HCP8Quy4lwIn5T5mRidicYL2eVZuDTe1d_0LP8_Ib9d9GGxHkXAFOyx0cv46c5lJprRb18JckxIUuvTPhtJO8l_AUZ2Z5UOXvjmXp4X7eucfUQM3u9lxFDpsjBMlYQRSNrvJdCu2o4K0O2ktdNKuoWMC458fTSBl7n8S2iaL8xiT89kiUetlHCGgaLrnMZpvts8bU1bQsdoGAN6IQWTNrR7PQnEwOMoSaHbapPEOIQTvM9KqaXDNiP_0zNf_BvP5cMygUMy4WBBDpXvvqwLVQWPc2ro6kdGfEP8jLoZREclmJrE9C8HC5K1Ecx0RIJjkJYMjuKc6jcqJzjnYmomGelqlXGwGfnWTGYTYaST-3SXFq9gDZgDfgjqulgbpJWvIteJlYIzM_kVEVMq3aPLWvEnLndAKFmAD_FdDN_owViMtN25CNOGlP86vU-Ye9BIhBT6ROVvQ8e76axsWiDosKoUz9uVBxmrRNAo-ehMpV0q1K8buZdt2aVAU7nRTxZ9nCsg8e5MPowJ2cfK_k0lgtyrWeCp3qDU2ACcAlW7eOQPnP_Up0zJAGBnL5hB1XNuWNvJ5bpfdFjyeuUzkmT5Z6h1V2sr0JzvhphkpAuURpwBGLkDWSkbMdbH7_nWVss14IvXJ3NLoIl9OVsDewQVuWoRhI-z8fzmzuxr9m5YRrH4qxhLqJTwhDU63YeV=w1346-h1009-no
wP4502heTeg8rzCcZqZ4Qs_n_iRaRZBq2kVbfzMAPj5ZVO5Tx-zAzS5LSy9vECDEDA8fSikv91H1Bl9fv8PDjYkkHXV9YaRM_dMb_haOThK8u9lb4mt-eyCm2HCnQQIAxm9J66dNb7CTTpsMUWk_mXJWFvMNC3BoerdxuWcNnMXq0sgaJXWBBwAwQVpaZntTa5rJnMHjo_i9OWhb0_qt95RUmFtEfSoj8y5-vsYFC01WtGmW2XUviIDOxzm-MTgBRY_YtfhVbw1332MJHBzENA0oc7HWNRjQ-wDJiRv6og-0VSJzJiN6KrChUbX7q9yyTL7C-9R1VmuKJWlVUrdc4Uxlajzz2Sg2WDFnURDS7qJKMrE8hrRGp_OOCxEg8oFNdOJfWOEXw9LJtTvtR7w4E3JziQW6vLsocuhXpdOFK3kpvdSpjWaYYejjH1vFbQz60ZgLfyi3xIzH9ZsQT3WFEE0DPySRhaaAsnsICzMWU78Jyn1nC395p1Kmzhqh2G3IvDPXnblSJMEiyZtEiE6JM_ZNPHft9ZsMfPKsIPIEH9kvdvKOBGNbH8V7k-KhnSClvyotd4S_qcJcTwOk_QxT4b1oIvSAvh-kToX4wdudBXYTCVnkzeCIAmSQEkYtZYHx9bAbxcsAbpP1WoxLgkFHJNgndv9-Ixvu9eUWOSoOfYrcJM6wtoZkDrTmY6XvZXhIoR_3NT9MPNf5iODTl55X2EEG9fJJsYqpwkD_1ISXxOmLmfDDCiciCHR0=w1346-h1009-no
 

caspice

New member
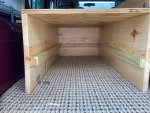
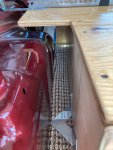
Reconfigured my storage setup. I had previously used a storage crate and half of a hitch cargo carrier that was bolted to a length of perforated-slotted angle steel that is attached using the hardtop bolts. While it worked it was unsightly and not overly organized.

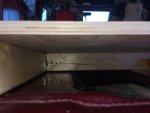
After reviewing many photos and videos I decided to make a simple single drawer box that was half the width of the rear floor, just a little taller than the wheel arch, and just long enough to fill the span between the back of the rear passenger door opening to the back gate.

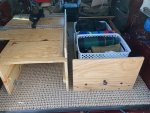
So after taking a lot of measurements and triple checking the numbers I cut all the wood to the appropriate lengths, assembled it all, test fit it and then poly sealed the whole thing. Only problem was that during the test fitting I never bothered to try and open the drawer. The drawer could not be fully opened due to hitting the rear gate latch strike. Bummer!

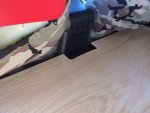
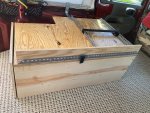
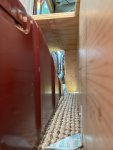
I could have easily repositioned the storage box to clear the strike but that would have been at the cost of available floor space which is needed for my legs while sleeping. Since I would much rather have the leg space the only recourse was to reduce the width of the box. The box pictured is the 2.0 version and is about 8" narrower than version 1. The box is secured using two anchors into the floor and a side bracket that attaches to the perforated-slotted angle steel. Additional strips of perforated-slotted angle steel are attached to the top of the storage box and positioned so that a large storage grate will fit snugly in-between the rails.

1 Storage box.jpg

2 Storage box side view.jpg

3 Storage drawer.jpg

4 Storage box opening.jpg

5 Additonal side storage.jpg

6 Side storage slot view 2.jpg

So far so good but as these types of modifications are a process of discovery this setup is apt to change.
 

Forum statistics

Threads
188,396
Messages
2,904,147
Members
230,274
Latest member
mbauerus1
Top