Point Five Ambo Build

patoz

Expedition Leader
Bob, thanks for the tips and you probably just saved me about 3 or 4 hours of research.

I bought gasket from McMaster (http://www.mcmaster.com/#catalog/121/3587/=yyxfom) -- 1/16" x 2" Neoprene/EPDM/SBR closed cell foam (# 8694K64 -- $13.89/50 ft) for wherever I needed a thin gasket. From the site's description, it sounds like the stuff you'd need as well, but maybe a bit narrower.
That sounds exactly like what I had in mind. A question though, does it have adhesive already on it, or do you have to add it? I want the gasket to stick to the ambulance body but release from the Tread Brite panels when I remove them.

...you might get your welder friend to use a plasma arc to cut the metal instead of trying to saw it.
He's 75 miles away, working full time now, and doesn't have a plasma arc, so that's not an option. I've cut aluminum plate and tubing, channel, etc. using fine tooth wood cutting blades before with pretty good results. So today, I ordered two Freud Diablo blades, one for my circular saw to cut the panels with, and one for my miter saw to cut the 2" square tubing with.

http://www.amazon.com/gp/product/B00008WQ37?psc=1&redirect=true&ref_=od_aui_detailpages01

http://www.amazon.com/gp/product/B00008WQ39?psc=1&redirect=true&ref_=od_aui_detailpages01

These blades are laser cut with carbide tips, and made specifically for non-ferrous metals and plastic work. I also have an 8' cutting guide so I can make straight cuts.

I suggest using the knurled Riv-Nuts for better torque resistance - McMaster has them (search for "rivet nut"), and for what you'll be doing, their #94020A343 should be about right. It's 1/4-20, aluminum, knurled, and can handle material up to 0.165" thick. Price is $12.80/25 pieces.
I ordered 50 of these when I ordered the tool, so I'm good to go on these I think. I'm thinking of placing them 12" apart, what do you think? If 50 is not enough, I'll just order some more.

I'll need to pick up some drill bits and probably the countersink you mentioned, although I do have several similar ones that may work.
 
Last edited:

rlrenz

Explorer
The gasket material has adhesive on one side, and it's a decent adhesive that does the job. A 50 ft roll is about 9" in diameter with peel-off on the adhesive.

If you've cut aluminum with saws before, then you know what a mess it can be, but I also use saws - no plasma arc yet.

Bolt spacing sounds very wide to me - I would think no more than 4" or maybe even closer. When you lay them out, maybe use a compass to walk off the bolt spacing, and adjust it a little to get the spacing to match the space - or you could just come in from each side, and have the spacing for the center bolts be whatever it works out to be.
 

patoz

Expedition Leader
OK, it looks like I'm going to be placing another order to McMaster anyway, so I'll order another 100 or so RivNuts also.

I'll probably use the centering method (easy) for the spacing, and I'm also working on a method for supporting the panels so that one person can secure them in place when it comes time to close it back up each time. The two sheets weighed 123 lbs. together, according to the forklift operator who loaded them for me, so after the panels are cut to size, the upper will weigh approximately 57 lbs. and the lower 23 lbs.
 

rlrenz

Explorer
Wood staging comes to mind - a wood brace plus a neighbor to get things into approximate place, with a Wonder bar for fine tuning. The challenge will be on-off as you do the multiple drilling. It might be worth installing a lifting ring and using an engine hoist.
 

patoz

Expedition Leader
My neighbor will be helping me this weekend I hope, and he has fabrication experience also. He works during the week, so what I'm thinking of is something that I can use once everything is drilled and mounted, that will allow me to remove and remount the panels by myself when I need to. I'm thinking of something along the lines of a pulley system that can be attached to the rain gutter to hoist the top plate into position. Once I get one bolt in, the rest will be easy. The bottom panel will be no problem because it will be lighter and I can just sit it across the tongue and work it into place.

Or, I could just take a few 1/4" x 2" bolts, cut the heads off and taper the ends, and make some temporary alignment pins out of them. Install a couple at the top edge and just 'hang' the panel from them. Then install the screws, remove the 'pins' and install the remaining screws in their place.
 

rlrenz

Explorer
Why not install the lower panel first? Easier to hoist into place, and a clip or bracket could be slid under one of the upper bolts to help support the top panel.
 

patoz

Expedition Leader
Apparently, I've been over thinking this because that is an excellent idea and simple too!
 
Last edited:

patoz

Expedition Leader
This part is not very exciting, but it's progress none the less.

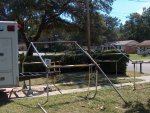
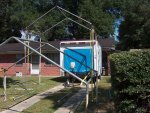
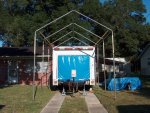
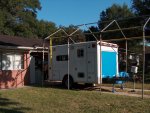
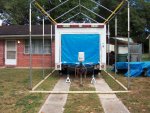
I don't have a nice big shop to work in like some of you guys do, and since our temperatures are still hitting 90°+ in the sun, I decided to build a 'shop' around the ambo/camper trailer. I needed something big enough to cover the ambulance body, the tongue area, and an area on the drivers side which will be the cutting and fabricating 'shop'.

I had the frames from two different canopies (a 10' x 20' and a 16' x 20'), but no covers. I also have a new silver 20' x 30' tarp. So, with my neighbor's help, we started trying to put the larger frame together, but between the rust and bent pipe, we gave up after two hours. Feeling frustrated, I jumped on the computer to see what I could buy new and where on a Saturday. Not much to choose from here, and after seeing the prices for anything heavy duty and big enough to do what I wanted, I gave up and went back to the drawing board.

What we finally decided on was to put the galvanized 10' x 20' frame together, and center it over the ambulance body and tongue, then cover it with the silver tarp. Since the tarp is 20' x 30', it will go on across the frame which will require about 12' of material, and the rest (approximately 18') will extend out to the side to another set of poles, making a cover for the fabrication area. Basically, it will be configured something like this, but without sides...

18x21-enclosed-garage-12leanto.jpg


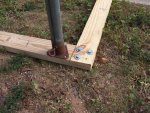
The frame legs were only about 6' tall, so we added 3' extensions from the other frame making it approximately 9' on the sides and about 12' at the peak. Tomorrow, I'll clean it all up some, and then build a base plate out of some treated lumber that will run around the perimeter under the legs. This will keep the legs in place and maintain the proper spacing, while giving me a good way to anchor it down with some rebar spikes. In case of a storm, I can also anchor the frame to the ambulance itself using some ratchet straps if need be.

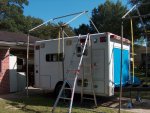
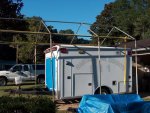
Here are a few pics as it went up...

The frame consist of three 6' sections, which with the couplings make it 20' long. We put the two end sections together first, with them sitting on the 3' extensions.

HPIM1293.jpg


Then we added the 6' legs, one side at a time, and raised them up.

HPIM1296.jpg


Next, we walked the two sections into place over the ambulance body

HPIM1297.jpg


Finally, we added the connecting bars to form the center section.

HPIM1298.jpg


HPIM1299.jpg


HPIM1300.jpg


And that boys and girls, is how you make something out of nothing...!


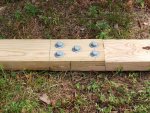
Update on 10/11/15: A few pictures of the baseplate and all of the corners now have four 3/8" lag screws in them.

HPIM1305.jpg


Lap joints on each side.

HPIM1306.jpg


The front plate is removable so I can pull the camper out without breaking it.

HPIM1308.jpg
 
Last edited:

rlrenz

Explorer
And as long as it gives you some shade, and helps keep the rain off, then it's perfect! I've seen many workboats in the gulf with a 10x10 pop-up canopy set up on their decks so the workers get some shade & rain-proofing. Even here in MN, I've thought about doing something similar so I can work on the buggy when it's in the driveway - not so much for rain, but to cut down the glare when you're working on a white ambulance in the sun.

Other than the fact they wouldn't do much with an aluminum body, I have some great magnets I could use to attach an "umbrella" to the area I was working on....
 

patoz

Expedition Leader
And as long as it gives you some shade, and helps keep the rain off, then it's perfect! I've seen many workboats in the gulf with a 10x10 pop-up canopy set up on their decks so the workers get some shade & rain-proofing. Even here in MN, I've thought about doing something similar so I can work on the buggy when it's in the driveway - not so much for rain, but to cut down the glare when you're working on a white ambulance in the sun.

Other than the fact they wouldn't do much with an aluminum body, I have some great magnets I could use to attach an "umbrella" to the area I was working on....

Well, it's not 'purdy', but it should get the job done!


What are you, one of dem dare evo-lotionists? Always claimin ta make sumthin outta nuttin. ;)

Naw, just a cheapskate!


cheapskate-btn-cooltext.png
 

patoz

Expedition Leader
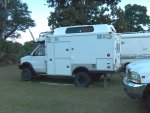
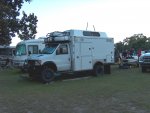
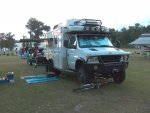
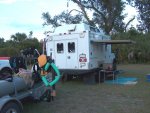
This past wednesday, I had the honor of meeting the builder of one of the most extensively modified Ambulance rigs I've see on this forum so far, and that would be Hobie Tony and his AmboVan. He was here in Pensacola for a Hobie Cat Regatta that was being hosted by one of our local Yacht Clubs.

The Yacht Club turned their entire front lawn into a dry camping area for the participants of the race, and it was pretty full of all kinds of motorhomes, campers, tents, speciality trailers, and of course the Hobie Cat trailers. Since Tony was involved in setting up for a presentation, we only had about 20 minutes to talk, but I did get a quick tour of his home on wheels, and it's as awesome in real life as it is on the forum.

Here are a few pictures I took of his rig while I was there.

HPIM1301.JPG

HPIM1302.JPG

HPIM1303.JPG

Untitled.jpg

Tony, it was great meeting you, and I hope you did well in the race!
 

cjken

Explorer
Ambovan is looking good!!

Pat what truck do you tow yours with? I can't remember from back in your thread.
 

Forum statistics

Threads
188,304
Messages
2,905,205
Members
229,959
Latest member
bdpkauai
Top