Pointers for attaching an awning to a flippac

austintaco

Explorer
It's on!!

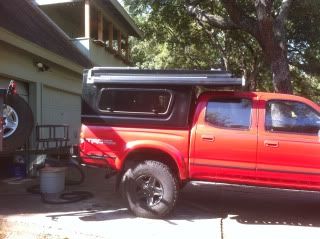
I'll have to post a pic once we get to Colorado and get settled. It's been a hectic last 5 days waiting to get my truck back and then finally last night pulling the trigger and drilling into the shell. It went very smooth except that on the 2nd bolt, the drill snagged the carpet on the interior and got jammed. It made a mess of that patch of carpet, but it's only cosmetic and easily smoothed over.
 

Rotorgeek

Adventurer
I'll have to post a pic once we get to Colorado and get settled.

I'm in Denver, CO and would love to see your Flippac and rig. Let me know if you come near Denver and I'll meet up with you and buy you a beer if you let me :drool: on your toys.
 

austintaco

Explorer
93e179a7.jpg

I hope this is visible. My front diff sprung a leak...twice! At 2 am, when i thought all was good, i had my first pile of diff fluid, and i hate the smell of diff fluid! Freaked out, slept for two hours, woke up and started to investigate. 12 hours later, i'm waiting on seal #2 to fix it. This is only the tip of the iceberg on truck issues this week. Denver sounds good right now.
 

austintaco

Explorer
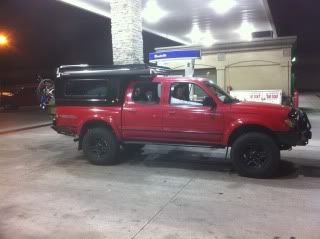
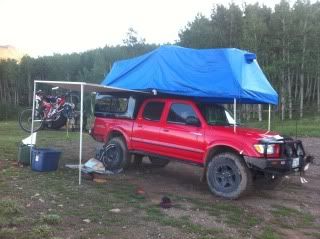
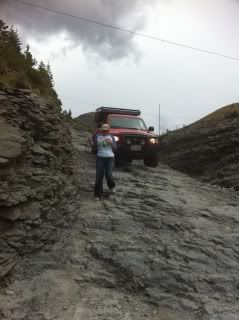
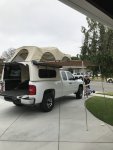
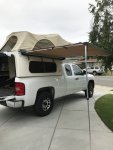
We made it! I am going to write up a trip report, but since I left off with the awning install, I wanted to post a pic of the truck and awning in action here. My install held up, with no issues, and made it down up and over Black Bear Pass!

Packed up and leaving at 12:30 AM on Monday morning
3d1cfa47.jpg


One of our 5 campsites. This was right off of Last Dollar Rd, and was a quick stay before heading to Ouray.
8a9faf50.jpg


One of many shots I have going down Black Bear. My wife walked down almost every switch back so she has great shots of my truck, but on her camera. I got out to investigate an area and snapped this one with my camera.

83ba4932.jpg


The awning was actually one piece of equipment that didn't give us any issues. It's a breeze to set up and take down, and I only paid about $50 for it! The flippac shows some spider webbing on the driver side rear. I think its just the paint, but I'm not a fiberglass expert. On our first night, in Mesa Verde, we had problems shutting the flippac. The lid has become out of alignment so I had to push it over while she clamped it shut. This was before any four wheeling activities.

I'll do a trip report next with more photos. Thanks again for all of the help!
 

JasonRedwood

Explorer
I noticed when I was working on mine, if the ground wasn't level, the flippac would have difficulty shutting. So maybe if there was flex in the truck were you parked that may be the culprit.
 

austintaco

Explorer
That might have something to do with it. I know that the lid can be adjusted, I just have to get up there and mess with it. I still have to unload from the trip. I can't drive straight through on road trips like I used to do!

Full report from our trip is now posted.
 
Does anyone Know exactly how big the metal tubing is in the shell? and its exact location? I hear 3/4 " down from rubber seal. does it run the full length of the shell? Is it steel or aluminum?

Cheers.
 

rharries

New member
On my new Flippac, (2015 Tundra, 6.5 foot bed), I discovered the aluminum rail is located~1/2" behind the fiberglass skin. the proper length of rivet that will grip inside wall of the aluminum tube to the outside of the awning channel is 0.625" (5/8"). this length of rivet is not available at my local hardware store, and the only place I have found for obtaining this hardware is on-line at Hanson rivet online. http://www.erivet.com/storefront_productlist01.cfm?srchtxt=PASD320
unfortunately, a minimum of 100 rivets is required.

I have also discovered that standard 1/4" bolt heads do not seat in the Fiamma channel, and will need to have the flats ground down.

I guess I will have to wait a little longer to complete installation, unless somebody has alternate solutions(?)

I may simple abort the upper support channel and bolt the awning directly to the shell as Timber did. hopefully this is durable.
 

Arclight

SAR guy
I installed my 6.5' ARB awning using long rivnuts designed for fiberglass. Rharries is correct, there is a gap between the skin and the steel box tubing. You want to be careful placing the holes - the driver-side has the two light fixtures on it (the holes for my homemade brackets almost intersected them) and the passenger side has the hammock hardware riveted to it. I think I placed mine 3/4" down from the top of the fiberglass, and it was a bit low but OK. Measure carefully with the tent up to be sure before you drill.

Here is how I did it (read page 5-6):
http://www.expeditionportal.com/forum/threads/128820-Flippac-build-out/page5

Also double-check that your crank will clear on both raise and lower if you decide to mount it on the driver's side.

Arclight
 

Camelfilter

Explorer
For the awning on my FP I did forum user Subterrans method by modifying some door hinges.

Check out his build starting around post #22 here:

http://www.expeditionportal.com/for...ntures-of-an-88-Phoenix?p=1533685#post1533685

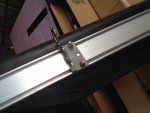
My awning is a CVT which has channels in its aluminum backing plate for nuts. I forget what size, maybe metric? Anyways I bolted halves of the hinge to it.

The other halves of the hinge I bolted to 90 degree plates which are bolted directly to my FP.

Really sturdy setup. The awning has seen some reasonably high winds & pretty gnarly storms deployed. Has also been mounted to my truck for months at a time, including this last chunk of time whuch includes my crossed country drive with high speed interstate driving.

This setup is also super easy to remove it for storage & then reinstall.
 

rharries

New member
Fiamma 35 install updtae..

I found some 3/16" diameter blind rivets with a 5/8" grip range and was able to install the upper channel. Unfortunately, they are aluminum with aluminum mandrels, but we will see how it goes. I installed 7 blind rivets, as 15 seemed excessive, given the 1/4" bolted connection. seems pretty solid.

I needed to drill out the hanger to accept the 3/16" rivets, as the pre-drilled holes were only 1/8"

I followed the lead and set the upper channel rivets 3/4" below the Flippac gasket, and all rivets felt really secure.

I discovered that metric bolts (M6 ?) do in fact fit in the slotted groove, so no need to grind down 1/4" bolts.

the only issues that I encountered were:
1. The side of the Flippac is not flat, so I had to "slide" the awning onto the hanger channel. it took some force, but no rivets popped. I should have cut 12"-18" off the hanging channel and centered it where the Flippac is flat, or perhaps furred out the channel with some spacers. Check the flatness of the Flippac surface with a straight edge before installing the hanging channel.
2. The 2 bolts that secure the awning onto the shell should be drilled oversized, and at a sharp upward angle as the awning rotation requires this for proper bolt installation. Not really a big deal if you seal the penetration with silicone.

I'll let you know how it holds up, as I am headed out this weekend.

oh yeah, you may want to apply some backing force when drilling the 1/4" bolt holes, as I peeled off a big chunk of interior fabric (on the last hole!)
 
Last edited:

Camelfilter

Explorer
Rharries-sounds like a decent instal.

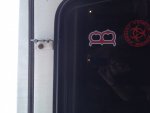
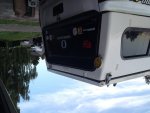
Here's how mine with the hinge method looks:

image.jpg

image.jpg

image.jpg

image.jpg

And this is how the back plate / other hinge halves on my awning looks:

image.jpg

...& my standard apology for the upside down pictures...iPhone...ugh!
 

austintaco

Explorer
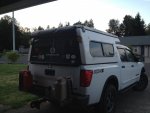
Since I started the thread, I figured I should report back. I have had no problems with my awning install. High winds, trails, etc, and it has not budged. I am glad this post is around, because I would not have remembered what size of bolts I used to install it without this thread to refer to.
 
So I used my uncle tims method timber on here .

Drilled 4 5/8s holes 3/4” down from top lip
Used 2.5 inch 5/8s bolts that slid directly into the back of my smittubuilt awning.

I had a roll of 1/8 thick rubber I got off a job site that’s used for concrete barrier that I use for everything. I cut it to fit the metal channel on the back of the awning marked holes and cut holes for the bolt pattern installed it which also held bolts in place when I installed .

Also filled holes with silicone

All in all 2 hour job and seems very very sturdy.
 

Attachments

  • F25661B1-6BE6-477B-8C1F-58976FB0F672.jpeg
    F25661B1-6BE6-477B-8C1F-58976FB0F672.jpeg
    1.3 MB · Views: 21
  • C96BE266-B182-45B7-A8CD-B563D183C17E.jpeg
    C96BE266-B182-45B7-A8CD-B563D183C17E.jpeg
    2.7 MB · Views: 17
  • 5955DA43-962C-47DA-8D6F-2A41447277C4.jpeg
    5955DA43-962C-47DA-8D6F-2A41447277C4.jpeg
    1.3 MB · Views: 18
  • 974ED5AC-60E9-490F-8B16-CFE20CD9322E.jpeg
    974ED5AC-60E9-490F-8B16-CFE20CD9322E.jpeg
    1.9 MB · Views: 21

Forum statistics

Threads
188,214
Messages
2,903,873
Members
229,665
Latest member
SANelson
Top