OverlandKyle
Adventurer
Ive been wanting to mount an awning to my Bantam trailer for a while now and couldn't figure out the best way to do it. I love AT's military trailer awning mount but I knew it wouldn't work as part of that bracket mounts where the tailgate is. After several different trips to harbor freight, home depot, REI, the bike store, and Walmart..... I had my Eureka moment!!!
Total expenditure came out to just a little bit over 50 dollars... the frontrunner awning brackets in the picture came with the awning and isn't included in the cost.
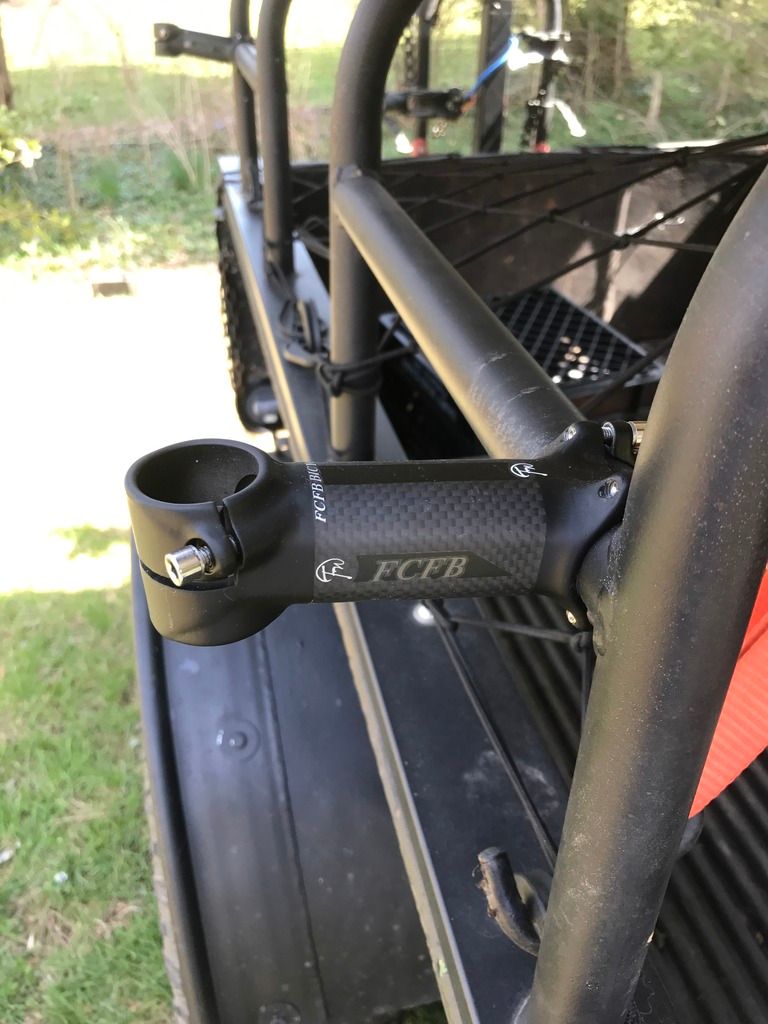
First, I got some mountain bike handlebar neck stems that were in the clearance bin.... 3 dollars or so each x2.... for those who may be interested in making their own.. Yakima bars are a perfect fit for the standard MTB handlebar slots.... the cargo bar outer tube... with two or three wraps of electrical tape is the same diameter as well. locktite went on the bolts.... thing ain't budging!!
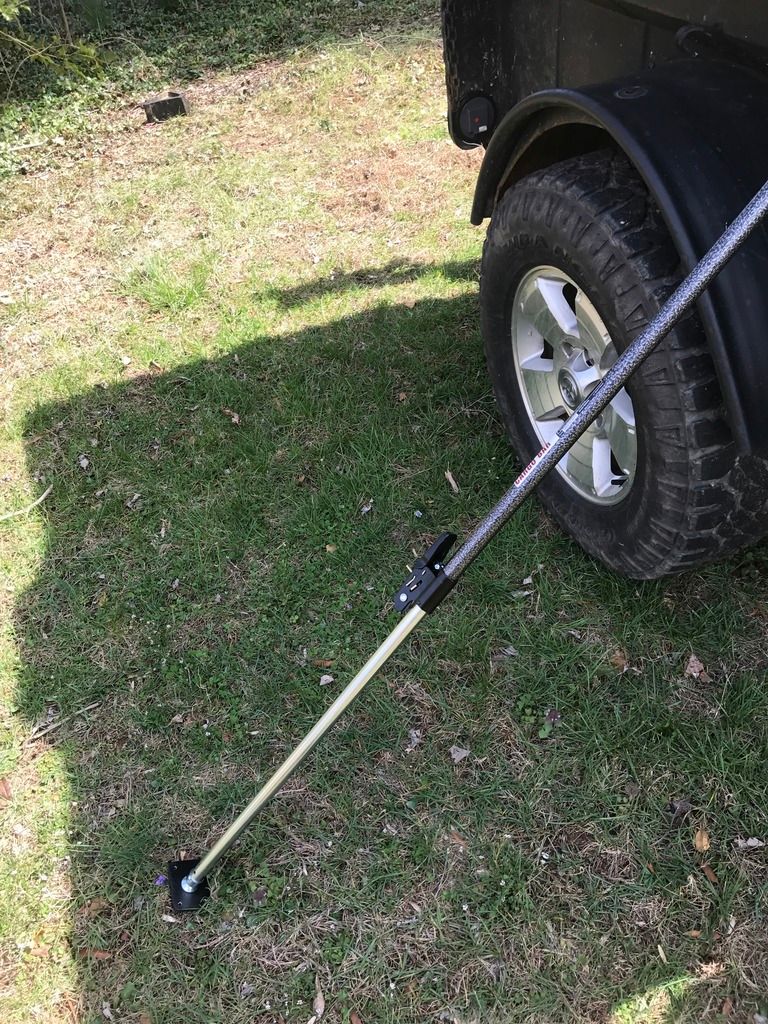
Got some ratcheting cargo bars from Harbor Freight... 17.99 x 2 with coupon... removed the bottom pads but left the top ones on as they aren't visible.
several longer bolts/nuts for the awning brackets $1.09
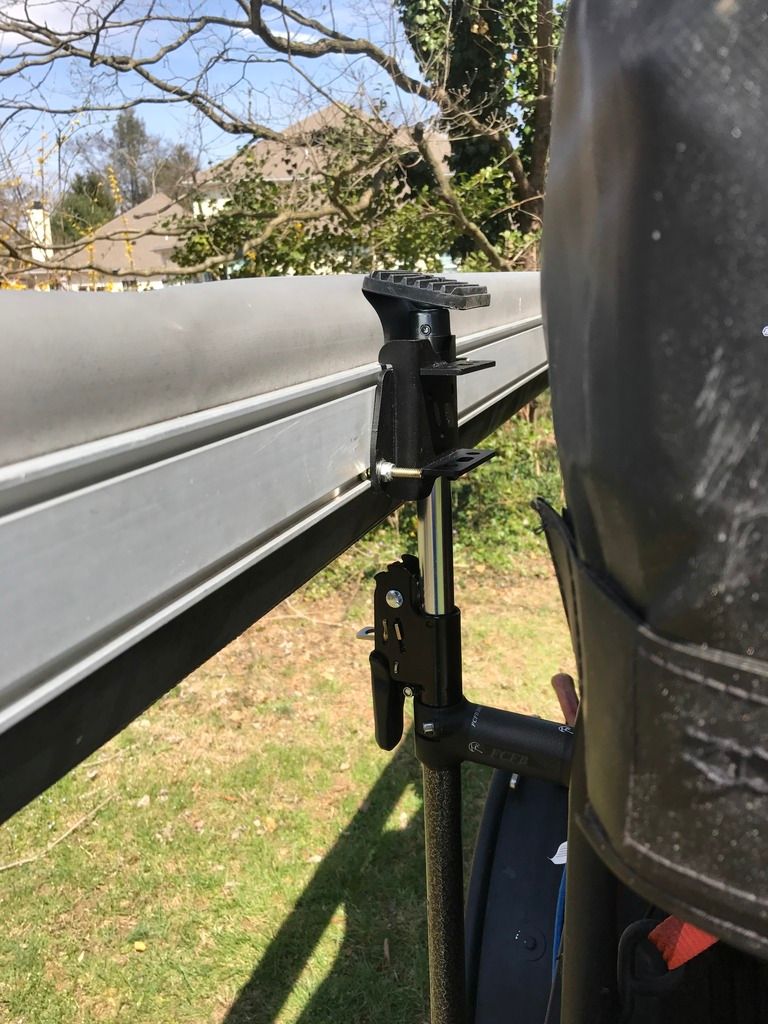
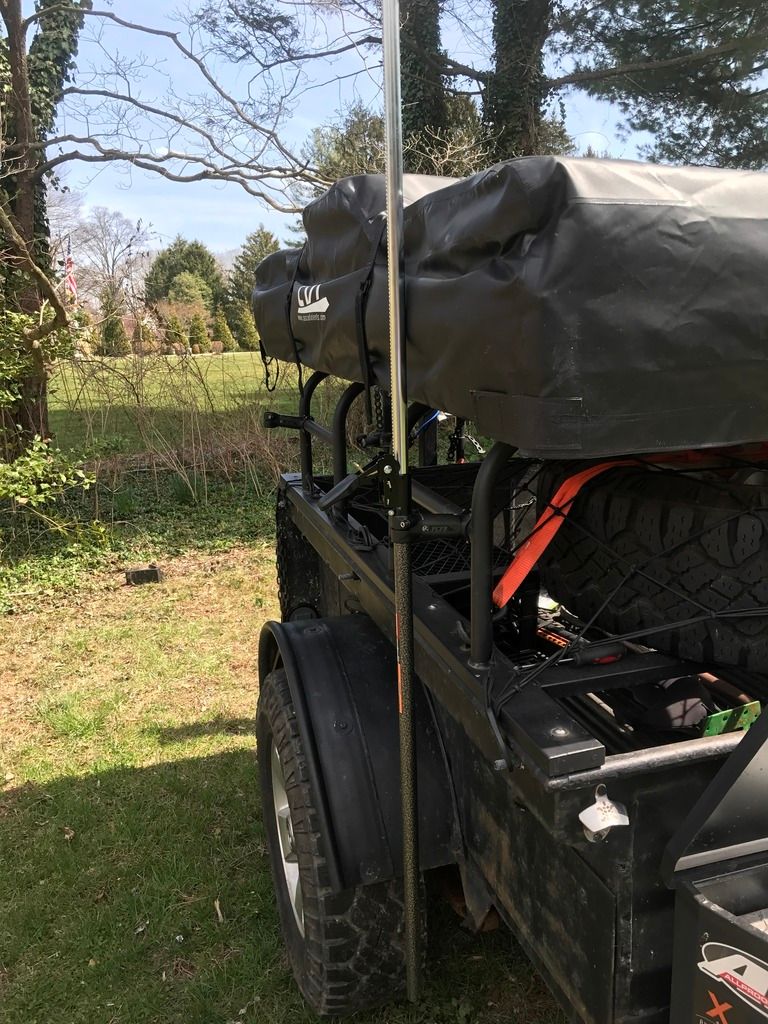
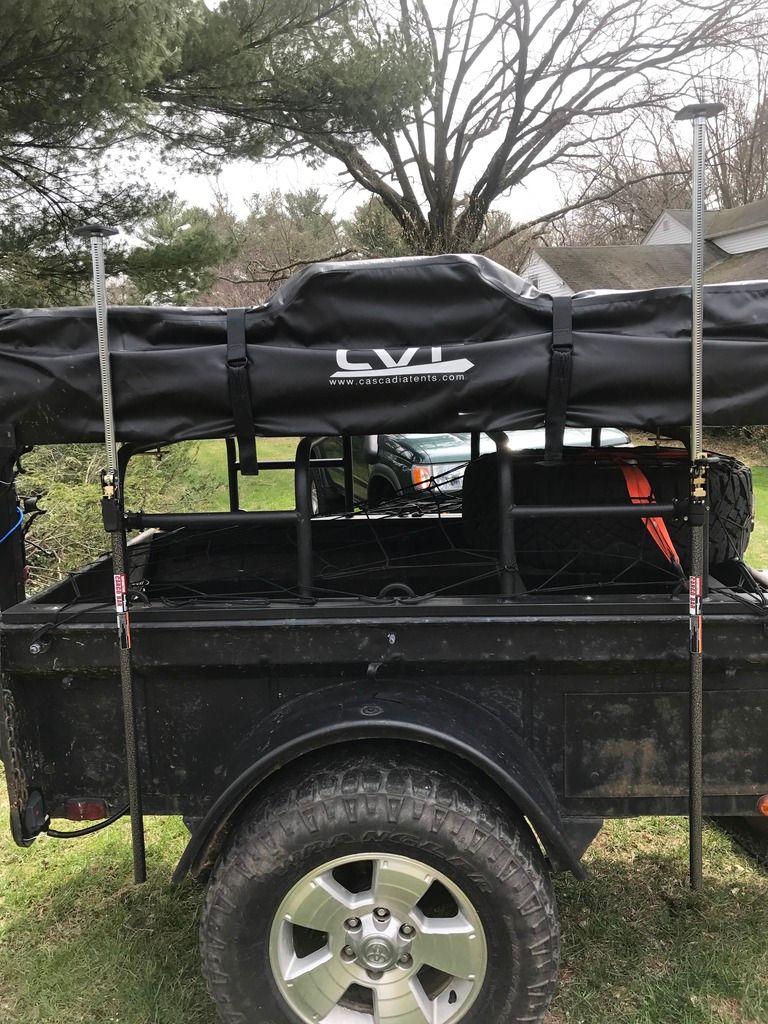
when in travel mode... it is rattle free and shimmy free as the base of the aluminum track on the awning rests squarely on the collar of the outer tube of the cargo bar..... when fully extended, there is very little sway as there is some tension in between the two supports that stiffens it up considerably. I will probably drill a hole in both of them and add a pin at one point as backup but the ratchet, when in locked mode has full engagement. I put about 35 pounds on top of it at full height and it didn't budge.
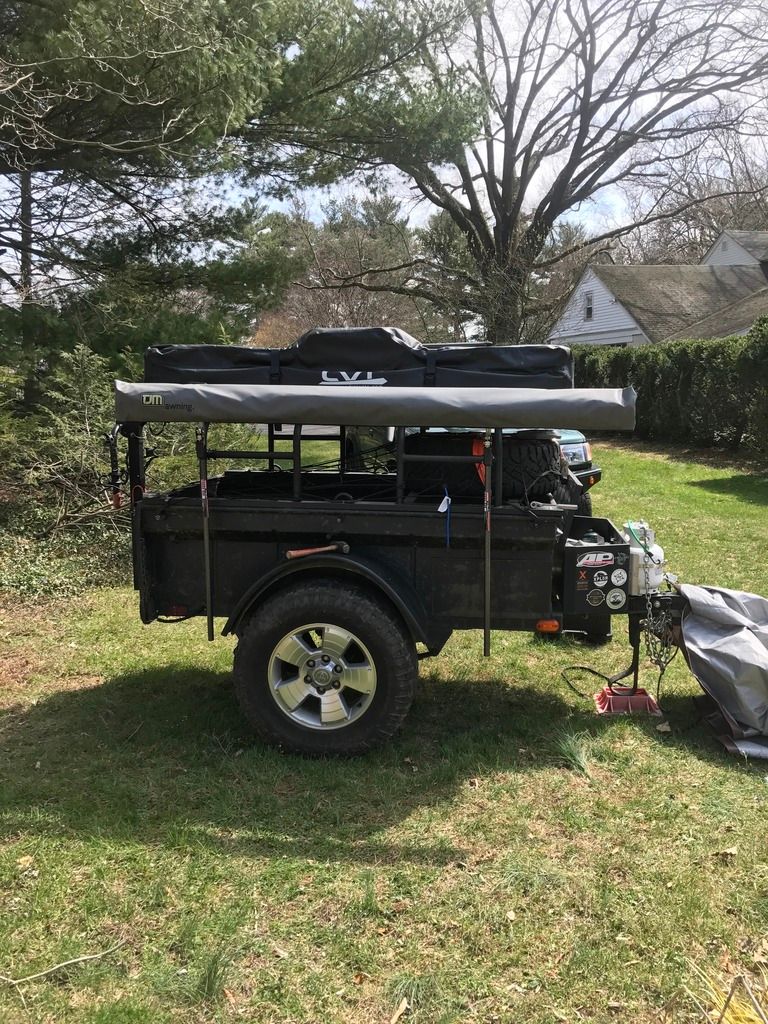
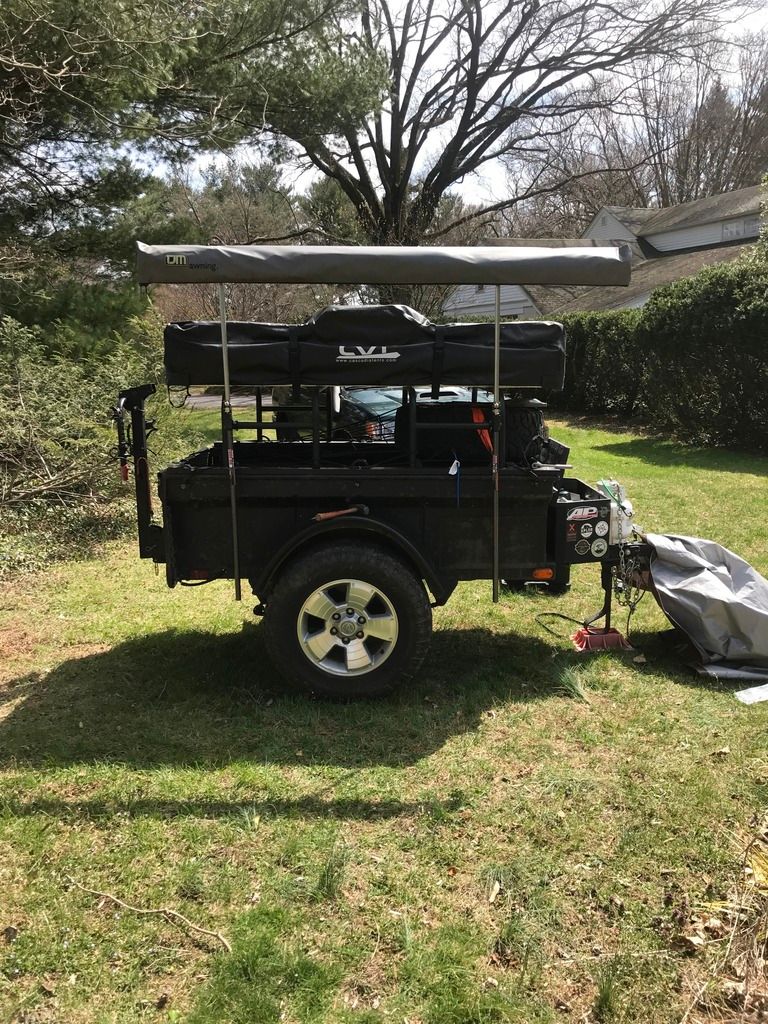
This thing is ROCK SOLID and is adjustable by a fair amount on both sides to slant it for rain run-off if necessary. I also had to shift the RTT about an inch toward the other side to allow enough clearance for the backside of the brackets
)nce I get it all dialed in, I'll clean it up a bit, peel off all the warning labels and stickers, hit it with a matching coat of paint, insert Yakima end caps on the bottom portion and viola.... a perfectly useable and super cheap solution to having shade and also an room as I have the wall kit for the awning as well.
Edit: photo angle is a bit misleading..... the bottom of the cargo bar only extends below the bottom of the frame by 1/2 inch to 3/4 inch
Total expenditure came out to just a little bit over 50 dollars... the frontrunner awning brackets in the picture came with the awning and isn't included in the cost.
First, I got some mountain bike handlebar neck stems that were in the clearance bin.... 3 dollars or so each x2.... for those who may be interested in making their own.. Yakima bars are a perfect fit for the standard MTB handlebar slots.... the cargo bar outer tube... with two or three wraps of electrical tape is the same diameter as well. locktite went on the bolts.... thing ain't budging!!

Got some ratcheting cargo bars from Harbor Freight... 17.99 x 2 with coupon... removed the bottom pads but left the top ones on as they aren't visible.


several longer bolts/nuts for the awning brackets $1.09

when in travel mode... it is rattle free and shimmy free as the base of the aluminum track on the awning rests squarely on the collar of the outer tube of the cargo bar..... when fully extended, there is very little sway as there is some tension in between the two supports that stiffens it up considerably. I will probably drill a hole in both of them and add a pin at one point as backup but the ratchet, when in locked mode has full engagement. I put about 35 pounds on top of it at full height and it didn't budge.


This thing is ROCK SOLID and is adjustable by a fair amount on both sides to slant it for rain run-off if necessary. I also had to shift the RTT about an inch toward the other side to allow enough clearance for the backside of the brackets
)nce I get it all dialed in, I'll clean it up a bit, peel off all the warning labels and stickers, hit it with a matching coat of paint, insert Yakima end caps on the bottom portion and viola.... a perfectly useable and super cheap solution to having shade and also an room as I have the wall kit for the awning as well.
Edit: photo angle is a bit misleading..... the bottom of the cargo bar only extends below the bottom of the frame by 1/2 inch to 3/4 inch
Last edited:


