You are using an out of date browser. It may not display this or other websites correctly.
You should upgrade or use an alternative browser.
You should upgrade or use an alternative browser.
Prepping a defender 130 for around the world..
- Thread starter The Rover Shop
- Start date
The Rover Shop
Explorer
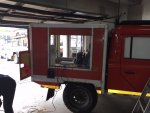
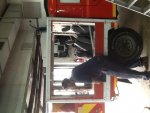
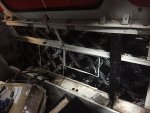
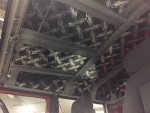
So I ripped all of the interior out so I can make out own rear seating system that converts into a sleeping area for when we are doing serious miles or when we wanna grab a quick nap at the side of the road without raising too much attention.. Also doubles as a good platform for our Australian cattle dog (Matilda) to be able to go from side to side and scare away bad guys.. Since I am not reinstalling the headliner but instead doing a custom overhead console I installed dynamat to keep out noise and heat, I will also be installing another. Layer of closed cell foam and carpeting as the headliner

The Rover Shop
Explorer
The Rover Shop
Explorer
So I got to doing the rear sleeping seating arrangements last night.. This is the seat box itself with storage, on top of this box will be the seat cushions that lock into place and then can be removed, the base comes out and forward and then the backrest comes out and down into the spot where the base was..this gives 30+ inches of flat sleeping laying area??storage is accessed by simply lifting the seat cushions..
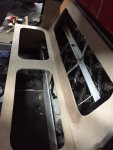
The webasto diesel heater is located under the seat box and exits through it, drawing air from inside the box..the storage space behind the seat back will probably house my heavy recovery gear as it's an awkward kind of space... But if I learnt anything travelling, you can never have enough storage..lol


The webasto diesel heater is located under the seat box and exits through it, drawing air from inside the box..the storage space behind the seat back will probably house my heavy recovery gear as it's an awkward kind of space... But if I learnt anything travelling, you can never have enough storage..lol
The Rover Shop
Explorer
The floor area in front of the seats will house our clothes boxes and other personal items that we use on a day to day basis.. And also provide support for the base when moved into sleeping mode.. When we need to use the rear seating section as seating, like for when we have visitors or our kids or a guide through certain countries the boxes can easily be removed and placed in the rear compartment.. I will also be installing 3 or 4 sets of seat belts as well..
The Rover Shop
Explorer
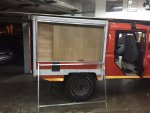
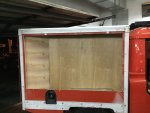
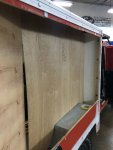
Mocked up the right rear tool area, this section will house things like shovel, axe, recovery ropes, saw etc etc as well as my bags of hand tools..(if there is one thing I know about driving a land rover, you WILL need tools..lol..) and on the base level I will mount the on board air compressor etc etc,.the rear section is angled so as to not obscure the small rear access hatch, haven't decided what that shall be for yet, or even if I will keep it..on that angled wall will also be the switch panel and the solar panel controller..


Last edited:
The Rover Shop
Explorer
This wall also provides additional rigidity to the roof section which is going to be the floor of the poptop raising roof tent..
The Rover Shop
Explorer
There ya go...all fixed..
We will be running the webasto airtop 2000 diesel fire unit.. With temperature sensor controls and timer..
So I got to do some more of the rear seating storage unit... These seat bases will be covered in comfy 2 inch memory foam..
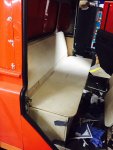
And then, as mentioned, the base moves forward and then the back drops down to fill that space, drop down legs that will be clipped under the leading edge of the base will provide support at the front of the "bed".. I kept the pieces I cut out and will install them into the openings as hatch covers..

We will be running the webasto airtop 2000 diesel fire unit.. With temperature sensor controls and timer..
So I got to do some more of the rear seating storage unit... These seat bases will be covered in comfy 2 inch memory foam..

And then, as mentioned, the base moves forward and then the back drops down to fill that space, drop down legs that will be clipped under the leading edge of the base will provide support at the front of the "bed".. I kept the pieces I cut out and will install them into the openings as hatch covers..

The Rover Shop
Explorer
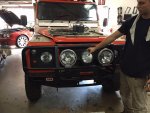
I also cut off the front bumper as it was kinda NAFF... I will be completely cutting out the superwinch cradle from the old bumper and cutting out the front of the ARB bumper and welding the superwinch cradle into the arb bumper... And welding another light tab in between the 2 bumper spot lights, so 3 of these (may do the 2 terrafirmas and one centre ARB intensity led light) honking big terrafirma HID spot lights will be mounted in the front, like the safari gard setup..that should give me enough lights, combined with the trucklite led headlights..:Wow1: also will have the 52 inch curved LED light bar under the roof rack...

The Rover Shop
Explorer
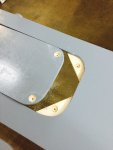
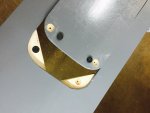
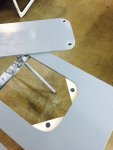
Wanted to make hatch covers for the storage sections, had some of those high strength neodyne magnets around so I played with them.. Used a paddle bit to bore a hole dep enough to recess the button magnet in on either side corresponding to each other, glued them in and let them set off...it works pretty good.


The Rover Shop
Explorer
Pedro can't own something this cool....Pedro has a pair of 130's....rock sliders... Gonna be a long time to build a truck up around that.. ..
..
Similar threads
- Replies
- 0
- Views
- 75
- Replies
- 12
- Views
- 3K
- Replies
- 1
- Views
- 655

