Pro-Rig V2.0 - Home Built Compact Composite Pop-up

Ramdough

Adventurer
I saw another build on this forum with a set of brushes in the upper edge of the bottom camper half.

e54ddbf52d77c30126dd474bdf8836c7.jpg
4b44bcbedd61918395c9d2452d8a1284.jpg


I think the build is called "out with the old in with the new" or something like that.


Sent from my iPhone using Tapatalk
 

CoyoteThistle

Adventurer
Similar. What is your spacing distance? I would add some of these for dust http://www.tmhardware.com/Adhesive-Weatherstrip-Pile-Brush-for-Glass-Sliding-Doors.html
Kevin

I saw another build on this forum with a set of brushes in the upper edge of the bottom camper half.

I think the build is called "out with the old in with the new" or something like that.


Sent from my iPhone using Tapatalk

Ahhh, I was thinking about the seal at the bottom for when the slide-up is down (what my photo shows), not sealing the gap between the walls.

For sealing the gap between the walls when the slide-up is up, I have a couple plans which defy description. It's high on my list of next things to do so stay tuned. I have a variety of gap widths (by design). 1-3/8" front and rear - this seal will also limit the upward travel of the slide up. 1" on the sides and 2" on the sides where the windows are - makes sealing when in the up position a bit of a pain on the sides.

I like that seal ramdough, thanks for posting. Yeah, I know the thread you are talking about. IIRC, he rejected a brush-only seal at some point but I don't remember seeing this one. Could work for me on the sides. No idea where to find it though. Wonder if he made it out of two different seals? Anyone know what it is called or where to get it?

Few updates on other issues to follow...
 

Ramdough

Adventurer
Ahhh, I was thinking about the seal at the bottom for when the slide-up is down (what my photo shows), not sealing the gap between the walls.

For sealing the gap between the walls when the slide-up is up, I have a couple plans which defy description. It's high on my list of next things to do so stay tuned. I have a variety of gap widths (by design). 1-3/8" front and rear - this seal will also limit the upward travel of the slide up. 1" on the sides and 2" on the sides where the windows are - makes sealing when in the up position a bit of a pain on the sides.

I like that seal ramdough, thanks for posting. Yeah, I know the thread you are talking about. IIRC, he rejected a brush-only seal at some point but I don't remember seeing this one. Could work for me on the sides. No idea where to find it though. Wonder if he made it out of two different seals? Anyone know what it is called or where to get it?

Few updates on other issues to follow...

I think he had a link for the brushes in his thread. Also he added the foam as a custom feature. The detail was buried in the thread if I recall. I had to read it a few times to grasp all that he did. The foam strip was something he added. Also, he used the spring clips from house window screens to maintain pressure evenly on the brushes.


Sent from my iPhone using Tapatalk
 

CoyoteThistle

Adventurer
Java you can see my design here
Kevin

I think I get what you're doing there. I like it. Super clever lifting mechanism too in the lower part of the image (I think I see how that is working).


I think he had a link for the brushes in his thread. Also he added the foam as a custom feature. The detail was buried in the thread if I recall. I had to read it a few times to grasp all that he did. The foam strip was something he added. Also, he used the spring clips from house window screens to maintain pressure evenly on the brushes.


Sent from my iPhone using Tapatalk

I'll have to dig deep in to the westyss thread again. I remember following it way back when but then fell too far behind and missed a lot.

Hmm, all this has me re-thinking my approach to sealing in the up position. This will keep me up at night for a while...
 

Ramdough

Adventurer
I think I get what you're doing there. I like it. Super clever lifting mechanism too in the lower part of the image (I think I see how that is working).


I'll have to dig deep in to the westyss thread again. I remember following it way back when but then fell too far behind and missed a lot.

Hmm, all this has me re-thinking my approach to sealing in the up position. This will keep me up at night for a while...

Hahahaha...... you suffer from project insomnia too?

I looked at copying westyss for a while, then started leaning toward a fixed roof.

He had 6 stainless roller slides where 2 were on the front, back, and left (or right) side to maintain the gap for the brushes. I figured some delrin or other plastic rub rails would do the job too. His thread had a link to where he bought the brushes from and how he fabbed the seals. I would think having brushes like him with the wiper foam, then a rubber bulb seal when closed would do the trick. You could also have a filtered air intake between the camper and truck and use a small fan to pressurize the camper to keep just out. That is if you want to go that far to keep it all clean inside.


Sent from my iPhone using Tapatalk
 

CoyoteThistle

Adventurer
Hahahaha...... you suffer from project insomnia too?

I looked at copying westyss for a while, then started leaning toward a fixed roof.

He had 6 stainless roller slides where 2 were on the front, back, and left (or right) side to maintain the gap for the brushes. I figured some delrin or other plastic rub rails would do the job too. His thread had a link to where he bought the brushes from and how he fabbed the seals. I would think having brushes like him with the wiper foam, then a rubber bulb seal when closed would do the trick. You could also have a filtered air intake between the camper and truck and use a small fan to pressurize the camper to keep just out. That is if you want to go that far to keep it all clean inside.

Haha, "project insomnia" - I like it. I do tend to occasionally wake up at 3 AM and get fixated on some aspect of the camper and lay there thinking till the sun comes up - annoying as heck. So it goes...

Yeah, I'm really thinking about the fan/pressurization approach. Dust annoys me and drives my girlfriend nuts. Only question is whether to add it to the list now or put it off til later.

With the seal, I mainly want to keep bugs out and heat in when the slide-up is up. Brush would do that I think. Might move that direction...
 

Ramdough

Adventurer
You could always wait and see about the dust fan. If you don't have a dust problem.

I would try the brushes with foam backup and then a bulb seal on the bottom lip. Just what I would try.


Sent from my iPhone using Tapatalk
 

CoyoteThistle

Adventurer
You could always wait and see about the dust fan. If you don't have a dust problem.

I would try the brushes with foam backup and then a bulb seal on the bottom lip. Just what I would try.


Sent from my iPhone using Tapatalk
Good calls on both counts. Might get the brush on and then retrofit the foam since it looks like another extra bit of work I don't have time for on the current deadline.

Few little updates to report from the last few days.

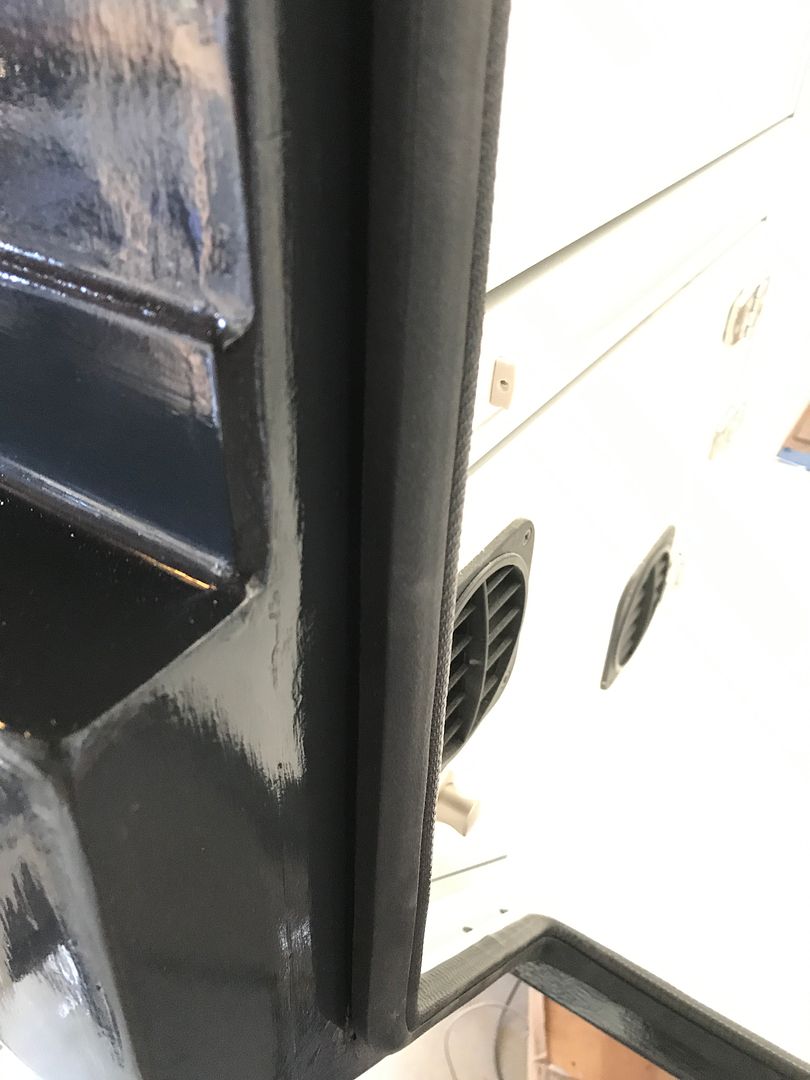
Got the bulb seal in around the door opening. Makes it look nice and clean.


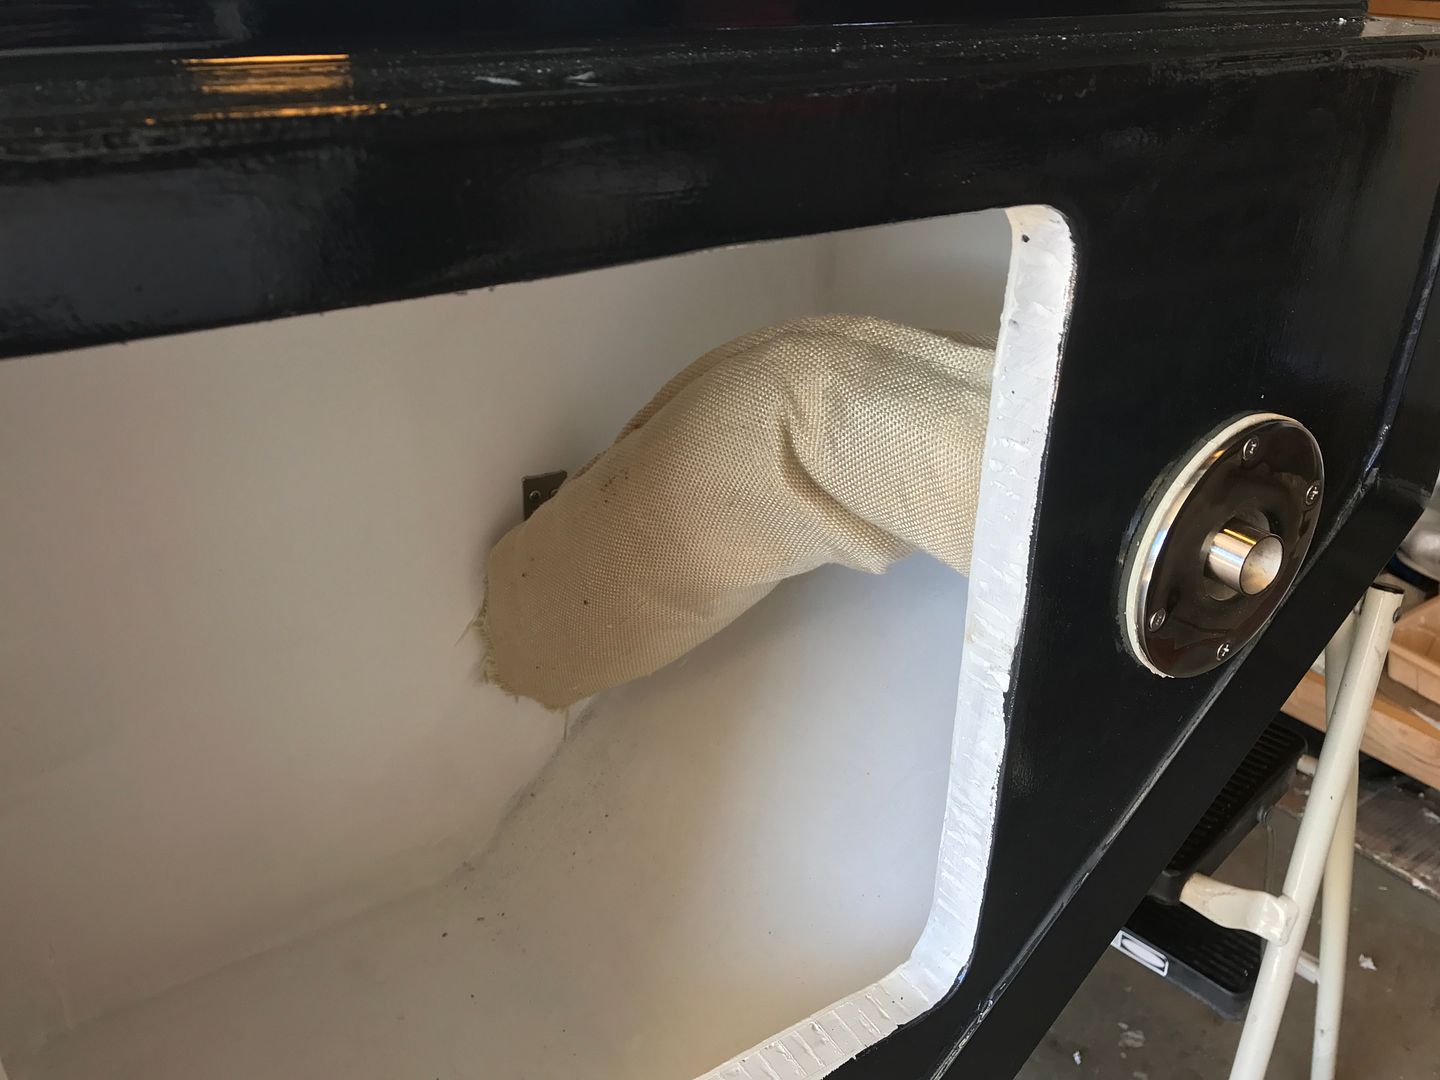
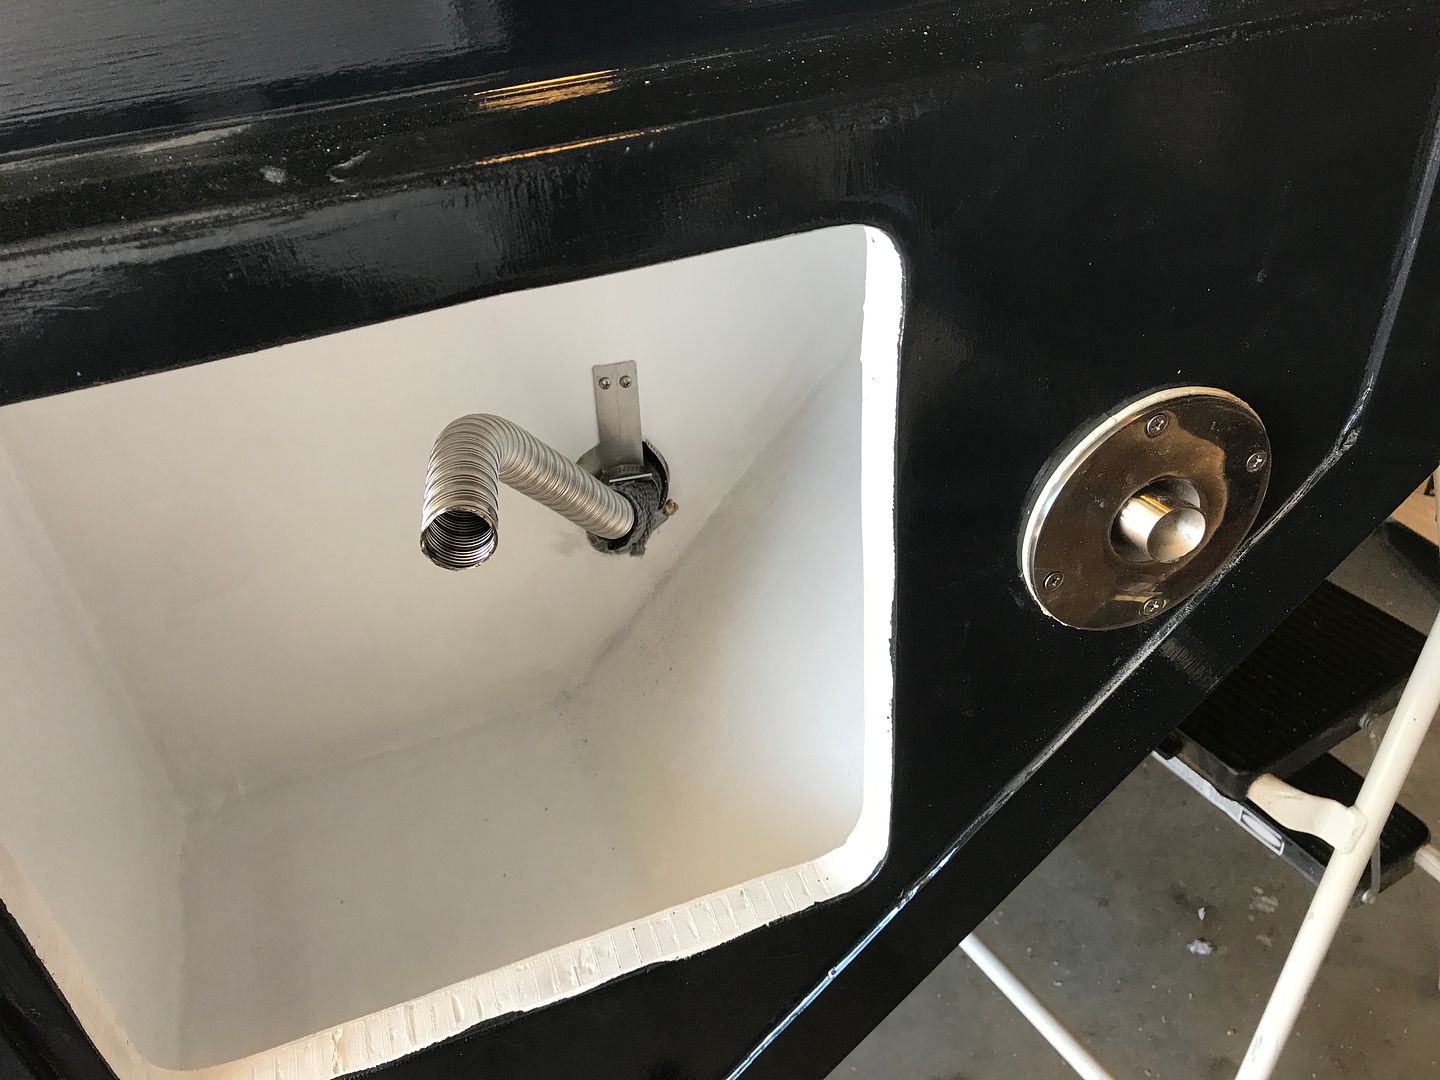
Also got the exhaust for the Propex heater finished. The SS hose comes out through the outside storage compartment. Used some of that fiberglass-like exhaust header wrap that I had laying around to insulate a bit where it passes through the wall. Bracket and hose clamp keeps it in place here. At right is the fancy double-walled thru-hull thing.


Added some of the insulation to the hose and got it all hooked up. Looks pretty clean.


Had a good busy day today and crossed a few things off the list. Details to follow...

matt
 

CoyoteThistle

Adventurer
Crossed a couple things off the list.

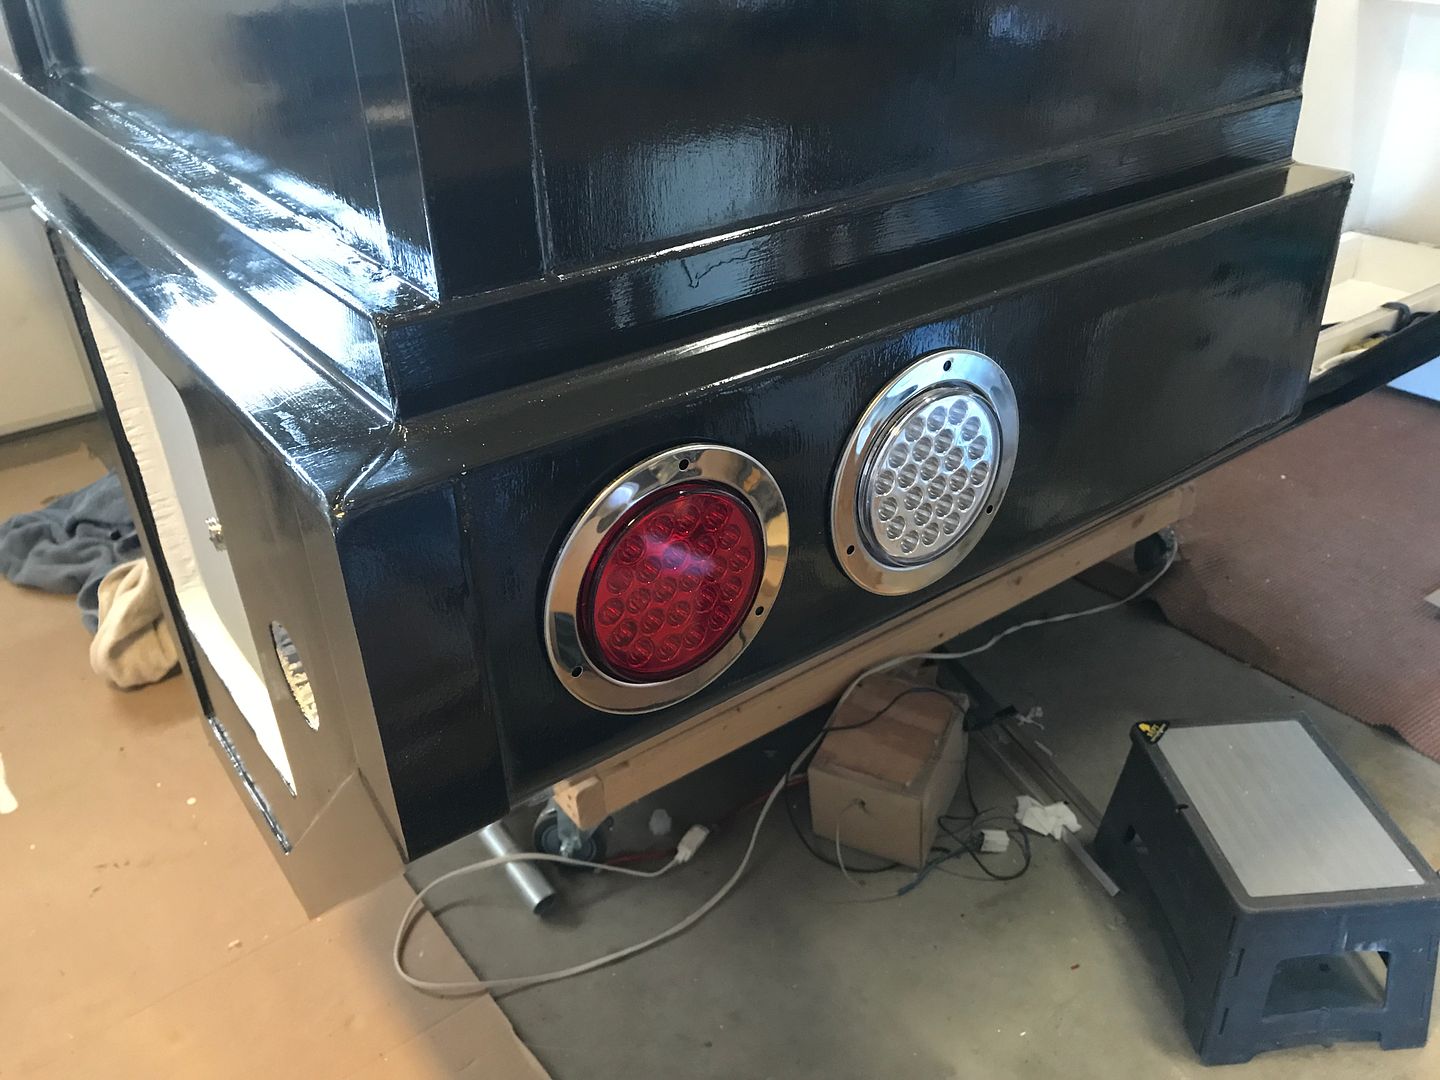
Got the taillights in a few days ago. Gonna wait to make sure all is working before sealing and screwing in. Wiring is done though. Pretty happy with the way they turned out.


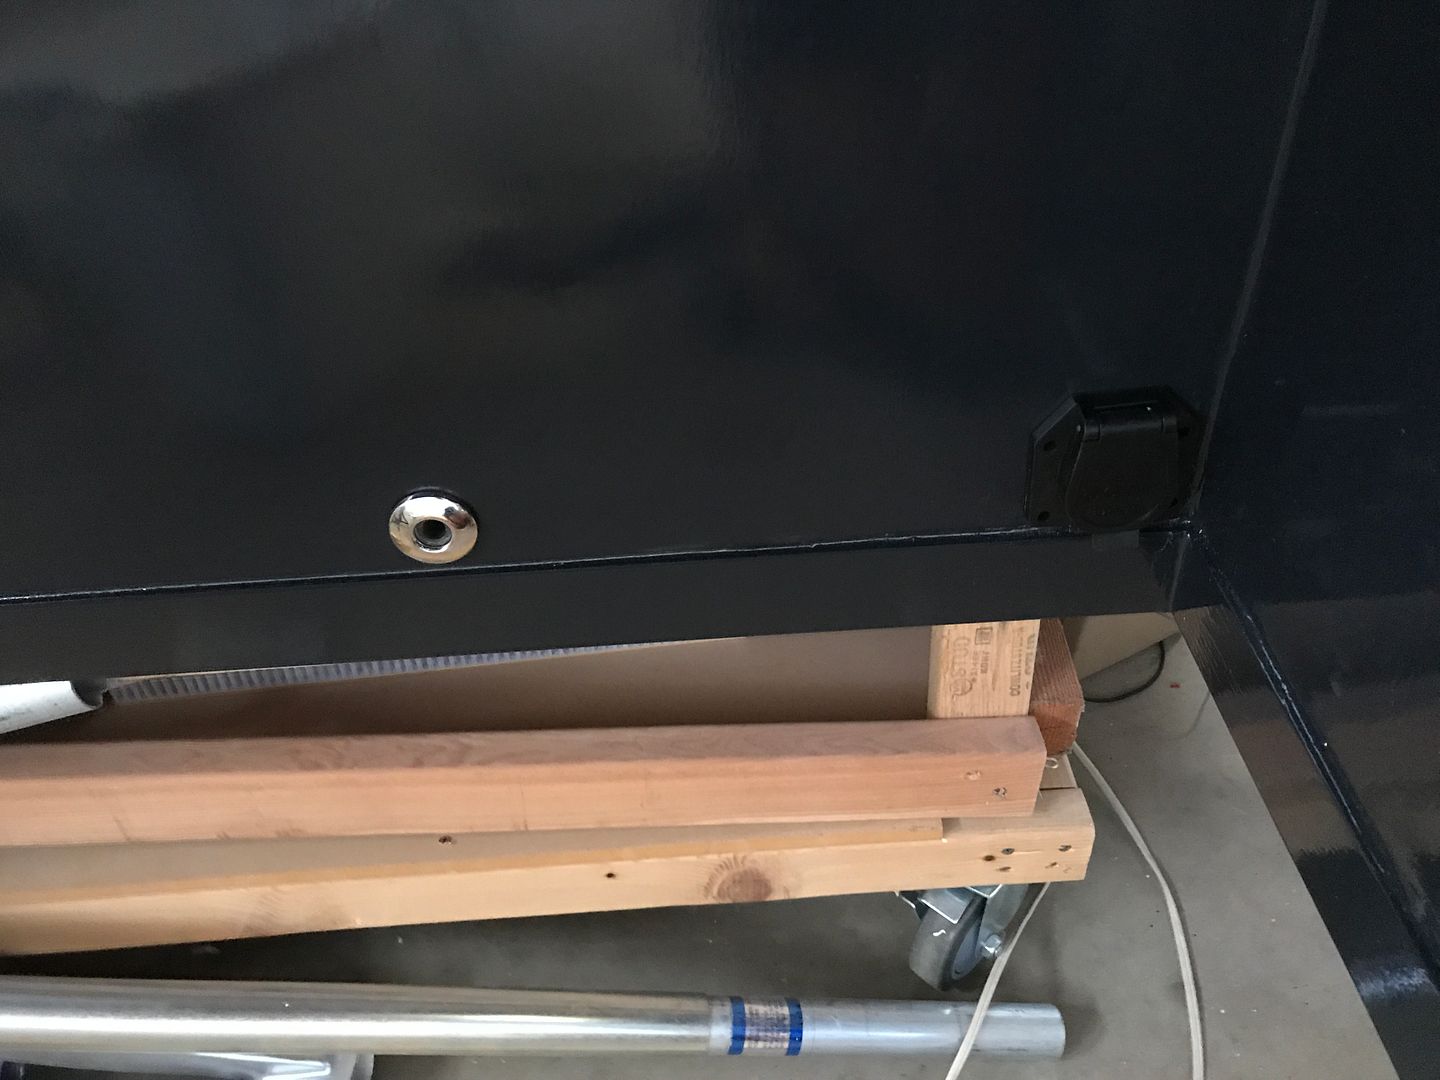
Wiring for them will come from the trucks 7-pin trailer harness and enter on the side through a regular female 7-pin receptacle, at right (hard to see).


Chrome thru-hull is the drain/emergency pressure release for the water heater.

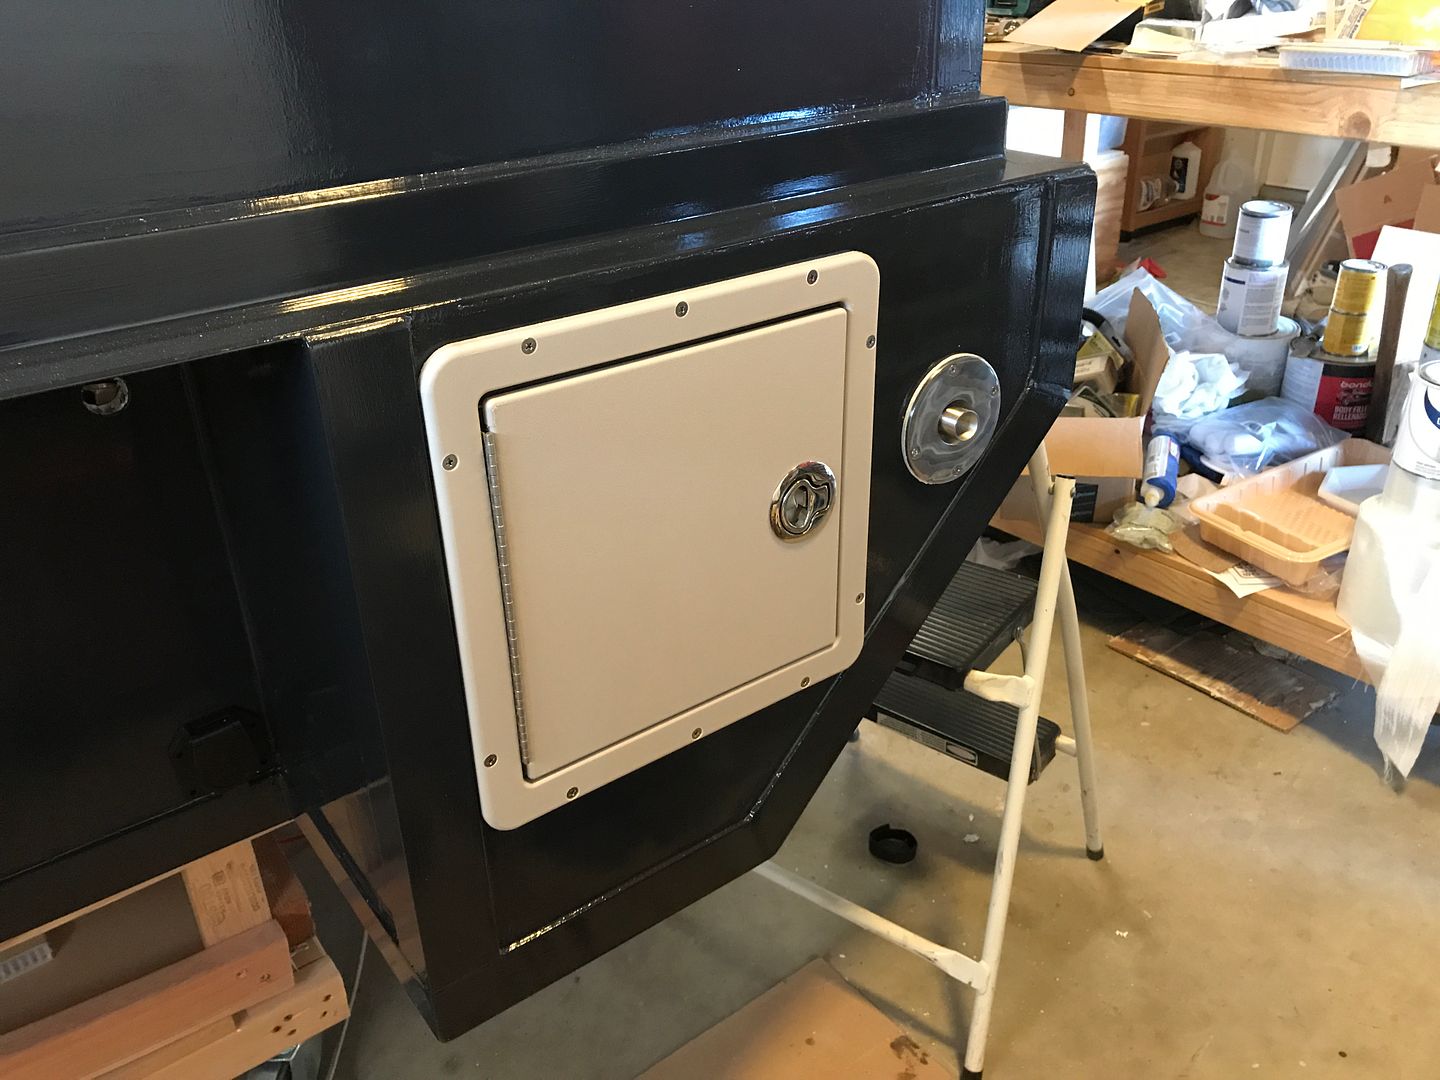
Got the rear outside hatch in. It's from one of those surplus boating places. Not crazy about the color but a little contrast is good.


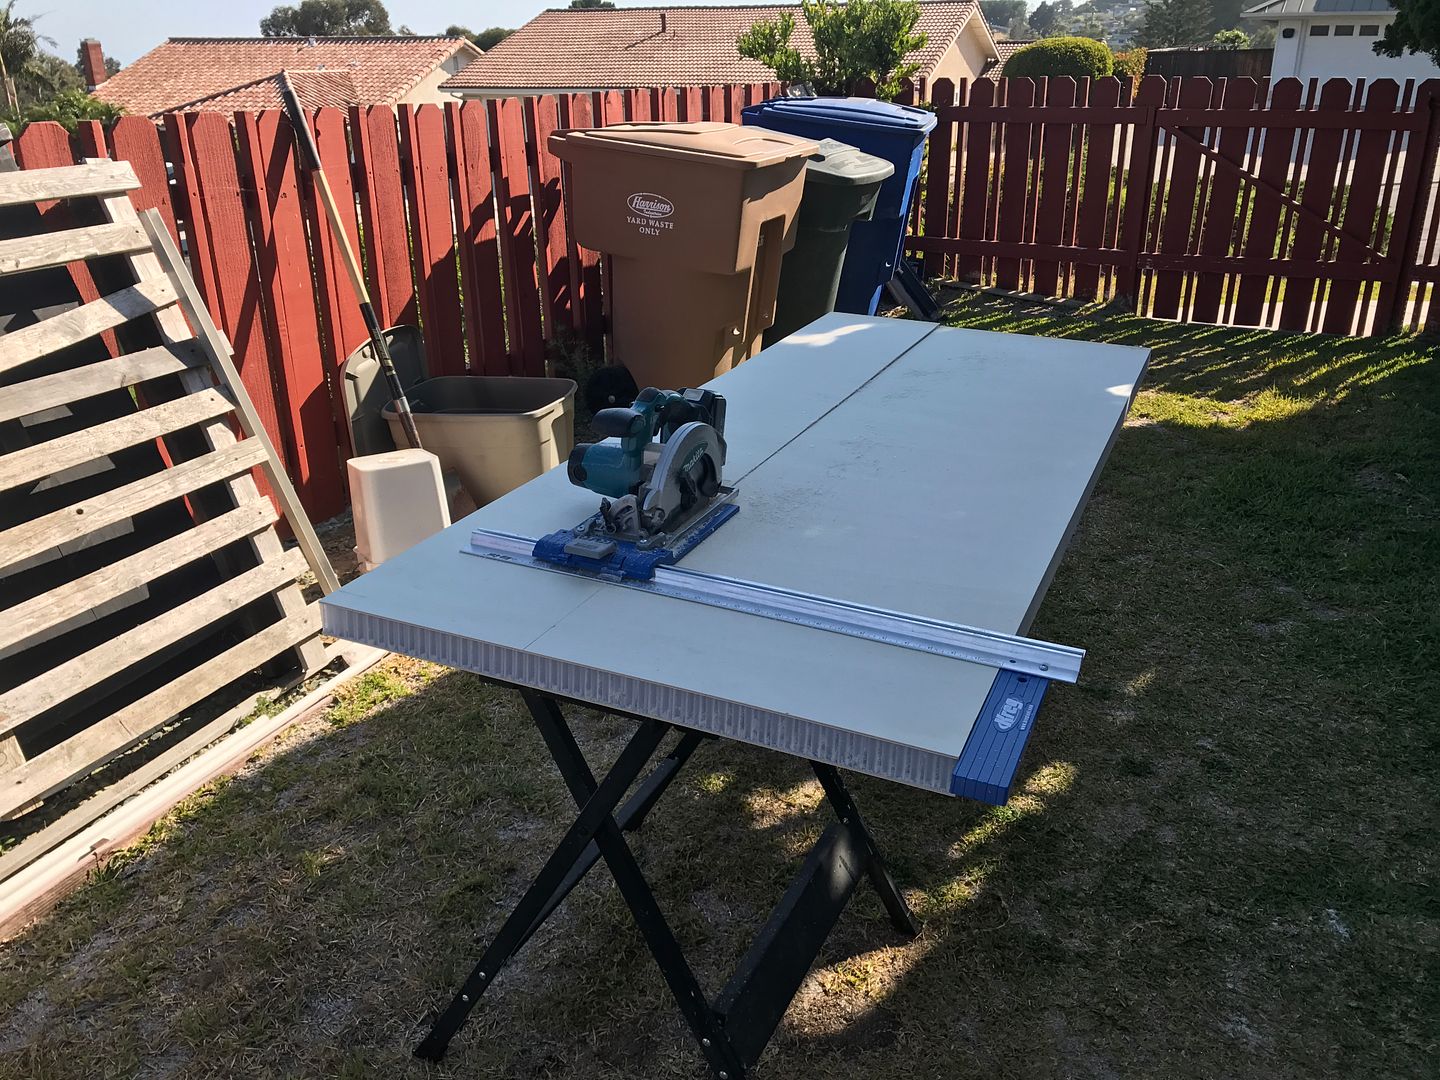
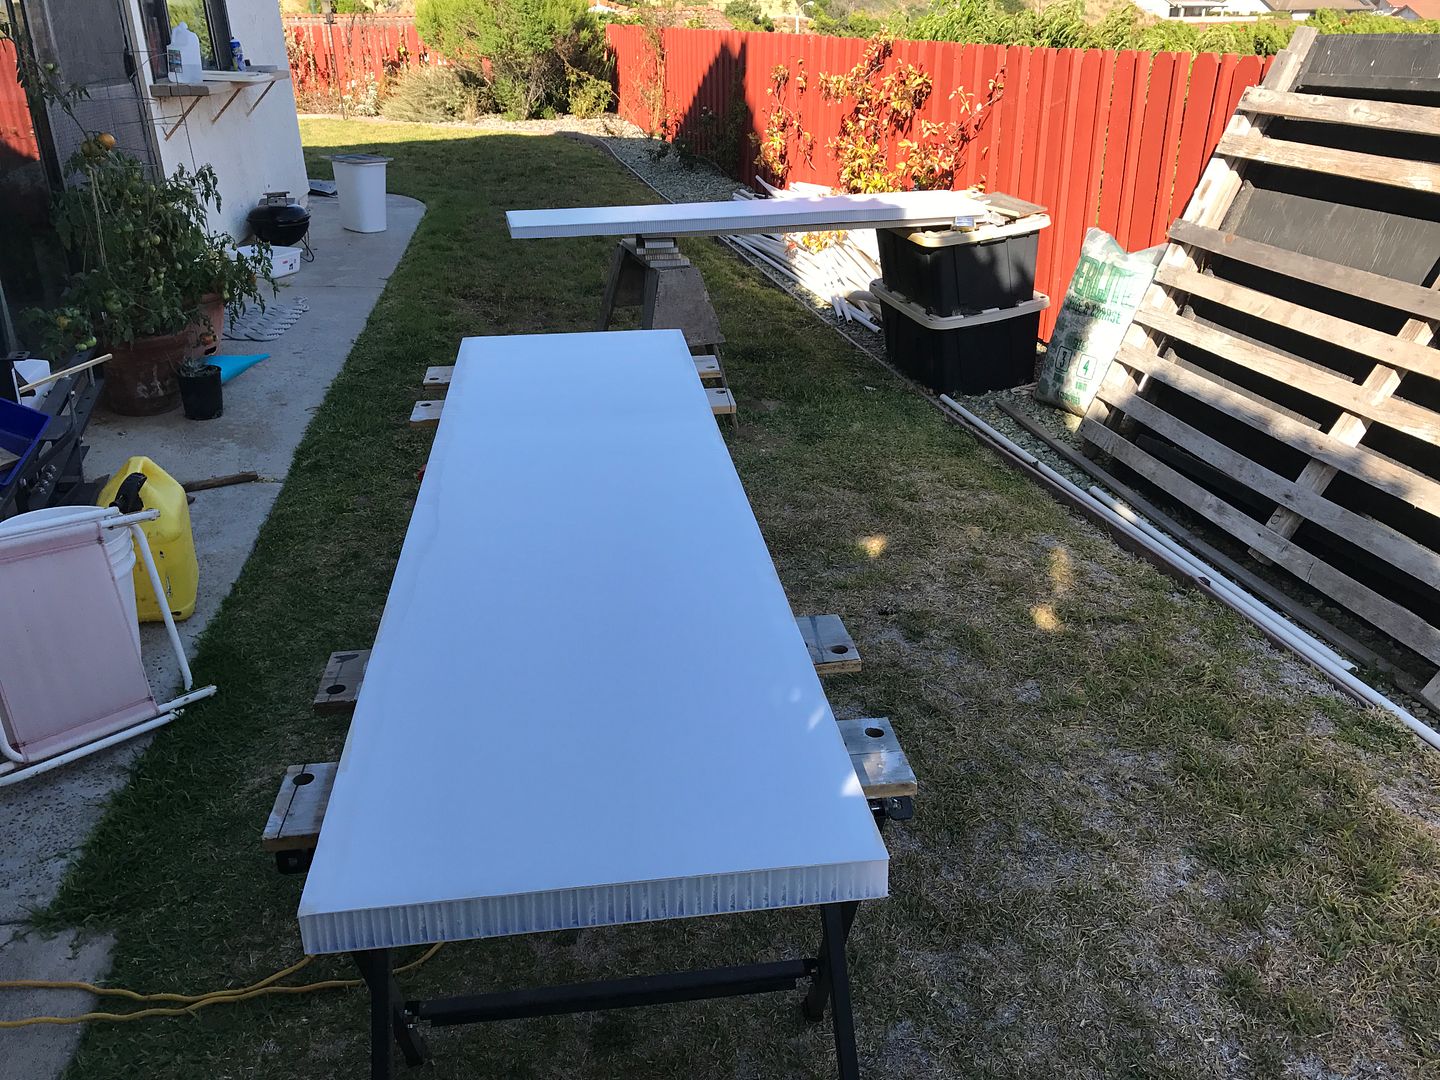
Finally got to work on the bed platform. Two pieces 18.5" wide. This composite is 1.75" core - want it to feel nice and solid with no flex. The two pieces plus the 20" wide "built-in" section will give a 57" wide bed. Almost queen width. Pieces of the platform will stack on the built-in sections when not in use. Cushions from the seats will fill out the mattress.

How come the both batteries have to die when there are just a few inches left to cut?


Eventually finished and got a few coats of paint on one side of each piece. Had to wait for the work area to go in to the shade - we finally got some of the heat at the coast this weekend - low 80's!!.


These will get anodized aluminum channel around the edges. I want to use something non-slip on the upper surface of these to keep the mattresses in place (don't really have a good option for raised edges all around). Maybe some sort of fabric?

Speaking of fabric, foam and cushion fabric got dropped off at the sewing lady this weekend too. Somewhat crusty old gal who works out of her garage. Comes highly recommended though, so what the heck. Feels good to outsource that part of it.

Thought I had a plan for the brush seals but now I'm not so sure. Looks like there might be some more Project Insomnia in my future...

matt
 

CoyoteThistle

Adventurer
Been busy.

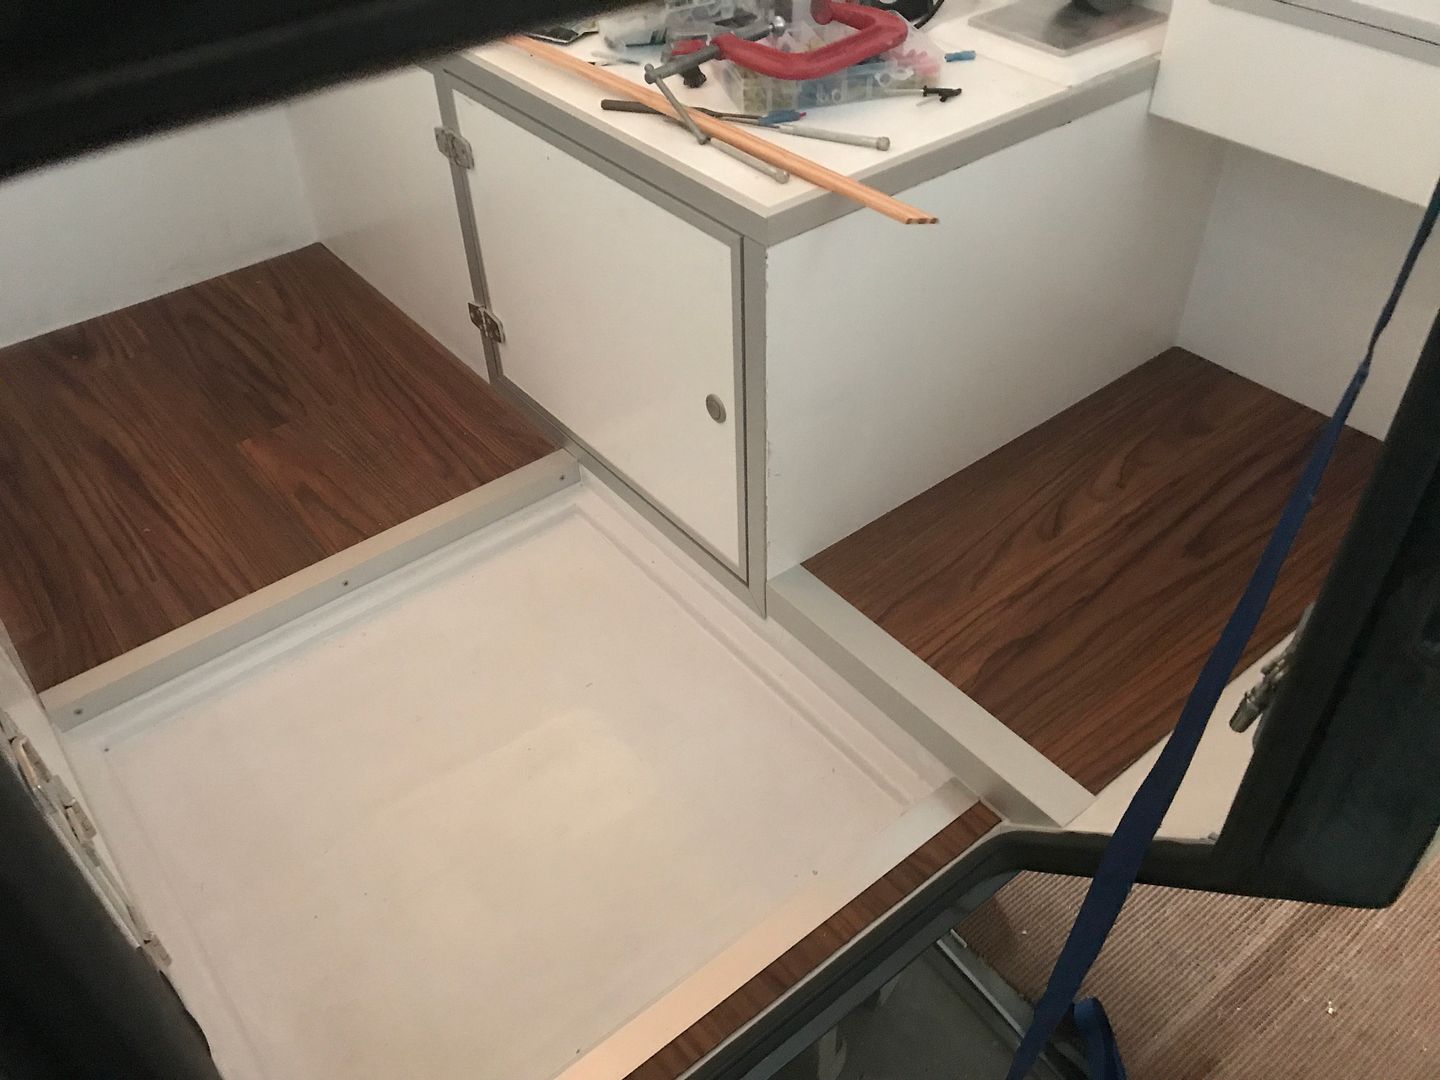
Floor is installed.


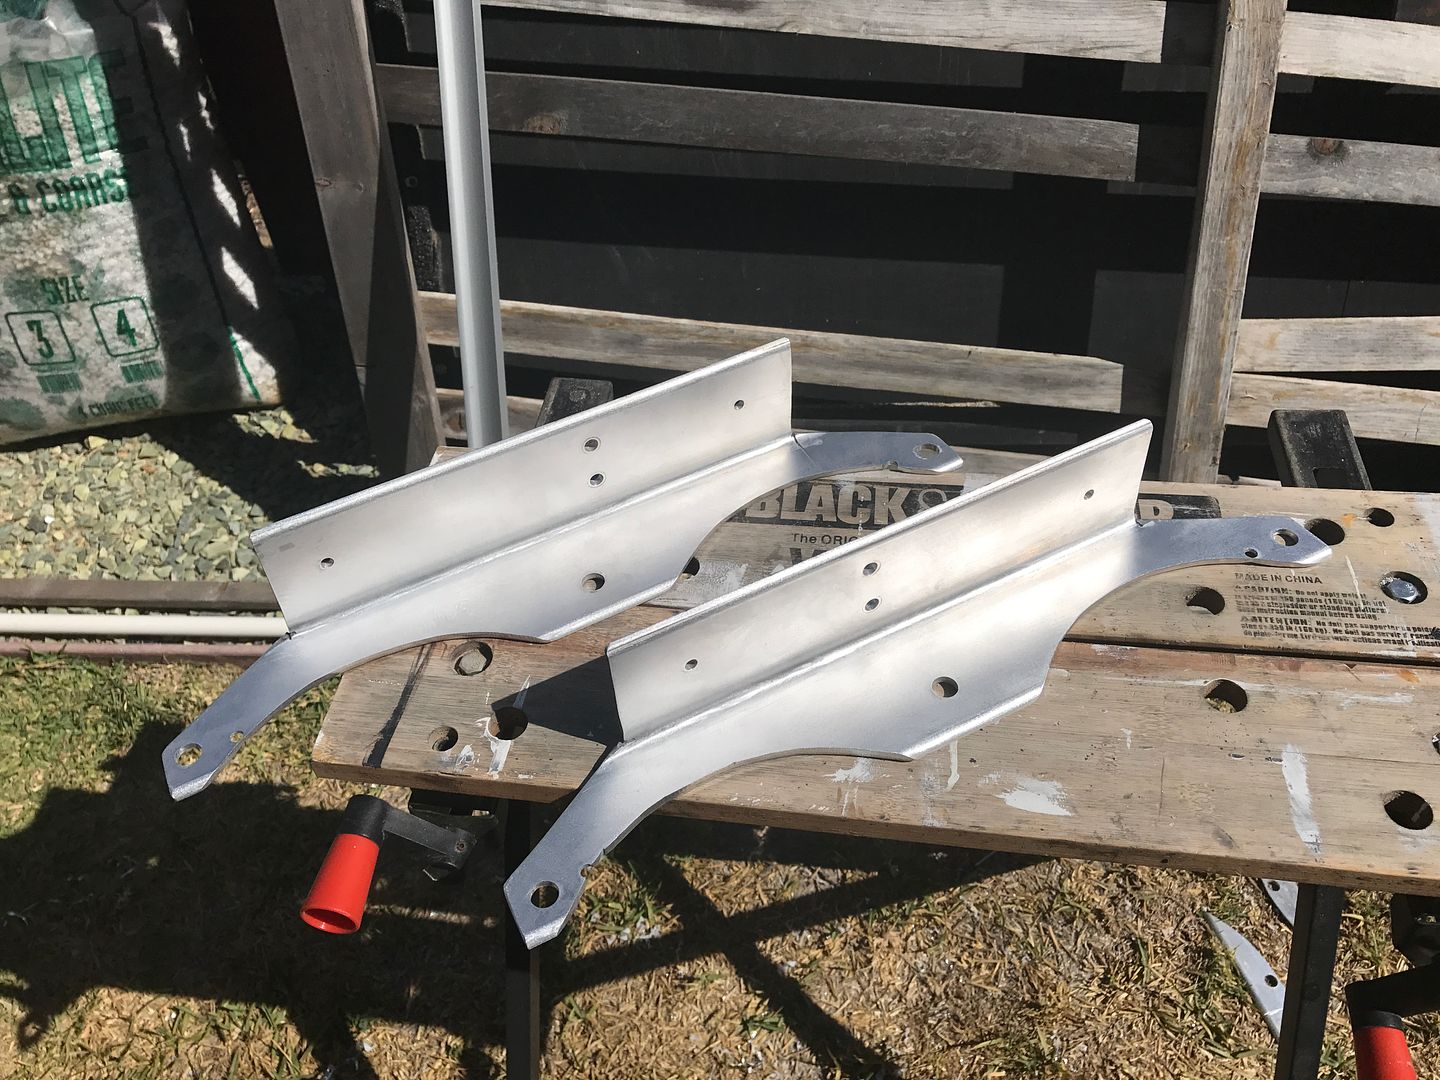
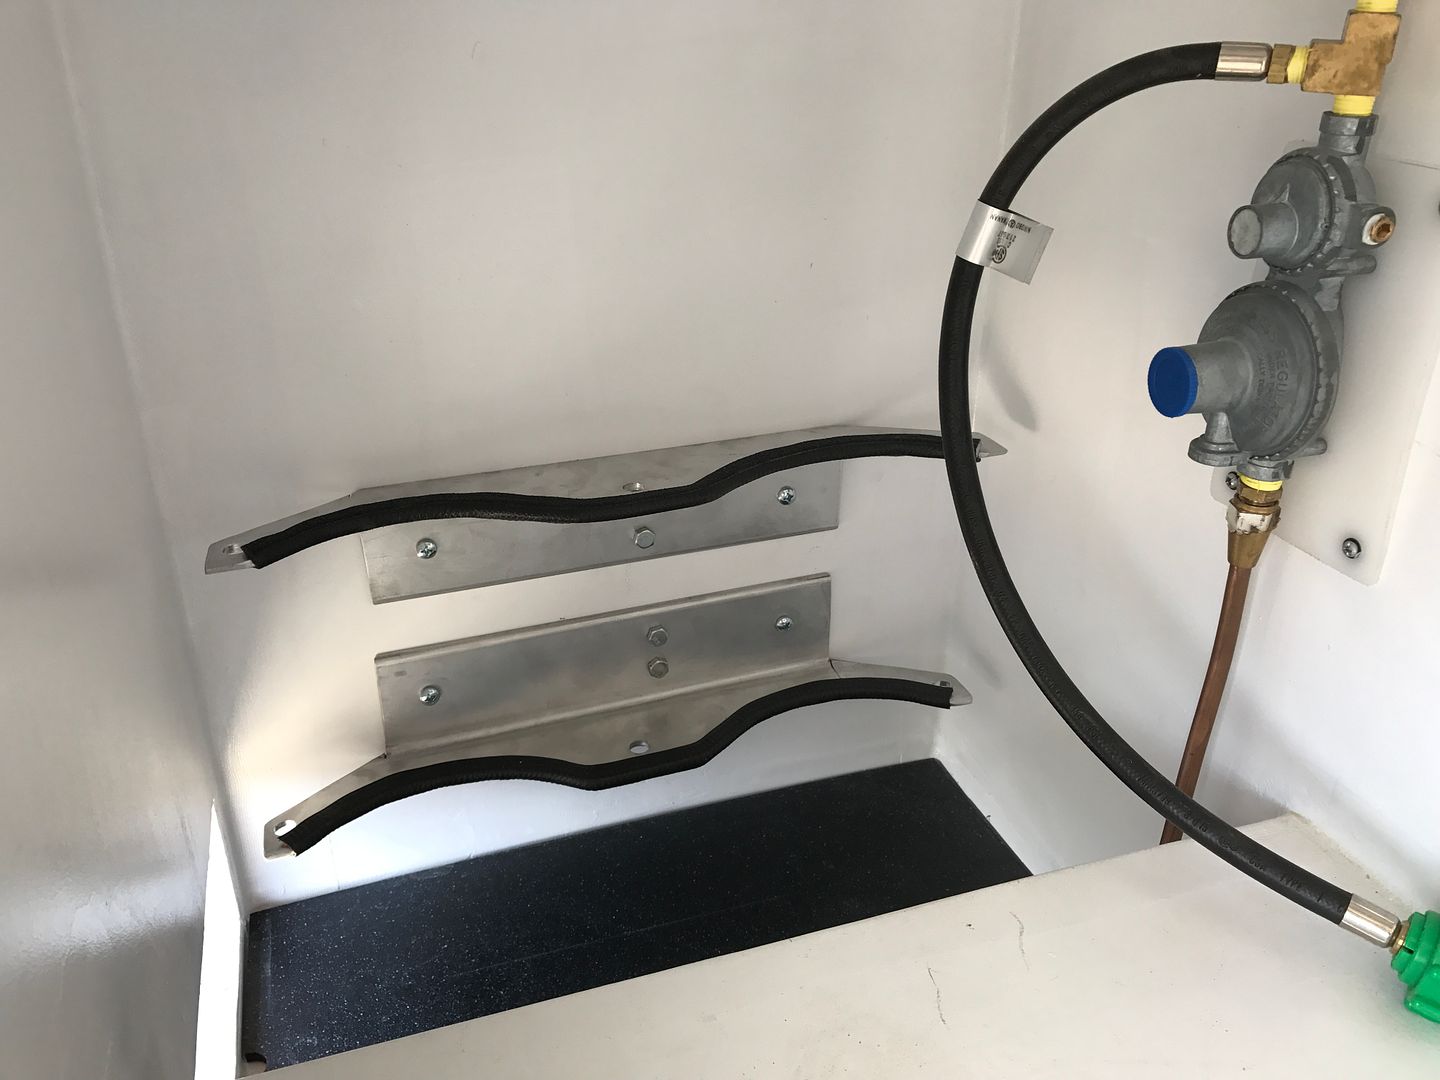
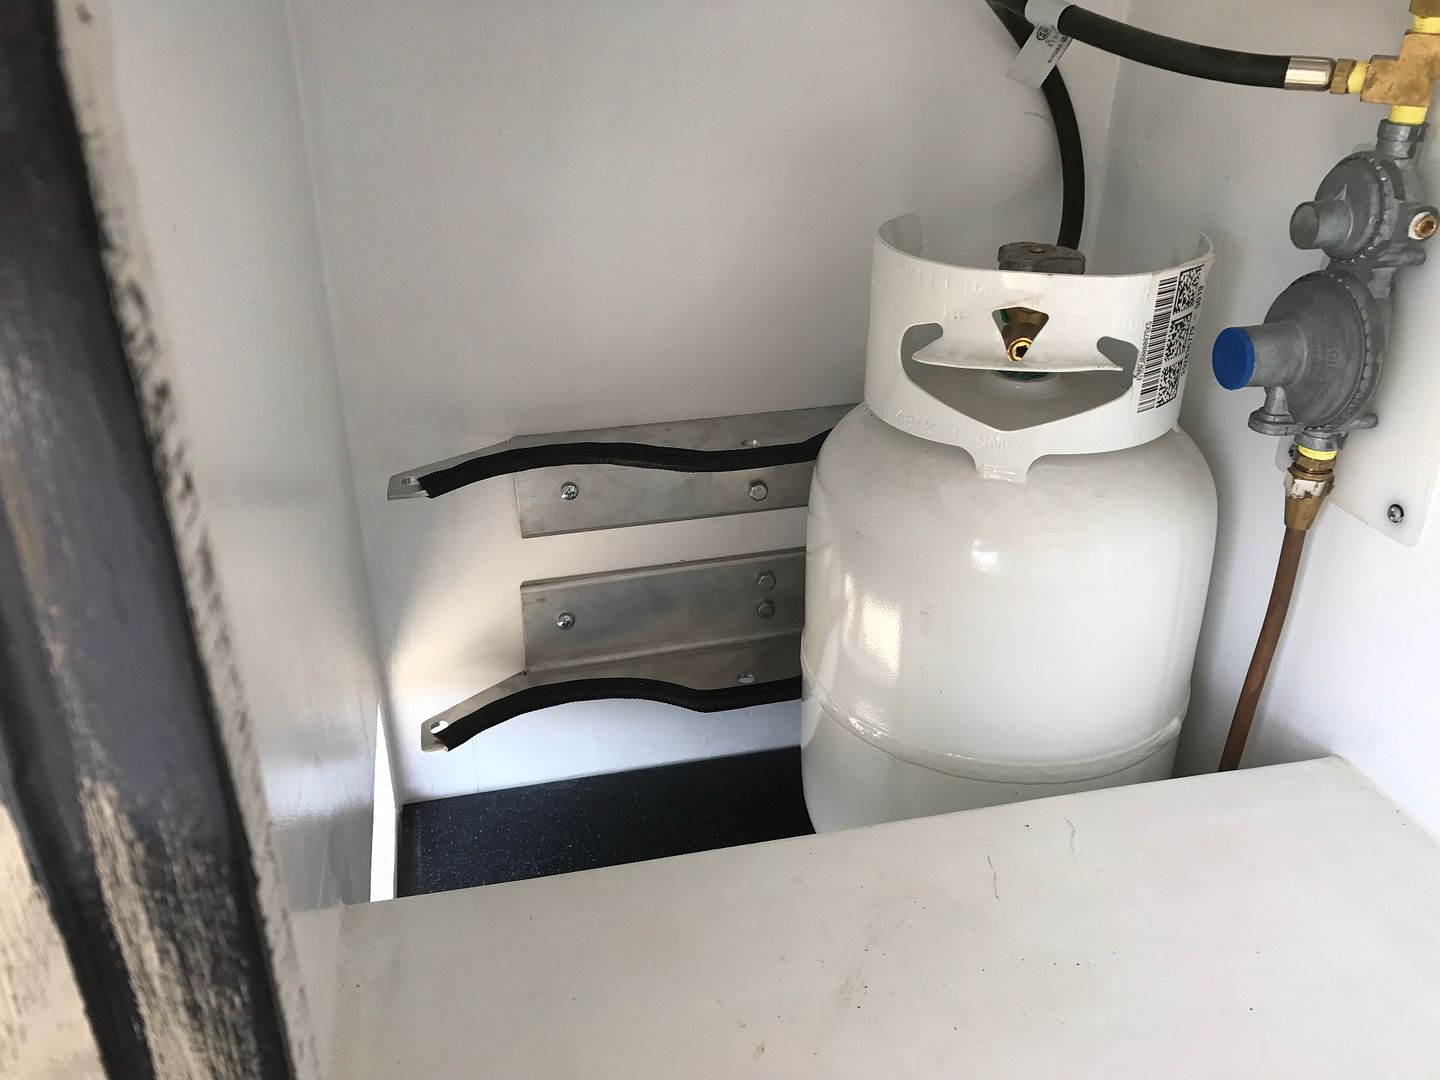
Figured out a mounting system for the propane tanks. I had some 3"X3" aluminum angle that came off of the old camper. There are some random hole locations but they were just the right size. Just cut a couple curves to cradle the tanks and polished them up a bit.


Added some edge trim and bolted them in.


Voila!


I'll add some ratchet straps to keep them in place.

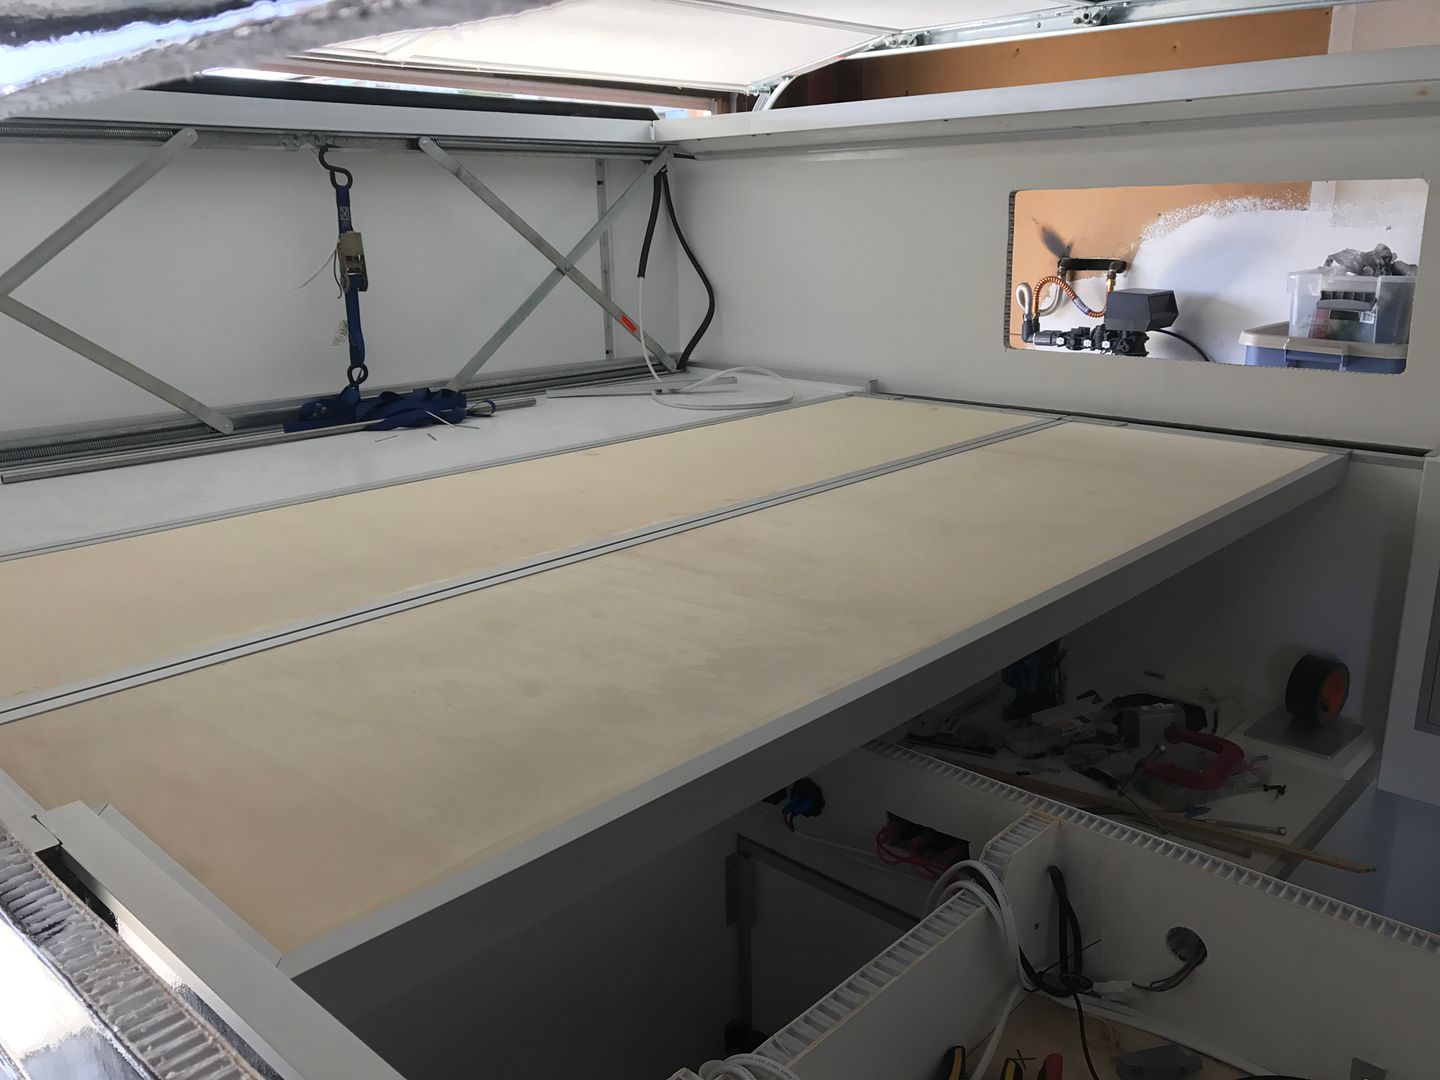
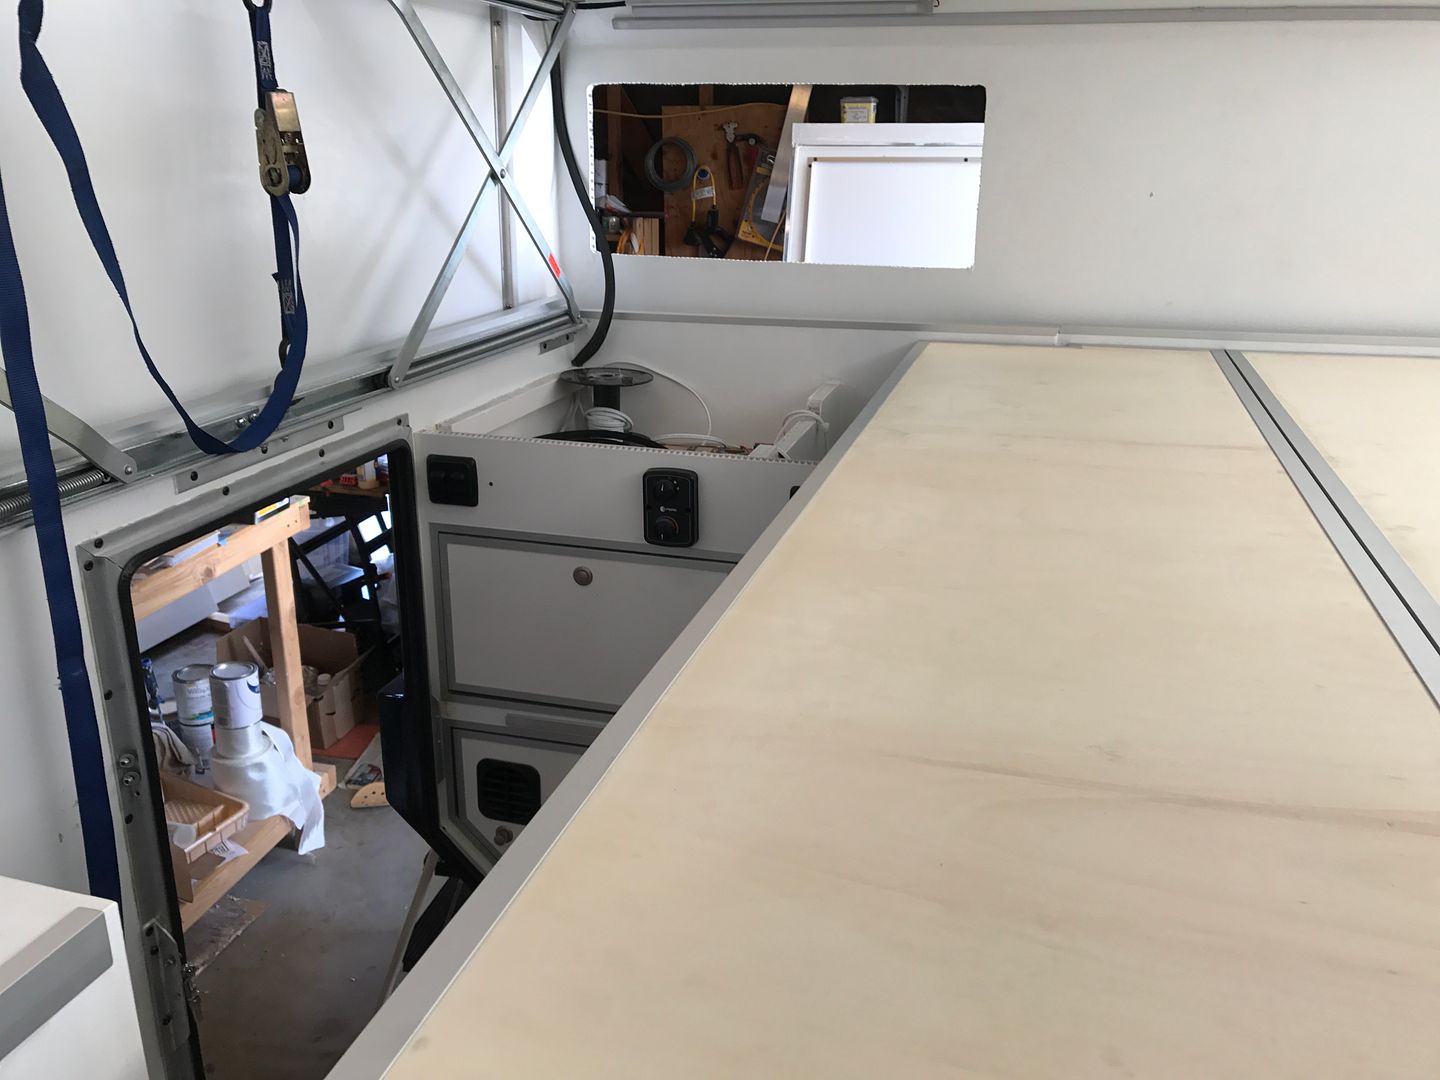
Bed platforms are in!


Still need to do something with the top - thinking about plasti-dip as a non-slip coating.

Standing room only when the bed is deployed!


Potti, stove and water faucet all accessible though when the bed is out.

Fridge and all cabinets are accessible underneath.


The hatch that covers the shower is sized to bridge the gap between the seats, making a single berth for a short person (24"X70") who isn't claustrophobic :)

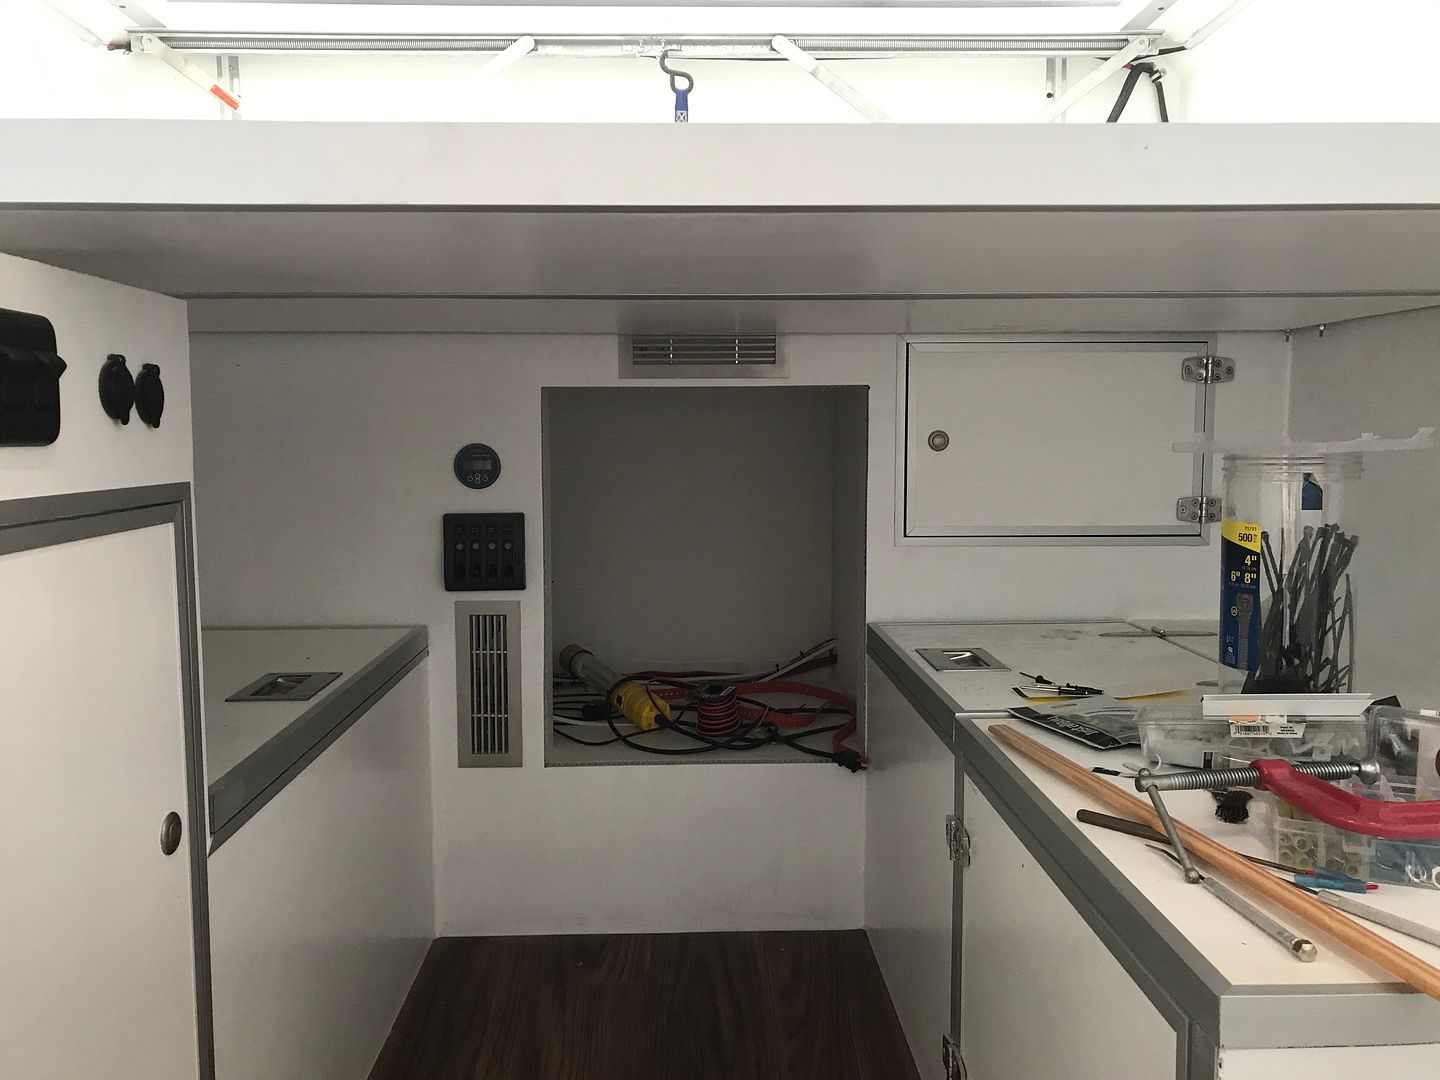
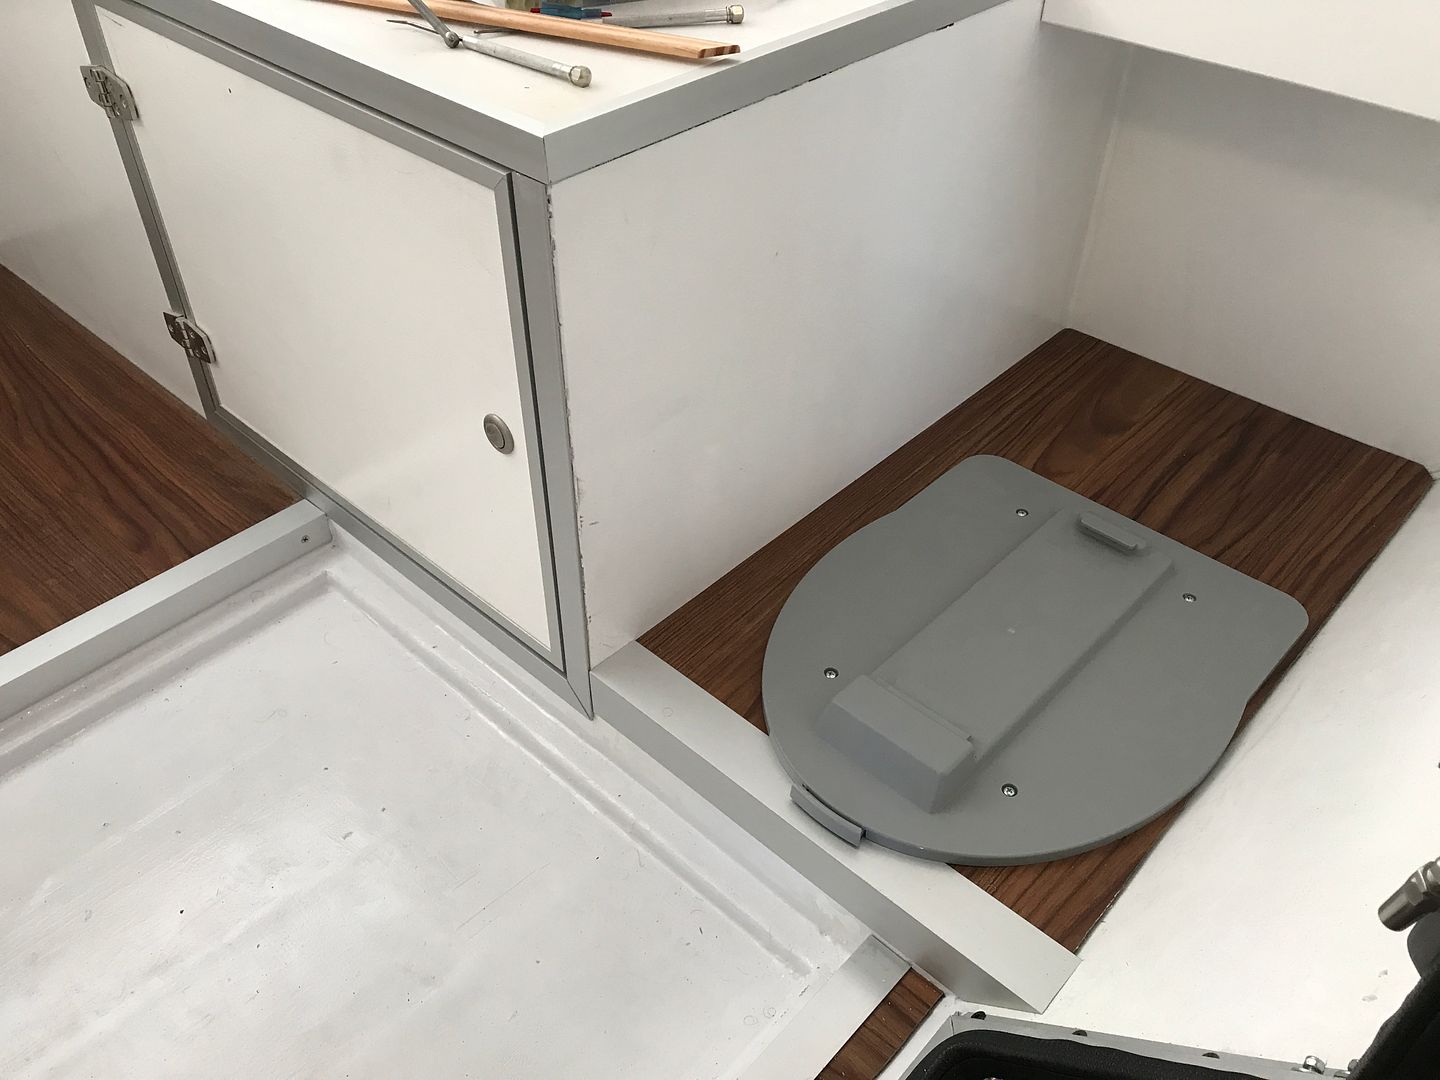
Also got the mount for the porta potti in - Thetford Curve.


Wondering if I need a supplemental strap-down system of some sort to keep the potti in pace while on rough roads? Anyone have experience with this mounting base off road?

Got a plan for the slide-up seals, materials are on the way.

Hope to get it on the truck this weekend and get the mounting anchors dialed.

matt
 

Forum statistics

Threads
188,348
Messages
2,903,639
Members
230,227
Latest member
banshee01
Top