Project Trail-Hopper

DSALMON-629

Observer
Salmon- Can't get over how nice it's looking. I bought the same sheet-metal, and starting to think about the edges and corners. Are you using the same stuff and bending the corners in a brake?,, or using extruded aluminum angle stock? I don't have a long brake so, I'm about to ask the vendor I got my sheets from if they will sheer and bend a couple of strips for me, but not sure how it will look.

I am going to use 1" X 1" aluminum angle, I will anneal it to soften it and then work the curves with a dead blow mallet most likely.
 
Last edited:

DSALMON-629

Observer
I will be taking a break from posting for awhile, I'm headed to Silverton/Ouray Colorado in the morning for some wheeling and riding. Originally I was hoping to have the trailer weather tight before this trip but would have had to rush too many things to make the deadline and decided it wasn't worth rushing and not being happy with the results. I will post more updates and when I get back.
 

DSALMON-629

Observer
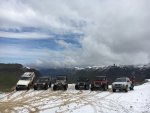
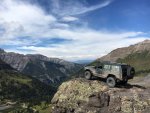
Im back from my trip, got to hit up lots of trails while I was in Colorado. Black Bear Pass, Imogene Pass, Engineer Pass, Poughkeepsie Gulch, and lots of others. Progress should start back up on the trailer in the next few days.
IMG_1735.jpg
IMG_1742.jpg
IMG_1774.jpg
 

DSALMON-629

Observer
I've been super busy with school and work lately and haven't made much progress on the trailer build. I got the deck in the trailer and got it screwed down to the frame.

Had to sand a few spots on the deck to make it fit and ended up looking like a stuffed animal from all the sawdust!
IMG_1885.jpg
The PVC frame for my trailer wiring.
IMG_1975.jpg
Running the wires through it.
IMG_1977.jpg
The rats nest of wires before I finished.
IMG_1990.jpg
Looks a little better now.
IMG_1994.jpg
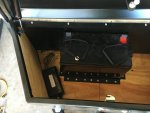
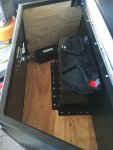
Lots of room left for my fuse block, solar panel charge controller, battery tender, shore power plug and maybe an inverter to run some 120 power GFCI plugs.
IMG_1995.jpg
 

DSALMON-629

Observer
Finally an update

So with school and work I got busy and kind of lost my motivation to work on my trailer, I finally started working on it again and i'm making decent progress.

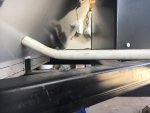
I figured out how I wanted to run my wiring from my tongue box into the trailer. Heated and bent a piece of pvc to match the angle of the front of the trailer.
01af8ef88cdbc1c8f932f47f5f9cc4849a0762c81e.jpg

After I painted it.
01f8c0ceab2dba9ff47aef1b1a8548ae6e3a133026.jpg

Got the hatch struts put in position and mounted in place.
0118d4aba9c505cdbd094abffb00c1833bf531a50d.jpg

Bent my steel to make my spare tire carrier.
010f5002ce30af2ba19f04b20e674798e678689c04.jpg

Bent my aluminum angle around the outside edge of the trailer. This part went a lot better than I had anticipated, there was a learning curve when I started out but figured it out pretty quickly. all that's left for this step is to pull it back off, paint it, and reinstall it with some silicone and rivets instead of screws.
01b439e3d4614d554aa9b23bb8aa49a45b5f7a99d5.jpg
015079d57bd18bcb017fafadcbb21a87841dda1dbd.jpg

I am halfway done with insulating the trailer, cutting 1" Styrofoam sheets to make tight fits in between all of my steel studs.
019cf88fe044eeef8d427bf3c8e3da9380cd331ba2.jpg

I am hoping to have my trim reinstalled and get the trailer weather tight this weekend, we will have to wait and see how much I actually accomplish.
 

1.9TDIZook

Observer
Nice work!
I made a cab over camper the same way with 1" square tube and insulated with 1" foam.
A small heater kept it toasty in winter and the foam also worked as a sound deadener.
 

DSALMON-629

Observer
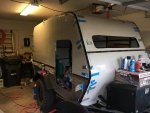
Pulled the Driver side trim off to prep and paint it.
01710c0b55182676ffeb1f895444e01cd2cfb93496.jpg

Got a few good coats of paint on and it will get reinstalled tomorrow most likely.
0167fe47f34e862507a6cfe805c06f110a67af7f88.jpg
 

DSALMON-629

Observer
Got my trim bent to shape for the back hatch. Just needs to be painted and riveted in place.
0115fdf96ddf77ad558920e4d358bb7c1404823d72.jpg

Working on the latch mechanism for the hatch.
01d32f22cafd53de764f23ed2086dec2357a7c0c39.jpg

016c025cd156f6e7ce40b5a7430a038b157e200812.jpg
 

Ozarker

Well-known member
That's professional work, you should do custom builds to pay for school! Well planed, executed, great craftsmanship and materials, that's first class! :)
 

DSALMON-629

Observer
Thanks, there is definitely a learning curve with this kind of work. If I built another I feel like it would be a lot nicer. I'm already considering building another.
 

DSALMON-629

Observer
Got the rear hatch trim painted and installed
017b89fbe6bd42f38ccc6626720204b6b69e829e5a.jpg

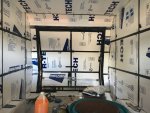
Got all of the interior insulated
01aa725df4e13faa225768fbcf9b7101563fd6fd04.jpg

Next step is running wiring for all of my electrical. Does anybody have anything they would recommend that they wish they would have put in their build?

This is what I have planned so far

Porch lights
Interior reading lights
Interior overhead light
Battery meter with built in USB outlets
Vent Fan
Radio
A/C unit
120v GFCI plug in galley, haven't decided if this and the A/C will be solely off shore power or run an inverter.
12v water pump
Overhead Galley light
Lights under galley cabinets
 

DSALMON-629

Observer
Started getting ready to run wiring, tonight I cut channels in my foam insulation for the wires to run through behind my paneling.

016b0239b8c90cc1925e5dbf045ad6ce90f06dc7c7.jpg

019f46f57f8590f0a7b04565b83f56e8bf5c01b263.jpg

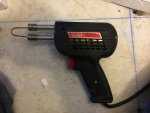
Using a soldering iron with a piece of copper wire bent into a U shape the size I wanted for my channels.

016d7d4a20d3e347d3aa7aa4685a12e3454f67c7b9.jpg
 

Forum statistics

Threads
188,032
Messages
2,901,459
Members
229,352
Latest member
Baartmanusa
Top