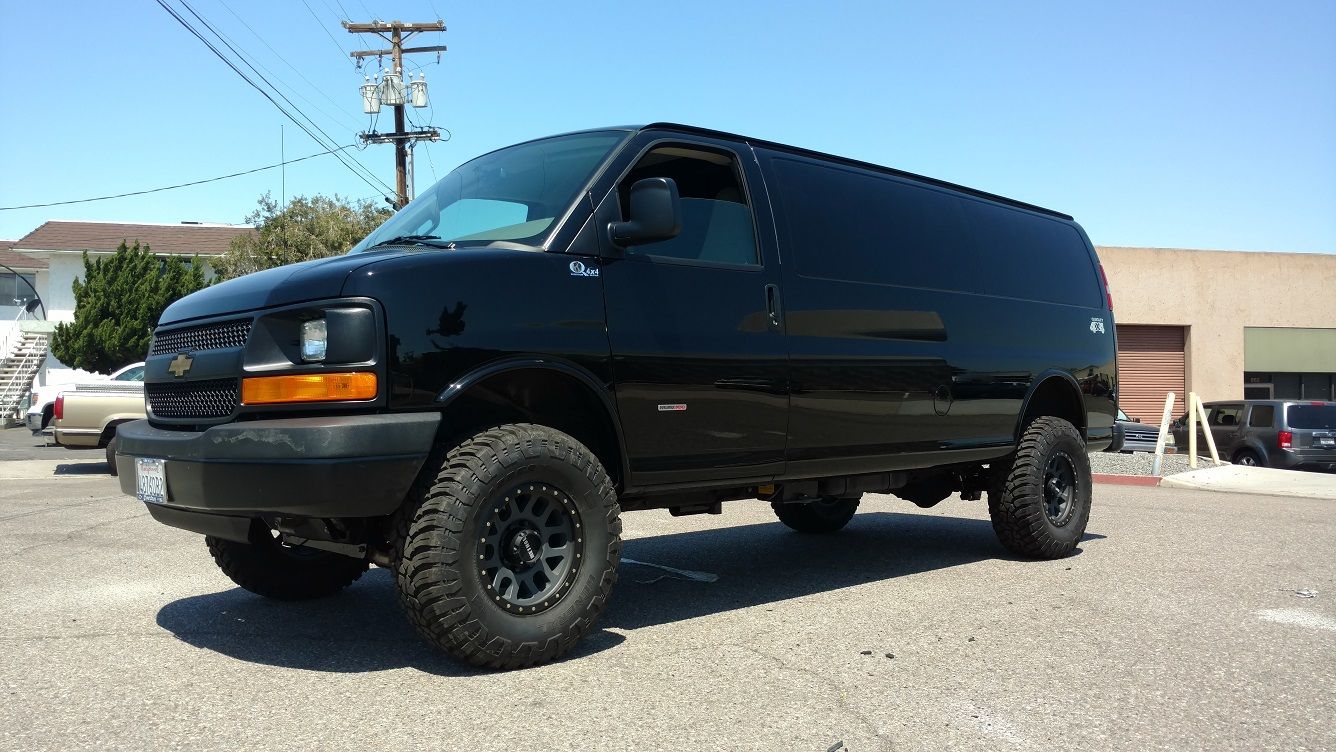
Quigley 4x4 Chevy Express build

710m

Observer
More interior build

Ok, where did we leave off. Since the last we posted we changed the layout in the back and made it suitable for living in for a few weeks with the five of us.

On the driver side we added a countertop that doubles as a bed for one of the kids. On the counter we put the microwave and it has a flush mounted sink. We keep our water in scepter cans underneath the sink and the fridge is near the end of the van. The nice thing about this setup is that the microwave and fridge are accessible from inside as well as from the back without getting in. The induction stove is stored inside a cubby underneath the microwave.

Currently we keep our things (cookware, clothes, misc.) in bins just slide into the shelves. The bins are secured by rope and carabiners. Its a simple setup, but quite effective. We can load the bins in the house and carry them out to the van and we're ready to go and its doesn't waste too much space.

Now for what people really want: pictures.


710m

Observer
sitting and sleeping

Instead of a dinette in the back, we decided to have a gaucho on the side with the counter on the opposite side. This provides more storage and it is actually handy to sit on the couch while working on the counter and grabbing things on the opposite side.

I had to put this together the day we left for a 2 week trip to California, so the fit and finish isn't perfect, but it is functional. My wife sewed the cushions with 2" foam.

I simply welded up the frame and screwed the plywood sides to it using self-drilling screws (my new favorite fastener). The top is two pieces of plywood held together with a piano hinge and a couple of holes for the seat belts which are secured directly to the van body. The bed frame is secured to the van floor with a couple of screws.

In the sitting configuration.


In the sleeping configuration (it's about 5' long, just right for my daughter, at least for now.)


This time without the cushions:


There is nice storage underneath the bench. You can also see the plywood blocks that locate the seat in either configuration so the plywood doesn't slide around. The plywood is not really secured to anything.


A parting shot of the frame:


At some point I may add a permanent backrest section above the moving section to make it more comfortable to sit.
 

4Fox

Observer
Looking great!

I have a 5' bench on the pax side also. I'll be putting in a small drop leaf on the forward end to add about a foot to the sleeping platform.
 

710m

Observer
Thanks for the kind words. I wish I could match the fit and finish of some of the other vans on this site, but I just kind find the skills/time/patience. At some point I'll make it all look a little nicer.

Right now the two biggest gripes are the crappy seats and the low ceiling, even when the top is up. We could move all the panels to one side every evening when the top is up, but that's a bit of a hassle with the bedding up there. It'd be nice if that platform as a whole could be secured to the ceiling when the top is up...
 

86cj

Explorer
Alot of great pic's here for people, and I just gave your link to fire_strom...........

Your van's big brother should be famous this week too..........
 
apparently my progress isn't as fast as some of the folk on here, but I managed to get van completely gutted. Removing the seat rails was a real chore. There were some bolts above the heat shield on the exhaust and I finally figured out how to get to those. First I was loosening the heat shield at the edges by the rivets, but at the end I just drilled 1.25" holes right where I knew the bolts would be. That really was the best way to go.

I'm curious as to how you removed the bolts on the long passenger side rail that bolt above the frame crossmembers. I got mine out by cutting the top half of the rail with an angle grinder, then drilling out the bolts as much as I could stand, then pounding the remainder of the bolts through. Took me 4 days to get all those things out when all was said and done.
 

710m

Observer
I'm curious as to how you removed the bolts on the long passenger side rail that bolt above the frame crossmembers. I got mine out by cutting the top half of the rail with an angle grinder, then drilling out the bolts as much as I could stand, then pounding the remainder of the bolts through. Took me 4 days to get all those things out when all was said and done.

That's essentially what I ended up doing as well. Except I used a 1" (or something like that) holesaw on the top of the rail to cut an access hole to the top of the bolt and then drilled them out using a 5/8" drill bit (or whatever size it was).
 

Gar.

New member
How is the van holding up? How are you liking the CCV top? Which wheels did ya end up going with?

Gar
 

Weldtec Designs

Supporting Sponsor
Chevrolet Quigley lift kit

Good luck, I was thinking of buying one of those. Lifting more than just by torsion key looks to be difficult. Another forum has detailed pics of the front suspension, looks like it may be possible to modify a front lift subframe from a Chevy truck to make it work but it's uncharted territory.

Just to let you guys know we do make a 3" lift for the Chevrolet Quigley 4x4 for those of you that did not get it with your van from Quigley. This kit allows you to run a 285 tire. From there we have the coilover conversion kit which allows you to run a 35" tire. We are doing one now and i will post more pics as soon as we get it done.
Here is another pic with the latest coilover kit installed on 35" tires
 

Weldtec Designs

Supporting Sponsor
Very nice! Which make wheels and tires on that van? What is the OS, and BS?

Gar

These are the Method Race wheels. 17x9 with 4.5 backspacing sitting in 35x12.50 General Grabbers X3. It rides really nice as lately I have been driving a stock Quigley with no lift, it is sitting on the bump stops with the regular shocks. I can t wait to tear this one apart being a complete build out on the inside by Explorer. I will be sure to post pics.

YOU READY TO BUILD YOURS? ^^^^
 

Gar.

New member
These are the Method Race wheels. 17x9 with 4.5 backspacing sitting in 35x12.50 General Grabbers X3. It rides really nice as lately I have been driving a stock Quigley with no lift, it is sitting on the bump stops with the regular shocks. I can t wait to tear this one apart being a complete build out on the inside by Explorer. I will be sure to post pics.

YOU READY TO BUILD YOURS? ^^^^

I am so ready! Riding on bump stops really stinketh! I want to get at least 18K miles on it before I make any suspension mods. When I am ready, you'll be doing the coil over, rear leafs, fox shocks, front and rear bumpers, and rock rails. By then ill have more cash saved up as well. I may have ya do some of the non-suspension mods sooner. I'd also be interested in your ideas on building an under floor storage area where the spare tire would normally be.

G
 

710m

Observer
How is the van holding up? How are you liking the CCV top? Which wheels did ya end up going with?

Gar

The van is great. I still owe the forum the write-ups for adding new seats and a water pump system. The CCV top does its job and makes this van functional for us. We've camped in the van with 5 of us (kids are 10, 8, and 6 yo) for maybe 30 nights or so with relatively few complaints. I'm glad we went got it instead of waiting for something potentially better to come along.

I ended up putting 235/85R16 tires on there (31.7") and they don't rub anywhere. I got Kumho Road Venture AT51 tires and they seem to handle pretty well.

Overall I'm really impressed by how well the van drives, we can cruise smoothly as fast as I care to go (about 90 max). The main comfort issue is wind noise, which seems to be coming from the roof fan (a closed Fan-Tastic vent).
 

Forum statistics

Threads
188,060
Messages
2,901,699
Members
229,411
Latest member
IvaBru
Top