You are using an out of date browser. It may not display this or other websites correctly.
You should upgrade or use an alternative browser.
You should upgrade or use an alternative browser.
Rambo - GMC Ambo Conversion (Roof Raise)
- Thread starter TheRealPapaK
- Start date
TheRealPapaK
Active member
Good start on the floor! Have a look at my build, very similar to what you did but I added more insulation then carried on to the ceiling and doors. I think i posted some pictures and details.
I was reading your post. What did you end up using for insulation under the floor? I'm trying to think of something that's flexible and won't compress much. I also did the ceiling and doors. I did what you did and jammed roxul in the cavities too. I figure the cab is going to be the coldest place in the ambo
llamalander
Well-known member
Nice start on the ambo, down here in the States we hardly know winter is coming-
Re. the Victron reviews on Amazon, they only offer support through their vendors, which Amazon will not do, so its a poor way to buy their products. Many of their vendors actually sell the kit for less anyway, and it is very high quality, constantly updated and has been reliable for me. If you're interested, find a vendor you can communicate with who can help you set up and troubleshoot a system and you will find it a good value.
Re. the mass-loaded vinyl, it's one of a few ways to soundproof, there are plenty of alternatives if you can't get it fast enough. Soundproofing can involve deadening with mass or insulation, decoupling, and air sealing, or some combination of all these. Self adhesive membranes, like sound mat or PSA roofing material, seal and add mass and limit the noise that is carried through the surface it is on. Whatever insulation you use will also help reduce the noise. The most noticeable improvement will happen when you manage to seal off every opening to the engine bay and the wheel wells. Even a 1cm hole to the outside will let a lot of noise in, so maybe start with that and see what you need to add afterwards-
This all looks like fun, keep posting if you can.
TheRealPapaK
Active member
TheRealPapaK
Active member
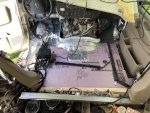
Well I didn't get many pictures today. I got the floor covered in 1" foam where it was flat and then put an inch or so of roxul every where that was curved. I know it won't do much but I figured it was worth it. I got the seat back in and I realized I can get my doghouse back in position. I think I have to pull a seat to get it in...blah.
I also got an inch of rigid foam in the ceiling of the cab so that is at R5-ish now.
Other than that, I moved the rear A/C out of the way. That thing was really in the way this whole time but I didn't want to mess with the hoses so it stayed attached.
Finally, I am waiting on my welder buddy to fill the gap in this roof. I was going to use scrap pieces but there is nothing that really works with out having seams everywhere. I figure by the time I spend a day cutting it, cleaning it up, and buying a new blade for the table saw, I might as well just buy some new stuff. The original walls were 1/8" aluminum which is HEAVY DUTY. What would you guys buy to replace it with? I am hoping something light enough that I can work it around the corners a bit.
I have some butyl tape, some polyurethane adhesive and some pop rivets. Do you think a guy could do this all with no welding? Just over lap all the seams and work back to to front? I am tempted to try it as this is what is holding me up now.
TheRealPapaK
Active member
I got everything to fill the gap in pace today. Hopefully I can get it bonded and riveted tomorrow.
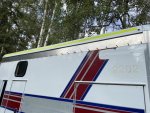
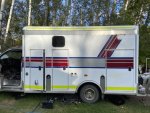
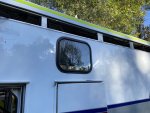
Other things Ive been doing is installing the kitchen window, pulling old wire out, getting parts together etc.
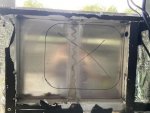
I picked up lithium batteries today. I couldn’t find battleborn in Canada so my local battery supplier hooked me up with some 100Ah lithium’s for $750 Canadian each which I thought was quite good. They are a brand new line so hopefully there are no issues but they do come with a 48 month warranty so here is hoping.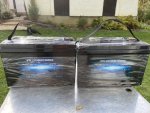
Hopefilly the polyurethane adhesive goes smooth tomorrow!


Other things Ive been doing is installing the kitchen window, pulling old wire out, getting parts together etc.


I picked up lithium batteries today. I couldn’t find battleborn in Canada so my local battery supplier hooked me up with some 100Ah lithium’s for $750 Canadian each which I thought was quite good. They are a brand new line so hopefully there are no issues but they do come with a 48 month warranty so here is hoping.

Hopefilly the polyurethane adhesive goes smooth tomorrow!
Bikersmurf
Expedition Leader
You’ll have to let us know how the lithium batteries work out. So far I’ve been running 232 AH golf cart batteries. Lithium aren’t in the budget at this time.
TheRealPapaK
Active member
Yeah I’ve been spending too much money but when I realized the AGMs were dead and how much they would cost to replace them, I decided to bite the bullet when I was quoted the price. $484 for the AGMs each vs $750. Canadian prices. I’ll let you know how it goes. I might need to look into a DC-DC charger now. Sigh.
Bikersmurf
Expedition Leader
I picked up the FLA golf cart batteries for $60x2. The money saved will buy a lot of solar and other stuff.Yeah I’ve been spending too much money but when I realized the AGMs were dead and how much they would cost to replace them, I decided to bite the bullet when I was quoted the price. $484 for the AGMs each vs $750. Canadian prices. I’ll let you know how it goes. I might need to look into a DC-DC charger now. Sigh.
TheRealPapaK
Active member
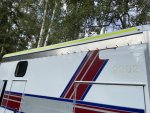
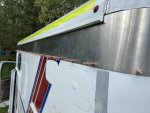
The sheet aluminum is clecoed in place. There is a pretty wide gap at the top of the corners that I might have to bridge some how. Maybe I’ll try to get drip edge to wrap around it. Tomorrow is urethane adhesive day. Hopefully it goes smoothly. I’m debating doing everything at once or just doing the top and then sneaking in the tip of the adhesive under neath the bottom and gluing that down after. I figure it should have enough flex to do that...


TheRealPapaK
Active member
Not too much to report. I got the aluminum bonded and riveted in place. My welder was having a hell of a Time welding the aluminum so I need to come up with a new plan for the corners and seams. He was able to fix the cracking corners but we had to grind out a bunch of bondo so I have to do some body work to fix them up.
I’ve just mostly been slowly picking away at electrical things.Removing wires etc. I got the new light bar and horn in place. I need to wait for some relays in the mail to get them functional.
While chasing wires I noticed I have to cables from the OBI II and the immobilizer that go to the back. Since they aren’t hooked up to anything I assume I can get rid of them but Ithought I would ask just in case...




Cummins_expo
Adventurer
Great work- Fast work !
Bikersmurf
Expedition Leader
That makes me want to buy a light bar for the front... if only I had a need.Not too much to report. I got the aluminum bonded and riveted in place. My welder was having a hell of a Time welding the aluminum so I need to come up with a new plan for the corners and seams. He was able to fix the cracking corners but we had to grind out a bunch of bondo so I have to do some body work to fix them up.
I’ve just mostly been slowly picking away at electrical things.Removing wires etc. I got the new light bar and horn in place. I need to wait for some relays in the mail to get them functional.
While chasing wires I noticed I have to cables from the OBI II and the immobilizer that go to the back. Since they aren’t hooked up to anything I assume I can get rid of them but Ithought I would ask just in case...
View attachment 612518
View attachment 612517
jeep monkey
New member
Hey your rig is looking great. I'm curious... what brand of rivets are you using?The sheet aluminum is clecoed in place. There is a pretty wide gap at the top of the corners that I might have to bridge some how. Maybe I’ll try to get drip edge to wrap around it. Tomorrow is urethane adhesive day. Hopefully it goes smoothly. I’m debating doing everything at once or just doing the top and then sneaking in the tip of the adhesive under neath the bottom and gluing that down after. I figure it should have enough flex to do that...
View attachment 611793
View attachment 611794
Similar threads
- Replies
- 49
- Views
- 11K
- Replies
- 11
- Views
- 3K
- Replies
- 3
- Views
- 1K

