Roof mounted water storage

Switch

Observer
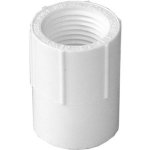
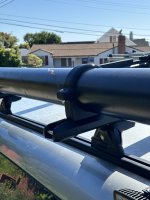
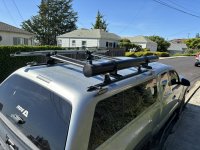
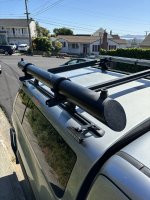
This was made from parts left over from various home improvement projects. Rather than spending $20 for 4" ABS end caps I just used 1/4" ABS plastic sheeting that I already had on hand. I put one fill/drain spout on each end so I could siphon from which ever side was lower. The spouts are just 1" PVC female threaded couplings with threaded plugs that were shaped to fit the curvature of the 4"ABS pipe.

DSCN7895.jpg

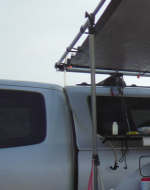
To siphon water I used a hose and black plastic beverage tap from my home brew stuff. I drilled a hole in a third threaded plug and ran the tubing through so it reaches the bottom of the inside of the ABS pipe. It holds about 12 Liters of water. I was surprised by how handy this was & wish I'd thought of this years ago.
1713655342768.png
 
Last edited:

Dennx

Adventurer
Nicely done. Are the ABS sheets plastic welded? Epoxy? More pics please and a list of parts and sources. Thanks.
 

perkj

Explorer
Very nice. Curious as to why you choose to syphon with the plug off the top vs the bottom where it could be gravity fed as well?
 

Switch

Observer
Nicely done. Are the ABS sheets plastic welded? Epoxy? More pics please and a list of parts and sources. Thanks.

Thanks. The local plastics shop (Tap Plastics) recommended using IPS #16 solvent for joining both the ABS plates on the ends and the PVC caps. For then ends I used a liberal application & a lot of pressure so the glue poured out and took a bit of sanding on the outside to clean up the mess afterwards. That stuff cures real hard. The fill/drain spouts looked like this before filing them to fit to the ABS pipe:
31OnwSz1X7L._SY300_.jpg

I just cut them shorter and rounded with a curved file. I was more careful with the solvent when I attached the spouts so there was less clean up.

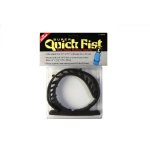
So the parts list is just 4" ABS pipe, 1" threaded female end caps, 1" threaded mail plugs, 1/4" ABS plastic sheeting and IPS #16 glue. I attached to the rack with two 9.5" quick fist.
41m9BlKJSJL._SL500_AA300_.jpg
 

Switch

Observer
Very nice. Curious as to why you choose to syphon with the plug off the top vs the bottom where it could be gravity fed as well?

At first I was going to put the drain on the end or bottom but then I figured this was:
1) less work
2) less likely to leak
3) could be filled or siphoned from either end
4) could be turned upside down to drain completely if needed.

In short, I punted on the hard part.
 

Ex Jay

Observer
It would be a good idea to use pipe that is rated for potable water.

Just because a pipe is non-potable doesnt mean its non-potable but rather that it is untested. Sorta like the whole DOT dilemma with wheels. ABS is a very stable resin that does not leach chemicals into food or water. All IPS abs cements are safe for drinking water, however I dont believe #16 falls into this category.
 

Switch

Observer
Just because a pipe is non-potable doesnt mean its non-potable but rather that it is untested. Sorta like the whole DOT dilemma with wheels. ABS is a very stable resin that does not leach chemicals into food or water. All IPS abs cements are safe for drinking water, however I dont believe #16 falls into this category.

I didn't think about that. In any case, I carry potable water in 22 L containers so having 14 L of "non-potable" water means I'm not using potable water for non-potable purposes (like dishes). So this effectively adds 14 L of potable water. But, if I ran out of potable water I'd certainly drink water from the tube before dying of thirst.
 

Switch

Observer
Also the black abs + sun = hot water

Not sure if that was deliberate or not, but take credit for it either way.

I'm sure in the Summer it will be warmer but the Winter sun in Death Valley w/ day time temps in 70's had no noticeable effect on warmth. Other people who have done this have reported similar results.
 

Switch

Observer
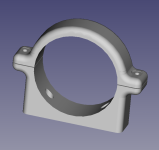
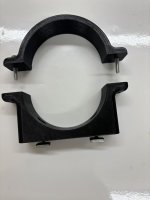
Today I upgraded the attachments for the tank. The old Super Quick Fist® never worked very well so the tank would rotate or slide back and forth. Not a lot but enough to be a nuisance. Then one broke part way and it was time to revisit the whole problem of mounting the tank to the rack.

Now that I have a Prusa MK3S printer the solution was pretty straightforward.

1713655683801.png

IMG_0646.JPEG

I want these to be as strong as possible so they are printed as a solid part weighing 360g or about 3/4 lb. per pair.

IMG_0654.JPEG

In the photo above you can see a scratch in the tank when it moved around on the old mount.

IMG_0651.JPEG
IMG_0653.JPEG

The new mount is also smaller than the old mount, so it fits with the canoe on the truck. And because it is fastened more securely, I can just leave the tank on the truck all summer. I will get a lot more use out of this from now on.
 
Last edited:

Forum statistics

Threads
188,342
Messages
2,905,812
Members
229,959
Latest member
bdpkauai
Top