Round fenders need flares; Flexy Flares?no, I made my own!

workingonit71

Aspirantes ad Adventure
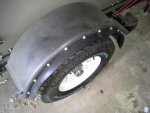
I saw a couple of threads concerning adding extension flares recently, but no one says if they used Pacer Performance Flexy Flares or not. One thread had Jeep type fenders, and the other had a military trailer with no fenders, just needed a n extending lip to attach to the tub. I have rounded fenders, with a strong rounded lip on them. They are solidly welded in place, with stiffeners fore and aft, with inner shields stitched to them. Cutting the lip off, straightening the lip, or re-mounting the assembly is/are not options. I need 1.5" more coverage. Pacer Performance Flexy Flares seem to be the best option (unless I can make lawn edging look good), and I can buy it by the foot for $7. I can't tell which would work better, or if bolting them on the fender (small bolts, locknuts, bedliner overcoating) or 3M double-sided tape would hold them on. Ideas?
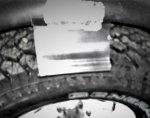
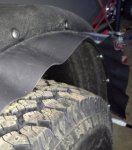
  • new tires & fender clearance.jpg new tires stick out 1.5", just need to cover tread
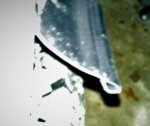
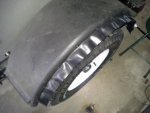
  • FLEXY FLARES.jpg left,bolted to underside of lip; right,trimmed and taped to outside edge
 
Last edited:

Haf-E

Expedition Leader
Seems like a lot of work for 1/2 inch of additional coverage... maybe look into the slip on edging used on boats and for weatherstripping doors etc.

The Flexy Flares have a pretty good reputation from what I hear - considering what they are - DIY type product. I am about to order some for a project as well.

I don't think 3M adhesive would work well in this application - I would go with the left version and bolt it onto the top flat surface of the fender probably - maybe with a metal strip to trim it out some.
 

workingonit71

Aspirantes ad Adventure
I need 1.5" more fender width (corrected my error in typing)

Seems like a lot of work for 1/2 inch of additional coverage... maybe look into the slip on edging used on boats and for weatherstripping doors etc.

The Flexy Flares have a pretty good reputation from what I hear - considering what they are - DIY type product. I am about to order some for a project as well.

I don't think 3M adhesive would work well in this application - I would go with the left version and bolt it onto the top flat surface of the fender probably - maybe with a metal strip to trim it out some.
You're correct; a 1/2" inch is negligible, I meant 1.5". I agree- the left side flare is probably the one to use, though if the vertical piece on the right is trimmed to the same height of the rolled lip, then bolts or metal screws could attach it, and the gap left between the fender and flare could be filled with seam sealer (or my favorite adhesive, Loctite PL Premium-I use that ******* on everything).
 

Haf-E

Expedition Leader
That sounds more reasonable. I think your idea of attaching the right hand version to the vertical / outer edge of the fender is best - that way the hardware would be mostly hidden under the flare's edge. the gap between the rolled edge of the metal fender and the rubber flare's square edge could be addressed in a couple of different ways.

You might order up a small chunk of it to see how it works - 1 foot would probably be enough to tell.

Best of luck with it.
 

Pntyrmvr

Adventurer
I ordered the Pacer flex flare sample kit for $25 from Summit. It has a bunch of different styles in it long enough to lay up next to the sheet metal for a good idea how it will look once installed.


"Talk is cheap. Whiskey costs money."
 

workingonit71

Aspirantes ad Adventure
get samples, or just go for it and make it work?

That sounds more reasonable. I think your idea of attaching the right hand version to the vertical / outer edge of the fender is best - that way the hardware would be mostly hidden under the flare's edge. the gap between the rolled edge of the metal fender and the rubber flare's square edge could be addressed in a couple of different ways.

You might order up a small chunk of it to see how it works - 1 foot would probably be enough to tell.

Best of luck with it.
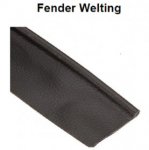
I examined the rounded lip of the fender a little more closely; I think I could cut down the vertical section of the side-mount flare to 3/4" and use sheet metal screws to attach it. It would probably leave a small gap between fender and flare on top, but using seam sealer or the PL adhesive would seal it. Probably would look like fender welting on old cars.
  • fender welting.jpg
I downloaded drawings from Pacer, and looks like the 2.5" flare would be the one to choose.
  • flexy flares (sidemount) comparison.jpg
Pntyrmvr said:
I ordered the Pacer flex flare sample kit for $25 from Summit....
I couldn't find the sample pack on Summit, but Jegs has it. But, on second thought, do I want to spend an extra $30-40 to buy the samples, or just get 1 foot of the 2.5" flare? My fenders measure 48" around...@ $7 a foot + shipping, I'll be spending $65 already. Then add the seam sealer, PL adhesive, or welting ($9 + shipping at Speedway) and buying some black paint (if I use the seam sealer or adhesive, they'll need to blend in), I'll be in for $ 75 or more. I wasn't anticipating this much extra cost, after buying the tires, a new wheel, and now flares. I had earmarked additional outlay for some interior changes I'd put off , and a Unistrut awning system I wanted to do. All in a month. I will buy a $10 roll of lawn edging today at Home depot, just to simulate the general look/length I can get away with, then order only what I'll actually use. Who knows, the lawn edging might not look bad (ha,ha), and I have another use for it anyway, so it can't hurt.
 

workingonit71

Aspirantes ad Adventure
lawn edging tested for fender flares

Beware, bad photography ahead! I cut off a piece of the Vigoro plastic lawn edging, which is stiff and maybe won't conform to the round fender as well as rubber would, but I tried it just for sizing and coverage purposes. It is 4.5" from edge-to-edge, with about 1" (with a folded edge) going under the fender lip, where aanother lip on the edging on top catches the fender lip. I used some foil tape (the only tape I had handy) to secure it in place. I took three photos (with a new photo app I obviously haven't got set right):
  • sample of lawn edging coverage test.jpg photo shows extra coverage (2" extra)
  • lawn edging coverage test 2.jpg top left corner(next to tape) shows edging secondary lip gripping fender lip
  • test view 3.jpg edging curling the wrong way, firm outer edge,and coverage extent
The edging almost fits right: 1) outer (secondary) folded lip of edging tries to grip the fender, but only has about 3/8" surface to use for attachment), first folded edge of the edging (unseen in photos) tucks under the fender, but could be used for underside attachment, 3) edging is rolled up the wrong way to conform to the curve of the fender (if cut to proper lengths, and laid out in the sun, or softened with a heat-gun, it could be re-curved. Tomorrow, I'll try re-curving the edging so it will follow the fender curve better. If I can make it conform, I'll tape it on, and see if the stiff outer edge will follow a smooth arc. If all goes well, I'll trim to length, and try a 3/4" #10 TEK screw & bonded washer to see how firmly it will attach (at the lower rear fender area, to be covered eventually with a small mud flap I'm making). Now, if it does look OK, and attaches well, then I'll use it for a single trip (about 500 miles). It'll probably fail by the end of that test, so at least I'll know which REAL fender flare to buy (I'll have to match the drilled holes!). Keep tuned, I'll report back in stages.
 

workingonit71

Aspirantes ad Adventure
modified the Vigoro, used Tek screws/washers (needs capscrews/nylocks instead)

  • I decided to go with the natural curve of the rolled edging (wrinkled badly when trying to make it go the other way). The stiff oval outer edge almost fit inside the fender lip radius perfectly (with fingertip pressure applied), so I hand-fitted the edging into the fender lip, working with continuous pressure all around the fender, to get the exact length I needed to cut to length. When that was done, I looked down to see the tire coverage I wanted, and marked it with a soapstone pencil. Back at my truck tailgate (I use it for projects, since my garage is full: trailer & parts in one bay, my Chevelle dragcar, parts, and assorted equipment in a second bay, furniture from two rooms being re-built in the third bay; I haven't been able to use my workbenches for three years), I saw a thin line marked on the edging that was exactly where I marked it. That made cutting the edging much easier; I followed the line with kitchen shears. I tried to get the trimmed Vigoro to stay in the fender groove, so I could take pictures and decide if it was OK enough to use on my rough-hewn trailer, but with tape and clamps in various positions, it would not stay where I put it.
  • So, not wanting to do this, I went ahead, marked equally-spaced spots along the fender edge, and started to drill pilot holes (at a consistent angle, to finish with the self-drilling Tek screws. After having three bits snap, when the rounded fender edge caused them to slip out of the indentations I provided, I tried to make the holes of uniform angle and placement, but ended up not so much. Anyway, the 3/4" long Teks (with a washer underneath) were just long enough to grab the plastic oval edge under the lip. It would never hold the edging in place on the road, but it was good enough for photos.
  • If I decide to keep it, I'll taper the leading edge, attach 12-inch wide mud-flaps at the rear (bolted to both fender and plastic flare, for continuity), and re-attach all with #10-24 x 1" black-oxide button-head cap screws (with washers on only the underside of the plastic), and ny-locks to secure. I don't think it looks too out of place with my handyman's approach to trailering; others, with a finer aesthetic taste may think them "ghetto", but at my age, I don't care...just if it works. I'll wait a week, or so, see if I still think it's OK, then either remove it, or duplicate it on the other side (with hardware changes). But, after drilling the holes in the fender, I'm committed. I could probably use the same holes with the Flexy Flares, so that is now a back-up plan. P.S. I went back to my old photo app on my phone; photos look a little better than taken with the try-out app!
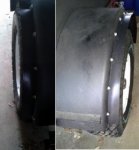
  • Vigoro fender 1.jpg just the right amount of (minimal) tire coverage
  • Vigoro fender 2.jpg waviness along outer edge (function over form!)
  • Vigoro fender 3.jpg with black-oxide capscrews, the flare will blend in better
 
Last edited:

workingonit71

Aspirantes ad Adventure
an unfortunate turn of events!

  • ... Anyway, the 3/4" long Teks (with a washer underneath) were just long enough to grab the plastic oval edge under the lip. It would never hold the edging in place on the road....
  • If I decide to keep it, I'll taper the leading edge, attach 12-inch wide mud-flaps at the rear (bolted to both fender and plastic flare, for continuity), and re-attach all with #10-24 x 1" black-oxide button-head cap screws (with washers on only the underside of the plastic), and ny-locks to secure. I don't think it looks too out of place with my handyman's approach to trailering; others, with a finer aesthetic taste may think them "ghetto", but at my age, I don't care...just if it works. I'll wait a week, or so, see if I still think it's OK, then either remove it, or duplicate it on the other side (with hardware changes). But, after drilling the holes in the fender, I'm committed. I could probably use the same holes with the Flexy Flares, so that is now a back-up plan.
  • Well, I only waited four days, and bought some #10-32 x 1" capscrews. black oxide flatwashers, and some #10-32 nylocks. I removed the Tek screws from the fender, one at a time, drilled the fender and lawn edging with a 3/16" bit (using the same holes that the TEKs had made, this time making sure the angle was more consistent). Previously, the Teks were only partially penetrating the hard oval edge of the Vigoro, so they would've worked loose at highway speeds. I drilled all the way thru the oval edge, so I could put a washer and nylock to ensure them staying put. I had trouble getting the capscrew to go all the way thru enough to get the washer/nylock onto the end, to tighten. When I succeeded, using a lot of force to coerce the oval to fit into the curved fender edge, and tightened the screws, then the Vigoro wrinkled up badly. Looks like ruffles on a petticoat (I'm old, I remember girls wearing them). I went ahead, doing the same procedure on the other fender. Same result.
  • I don't know if releasing some tension from the tight fasteners would also remove the wrinkles from the edging (I ordered some 1.25" long capscrews to use, perhaps the extra length will make a difference. If that doesn't work, I'll try using a hair-dryer to attempt reshaping them. Or I might just have to use them as is; it'll give people at my next group camp something new to see. I have already spent my "allowance" for this month (and most of next month's), so I will not be able to get the Flexy Flares alternative for awhile (unfortunately, I'm retired, and my wife didn't appreciate me cutting my income by 75%).
  • wrinkles form when capscrews drawn in tightly.jpg wavy gravy; kinda unique-maybe it'll grow on me?
  • 1 inch capscrews & washers on both sides of plastic.jpg black hardware looks better; perhaps release wrinkles by backing-off 1/2"
 

workingonit71

Aspirantes ad Adventure
another day, another problem: the joys of low $$$$ fabrication

  • I don't know if releasing some tension from the tight fasteners would also remove the wrinkles from the edging (I ordered some 1.25" long capscrews to use, perhaps the extra length will make a difference. If that doesn't work, I'll try using a hair-dryer to attempt reshaping them. Or I might just have to use them as is...
  • View attachment 391275 wavy gravy; kinda unique-maybe it'll grow on me?
  • View attachment 391268 black hardware looks better; perhaps release wrinkles by backing-off 1/2"
  • I tried both of the above methods to smooth out the wrinkles (or ruffles? another term for disorder, it describes it better), and neither worked. Releasing tension by backing off on the bolts did nothing- the ruffles were already set; using a heat gun (first on a scrap test piece) just deepens the color, and actually emphasized/increased the waviness. I left them alone after that.
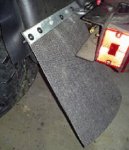
  • So, I went on to phase two: I took some very stiff 12" wide conveyor belt material (the same stuff I used for my hatch gap covering), and cut off two 12"x12" pieces, then used galvanized 1"x12"x1/8" thick bar stock to clamp them on a brace at the rear of each fender, before I drilled and bolted them there. I broke two more bits, hitting inner welds, and stripped the bolt holes on three of six bolt holes, so some Tek screws were used to supply a more secure attachment to the fender brace on both sides. I'll use bigger/better hardware later on, but I'm rushing to complete several trailer upgrades in a month's time. The mud flaps are at a 45 degree swept back angle, taking over where the fender flares leave off, to divert tire ejecta. Finished after dark, an didn't have my phone/camera with me to snap photos with, but I'll add them tomorrow.
 

workingonit71

Aspirantes ad Adventure
added conveyor belt material as mudflaps

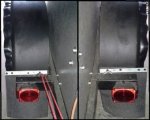
Here are the pictures, for better or worse, this is what I'm using, for the next month at least. Left shows bungee for quieting stabilizer & powercord entry into galley. Grey conveyor belt is very stiff, should deflect well.
 

Attachments

  • fenders & mudflaps.jpg
    fenders & mudflaps.jpg
    20.3 KB · Views: 7
  • 45 degree angled mudflap.jpg
    45 degree angled mudflap.jpg
    17.8 KB · Views: 6
Last edited:

workingonit71

Aspirantes ad Adventure
should've thought of this before; problem solved!

...Grey conveyor belt is very stiff, should deflect well.
  • I like to re-purpose material for other uses. Half-just being cheap, and half-just being different. That's always been the way I do things. I re-purposed conveyor belting as mudflaps, yesterday, just as I had used it before as a cover over the gap between my trailer body and opened rear hatch (I had snatched it from the scrap barrel at work, just with that use in mind).
  • I still wasn't satisfied with the wrinkled, ruffled look of the re-purposed lawn edging I used for fender flares, and saw no way to avoid removing them and finding another solution. I liked the solid way I got them to fit, and I'm sure they would've worked well, but they just bothered me. So, after contemplating using rubber tire tubes to cover and smooth-out the wrinkles, I suddenly had an epiphany, to use the same conveyor material to do the job.
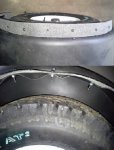
  • I still had my drill ready with the correct bit, and the impact still had the right bit in it, so I cut 2" wide strips of material (with my cut-off wheel), and used the last of my #10-32 x 1" capscrews, washers, and nylocks I had bought for the fender flare job, and bolted the conveyor belt to the lawn edging.
  • Now, the edging acts as a supporting structure, and the belting presents a horizontal, smoother appearance, around the fender curve. You can still see the wrinkled edging, if you view it on edge, but that's just part of the design (I'll claim, haha). The conveyor belting matches my grey trailer color scheme, now used for three functions. Yup, just as I planned all along.:victory:
  • conveyor belt as fender flare cover.jpg flat appearance, removes flex in the flare also
  • conveyor belt bolted on top of edging.jpg bolt-heads matching, no need for shorter bolts?
  • conveyor belt theme.jpg consistent grey material theme used, matches trailer color
 

Forum statistics

Threads
188,210
Messages
2,903,837
Members
229,665
Latest member
SANelson
Top