Rugged Expeditions
New member
Quick introduction, my name is Dan, and this is the first time we have put our expedition group's name out there, Rugged Expeditions.
What we will be doing is exploring most of California's beauty and sharing it through our cinematography and photography. But not limiting ourselves to just that.
We will also share our engineering and fabrication skills that aid us in doing our exploring.
1994 FZJ80 - 199k and counting.
Specs:
- Stock Motor
- Stock Drivetrain
- Dual Optima Batteries
Suspension & Tires:
- 2.5" OME Heavy Lift
- 285/70R17 BFG AT on Gear Rims
Body:
- ARB Front Bumper equipped with XRC10 Winch
- Kaymar Rear Bumper
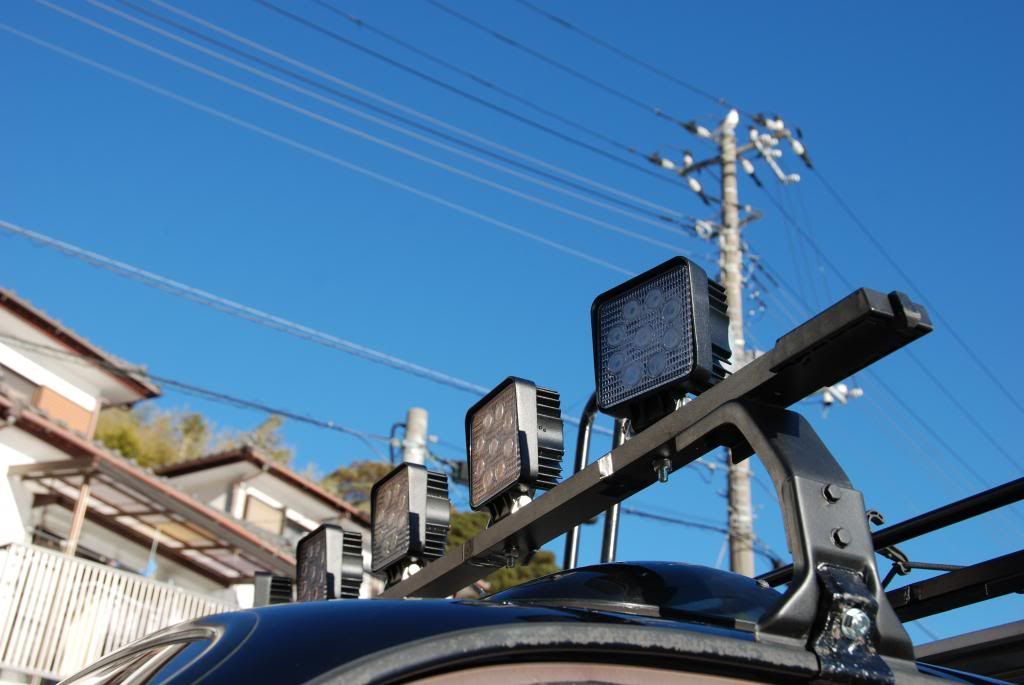
- Surco Roof Basket
- PIAA Hi-Lo Beam Fog Lights
Utilities:
- PROwatt SW2000 Power Inverter
- Cobra 18 WX ST II CB Radio with Firestik Antenna
- Custom Center Arm Rest
- JVC Deck Bluetooth USB
- Galaxy Tab 3 for GPS & Maps with RAM mount
- Custom Leather Bucket Seats (x4)
- Smittybilt GEAR Seat Cover
- Smittybilt Clinometer
- SMD48 LED Dome Lights
In Progress:
- Custom Rear Storage Units
- Slide out Grill
- 360 Degree LED Lighting
To Do List:
- Spare Tire/Jerry Swing out Carrier
- 7-Pin Mod
- Trail-Gear 67" Rock Sliders
- Rock Lights
- LED Lightbar
- Tepui Roof Top Tent
- Roof Awning
- Viair On Board Air with Tank
- Custom Wrap with logo
When and IF the motor goes, 4.7L swap. :ylsmoke:
Most Recent Pictures of My 80 on my last expedition:


and another:


With some of the crew:


What we will be doing is exploring most of California's beauty and sharing it through our cinematography and photography. But not limiting ourselves to just that.
We will also share our engineering and fabrication skills that aid us in doing our exploring.
1994 FZJ80 - 199k and counting.
Specs:
- Stock Motor
- Stock Drivetrain
- Dual Optima Batteries
Suspension & Tires:
- 2.5" OME Heavy Lift
- 285/70R17 BFG AT on Gear Rims
Body:
- ARB Front Bumper equipped with XRC10 Winch
- Kaymar Rear Bumper
- Surco Roof Basket
- PIAA Hi-Lo Beam Fog Lights
Utilities:
- PROwatt SW2000 Power Inverter
- Cobra 18 WX ST II CB Radio with Firestik Antenna
- Custom Center Arm Rest
- JVC Deck Bluetooth USB
- Galaxy Tab 3 for GPS & Maps with RAM mount
- Custom Leather Bucket Seats (x4)
- Smittybilt GEAR Seat Cover
- Smittybilt Clinometer
- SMD48 LED Dome Lights
In Progress:
- Custom Rear Storage Units
- Slide out Grill
- 360 Degree LED Lighting
To Do List:
- Spare Tire/Jerry Swing out Carrier
- 7-Pin Mod
- Trail-Gear 67" Rock Sliders
- Rock Lights
- LED Lightbar
- Tepui Roof Top Tent
- Roof Awning
- Viair On Board Air with Tank
- Custom Wrap with logo
When and IF the motor goes, 4.7L swap. :ylsmoke:
Most Recent Pictures of My 80 on my last expedition:
and another:
With some of the crew:
Last edited:


 ) it will be painted when Im done and ready to paint the storage unit: