Scott B.'s 2015 AC Build - Expo Style

Scott B.

SE Expedition Society
The last several weeks have allowed me time to get a lot of things done to the truck, both maintenance and mods. The scattered days of warm weather have helped, too.

First, a big maintenance project - u-joints and carrier bearing. While they might not be "worn out", I just passed 100,000 miles, so they are due for replacement.

Spicer parts

p1-jpg.3087657


About to go back under...

p2-jpg.3087658


Other maintenance items included a new serpentine belt and new spark plugs.

The first mod was seat spacers.

Reading all the commentary on seat spacers really got me wondering. Could tweaking the seat bottom angle really make that much of a difference?

To answer that question, I cut some 1" blocks out of a scrap 2x4, and placed them under the seat. No, I didn't drive this way - this was only a static test. Yes, moving the seat does make a difference.

However, being 6'2"+, I normally look out the upper 1/3 of the windshield. With the spacers in, my gaze out the windshield is even higher. But the seating is much more comfortable.

I sent a message to @olecoot, asking if he could cut me a set of 3/4" spacers. No problem - and they showed up the other day.

ss1-jpg.3087667


Using bolts that I already had on hand, the entire set installed in a few minutes.

ss2-jpg.3087668


I am anxious to take a long drive with them.

The next mod is a 5 for 1 deal. The base change is swapping the silver center dash trim piece for a black one. Purely cosmetic, but looks much better to me. I have always liked black interiors. Since the dash was coming apart anyway, I was able to do 4 other mods that each required the dash coming apart.

1. USB Charger
One of the 12V ports was replaced with a Blue Sea Fast Charge.

u1-jpg.3087683


The lower dash, power ports removed:

u2-jpg.3087684


The finished product

u3-jpg.3087686


I had to open up the hole in the dash ever so slightly to fit the Fast Charge. For wiring, I made a short adapter from the factory wiring to the FC.

Why install the Fast Charge when I can just use a USB charger adapter? Simple - with my CB mounted under the dash, the adapter will not fit in the left-side port.

2. Seat Heater switches
As can be seen in the above pictures, I installed switches for seat heaters. I have the heater assemblies, and will install them once I figure out which way to upgrade the seats. Meantime, since the dash was apart...

3. TPMS Light Disable
After 3 1/2 years, my TPMS light is off!!!!!!!!

I cut the blue wire and tied it to the red w/white stripe. Works great!

t1-jpg.3087708


4. Hypertech Speed Calibrator
After 3 1/2 years, my speedometer is much closer to my GPS reading!

h1-jpg.3087713


This mod was purely plug and play. Program the box, plug it in. The hardest part was pulling the dash apart.

h2-jpg.3087714


We're not done yet...
 

Scott B.

SE Expedition Society
Black Interior Trim

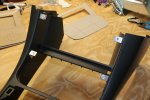
The stock interior trim pieces on my truck are a metallic-ish silver. They are bright, and I prefer a darker dash. Fortunately, someone was looking through the parts catalog, got an idea, and posted it. The rest, as they say, is history.

I bought a set of black interior trim pieces - steering wheel controls, console cover and radio surround. The steering wheel controls are from a 2016, and the surround and console parts are from a base model truck.

b3-jpg.3087730


I also picked up a 4WD switch from a HiLux. These are black - and lighted.

b1-jpg.3087720


Installation was straightforward.

b2-jpg.3087721


It looks so much better to me.

I will have post a picture of the entire dash back together.
 

Scott B.

SE Expedition Society
I almost forgot -

I PlastiDip-ed my emblems

e1-jpg.3087732


and finished the 2nd coat of paint on the front bumper.

b1-jpg.3087734
 

Scott B.

SE Expedition Society
Air Pump Filter

As a preventative maintenance measure, I did the "Uni-Filter Mod".

For those that may not know, the newer 4.0L engines have an external air pump that runs under certain conditions. This pump has a foam filter that tends to fail. Its failure can cause small pieces of the foam to enter the pump and cause valve damage (to the air pump, not the engine.) A simple fix is to replace the prone to failure foam filter with a pleated filter.

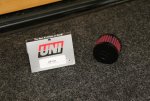
I picked up a made in USA Uni filter.

508656

Here is the air pump (under the cover)

508657

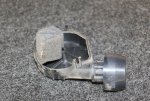
Here is a view of the filter (the air pump lid is upside down)

508658

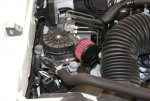
The foam filter and dirt deflector (at the front, or right side of the picture) are removed, and replace with the Uni filter.

508659

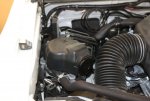
With the cover on, you can barely tell the difference.

508660

The filter failure problem is not as prevalent on the 2015 models, but why risk it?
 

Scott B.

SE Expedition Society
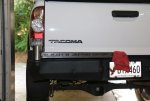
Rear Bumper - Slowly.........
This project seems to be one I never work on.
clear.png

I have a good design plan in my head, and do plan to complete this. I am anxious to get the spare tire out of the bed (obviously, not anxious enough!)

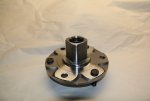
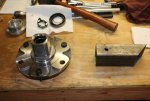
The tire mount is one part I didn't have to think about very much. As on a previous swing-out, I will use a front hub. Easy and simple. Except, the Toyota hub does not fit inside 2x2 tubing. The outside diameter of the hub is approximately 1/2" larger than the inside opening of the square tubing.

The two ways to solve the problem are either cut the tubing to allow the hub to fit, or cut the hub to fit in the tubing. While I think either solution would be strong enough, I decided to modify the hub and leave the tubing intact.

So the question became, how to modify the hub? The steel in the hub is too hard for a hack saw. A cut-off wheel would work, but not be extremely accurate. Probably not an issue, but the OCD in me was not satisfied. Hmmm....
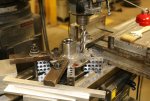
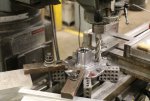
The solution became obvious - the hobby shop at work has a mill! Once set up in the mill, I was able to cut all 4 sides, keeping each square to the other. Cutting a 0.005" a pass, it took a while......................
rb1.jpg

It came out great!

rb3.jpg

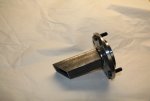
A few passes with a flap disc, and I have a nice snug fit into the tubing. And, it was fun using the mill.

Now that the mount is complete, it's time figure exactly where the tire will hang.

RB2.jpg

I also have the latch pieces cut. I will need to pull the bumper off, cut and weld the latch pieces in, then re-paint the bumper. Then, build the swing outs.

It's coming - slowly....
 

Scott B.

SE Expedition Society
Front Bumper

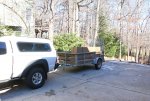
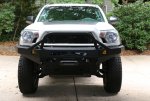
I ordered a PelfryBilt front bumper to match my rear bumper and skid plates. I decided I liked the center hoop the best - truth be told, they all look good. I picked it up about 10 weeks after ordering. Glad I have a trailer!

fb1.jpg

I painted it the same Rustoleum Truck Bed Liner (spray can) that I did my rear bumper and sliders. I like this product, and it is not difficult to touch up.

With the new bumper, I had to get some matching accessories!
;)


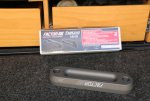
First, a winch line fairlead. I opted for the thick version from F55. The more bearing surface, the better - both for the line and the fairlead.

fb2.jpg

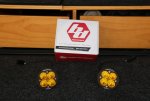
Second, lights are important, and a few good lights is a wonderful thing. These BD wide angle cornering "fog" lights fit in the bumper perfectly. BD also makes a wiring harness adapter, so I can utilize my factory wiring.

fb3.jpg

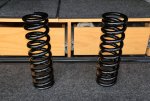
The bumper, being steel, and winch combination weighs more than the stock setup, so one more accessory is in order - springs.

fb4.jpg


These are 14" long, 700 lb springs, designed to fit Bilstien 6112 shocks. I ordered them from @Wheeler's Off-Road Inc - fair price, great service!

One last item. Looking at how the bumper mounts to the front of the truck, one can see how it might not be the strongest mounting system. Several companies make re-enforcing brackets for use with these bumpers, either for/with their bumpers or aftermarket. PelfreyBilt has one, but I didn't like it. To me, it didn't look like it added that much strength. I found one I really liked - from @C4 Fabrication. It wraps around the front of the bumper and ties into the frame, about 10" behind the mount. Simple to install, and should be very solid.

fb5.jpg

After parts were gathered and painted, it was install day!!!!

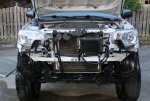
Pulling off the factory bumper was not too difficult. A quick wash to remove all the hidden dirt and grime.

fb6.jpg

Voila!

Here is the truck with bumper and springs installed. In this photo, the bumper is not quite aligned.

fb7.jpg

Quite a different look. The winch is installed here, but without line. I will write an upcoming post about that.

So far, I am very pleased with the bumper. The bedliner is easy to clean - a scrub brush gets rid of the bugs. And the lights - wow. I can't use them in traffic, but otherwise they are great.
 

Scott B.

SE Expedition Society
Dual Batteries - Part 2

I did a fair amount of research while designing this system. I had originally planned to utilize a ML-ACR to isolate and control the batteries. Simple, solid and reliable. And, that is the setup I had in my previous truck.

However, it turns out we have "smart" alternators. These devices are so "smart", that they won't see the lower voltage battery of a 2-battery system. Not seeing the lower voltage, they won't sent voltage out to charge the batteries. This causes the auxiliary battery to never be fully charged. Sure, you can charge the battery from an external source (house charger, for instance) but that is not a solution I wanted.

Enter a DC-DC charger. What is this? A battery charger, that charges a battery off of a 12-volt input source. It increases the voltage, massages the signal, and keeps the auxiliary battery charged and happy.

One main drawback, in my mind, to this setup, is you do not have the ability to, with the flick of a switch, run the truck off the auxiliary battery (self jump, etc.) This is a feature I used on my previous truck when the starting battery died.

So, we have many PROs and one major CON. Some more thinking and figuring let to a workable solution - a 2 part solution, actually. First, I now carry a lithium jump-pack, to jump start the truck in the event of a dead battery. These little things are really amazing. Just make sure you always have it charged up. Second, by using an auxiliary battery that is the same size as the starting battery, in the event of total battery failure, I can move the aux battery from the bed to under the hood, and run the truck. I realize the probability of needing to do this is quite remote, but it has happened in my case, and I want to be prepared.

During my research, I made another observation (that I should have made long ago) - the Odyssey AGM batteries like to be charged at ~14.5 volts, rather than the ~13.7 that the alternator provides. Thanks to HKB Electronics out of Australia, there is an elegant solution. In essence, it is a Schottky Diode in an easy to install package. It just replaces the existing alternator voltage sensing fuse, ALT-S, bumping the charging voltage to ~14.5.

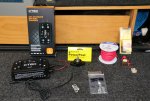
The legwork done, it's time to gather parts!

db1.jpg

CTEK DC-DC charger (which has the ability to charge AGM batteries at a higher voltage), Blue Sea fuses and terminal post, some wire and fittings from Del City.

db2.jpg

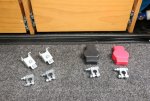
A couple of sets of military battery terminals, and a pair of Slee Off-Road terminal extenders.

Let the fun begin!

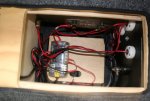
I mounted the auxiliary battery in the front of the bed, under the sleeping platform. I originally wanted it in the right side compartment, but logistically, it worked better in the center compartment.

db4.jpg

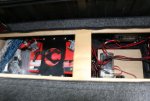
In the right hand compartment, I mounted the CTEK and the terminal post. This is the compartment where the wiring from the front of the truck comes into the bed. (The white things are Blue Sea Cable Clams.)

db3.jpg

You can also see a fuse block. This is for all the bed-mounted accessories. Please excuse the wiring mess - at the time of this photo, I had not straightened and organized the wires.

So far, everything is working fine. I can run the fridge for several days without worrying about starting the truck. I can run the air compressor without running the truck. I can power the teardrop without worrying about killing the main truck battery. I sense a theme here...
 

Scott B.

SE Expedition Society
Winch

Part of the reason of adding the front bumper was to mount a winch. I decided to go with a Warn VR-10S (second gen). I thought about a Zeon, but determined the added cost, size and weight were not necessary for my intended use.

The winch is wired directly to the battery, power to the motor being controlled by solenoids (or similar devices.) As an added measure of safety, I installed an on/off switch in the power lead. This will help insure the winch is only powered when I want it to be.

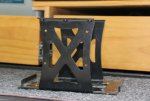
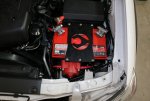
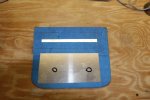
I started with a marine battery switch from Blue Sea. I found a convenient mounting place on the side of the battery cage. Close enough to not require lengthening the battery cable, and convenient to get to. To mount it, I fabricated a plate from aluminum (NASA surplus!).

w1.jpg

Here, you can see the holes I drilled to hold the plate.

w2.jpg

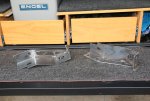
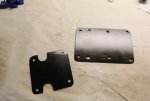
On the right is the fabricated mounting plate. On the left, is a non-conductive plastic sheet, to provide an extra layer of protection against shorting. This piece mounts between the switch and plate, protecting the positive leads.

w3.jpg

A top view of the mounted switch

w4.jpg

Some more goodies to go with the winch.

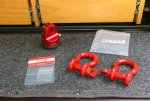
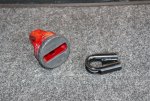
I bought the ProLink from a friend of mine at the tire shop. He pulled of his truck (not sure why). It has a very small ding on it, and was quite a bit cheaper than a new one! I did have to get a replacement snap ring. I also picked up two Crosby 3/4" shackles.

w5.jpg

Installation of the ProLink turned out to be interesting. Warn splices a thimble on the end of their winch line - which is fine and good until it doesn't fit in the ProLink. :mad:
clear.png
It was ever so slightly too thick.

w6.jpg

The solution? Learn to splice!

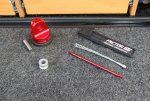
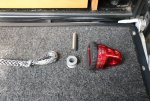
Factor 55 makes an aluminum sheave which fits inside the ProLink. The sheave allows for a larger radius for the line wrapping around the pin. I ordered a sheave and fid for splicing the line.

There are several companies that make fids for splicing. Factor 55 is the only one I found with a line grabber (Chinese finger torture looking thingy in the picture) that attaches to it. As it turns out, this simple little addition makes the process a little easier.

w7.jpg

With the help of my new tool and couple of YouTube videos (some know what they are doing, many do not - be careful whom you choose to copy) I unspliced the line, pulled out the thimble, and re-spliced it.

NOTE: Warn did not taper the tail in their splice. While not tappering the tail is a timesaver, it puts excessive load at a single point in the line - which will lead to early failure of the line. Make sure you always taper the tail in your splices.

w8.jpg

w9.jpg
 

Scott B.

SE Expedition Society
CV Axle Rebuild

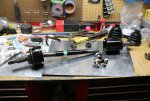
After 100,000 miles, a hole in one of the boots, CV axle grease all over the front suspension, it was time to rebuild the CV axles. I considered just replacing them, but OEM ones are quite expensive, and aftermarket ones are of varying quality and I didn't want to take a chance. Besides, they are really easy to rebuild, and Toyota sells an all-in-one kit for less than $40.

One kit is used for each axle shaft.

cv1.jpg

Pull the axle out of the truck, and clean it. Yes, get all that sticky, yucky gray/black grease and gunk off, pull the old boots off, and clean some more.

Once cleaned, this is what you end up with.

cv2.jpg


Re-assembly is just as easy. Squeeze the bags of grease into the boots, squeeze the new clamps, and put the axles back in the truck.

Keep an eye on the boots for a few miles, just in case one of them "burps" grease.
 

Scott B.

SE Expedition Society
Dual Batteries, Part III

I want to be able to monitor the state of both batteries, especially when the truck is not running (camping, etc.) Being old school, I like analog gauges. I decided to add two Autometer voltmeters (gauges), to match the ones I mounted on the A-pillar.

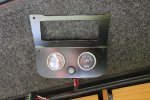
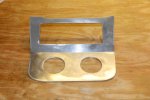
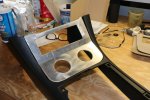
As with all gauges, they needed to be mounted in a visible location, but out of the way. The dual cup holder at the front of the console looked to be a good place. Since mounting the CB radio above the cup holders, they were of limited use. Besides, I needed a faceplate around the CB to clean up its look in the truck.

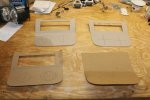
I got started with some CAD work.

db1.JPG

To mount the panel, I utilized small L brackets. 8-32 rivnuts were installed to accept the panel mounting bolts.

BTW, this piece is NOT symmetrical side to side.

db2.jpeg

The final pattern transferred to metal (aluminum).

db3.jpeg

I fabricated a makeshift brake to bend the panel.

db4.jpeg

The almost finished product. It still needs the mounting holes drilled.

db5.jpeg

Another test fit.

db6.jpeg

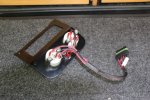
As I was wiring up the gauges, I realized that these gauges did not have an ignition/on lead. Once connected to a battery, the gauge reads voltage. I don't think a gauge would apply much of a draw on a battery, but I didn't want them on all the time. But, I also didn't want them on only when the truck was running. I really want these to monitor the batteries when the truck is not running. Besides, if they were wired to the ignition, I would need the key just to check the voltages.

The solution I came up with was a switch. I found a DPST switch to put between the batteries and the gauges. I ran wires direct from each battery to the switch/gauges and grounded everything to the chassis. Also, I used a Weather pack connector to allow for easy removal in the future, should that be necessary.

db7.jpeg

db8.jpeg

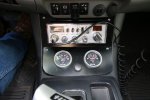
Here it is installed in the truck.

db9.JPG


The location has worked out well - both driver and passenger can read the gauges. The only drawback is at night - I get a little reflection off of the passenger door window.

All in all, very happy with these.
 

Scott B.

SE Expedition Society
Rear Bumper Tire Carrier and Fuel Can Swingouts

I haven't updated this thread for a while, but I have been working on the truck. A while back, I completed the tire carrier swingout, and plan to complete the fuel can swingout this week.

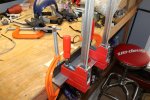
While this carrier looks like many others, I incorporated a couple of details I have not seen on other trucks. The idea that took the longest to come up with was the latching mechanism. Since I have dual swingouts, I needed to latch the arm somewhere along the length of the arm, rather than at the end. I went through a couple of designs before settling on this one.

To get started, I cut a rounded end on the 2x2 using a hole saw, to mate with the pivoting tube on the bumper. I also verified the length would work with my teardrop.

Here, I am determining the height I want the swingout to be.

rb - 1.jpeg

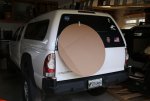
A cardboard cutout of the tire was used to determine placement. I didn't want to block the taillight, and wanted to keep it somewhat high.

rb - 2.jpeg

A side view, determining the approximate angle to carry the tire.

rb - 3.jpeg

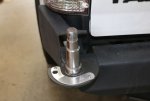
To mount the tire to the carrier, I picked up a front wheel hub (this one is a Dorman - much less expensive than a Toyota branded one.) The plan was to put the bearing-mount part of the hub into the 2x square tubing. Unfortunately, the diameter of the hub was greater than the opening in the tubing. We have a "Hobby Shop" at work, and there is a mill. This was a great project to learn how to operate a mill.

rb - 4.jpeg

Several hours later, I ended up with a squared off section, that fit perfectly into the tubing.

rb - 5.jpeg

Since these photos were taken, I drilled two holes in the tubing so I could rosette weld as well.

rb - 6.jpeg

I realize using the mill was not the most time efficient way to cut to hub to make it fit, but it was a learning experience. And, the resultant cuts are perfectly square. I don't I could have been perfectly square using a flap disk.

Here are the arm pieces, laid out. The angled cuts are 40*, giving a 10* rise to angle the tire back.

rb - 7.jpeg

Makeshift welding table, sitting on a sawhorse. Crude, but it worked. Lots of clamps to prevent/limit warping.

rb - 8.jpeg

Test fit on the truck.

rb - 9.jpeg

Here is a closeup of the machined and fitted hub.

rb - 10.jpeg

Continued...
 

Scott B.

SE Expedition Society
Rear Bumper Tire Carrier and Fuel Can Swingouts, Part II

Tire carrier assembled, test fitting on the truck.

rb - 11.jpeg

I bent and welded a piece of metal to the bottom of the swingout to act as a stop. This turned out to be a great place to mount the latch mechanism.

rb - 12.jpeg

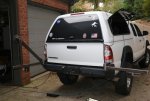
Both swingouts in the open-locked position.

rb - 13.jpeg

Test fitting, with the spare mounted. Getting excited now!

rb - 14.jpeg

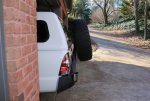
The 10* forward angle.

rb - 15.jpeg

The latch mechanism keeps the arms from swinging out; the plate keeps the arms from swinging into the truck. However, the only thing that keeps the arms from moving up and down while driving is the pivot itself. The pivots are know to fail from fatigue - from constant flexing.

To inhibit the up and down motion, I created a pin that locked the arm to the bumper.

The pin is made from 3/8" steel, and goes into a drill bushing, which has been welded into the bumper. I used a plastic flange bushing to eliminate the steel on steel. All these parts were source from McMaster-Carr.

rb - 16.jpeg

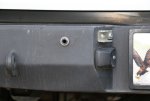
Here is the drill bushing in the bumper, and the flange bushing in the drill bushing.
rb - 17.jpeg

Here is the pin in the swing arm, just before welding.

rb - 18.jpeg

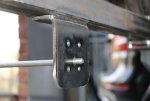
A close-up of how it works.

rb - 19.jpeg

I cut a drag plate out of aluminum, to carry the arm locking spring-pin.

rb - 20.jpeg


Continued...
 

Scott B.

SE Expedition Society
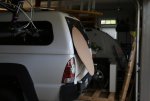
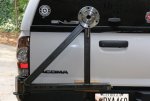
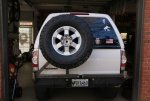
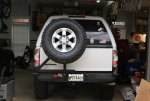
A final shot of the completed, painted carrier assembly.

rb - 21.jpeg

An additional thing I had to do was weld an additional brace in the bumper. The weight of the tire combined with the leverage of the arm caused the wrap-around part of the bumper to flex - a lot. So much, that I did not carry the tire until I re-enforced the bumper.

Since doing that, I have had no problems with either the carrier or the bumper.

Overall, I am very pleased with how it turned out.
 

Forum statistics

Threads
188,398
Messages
2,904,197
Members
230,274
Latest member
mbauerus1
Top