You are using an out of date browser. It may not display this or other websites correctly.
You should upgrade or use an alternative browser.
You should upgrade or use an alternative browser.
Scott B.'s Little Guy Offroad Teardrop Build
- Thread starter Scott B.
- Start date
RandomAbstract
Adventurer
Enjoying your build. I just bought a 5x10 Silver Shadow that I am customizing.
Scott B.
SE Expedition Society
Enjoying your build. I just bought a 5x10 Silver Shadow that I am customizing.
Thank you.
Do post your build thread - I am always looking new ideas!
Scott B.
SE Expedition Society
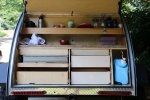
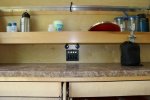
I started the electrical upgrades on the TD.
The plan is to add a switch panel inside for additional interior lighting and one in the kitchen area for work and night lighting.
What I started with:
Inside
Kitchen
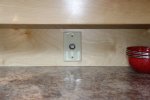
Taking things apart:
Inside
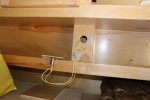
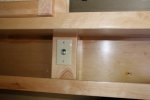
The existing box turned out to be a little too narrow to comfortably accommodate the Blue Sea switch panels I wanted to use.
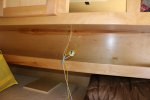
Seeing how the existing 12V ports were wired, and knowing what I was adding, I needed some more parts.

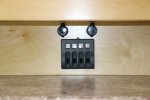
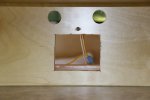
The first thing to do was cut a hole to mount the kitchen switch panel.
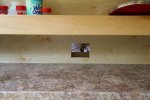
Test fit.
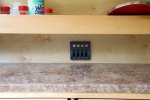
Next, drilled holes for the 12V port and USB charger port.
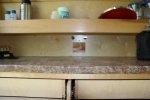
The plan is to add a switch panel inside for additional interior lighting and one in the kitchen area for work and night lighting.
What I started with:
Inside

Kitchen

Taking things apart:
Inside

The existing box turned out to be a little too narrow to comfortably accommodate the Blue Sea switch panels I wanted to use.

Seeing how the existing 12V ports were wired, and knowing what I was adding, I needed some more parts.

The first thing to do was cut a hole to mount the kitchen switch panel.

Test fit.

Next, drilled holes for the 12V port and USB charger port.


Scott B.
SE Expedition Society
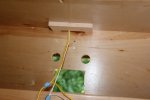
Inside, I build a new box. Similar in style to the original, but slightly wider. Also, the construction design is a little different.
A base block:
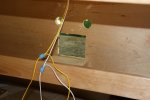
A top block:
With kitchen components installed:
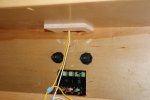
With side panels installed:
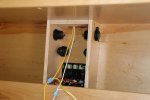
The side panels each contain a USB charger port.
The face panel (to be built) will contain the switch panel and a 12V port.
A base block:

A top block:

With kitchen components installed:

With side panels installed:

The side panels each contain a USB charger port.
The face panel (to be built) will contain the switch panel and a 12V port.
Scott B.
SE Expedition Society
Taking a break from wiring, I installed a set of Yakima roof racks.
Until recently, Little Guy used a different brand of racks that bolted to the side of the teardrop. However, the 5x8 did not have much room on the sides to mount the mounting brackets. (Actually, I was initially planning on using Yakima Side Loaders - but they did not fit either.)
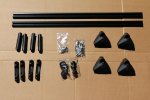
LG has started bolting Yakima sliding tracks to the roof of the TDs. I bought the racks from LG, and they came with mounting instructions. (I wanted their instructions, since I did not know where the cross bracing was positioned, and how strong it was.)
Here's what I started with:
Parts
Teardrop
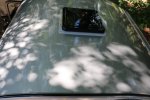
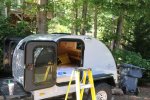
After laying out the rail position according to the LG instructions, I decided the rail position was not optimum. They had it positioned too far toward the rear of the trailer. Given that position, it would be very difficult to carry a load horizontally - and, if I could, the bar spacing would be minimal at best.
I opted to move the rail forward. I transferred their measurements to my new position, and found the additional cross braces I needed. Then, installation proceeded as specified.
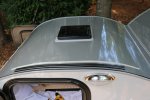
The result:
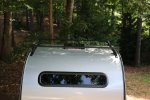
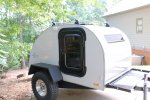
Overall, we are very happy with the racks. As it sits, there is a 28" space between the rails. Not the ideal 30 - 36, but should be sufficient for our plans.
Until recently, Little Guy used a different brand of racks that bolted to the side of the teardrop. However, the 5x8 did not have much room on the sides to mount the mounting brackets. (Actually, I was initially planning on using Yakima Side Loaders - but they did not fit either.)
LG has started bolting Yakima sliding tracks to the roof of the TDs. I bought the racks from LG, and they came with mounting instructions. (I wanted their instructions, since I did not know where the cross bracing was positioned, and how strong it was.)
Here's what I started with:
Parts

Teardrop


After laying out the rail position according to the LG instructions, I decided the rail position was not optimum. They had it positioned too far toward the rear of the trailer. Given that position, it would be very difficult to carry a load horizontally - and, if I could, the bar spacing would be minimal at best.
I opted to move the rail forward. I transferred their measurements to my new position, and found the additional cross braces I needed. Then, installation proceeded as specified.

The result:


Overall, we are very happy with the racks. As it sits, there is a 28" space between the rails. Not the ideal 30 - 36, but should be sufficient for our plans.
RandomAbstract
Adventurer
How did you find the rafters/spars to screw in the tracks? I have been considering options. One option is to buy the raw (longer) track from Yakima, but I haven't been able to find the rafters. A stud finder doesn't work.
http://www.rei.com/product/679476/yakima-tracks-with-bolts-60-inch
http://www.rei.com/product/679476/yakima-tracks-with-bolts-60-inch
Scott B.
SE Expedition Society
How did you find the rafters/spars to screw in the tracks? I have been considering options. One option is to buy the raw (longer) track from Yakima, but I haven't been able to find the rafters. A stud finder doesn't work.
http://www.rei.com/product/679476/yakima-tracks-with-bolts-60-inch
I used the info supplied by LG and my "tuned knuckle".
By tapping on the roof, you can hear/feel where the cross braces are.
Scott B.
SE Expedition Society
IF I keep mine, this is the route I plan on going for a rack. How much can you open the vent, before it hits the top of the load bars (assuming you had something on the rack)?
Not very much.
Our plan is to get a Yakima MegaWarrior and cut out the middle, to allow the roof vent to open fully.
The older rack style mounted the cross bars fairly high off the roof. This allowed the vent to open, but at a cost of aerodynamics and catching on tree limbs. I hope the lower bars will not have these problems.
RandomAbstract
Adventurer
I used the info supplied by LG and my "tuned knuckle".
By tapping on the roof, you can hear/feel where the cross braces are.
LOL, I have been practicing tuning my knuckle on the roof. Just hadn't decided to trust it yet.
So, I just fixed the rhino rack tracks that were leaking on my new project... Mine used a 3m adhesive foam tape with silicone calk along the outside. Each bolt was free to slide the length of the rail in a channel and had an o-ring that was suppose to pinch between the head of the bolt and the roof top. The leak occurred because the calk and foam tape was compromised and the o-ring didn't made contact. The attempted fix was new tape more silicone and thicker o-rings that compress on each bolt.
What were the mechanics of your rail attachment to the roof to prevent water damage?
What were the mechanics of your rail attachment to the roof to prevent water damage?
Scott B.
SE Expedition Society
So, I just fixed the rhino rack tracks that were leaking on my new project... Mine used a 3m adhesive foam tape with silicone calk along the outside. Each bolt was free to slide the length of the rail in a channel and had an o-ring that was suppose to pinch between the head of the bolt and the roof top. The leak occurred because the calk and foam tape was compromised and the o-ring didn't made contact. The attempted fix was new tape more silicone and thicker o-rings that compress on each bolt.
What were the mechanics of your rail attachment to the roof to prevent water damage?
I used RTV around the screws, under the rails.
Scott B.
SE Expedition Society
Continuing with the electrical,
The factory ran a power/ground pair of wires from the fuse block to a 12V port, and spliced those wires for the 2nd port. Since I now have 5 ports, I had to upgrade the wiring harness. Also, as I am adding two 4-switch switch blocks, I needed to add an easy way to add ground wires for the new switch circuits.
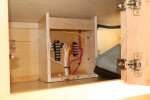
I decided to use terminal strips. I felt they would provide the easiest and cleanest installation. In the upper cabinet, LG built an electrical access panel - in my case, there was nothing in it. It was the perfect place to mount the terminal strips. The short one is +12V (supplied by the original circuit) and the large one is ground. Part of the strip is grounded by the original circuit, and the remainder is grounded by an additional feed from the fuse block. Yes, electrically, they are the same, but I wanted to add additional capacity from the fuse block.
Here is a picture of the terminal strips, mounted and wired, in the electrical panel:
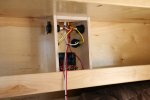
Here, you can see the new panel I built with the components wired in.
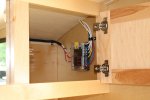
And lastly, the fuse block LG installed. The wires in the black split loom are the ones I added - the ground, and 2 new +12 circuits, one for each switch panel.
The factory ran a power/ground pair of wires from the fuse block to a 12V port, and spliced those wires for the 2nd port. Since I now have 5 ports, I had to upgrade the wiring harness. Also, as I am adding two 4-switch switch blocks, I needed to add an easy way to add ground wires for the new switch circuits.
I decided to use terminal strips. I felt they would provide the easiest and cleanest installation. In the upper cabinet, LG built an electrical access panel - in my case, there was nothing in it. It was the perfect place to mount the terminal strips. The short one is +12V (supplied by the original circuit) and the large one is ground. Part of the strip is grounded by the original circuit, and the remainder is grounded by an additional feed from the fuse block. Yes, electrically, they are the same, but I wanted to add additional capacity from the fuse block.
Here is a picture of the terminal strips, mounted and wired, in the electrical panel:

Here, you can see the new panel I built with the components wired in.

And lastly, the fuse block LG installed. The wires in the black split loom are the ones I added - the ground, and 2 new +12 circuits, one for each switch panel.

Similar threads
- Replies
- 6
- Views
- 2K
- Replies
- 3
- Views
- 986
- Replies
- 2
- Views
- 1K
- Replies
- 33
- Views
- 4K

