SETO - the DR(D4-7R) Moto

Every Miles A Memory

Expedition Leader
I dont know if this model has a different battery, but mine would die if I left the lights on without the motor running for what seemed like such a minimal amount.

I walked out one time, turned the key over, realized I didnt have my sun glasses, run back in the house and run back out with the glasses. Battery is dead :(

After that, I kept it on a trickle charger any time it was just sitting around
 

RHINO

Expedition Leader
check out the IRC battle rally for a front option,,, great all around tire.

T63 is a great choice for a matched set,,, for what your planning on doing its got good wear, great traction in all conditions, pretty cheap ect. its a good travelling tire that does very well off road.
 

Overland Hadley

on a journey
Had a chance to work on the bike over the last couple days.

Continued tearing into the front.

FullSizeRender.jpg

Working on getting the cables routed so I can raise the handlebar another couple of inches. Almost there, but I did strip one of the screw heads on the throttle cable. I should be getting a stripped screw remover for christmas, so I did what I could and am waiting on the rest. As for the raising of the handlebar, I am already raised 1" from stock with the Warp9 clamp and there was no problem with the cable length going up one inch. I need more height for a well balanced standing position, so I am going with Rox risers for another 2", that should put me close to where I want to be.
(Cool fact, Rox Speed is located 175 miles from me. When the closest major town is 100 miles from here, Rox feels like it is just around the corner.)


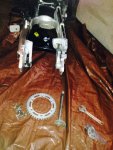
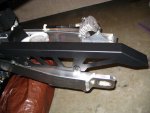
Took the rear wheel off and removed the rear sprocket. Then spent a long time cleaning up the grease mess from the old chain. Glad that I am going with a new chain.

FullSizeRender_1.jpg


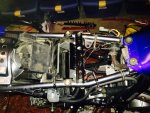
Then started getting at the rear shock. Took the air box out to get to the rear shock, I really like having the Clymer manual, it makes me feel smart and competent. When my girl saw the bike she said it looked to have half of its guts missing, it is getting there. If I decide to take this bike on a long trip I want to have taken apart and rebuilt the whole bike, no better way to know how to fix something.

FullSizeRender_2.jpg


Also took off the front sprocket and checked the countershaft seal, it looks good. And finally took off the kickstand, the bike came with the lowered height kickstand and I am switching to the standard height stand with some JNS Engineering love added. More on that in the future.
 

ober27

Adventurer
It really is nice working with a good repair manual, takes away a lot of guess work. That's going to be a perfect bike for your area, Forestry roads are my favorite places to ride.
 

Overland Hadley

on a journey
I cleaned up the shock, adjusted it to the higher seat setting, and set the compression and sag to better fit my weight. Then I took it to a shop and had it topped off with 175psi of nitrogen. It is now ready to be reinstalled. Yeah!

FullSizeRender.jpg


Stock Shock Settings:

Compression Damping - consensus is unless you are a lightweight, best is to have the compression set to the hardest setting. Screw at top of shock fully screwed in (clockwise).

Spring Pre Load or Sag - I found this information, measured from top to bottom of spring, 10" softest, 9.7 standard, 9.4 stiffest.


Plan is to upgrade the rear shock next winter, at the same time I rebuild the front forks. But we will see how it feels this season, with the nitrogen fully charged and the setting changed I am optimistic that it will ride much better.
 

Overland Hadley

on a journey
Urgh! I forgot about JIS (Japanese Industrial Standard) screws. That is why I have been having such a hard time with the little buggers. Damn.

Well after grinding another "phillips" head into a flat head with the Dremel tool to get it out, I remembered reading something about JIS screws on Japanese made bikes. Ok, now my utter inability to get these screws out makes sense. Need to order a JIS cross thread driver set before I touch another one.


Found this while I was looking for a driver. Not sure if it is true but it is interesting.

The Phillips is an American design created and patented by Henry Phillips in 1936. It went onto the production floor first at the Cadillac factory in 1940. One of the attributes that Cadillac engineers liked about the design is that the driver would "cam-out" after a certain torque was reached and not allow over-tightening of the screw. The design offered other advantages like self-centering and the tool, screw engagement was quick, with never more than 90 degrees of rotation needed before the tool started working.

Japanese engineers developed their own cross-point design, but did not view this "cam-out" feature as an advantage. They wanted the benefits of self-centering and quick tool, screw engagement that the cross-point design offered, but torque and over-tightening would be addressed at the operator or tool level, not at the screw tip.
 

RHINO

Expedition Leader
its absolutely true,,, ever notice how a phillips cams out? i sure do. the vessel drivers are simply amazing, once you start using them you'll be a believer too.
 

Overland Hadley

on a journey
its absolutely true,,, ever notice how a phillips cams out? i sure do. the vessel drivers are simply amazing, once you start using them you'll be a believer too.

Yes. I refuse to build with phillips head screws, Torx all the way when working with wood. Although, I guess I do use phillips head as finish screws, but you get the point.
 
Last edited:

Overland Hadley

on a journey
Giving SETO some JNS Engineering love.

Fender Brace. My idea was to mount a small light bar on the brace, but it looks like there will be a bracket coming from JNS for mounting aux lights under the main light. Went ahead and installed the brace as I already had it.

IMG_1123.jpg

IMG_1124.jpg


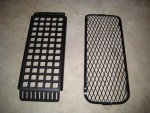
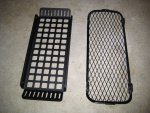
Installed the oil cooler guard. Glad to have more protection than the stock wire guard.

Couple photos comparing the stock and JNS guards.

IMG_1119.jpg

IMG_1120.jpg

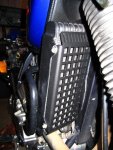
Installed. While I was working around the radiator, I also straightened some of the fins that I bent while power washing the bike this last autumn. I was not able to get the fin comb I bought to work, so I carefully used a screwdriver head to re-align the fins. Much better now, and I do not feel like such a chump for doing it.

IMG_1122.jpg


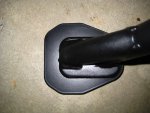
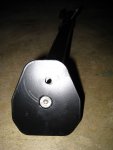
Got to work on the new standard length kickstand. Bought the kickstand on ebay, so I cleaned it up a little and mounted the foot pad. The foot pad will be nice, as I had to have a small block of wood handy last year to keep the kickstand from sinking into the soft soil we have up here.

IMG_1129.jpg

IMG_1131.jpg


More JNS parts to come, but that's all for now.
 

Overland Hadley

on a journey
teaser

working on the after


After

imagejpeg_2-3.jpg

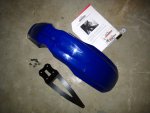
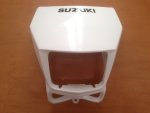
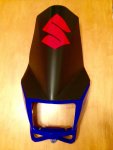
Bought a blue front headlight shroud on ebay, and took off the white sticker on the face so it is all blue. I tried to bend my own fairing, but could not get one to work. Saw this one and decided before I spent more time and money breaking plastic I would just buy a pre made one. (The guy's ebay name is "myhobby1") Then finished it off with an annoying Suzuki S sticker, for better visibility on the road.

I could have gone with a production windscreen, but I liked that this fairing gives me more room for a GPS in front of the handle bars. With my handlebars moved up and forward, I think the extra room will be good. And the rally looks doesn't hurt. :ylsmoke:
 

Overland Hadley

on a journey
Get excited for some fuzzy poor photos of a handlebar! It will be nice when spring comes and the bike can be out in the light, instead of in the dark under the bare lightbulb. :)


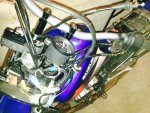
I have been working on the handlebars again. Last autumn I changed out the stock handlebar to a ProCycle kit of high bend handlebars and Warp9 raised clamps. (The kit also contained the lower foot pegs, giving me almost two inches more depth without dropping below the frame and skid-plate. Length I needed.) I wanted to make some more changes to better fit me, and my style.


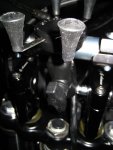
Rox risers for an additional 2". I am now at about 3" above stock, 5" more between foot-peg and handlebar, and that should give me the balanced standing position I am aiming for. (It was interesting to see that Rox is located here in Northern Minnesota!)

I did have to reroute some of the cables, but did not have to remove the gas tank as I was able to get what I needed from the tank on.
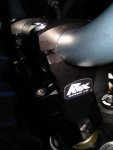
IMG_1134.jpg


Acerbis X-Factors for hand guards. These are huge soup bowls and should provide the needed protection for the ever possible 40* temps during riding season.
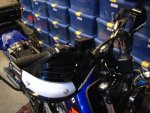
IMG_1140.jpg


Of course I had to change out the bulbs in the instruments for LEDs. I just really like the crisp look of an LED light, cheap smiles for me.

IMG_1147.jpg


Went ahead and put on the Trail Tech handlebar switch for the upcoming aux offroad lighting.

IMG_1141.jpg


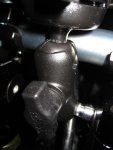
And the RAM mount for the smart phone went on. RAM X-Grip, short arm, M8 mount 367U screwed into the side threading of the Rox.

That is how I like to navigate, GPS app to know where I am and paper maps to figure out where I am going.
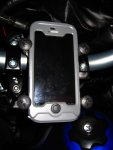
IMG_1148.jpg

IMG_1150.jpg

IMG_1152.jpg

IMG_1153.jpg


Thats all for now. More to come.
 

ober27

Adventurer
Wish you were a little closer, here in Bemidji we have "tire changing parties", several local motorcyclists get together two or three times a year to mount and balance our new tires. We have a lot of fun. Which tire did you buy?
 

Forum statistics

Threads
188,288
Messages
2,904,960
Members
229,961
Latest member
bdpkauai
Top