You are using an out of date browser. It may not display this or other websites correctly.
You should upgrade or use an alternative browser.
You should upgrade or use an alternative browser.
Show me your homemade bumper swing outs!
- Thread starter Luckychase5
- Start date
ssapach
Adventurer
I'll play.....some here may not frequent the 4Runner section, as I have posted in there already.
I turned down a rather large stud to 1.5" and threaded the end a bit. Made a sleeve out of an even larger stud, and a couple bronze bushings for the top and bottom.


My closing latch is real sophisticated.....

So far so good, once it was pumped fill of grease it made the hinge smoother and easier to swing.
Not sure what the breaking point will be, as I can support my whole body on this thing when it swings out, but the whole 4Runner leans quite nicely when it's open just with the weight of the tire.
Only downside so far is that my latch pin makes for some rattling when driving. It's not noticeable going down the highway and even around town, there are so many other noises from the vehicle that the pin rattling doesn't bother me.
I turned down a rather large stud to 1.5" and threaded the end a bit. Made a sleeve out of an even larger stud, and a couple bronze bushings for the top and bottom.


My closing latch is real sophisticated.....

So far so good, once it was pumped fill of grease it made the hinge smoother and easier to swing.
Not sure what the breaking point will be, as I can support my whole body on this thing when it swings out, but the whole 4Runner leans quite nicely when it's open just with the weight of the tire.
Only downside so far is that my latch pin makes for some rattling when driving. It's not noticeable going down the highway and even around town, there are so many other noises from the vehicle that the pin rattling doesn't bother me.
4x4junkie
Explorer
I hope you don't mind me stealing this idea so I can have mine stay open when I'm parked off-level.
...
Here's mine... Built from 2x5" rect. tube for the bumper, and various pieces of 1x2", 2x2", and 1x1" for the swingout (all 1/8" wall). Hinge is two bearings I got at a hardware store that fit inside of a piece of 1.5" pipe, the latch is a standard gate latch, to which I added a small spring to the lever to keep it closed (it did pop open while offroad once). The swingout closes up against a small but stiff spring to reduce rattles.
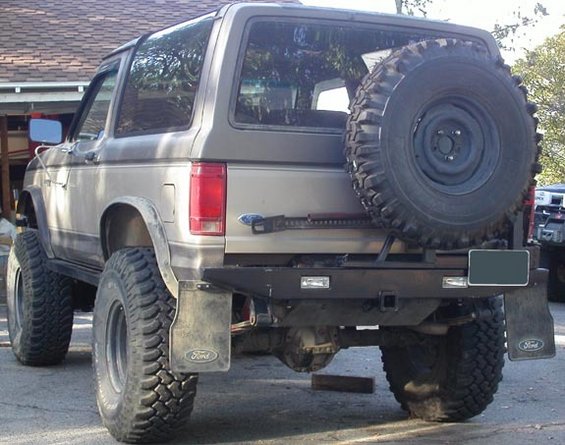
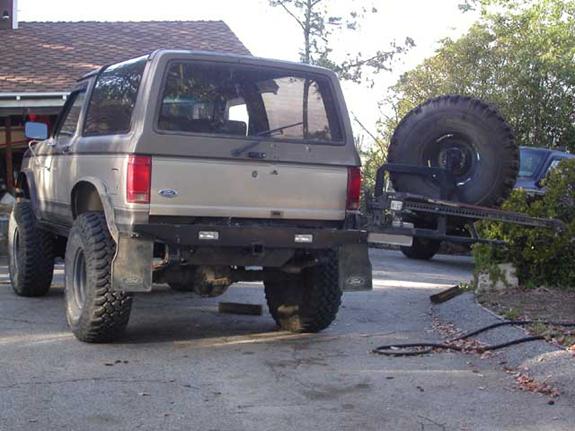

Seems about every 3 years or so I have to replace the hinge bearings (they get sloppy), so I might redo the hinge with better bearings or something in the future (maybe something from the site Box Rocket linked, which looks interesting).
×2 about gussets at the tire mount, right where it attaches to the swingout itself I had mine crack a few years ago.
.
Wh1t3nukle
I gotz dis
Well done on your execution. The bronze bushing is a great addition.
In general with greaseable bushing, moreover those exposed to direct sun, is to check or pump more frequently. The grease (depending on selection) will more easily heat up and flow out.
For your latch, you did a great thing capturing in double shear the motion that is fore/aft (open/close) direction. That is an important load direction. The largest amount of forces are generated in the vertical direction. Since you have the gaps there on the end, I highly suggest you do a full capture. Pretty simple with how you already are and basically just add material to shim the bottom (mostly) and top such that you end up with a 1/16" gap. This will give you full capture in the vertical direction such that it's a rigid connection all across now and into the bumper. Staying currently will eventually fatigue your welds and the nice spindle you made. Bronze may go first b/c of being much softer.
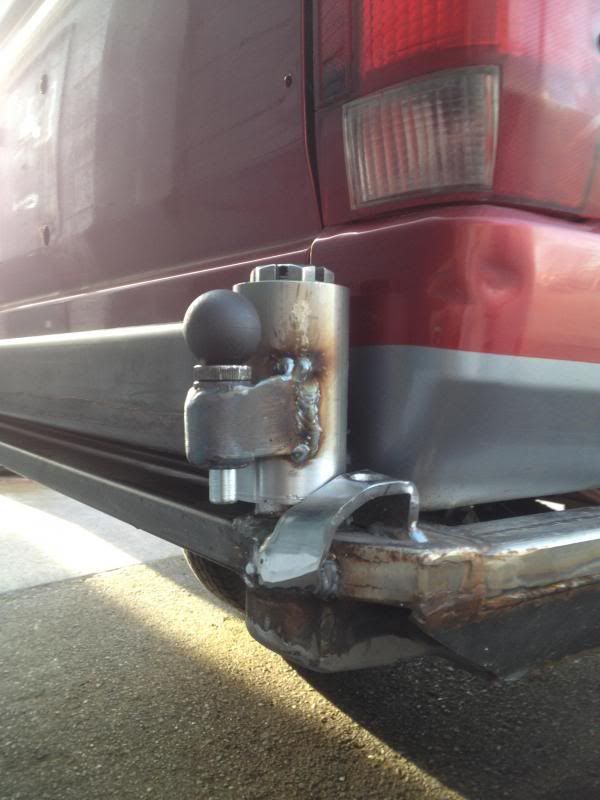
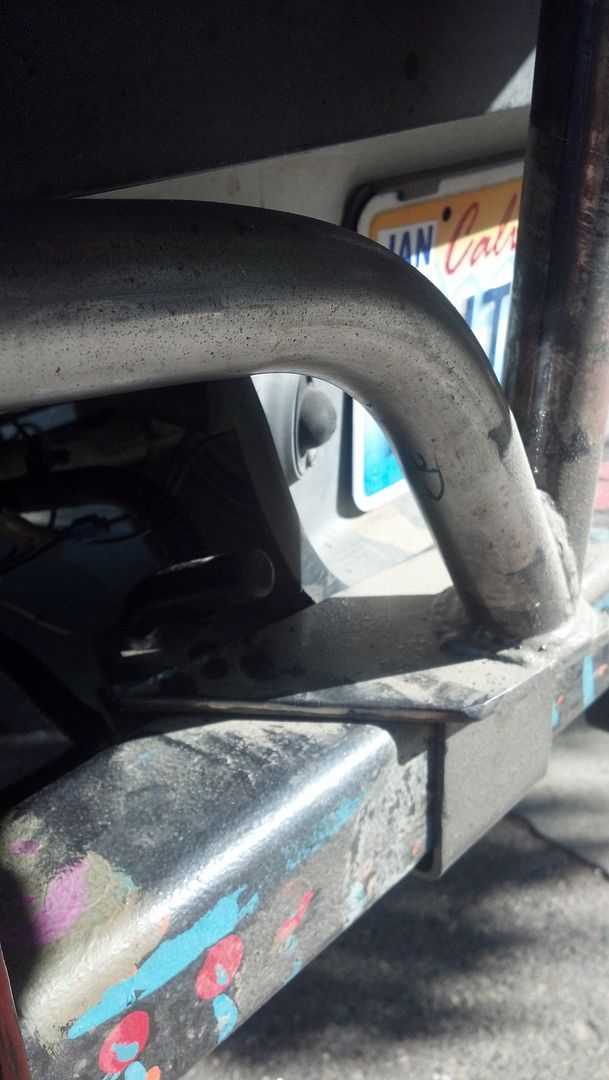
Closeup of mine just for reference using standard hitch pin. Capture is around the bumper. When I slide it on it's just barely scuffing the paint. Noise means movement and you don't want that on the swingout like this. btw, i like your corner protectors for the welding spatter.

I'll play.....some here may not frequent the 4Runner section, as I have posted in there already.
I turned down a rather large stud to 1.5" and threaded the end a bit. Made a sleeve out of an even larger stud, and a couple bronze bushings for the top and bottom.


My closing latch is real sophisticated.....

So far so good, once it was pumped fill of grease it made the hinge smoother and easier to swing.
Not sure what the breaking point will be, as I can support my whole body on this thing when it swings out, but the whole 4Runner leans quite nicely when it's open just with the weight of the tire.
Only downside so far is that my latch pin makes for some rattling when driving. It's not noticeable going down the highway and even around town, there are so many other noises from the vehicle that the pin rattling doesn't bother me.
ssapach
Adventurer
Well done on your execution. The bronze bushing is a great addition.
In general with greaseable bushing, moreover those exposed to direct sun, is to check or pump more frequently. The grease (depending on selection) will more easily heat up and flow out.
For your latch, you did a great thing capturing in double shear the motion that is fore/aft (open/close) direction. That is an important load direction. The largest amount of forces are generated in the vertical direction. Since you have the gaps there on the end, I highly suggest you do a full capture. Pretty simple with how you already are and basically just add material to shim the bottom (mostly) and top such that you end up with a 1/16" gap. This will give you full capture in the vertical direction such that it's a rigid connection all across now and into the bumper. Staying currently will eventually fatigue your welds and the nice spindle you made. Bronze may go first b/c of being much softer.
I get what you're saying about supporting the latching end. I was hoping that if I add some shims on the lower side to keep the whole thing nice and tight, that the rattling would also be dealt with.....well most of it, I think the pin will still rattle a little.
Just wasn't sure if I should weld a block of steel in there with a little bit of a wedge shape to it, or maybe use something softer that can be replaceable if it wears out.....
I'd assume its rattling because the tire is acting like a giant lever, maybe some sort of rubber wedge between the hitch and swing out so that its slightly more difficult to close but might not sway as much...?
amgvr4
Adventurer
I hope you don't mind me stealing this idea so I can have mine stay open when I'm parked off-level..
Go for it, I can't claim to be the first to use that idea, though I did source my pull pins from McMaster carr and not TMR customs where I first saw them. TMR wanted $2 more per pin and shipping alone would have been $20 for just two pin assemblies!
I'll play.....some here may not frequent the 4Runner section, as I have posted in there already.
I turned down a rather large stud to 1.5" and threaded the end a bit. Made a sleeve out of an even larger stud, and a couple bronze bushings for the top and bottom.


I wish I would have thought of something like this, it would have saved me $80. Good idea man!
Build thread here: http://www.expeditionportal.com/forum/showthread.php?t=118578
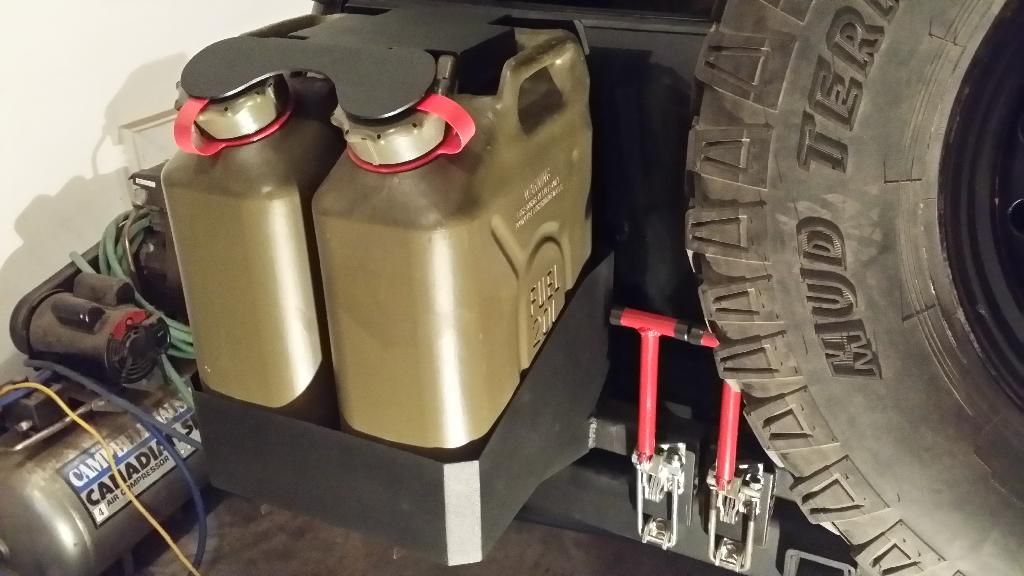
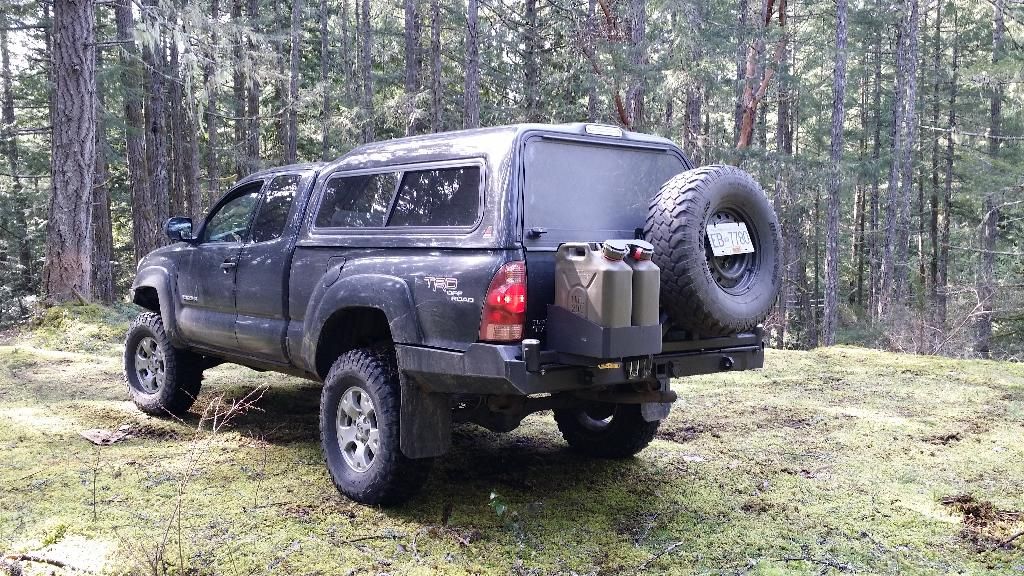
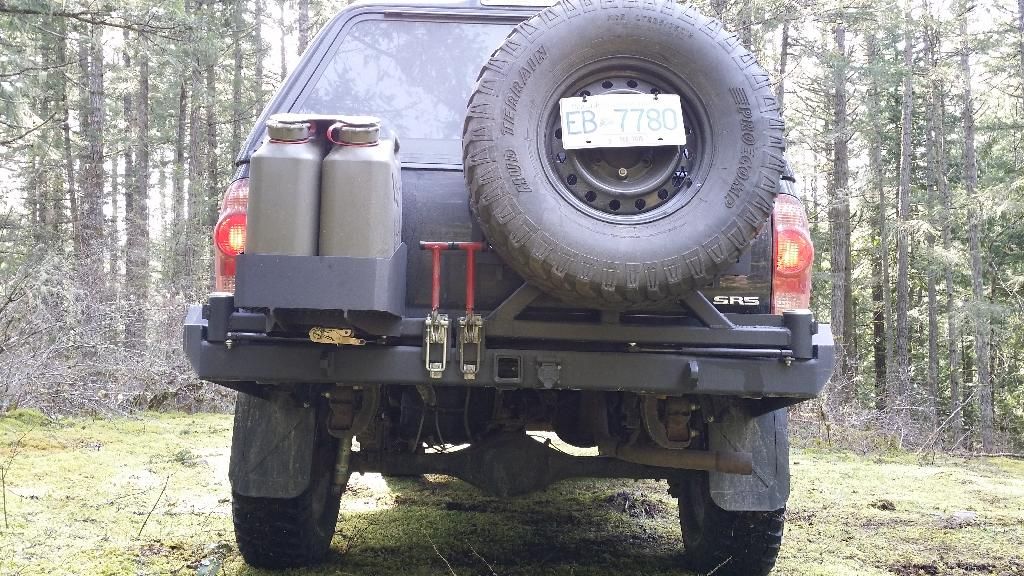
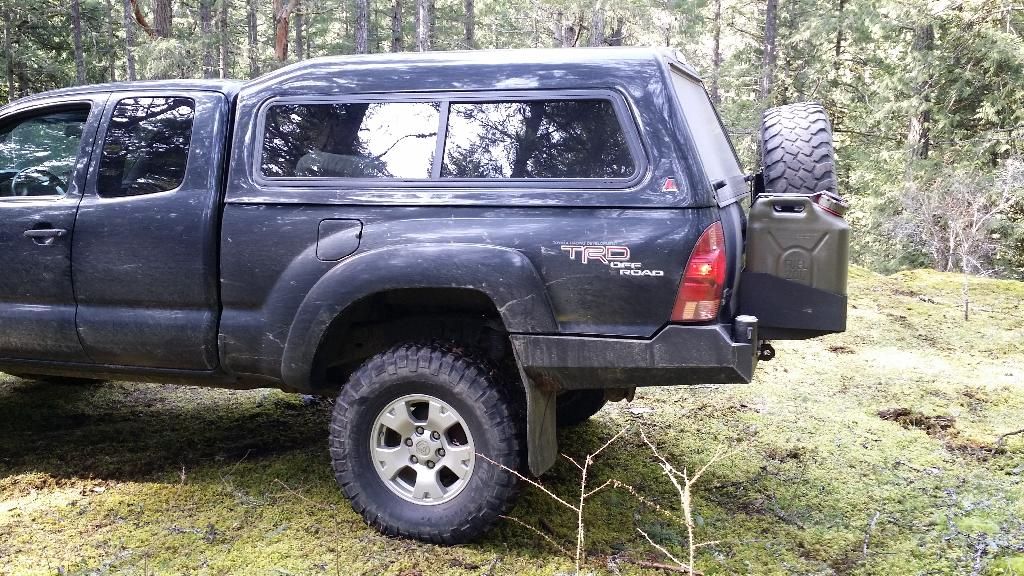
Sent from my SM-N900W8 using Tapatalk


Sent from my SM-N900W8 using Tapatalk
Luckychase5
Adventurer
Build thread here: http://www.expeditionportal.com/forum/showthread.php?t=118578
Sent from my SM-N900W8 using Tapatalk
Very cool build! I like your gas can carrier. My swing out will be similar, so far I'm not going for a tire carrier but maybe in the future.
Thanks for all the help, ideas and inspiration everybody !
Luckychase5
Adventurer
Mine is working great. I built my arm a little light - I used 2X2" 1/8" tubing so it flexes a bit. I put a piece of angle on the latch side for support and it's doing fine. It's been on there for over 2 years.


Here it is before powder-coating, to show some details.

Nice looking bumper! And thanks, just placed my order with McMaster. Also,what is the wall thickness of the 2" tube you are using? And what kind of latch are you using? looks nice and beefy. Thanks for the info!
Last edited:
98OzarksRunner
Adventurer
Nice looking bumper! And thanks, just placed my order with McMaster. Also,what is the wall thickness of the 2" tube you are using? And what kind of latch are you using? looks nice and beefy. Thanks for the info!
Thanks. The latch is the one maxterra used in post 46 in this thread. http://www.expeditionportal.com/forum/threads/36482-Tire-Carrier-Hinges-again/page5
The 2x2 tubing is 1/8". I'd recommend 3/16" or go with 2x3 tubing on the long arm for more rigidity.
BTW the bumper was built from a factory trailer hitch.
Here's my homegrown dual tire carrier.
Hinge Parts From McMaster-Carr
#91257A969, 1" Dia. Bolt, 6" Length, Grade 8
#97135A038, 1" Locknut, Grade 8
#98023A038, Flat Washer, Grade 8
#6338K439, Bronze Flanged Sleeve Bearing, 1 1/4" OD, 1" ID
#91712A119, Weld-in Pull Pin
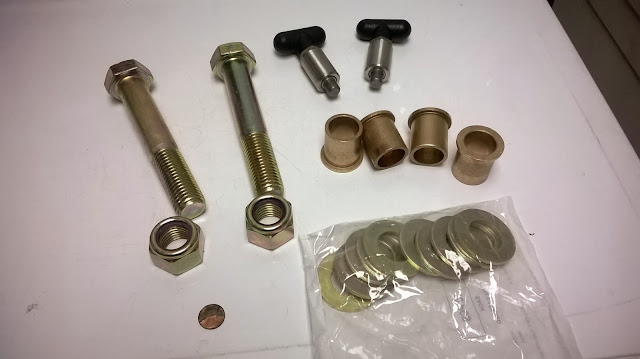
Pull pins for secondary latches. McMaster-Carr #90293A313, Quick-Release Pin, 3/8" Diameter, 2" Length

DeStaCo latch #341-R, 2000 lb., horizontal pull

LED trailer lights (I ended up not using the "arrow" turn signals).

Bolts pass through DOM tubing into which bronze bushings are pressed. DOM is 1 3/4" OD X .250 (1 1/4" ID).

Bushings being pressed in.
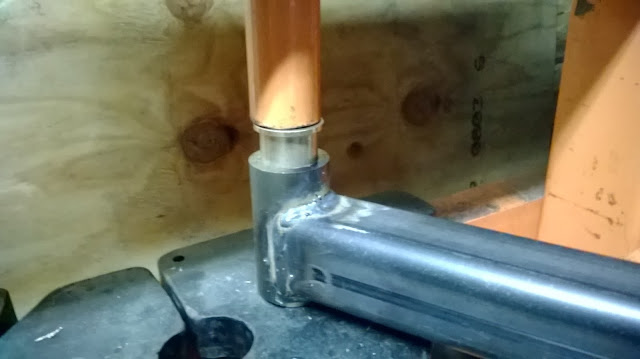
Swing arm is 2" square tube, 1/4" wall. Hinges brackets are double shear and made from 1/4" plate. Bumper body is 2X6 square tube, 3/16" wall.


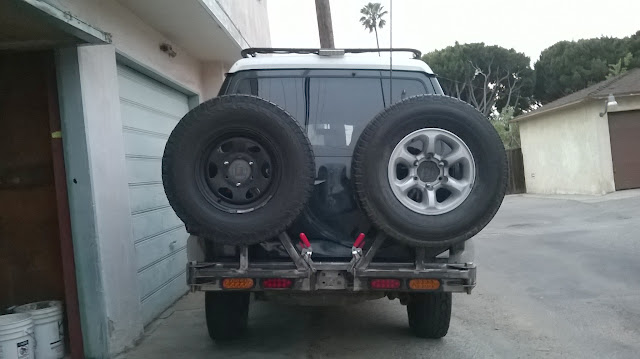
Slides are just pieces of cutting board.

Primary and secondary latches. Pull pins can be replaced with padlocks to lock the arms shut.
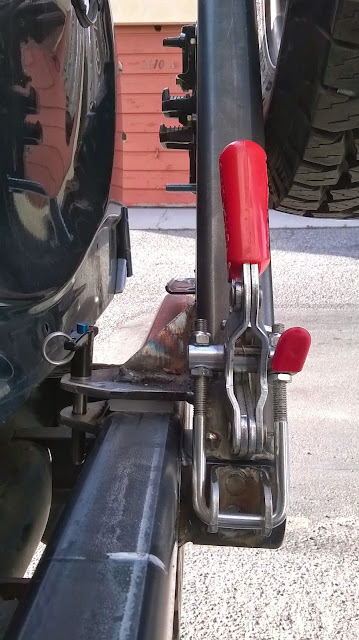

Painted in Rustoleum spray-on bedliner.

Hinge Parts From McMaster-Carr
#91257A969, 1" Dia. Bolt, 6" Length, Grade 8
#97135A038, 1" Locknut, Grade 8
#98023A038, Flat Washer, Grade 8
#6338K439, Bronze Flanged Sleeve Bearing, 1 1/4" OD, 1" ID
#91712A119, Weld-in Pull Pin

Pull pins for secondary latches. McMaster-Carr #90293A313, Quick-Release Pin, 3/8" Diameter, 2" Length

DeStaCo latch #341-R, 2000 lb., horizontal pull

LED trailer lights (I ended up not using the "arrow" turn signals).

Bolts pass through DOM tubing into which bronze bushings are pressed. DOM is 1 3/4" OD X .250 (1 1/4" ID).
Bushings being pressed in.

Swing arm is 2" square tube, 1/4" wall. Hinges brackets are double shear and made from 1/4" plate. Bumper body is 2X6 square tube, 3/16" wall.


Slides are just pieces of cutting board.

Primary and secondary latches. Pull pins can be replaced with padlocks to lock the arms shut.


Painted in Rustoleum spray-on bedliner.

Last edited:
Weekender41
Ready to Learn
Not the Prettiest
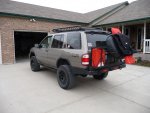
That is the final version.
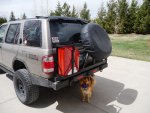
A little closer photo.
`
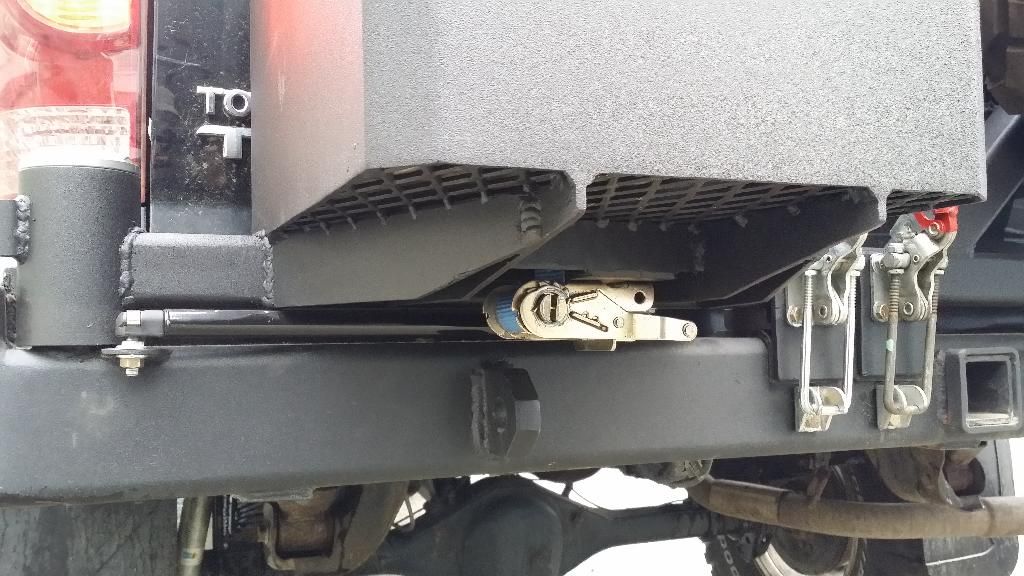
Im working on making a way to keep it in a locked open position. It closes with a linch pin
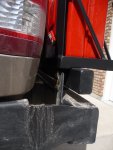
The linch pin goes through that straight pin which is welded to the swingarm. The flat plate has a hole cut just large enough for the
straight pin to go through, this prevents the swing arm from any motion up and/or down while driving. On the other side of the flat
plate are two rubber bushings that have to be pressed with vigor in order for the linch pin to go through the straight pin. This
prevents any movement forward or back while driving. Some have asked about the linch pin opening and falling down... Where this
would be incredibly rare if the spring was to open somehow while driving, the pressure created from the pressed bushings would hold
the pin in place.
`
That being said, I do check to make sure it is there when I fill up and I carry extra bushings and linch pins just in case.
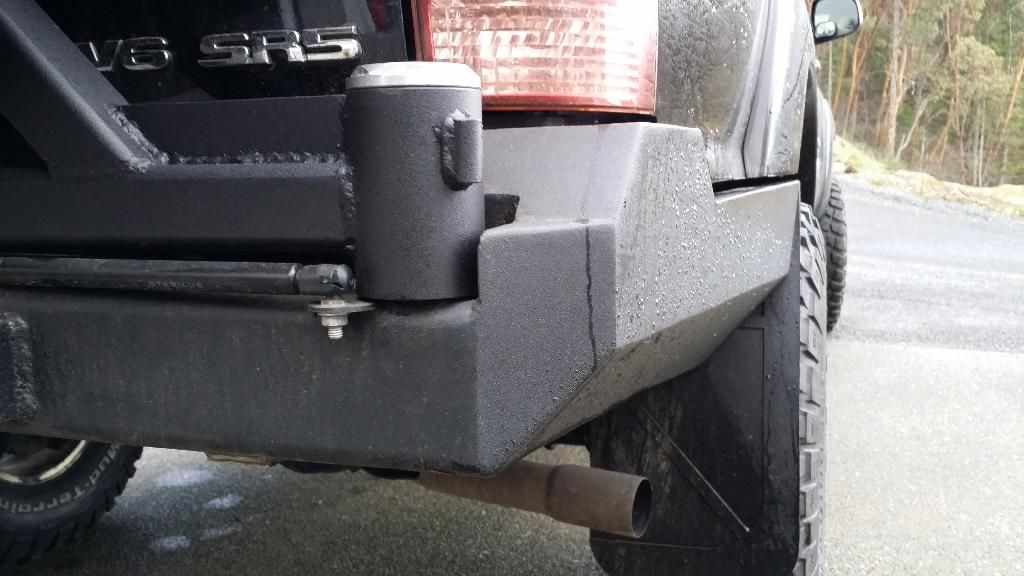
The biggest thing for me was to not have to move my license plate. It is in between the jerry can and the tire holder. Instead of using
the normal 4 screws to secure it, I am using just the two on one side since the license plate is shifted to the left. Grip tape was added
to the top surface of the bumper as well.
`
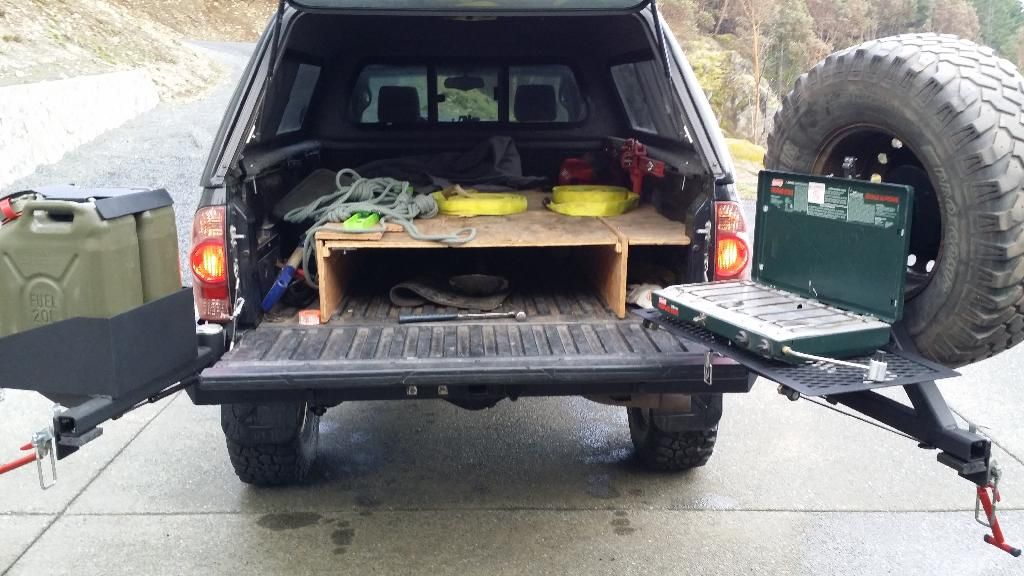
I have a aluminum box the same size as the jerry can that holds by recovery gear if I head out on a trip where the extra fuel is unnecessary.
The jerry can holder is lined with foam weather-stripping to prevent rattles or movement of the can/alu-box.
`
Cheers

That is the final version.

A little closer photo.
`
Im working on making a way to keep it in a locked open position. It closes with a linch pin

The linch pin goes through that straight pin which is welded to the swingarm. The flat plate has a hole cut just large enough for the
straight pin to go through, this prevents the swing arm from any motion up and/or down while driving. On the other side of the flat
plate are two rubber bushings that have to be pressed with vigor in order for the linch pin to go through the straight pin. This
prevents any movement forward or back while driving. Some have asked about the linch pin opening and falling down... Where this
would be incredibly rare if the spring was to open somehow while driving, the pressure created from the pressed bushings would hold
the pin in place.
`
That being said, I do check to make sure it is there when I fill up and I carry extra bushings and linch pins just in case.
The biggest thing for me was to not have to move my license plate. It is in between the jerry can and the tire holder. Instead of using
the normal 4 screws to secure it, I am using just the two on one side since the license plate is shifted to the left. Grip tape was added
to the top surface of the bumper as well.
`
I have a aluminum box the same size as the jerry can that holds by recovery gear if I head out on a trip where the extra fuel is unnecessary.
The jerry can holder is lined with foam weather-stripping to prevent rattles or movement of the can/alu-box.
`
Cheers
Similar threads
- Replies
- 21
- Views
- 13K
- Replies
- 3
- Views
- 2K
- Replies
- 0
- Views
- 4K
- Replies
- 22
- Views
- 6K
- Replies
- 19
- Views
- 15K

