Herbie
Rendezvous Conspirator
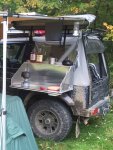
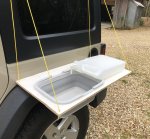
I am 100% about reducing the "hassle factor" and anything that contributes to making/breaking camp take longer. I've eliminated a lot of wasted effort, but one of the steps that still burns a lot of time is the setup/teardown of our kitchen. I've gone through a lot of iterations and each has been either faster, lighter, or both, than the last, but I think I can do better. I'm considering breaking my "minimize stuff outside the vehicle" rule and just mounting a small chuckbox/workstation to the rear door of the van. I've seen a few externally-mounted kitchens here (mostly on trailers), but I want more ideas!
Background:
I've got some considerations that seem to be uncommon in the van/expo crowd:
At the moment, this is my basic setup:
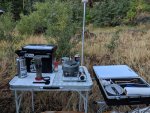
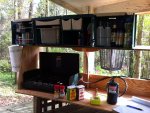
It consists of (1) a small electronics case with one burner and all the pots/pans/tools, (2) a small file box which contains only the kettle and coffee kit, and (3) a coleman pack-a-way camp kitchen.
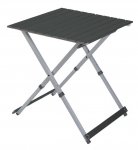
My key complaint with this setup is that the coleman kitchen requires a couple of minutes to setup/tear down, and it's "fiddly". Prior to assembly, the coleman is the "suitcase" plus 9 additional small parts: the main suitcase table has four lower-leg pieces that need to be slotted into the upper legs, then the table latched "open". The side-extension unfolds and origami's into a stand where two stretchers are then added to make a quasi-stable place to keep the box of kitchen tools. Finally the two-piece lantern hanger has to be assembled and strapped into place (or set aside to not get damaged/dirty). All told, I'd say this takes about 8-10 minutes to setup or take down, and success at keeping all the little pieces out of the dirt depends on either having helpers or another flat surface to work on during assembly. None of this is terrible, but it's just enough hassle that I would never consider setting up the kitchen for a quick lunch stop, for example.
I keep the coffee kit in a separate box so it can live inside the living space of the van. On trips when I'm alone, I can stow the bedding and upper bunk hardware so I feel safe enough boiling water inside. When the family is along (and usually sleeping in), I can easily grab the coffee box and jump outside the van to make the 1st cup.

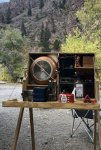
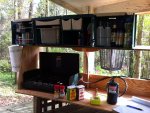
Previously, I had a self-contained chuckbox and workstation in a tool box that setup on a modified folding sawhorse:
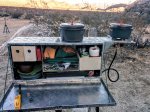
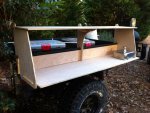
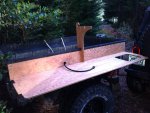
This particular unit was too big and too heavy, and the sawhorse was almost as much hassle to setup as the coleman camp kitchen. That said, it was convenient as hell, and it's got me thinking about building a smaller version of this that could be mounted to the rear door. I've run the numbers, and even though an aluminum truck box is heavier than the plastic case I'm using now, it would be overall lighter in the vehicle since I could eliminate the coleman kitchen as well. There are some down sides - loss of portability, and it forces me to work near the back of the van which isn't as well protected from sun and bad weather. (With the coleman and plastic case I can sort-of work under the awning if needed, though I still need to be careful about heat vs. the awning material.
So, do you have a camp kitchen setup on the outside of your vehicle or trailer? Do you have a different kitchen setup that's super quick to setup and tear-down? Show it off.
Background:
I've got some considerations that seem to be uncommon in the van/expo crowd:
- I don't cook inside the van. Technically I can heat water in there (see below), but between fear of fire and the general issue of smoke and fat/water vapors, I don't cook inside.
- I don't want to have to open up the rear doors of the van to cook either. It's very #vanlife to have a kitchen built into the rear hatch area with drop-down tables on the door(s), but our lower bed goes right up to the back door and my wife likes to sleeps in. Forcing the Mrs. to enjoy the cool morning air and sunlight just so I can make coffee is a bad idea.
- I do own and use lots of other cooking gear that is more involved to unpack/repack, but there are a lot of times when we're moving fast and I just want to be able to do some basic meal prep without a whole involved setup.
At the moment, this is my basic setup:

It consists of (1) a small electronics case with one burner and all the pots/pans/tools, (2) a small file box which contains only the kettle and coffee kit, and (3) a coleman pack-a-way camp kitchen.
My key complaint with this setup is that the coleman kitchen requires a couple of minutes to setup/tear down, and it's "fiddly". Prior to assembly, the coleman is the "suitcase" plus 9 additional small parts: the main suitcase table has four lower-leg pieces that need to be slotted into the upper legs, then the table latched "open". The side-extension unfolds and origami's into a stand where two stretchers are then added to make a quasi-stable place to keep the box of kitchen tools. Finally the two-piece lantern hanger has to be assembled and strapped into place (or set aside to not get damaged/dirty). All told, I'd say this takes about 8-10 minutes to setup or take down, and success at keeping all the little pieces out of the dirt depends on either having helpers or another flat surface to work on during assembly. None of this is terrible, but it's just enough hassle that I would never consider setting up the kitchen for a quick lunch stop, for example.
I keep the coffee kit in a separate box so it can live inside the living space of the van. On trips when I'm alone, I can stow the bedding and upper bunk hardware so I feel safe enough boiling water inside. When the family is along (and usually sleeping in), I can easily grab the coffee box and jump outside the van to make the 1st cup.

Previously, I had a self-contained chuckbox and workstation in a tool box that setup on a modified folding sawhorse:

This particular unit was too big and too heavy, and the sawhorse was almost as much hassle to setup as the coleman camp kitchen. That said, it was convenient as hell, and it's got me thinking about building a smaller version of this that could be mounted to the rear door. I've run the numbers, and even though an aluminum truck box is heavier than the plastic case I'm using now, it would be overall lighter in the vehicle since I could eliminate the coleman kitchen as well. There are some down sides - loss of portability, and it forces me to work near the back of the van which isn't as well protected from sun and bad weather. (With the coleman and plastic case I can sort-of work under the awning if needed, though I still need to be careful about heat vs. the awning material.
So, do you have a camp kitchen setup on the outside of your vehicle or trailer? Do you have a different kitchen setup that's super quick to setup and tear-down? Show it off.

