Hey all,
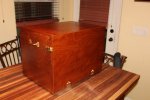
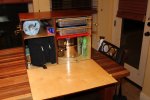
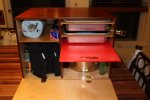
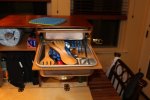
I recently went on a mission to build a suitable chuck box / camp kitchen to fit in the back of my JKU. It was a fun journey, and I learned a lot. Some of it might even be worth sharing. It is possible that the purpose of my life is to serve as warning to others... and perhaps even inspiration to a few. I promise, for those of you who live by the pics or it didn't happen mantra, pics as soon as the camera finishes charging.
So, every design starts with intent and assumptions:
I got away quite happily for several years using a small action packer for a kitchen. But... everything had to come out every time, and always ended up piled up on the ground. Not very fun to deal with. In addition, I had a very nice, but not very cooking friendly, set of Stansport non-stick pots and pans. They would be okay for backpacking with a large group, but I wanted something more substantial for "real" cooking. Thus, my wife collaborated with Kris Kringle and a new set of Magma cookware showed up at our house around Christmas time.
I wanted to build a chuck box that had the following design elements:
1) Fit between my ARB Fridge and the other side of my JKU on the cargo slide that I built for the back.
2) Fit water jugs behind (between back seats and the back of chuck box).
3) Hold a roll of aluminum foil and a roll of paper towel.
4) Hold my new pots, and all other assorted kitchen utensil except for Dutch Oven (that is only occasionally along for the ride).
5) NOT intended to hold stove or fuel.
6) NOT intended to hold water or water filtration.
7) NOT a pull-out permanently mounted system. I like to cook away from the car.
7) Be light enough I can lift it in and out of the car easily.
8) Have some sort of handles that would allow it to be strapped down.
9) Have space above it to store dry goods or other gear between the box and the shelf above it.
10) Be small enough to fit in bear boxes in public campgrounds.
11) Have a door that folds down to create a work surface.
12) Look decent, not perfect, but if I'm investing time and money, it should look decent.
13) This is NOT a "budget build" although I try to make reasonable value choices.
So I thought long and hard about building from sheet steel or aluminum. Both of those would allow the maximum interior space for the overall volume occupied. Ultimately I rejected sheet steel because I don't have a nice box/pan brake, and couldn't really justify the cost of one for this project. I also rejected aluminum for similar reasons, and the consideration that I barely (barely) have TIG skills, and certainly don't have them for aluminum. I was also concerned about the aluminum powder that seems to build up in the bottom of my truck toolboxes, I'm thinking that could be possible in an aluminum chuckbox too. In the end, I chose 3/8" Baltic Birch Plywood. It is lighter per square foot than 0.125 aluminum, more workable with my current skill set, and has a really good classic look when finished with black cherry stain and brass hardware. I'll go over more of the wisdom(?) of that choice when I get to lessons learned. There were definite pros and cons to that choice.
More to come... this might be a slow string of posts... pics soon.

