hiya
Thank you for the replies
")
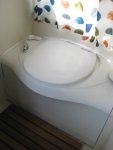
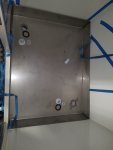
So, I bought a sheet of 316 stainless of about 1.5mm thick. At about 8'x4', and since I'd rather have bends than welds where possible, the sides ended up being more like 140mm high ish. 140 + 140 + 900 plus a bit for the bend. I do have a chunk of the sheet left and I could have cut that up for higher sides with more welds, but the lifted floor plus door threshold makes this about right as is.
I did want all sides to slope a little, but the reality of putting it in a bending machine meant only one pair of sides could slope. Otherwise one sloping side would clash with the other during bending.
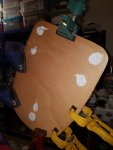
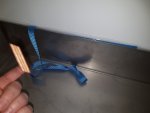
It is quite a snug fit which is good, max 10mm big each way. I've put it on small stacks of ply to lift it about 100mm to clear a standard domestic shower trap in two corners.. There's also a sheet of ply across them to help the steel span between stacks. I wondered if an imprint of those pads would end up showing through the steel in time.
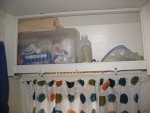
The gaps between stacks allow services underneath, like mains and 24v supplies, spare ducts, Eberspacher flow and return, plus waste drain runs. The Eber hot pipes, plus the venting around those runs will help to keep it dry. They also allow a hand to get back under for drain fitting maintenance if needed.
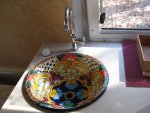
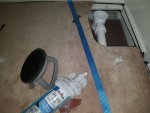
I asked the fabricator to cut holes slightly bigger than the top of the trap fitting, then weld that back on underneath to end up with the top of the plughole a tiny bit lower than the surroundings, so no puddles, but he dished it instead. That is a good solution, but his finishing has left that area looking different to the rest which I was thinking would be left as is.
But I might try a random sanding pattern to both hide that and make it less slippy.
I dropped it in to make sure it fitted, thinking I could put my fingers in one of the plugholes to lift it up again. I could, but because the hole is offset the tray twisted, that side came up the otherside dug in. I used a dent puller/glass carrying sucker to give a more even pull and got it up.
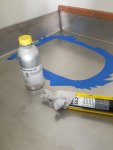
I've put some non-setting Sika type stuff in a few blobs underneath, and run some straps around from one side to the other to get it up again if I have to. A little excess of that has been siliconed in place along the edges that will be out of sight but just about accessible with a pokey stick or knife.
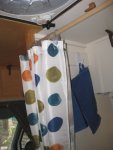
I'll cut some ply with an angled cut top and bottom to direct shower water off the wall and then create a drip away from the tray top edge.
Two drains, but it's flat. I don't really see the point of making a fall because unless the fall is huge at some point how we're parked will keep water at the wrong end. So most water will find it's way out, the last bit will be squeegied like it would have been anyway.
Another hopefully good idea is to have the drain into the grey tank on the opposite side of the tank to the shower. Then if the vehicle is leaning toward the tray the drain entry is at the other dry above tank water level side so no back flow.
I only put some blue tape on the walls for the second fitting, the first try scratched the walls a bit

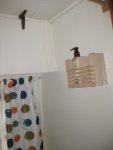
Sika tell me I can glue ply to stainless using 552, so I have countersunk bolts poking from the back of 18mm of ply cut to the toilet profile that will go up into the underside of my Separitt toilet, ply glued down hiding the bolt heads, threads poking up to receive the loo. The countersinking was done with a drillbit smaller than the bolt head, so tightening the bolt pulled the head into an interference fit in the ply, plus Sika around that too so hopefully thsy won't spin. I can double up on the nuts so they hold gently down onto the plastic of the loo, but then the second nut tightened hard onto the first locking it in place.
I haven't finished yet so a few more pics might follow later. That will probably explain it better than all these words anyhow
Jason