Switcheroo - 1 Bored Clerk's 2013 Tacoma Build

1 Bored Clerk

Explorer
Tools - Round 1

I have already introduced you to my new toolbox: Senior FatMax so now I'm going to start actually putting stuff into it. I know what you're thinking...who is this clown that doesn't have a vehicle toolkit ready to go? Lesser man? Clueless? Well, maybe. But that's not why I don't already have a good vehicle toolkit. When I sold my FJ Cruiser in 2010 (or so), I didn't have a 4wd truck for the next three years...but I did get a KTM 690R motorcycle and a 2wd Ford Ranger. So, my previous toolkit for the FJ was raided to supplement the home/shop tools as well as my motorcycle tool box. Turns out my moto toolkit can do quite a bit of work on anything metric. However, it has gotten very specialized for my motorcycle. :bike_rider: So, time to build a new kit for the truck that is more specific to truck duties. :smiley_drive:

I've always had GREAT luck with craftsman tools...breaking a grand total of two tools in my entire life. Oddly, I broke them both on the same bolt one right after the other. I was loosening one of the bolts on the transmission to rear diff brace on my turbo miata several years ago and broke the socket...grabbed a new socket then immediately broke the 3/8" breaker bar. I did get the bolt loose but was surprised to break two tools at once like that. Cursed bolt was my guess.

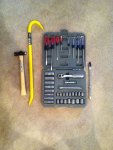
So, I made my first of several tool purchases today
IMG_0854.jpg

Stanley 24" wrecking bar - Always handy to have something that can do a lot of crude work quickly
Screwdrivers - Straight slot and phillips. If you don't know why you need these, please step away from the toolbox
Metric Socket set - All 3/8" drive. I didn't want one of the kits with 1/4, 3/8, and 1/2 drives because I have a set like that for my home toolkit and it interrupts my flow when I have to have three different handles for my sockets...and then switch from this to that to the other...ugh. SIMPLIFY!
3/8" Breaker Bar - you shouldn't use your ratchet to break bolts loose. It's hard on them and you don't get as much leverage.
Ball Peen Hammer - Sometimes things need to be peened? Or just be bashed on...precisely.

I have a lot more on my list but this is my start.
 

1 Bored Clerk

Explorer
Auxiliary Fuse Block - Parts and Pieces

I'm going to be adding some power drainers to my truck so I need a place to hook them up and be protected. I'm not a fan of tapping into factory wiring harnesses if at all possible so I'm going to put in an auxiliary fuse block. This system has been well documented in the Tacoma world so i have a lot of info to refer to when I actually start putting this together.

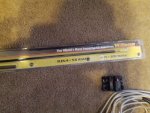
IMG_0856.jpg
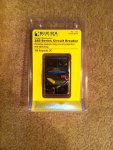
100 Amp circuit breaker
IMG_0857.jpg
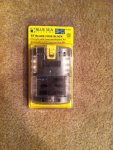
6 fuse block
IMG_0858.jpg
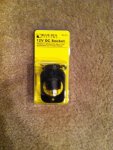
12V outlet - I like this because it gives me some options that I like for its intended purpose. More on that in a later post...
IMG_0859.jpg
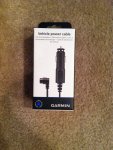
Garmin power cord for my 60CSX - I'll cut the 12V plug off the end of this and use that to wire into the fuse block

I still nned wire, connectors and various other bits and pieces but that's cool. This mod will take a while. I still have to design a mounting bracket for all of this stuff anyway. I know I can buy one but I really like to make my own stuff. :)

Here's what I plan to hook to this system:

Garmin 60CSX
Midland 75-822 All-in-one CB - Have had this for years and it's fine for trail runs with the included antenna (completely hand held). I'm going to mount a proper antenna at some point.
HAM radio - Some day...
Extra 12V outlet
That leaves two spots for future 'stuff'...
 
Last edited:

Wainiha

Explorer
I want a Blue Sea setup. You going battery to breaker to fuse box right? (I'm bad at electrical).

Where does the ground go? Fuse box to battery neg. or to the frame?
 

Plannerman

Wandering Explorer
I'm about to install an aux fuse block, as well. Have you decided where you want to mount yours?


Sent via fat thumb
 

1 Bored Clerk

Explorer
I want a Blue Sea setup. You going battery to breaker to fuse box right? (I'm bad at electrical).

Where does the ground go? Fuse box to battery neg. or to the frame?

I don't fully understand electrical either. That's why I'm going to stand on the shoulders of giants on this one and 'borrow' other peoples ideas! I found a lot of these setups over on TacomaWorld that I'll use as a reference. Battery to breaker to fuse box is correct. Can't remember on the negative side...I believe it went straight back to the battery negative terminal. Then you can either run all your accessory negatives back to the blue sea fuse box or ground them near the actual accessory. I'll be working on a little wiring diagram...then I'll run it by one of the Electrical Engineers at work to make sure I'm doing it properly. :) Not sure I'm going to run relays for each accessory, I may just see about switching the whole aux fuse panel on or off rather than each accessory. We'll see...
 

galvyork

Adventurer
I just bought a 100 amp breaker and a fuse block. I will be mounting them on the drivers side on a custom aluminum bracket I made at school. 3 mount points. Two Empty bolt holes on the upper frame rail and one on the factory fuse block mount. I'll just remove the bolt and slide the bracket tab between the bracket and metal wheel well. I'm gonna run a 4 gauge wire from the battery post to the breaker and then to the fuse box. The negative will be ground to the frame.
 

1 Bored Clerk

Explorer
I just bought a 100 amp breaker and a fuse block. I will be mounting them on the drivers side on a custom aluminum bracket I made at school. 3 mount points. Two Empty bolt holes on the upper frame rail and one on the factory fuse block mount. I'll just remove the bolt and slide the bracket tab between the bracket and metal wheel well. I'm gonna run a 4 gauge wire from the battery post to the breaker and then to the fuse box. The negative will be ground to the frame.

Make sure we all get to see it when you're done! I'm still in parts collecting mode, then I'll jump into designing mode...then...doing mode! That last one is where the trouble always starts. :)
 

1 Bored Clerk

Explorer
Duractrac Update - 5,000 miles

Well, we've been hammered with snow and ice (relative to our usual 'no snow at all' winters) over the last 5 days here in town. The Duratracs have been awesome! With a 4wd, you don't always notice the 'go' portion of the equation but you ALWAYS notice the 'stop' side of the equation. We started with about 4" of really dry snow. Then transitioned to about 6" of packed snow...then to slushy crap...to crusty crap...now icy, crusty crap. These tires have tracked well and gripped really well in all conditions. Of course, I've been in 4wd for 4 straight days and that always helps but I remember how awful my FJ Cruiser was with the older GY Wrangler MT tires. That thing SUCKED in slippery conditions...at least with those tires on. I had BFG KM2's on my 4wd Ranger last year...they were 'okay' but nowhere near as good as the Duratracs on the street in rain/snow/ice. Love the siping!
 

galvyork

Adventurer
Make sure we all get to see it when you're done! I'm still in parts collecting mode, then I'll jump into designing mode...then...doing mode! That last one is where the trouble always starts. :)

Will do, I'm having issues with adding pics but I will do my best to show my final set up. But I guess I got it figured out. The one is a pic of the cb antenna and my circuit breaker the other one is a pic of my bracket for the circuit breaker and fuse box.
IMG_20140211_164036.jpgIMG_20140211_163954.jpg
 

1 Bored Clerk

Explorer
Will do, I'm having issues with adding pics but I will do my best to show my final set up. But I guess I got it figured out. The one is a pic of the cb antenna and my circuit breaker the other one is a pic of my bracket for the circuit breaker and fuse box.
View attachment 211164View attachment 211165

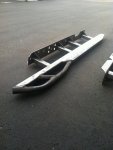
Lookin' good! I'll be working on my antenna mounts when I build my bed rack/storage dealy. It's on the drawing board and will be my next major project after my sliders/skids are done...which is very soon.

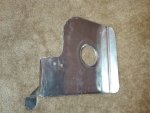
See!...very close to ready for powdercoat!
IMG_0875.jpg
 

1 Bored Clerk

Explorer
Tool Sushi - Portland Tool Roll

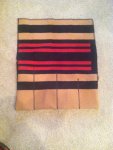
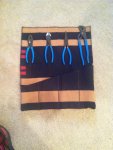
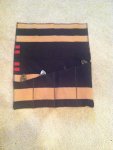
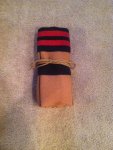
I got a few more tools for my toolbox and, since I HATE when all the tools are just loose and you have to dig through everything, I decided to divide them up and make tool rolls for different groups of tools. The first one is for my new pliers! My lovely fiance has a very nice and expansive collection of 'scrap' fabric so I dug through there until I found something cool...which, luckily, took about 2.3 seconds. :) Then she showed me how to use her sewing machine and serger and I went to town. It was almost criminally easy. I'll make one for my ratchet set soon.

IMG_0883.jpg
IMG_0880.jpg
IMG_0879.jpg
IMG_0885.jpg
:drool:

This is Pendleton Portland Collection wool. Super hipster stuff that I made slightly more manly by wrapping tools in it. Or, did I just sissy up my pliers? :eek:

Either way, I dig it!
 
I just read over the build you have started. WoW! We both think wickedly the same way about many things. I did have 1 question, maybe I am thinking it over too much, but what is the black fabric that covered the "Red stripes" in picture #2? Is it a top cover or something? Great job by the way!

Sent from my lifted UFO!
 

1 Bored Clerk

Explorer
Well, since I've been unable to post pics for the last few days...again, I figure I'll throw out some random questions/statements - Babble Machine...ON!:

I was sick last weekend so I couldn't finish up my sliders/skids. Total bummer. However, I'm feeling much better and the fiance is out of town all weekend so I will finish them up! Haha...unless I run out of shielding gas for my welder. :rolleyes:

I made my second tool roll while I was sick. It came out pretty good. It holds my socket set. Pics to follow once I can post pics again.

I have been eyeballing Warn M8000s winches (Synthetic line). Amazon has a GREAT price on them ($790ish) but they have it as 'usually ships in 1-2 months'...whatever that really means. Also, Warn is running a deal right now where you can get $100 back on that winch! Only catch is that you have to have your rebate postmarked by the end of April...and because of what you need to submit with your rebate request, you need the winch in hand by that date. So, Amazon, with their 1-2 month shipping may not get here in time. I may place my order and gamble on it anyway because the next closest price (with Warn rebate) would only be $20 less than the amazon price WITHOUT the Warn rebate. And, it's free shipping. I'm in no hurry so I guess it's a reasonable gamble. I'll probably be ready to start really planning my front bumper build when it shows up so that's another +.

On a winch side note, there is a brand new Warn Zeon 8 for sale on Portland Craigslist for $600 OBO (wont ship cuz its real heavy). That's a pretty awesome deal. I guess the box is open but the winch has not been removed.

Well, that was it. Just felt like spewing some uselessness all over the web. Have fun cleaning that up. :wavey:
 

locomacdaddy

New member
Amazon- Warn Winch

Hey! I just got my Warn 8000 winch from Amazon a few weeks ago. I'm an Amazon Prime member and I got that bad-boy in 2 days :Wow1:

I can't believe they are telling you months... your rebate will be contingent on the date of sale, not delivery. So you would still be able to get the rebate even though the UPC code (and box) won't show up for a bit. :coffee: My advice is to pony up and get Amazon Prime for 80 bucks (pay for it with the rebate)...it will be the best $80 you spend in your life! (sarcasm)

Seriously though, I use Amazon so much that I love it and as an impatient, neurotic, consumer...it's great to get your toys so quick in the mail!

Enjoying your build, but please don't make us wait for 3 months to see the winch mounted :) KTM's Rock! :roost:
 

Forum statistics

Threads
188,593
Messages
2,907,558
Members
230,704
Latest member
Sfreeman
Top