austintaco
Explorer
This project is not finished, but I thought I would post up some photos while it was raining. I borrowed ideas from Sierra Expedition's platform and Box Rocket's. When we go out on a trip, it's just me, my wife, and our two Boxers. They always ride in the cab, and after a few hundred miles they have proceeded to get hair and slobber on everything in the rear seats. We have a durable cover over the seat, but I keep my MV-50, tools, and a little other small items on the floor board. In addition, the two of them really don't have that much room to maneuver around.
After removing the rear seat, I was amazed at the amount of room in the back. However, without a seat, it gets loud from the road noise. I wanted to use the existing bolts, but I didn't want to lose the floor board space so I had to come up with some interesting cuts. BTW, I am a complete novice at wood working with only a small deck off the front of my house on my resume.
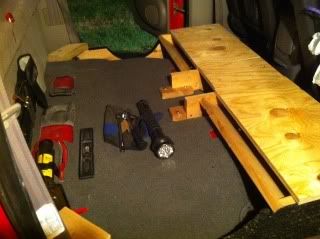
Here's a shot off the basic frame work for the platform. I don't have the main piece in place, but you can see the sides that I built off of the cupholder bolts. I tied them into the deck board that goes along the front and uses the existing front seat bolt on each side. The front has 3 cubby spots and the lids are set in place in this picture:
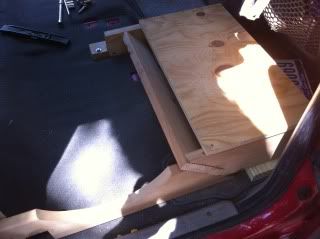
Here's a close up of the passenger side with the cubby hole lid screwed in place. It wasn't quite level, so I did this for a day to let it get the right shape. Lazy man technique, but it worked!
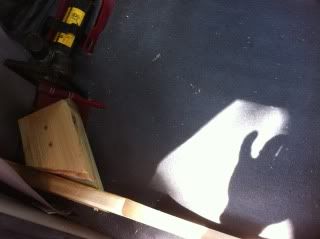
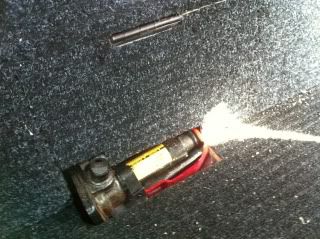
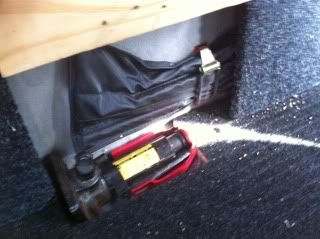
Each of the rear sides has brace that is bolted into one of the rear seat bolts. This is the passenger side:
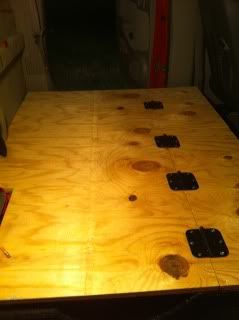
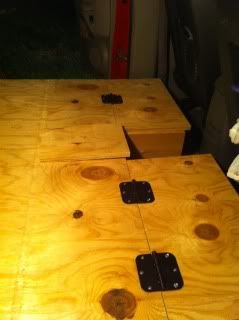
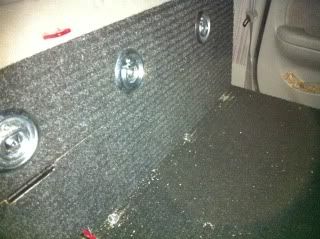
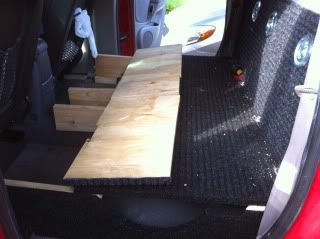
Here's how the platform looks laid out. It's not bolted in, but you can see the hinges and the basic fit. It will also be bolted in the back center with the existing seat bolt holes.
The middle cubby that will most likely have travel food items for us and the dogs:
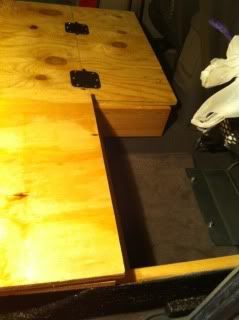
Passenger side with the door flipped back. I put the hinges on so I could flip the lids open 180 degrees if I had a large item to put on the floorboard:
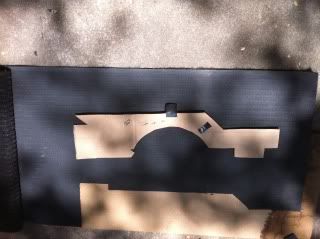
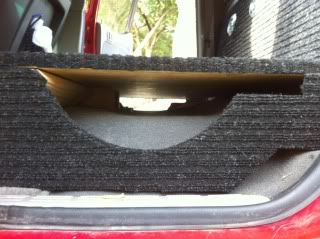
If you look at the space under the platform, I cut a semi circle so that I could stow stuff under there and be able to reach it. I thought about doing an access panel, but there wasn't that much space to access. Some recovery gear, first aid, etc..can go there and be easily reached. This is a picture of the shape of the side panel for one of the sides. I traced this onto some Home Depot indoor/outdoor carpet and applied with some staples and 3M adhesive:
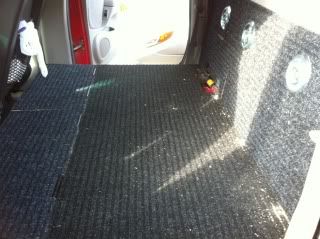
I have the platform carpeted, but I don't have a picture of it yet. For the back, I will using small eyebolts to bolt into the three catches on the back wall. The top of the back piece will make a nice spot for dog leashes, dog bags, bowls and other small items. I also bought some flush mounted tie downs that I am going to put into the main platform area, but I am waiting to see how I want to arrange everything. With the added space, I will be able to move our 5 day cooler from the back of the campershell, to the platform, and it will fit lengthwise from the the cab wall to the front seat. The dogs will have the rest of the area for travel time.
When I finish, I'll put up new photos. Thanks for all of the great ideas. Hope this helps out someone else.
After removing the rear seat, I was amazed at the amount of room in the back. However, without a seat, it gets loud from the road noise. I wanted to use the existing bolts, but I didn't want to lose the floor board space so I had to come up with some interesting cuts. BTW, I am a complete novice at wood working with only a small deck off the front of my house on my resume.
Here's a shot off the basic frame work for the platform. I don't have the main piece in place, but you can see the sides that I built off of the cupholder bolts. I tied them into the deck board that goes along the front and uses the existing front seat bolt on each side. The front has 3 cubby spots and the lids are set in place in this picture:
Here's a close up of the passenger side with the cubby hole lid screwed in place. It wasn't quite level, so I did this for a day to let it get the right shape. Lazy man technique, but it worked!
Each of the rear sides has brace that is bolted into one of the rear seat bolts. This is the passenger side:
Here's how the platform looks laid out. It's not bolted in, but you can see the hinges and the basic fit. It will also be bolted in the back center with the existing seat bolt holes.
The middle cubby that will most likely have travel food items for us and the dogs:
Passenger side with the door flipped back. I put the hinges on so I could flip the lids open 180 degrees if I had a large item to put on the floorboard:
If you look at the space under the platform, I cut a semi circle so that I could stow stuff under there and be able to reach it. I thought about doing an access panel, but there wasn't that much space to access. Some recovery gear, first aid, etc..can go there and be easily reached. This is a picture of the shape of the side panel for one of the sides. I traced this onto some Home Depot indoor/outdoor carpet and applied with some staples and 3M adhesive:
I have the platform carpeted, but I don't have a picture of it yet. For the back, I will using small eyebolts to bolt into the three catches on the back wall. The top of the back piece will make a nice spot for dog leashes, dog bags, bowls and other small items. I also bought some flush mounted tie downs that I am going to put into the main platform area, but I am waiting to see how I want to arrange everything. With the added space, I will be able to move our 5 day cooler from the back of the campershell, to the platform, and it will fit lengthwise from the the cab wall to the front seat. The dogs will have the rest of the area for travel time.
When I finish, I'll put up new photos. Thanks for all of the great ideas. Hope this helps out someone else.
")