TEJASYOTA
Adventurer
First Bud Built rocks as a vendor!
Second, THANKS to REAPER & Mrs. Reaper for hosting the January 30th TTORA WAT / BBQ!!!
On to the install....
I had ordered a front skid plate, basically the last day of 2008....prior to the price increase.
It was getting delivered by Fed Ex.
Well, apparently FedEx, forgotten how to get to my home, so they called me.
I gave the directions and went back to working on my computer.
No more than 10 Min's later, I get a call from Bud!
He wanted to know if Fed Ex called to find my home....WOW!
Now that is ultra-rare for a owner calling to make sure my stuff made it here!
Major props to Bud for doing that!
Yeah, it's RED!!!
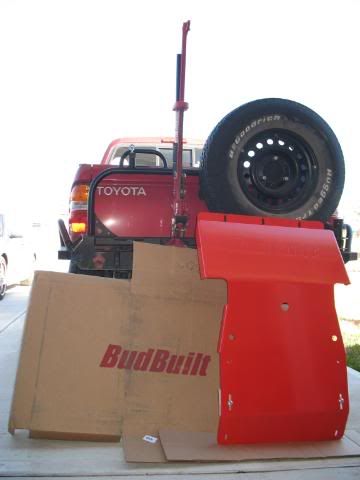
One thing I noticed, that the camera could not pick up, is that the front of the skid plate has "BUD BUILT..." engraved. So cool.
If I can find some black metal paint, I think it would be great to out line it, so it would be more visible.
THANKS BUD!!!
*********
On to the install...well my old stock skid was partly off - missing bolts and barely hanging on.
I first undid the two mounting bolts that's attached to the steering rack.
Next I dry mounted the Bud Bracket (hey I made it up) to see how it would fit.
Note that the flange will be aiming towards the rear of the truck.
Well the left hand bolt aligned fine.
But the right hand bolt did not align...infact, the flange for the bracket that holds the steering rack was really tall and interfered the Bud Bracket from sitting flush.
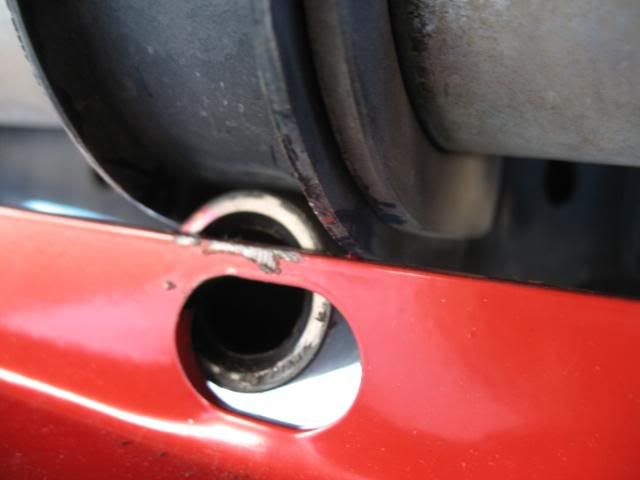
Well after getting on to Reaper's computer to view some other installs, I determined that my steering rack bracket was different than others and no one else mentioned it not fitting properly at that area.
SO...out come my Dremel tool.
A few minuets later...and one my dry fit....
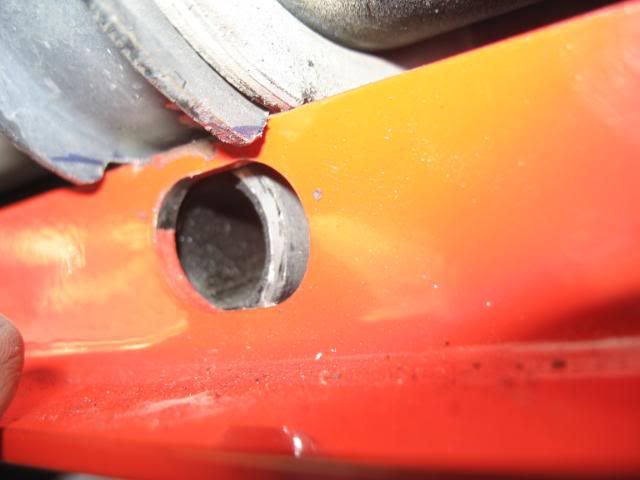
Perfect...a squirt of paint and a few more minuets of bolting down.
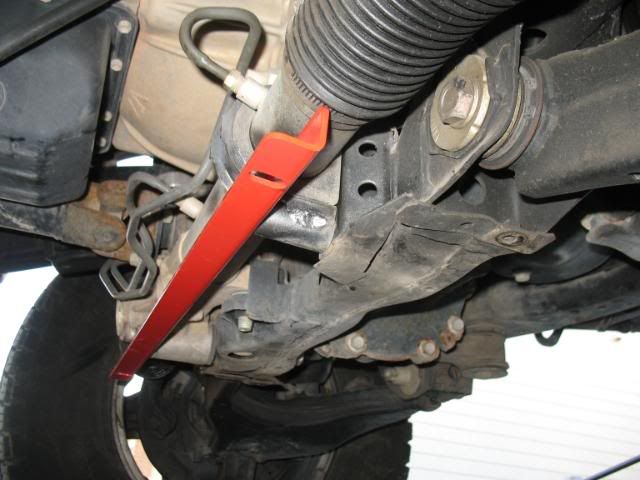
Next was to mount the main Skid Plate.
I first mistakenly tried to mount it to my ARB....wrong hole pattern. :banghead:
I then realized it was to hook up to the front cross member that is really thin and not structurally sound.
A washer was placed under the head of the bolt and under the base of the nut.
The use of additional washers is to help spread out the forces of the assembly.
Basically sandwiching the sheet metal between.
It bolted up fine, as you can see.
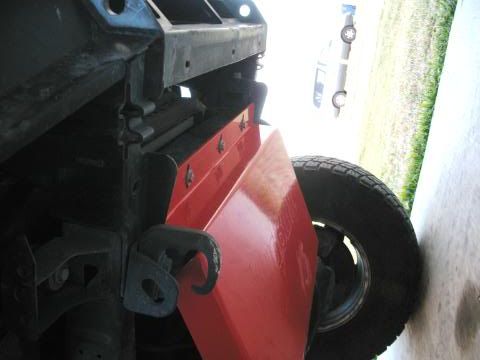
Sometime in the future I plan to change out that factory piece with something more STOUT!
Continuing on the build....
I left the bolts loose, then headed to the rear and bolted up the remaining areas.
Only one threaded hole, I had to use the supplied bolt as a thread chaser.
With some WD-40 and constant easing in and out, the thread was saved - no cross threading or flattening of the thread.
Here is the final assembly with every thing bolted down....
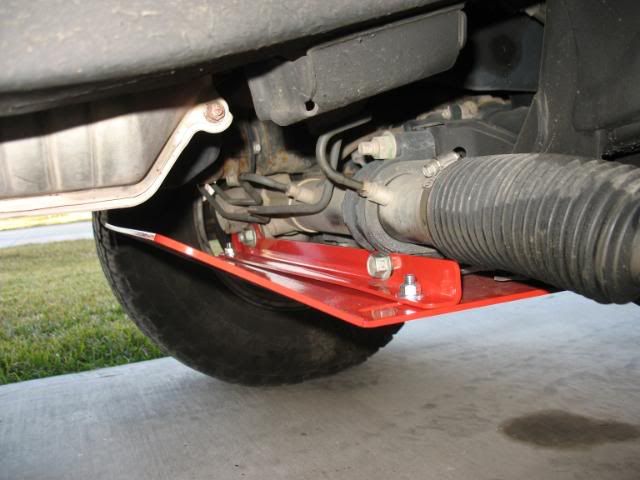
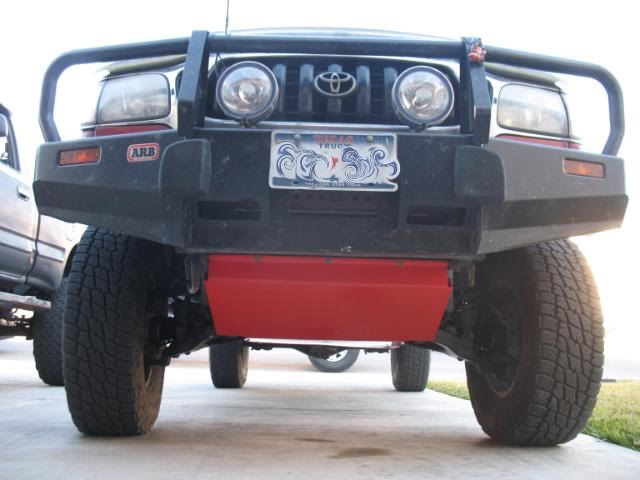
Thanks again to Bud Built for a well built skid plate and for Reaper for allowing us invade his home!
Oh yeah...I can not leave without this parting photo of Father and Son!
One last thing, I have ordered the Belly Pan and Crossmember brace.
Should arrive this month, so stay tuned.
:victory:
Second, THANKS to REAPER & Mrs. Reaper for hosting the January 30th TTORA WAT / BBQ!!!
On to the install....
I had ordered a front skid plate, basically the last day of 2008....prior to the price increase.
It was getting delivered by Fed Ex.
Well, apparently FedEx, forgotten how to get to my home, so they called me.
I gave the directions and went back to working on my computer.
No more than 10 Min's later, I get a call from Bud!
He wanted to know if Fed Ex called to find my home....WOW!
Now that is ultra-rare for a owner calling to make sure my stuff made it here!
Major props to Bud for doing that!
Yeah, it's RED!!!

One thing I noticed, that the camera could not pick up, is that the front of the skid plate has "BUD BUILT..." engraved. So cool.
If I can find some black metal paint, I think it would be great to out line it, so it would be more visible.
THANKS BUD!!!
*********
On to the install...well my old stock skid was partly off - missing bolts and barely hanging on.
I first undid the two mounting bolts that's attached to the steering rack.
Next I dry mounted the Bud Bracket (hey I made it up) to see how it would fit.
Note that the flange will be aiming towards the rear of the truck.
Well the left hand bolt aligned fine.
But the right hand bolt did not align...infact, the flange for the bracket that holds the steering rack was really tall and interfered the Bud Bracket from sitting flush.

Well after getting on to Reaper's computer to view some other installs, I determined that my steering rack bracket was different than others and no one else mentioned it not fitting properly at that area.
SO...out come my Dremel tool.
A few minuets later...and one my dry fit....

Perfect...a squirt of paint and a few more minuets of bolting down.

Next was to mount the main Skid Plate.
I first mistakenly tried to mount it to my ARB....wrong hole pattern. :banghead:
I then realized it was to hook up to the front cross member that is really thin and not structurally sound.
A washer was placed under the head of the bolt and under the base of the nut.
The use of additional washers is to help spread out the forces of the assembly.
Basically sandwiching the sheet metal between.
It bolted up fine, as you can see.

Sometime in the future I plan to change out that factory piece with something more STOUT!
Continuing on the build....
I left the bolts loose, then headed to the rear and bolted up the remaining areas.
Only one threaded hole, I had to use the supplied bolt as a thread chaser.
With some WD-40 and constant easing in and out, the thread was saved - no cross threading or flattening of the thread.
Here is the final assembly with every thing bolted down....


Thanks again to Bud Built for a well built skid plate and for Reaper for allowing us invade his home!
Oh yeah...I can not leave without this parting photo of Father and Son!

One last thing, I have ordered the Belly Pan and Crossmember brace.
Should arrive this month, so stay tuned.
:victory:
