Take The Truck's First Gen Tacoma Build

takethetruck

Active member
Figured it's time to start documenting our next adventure build before we get too far in.


Backstory:

With the addition of our second child on the horizon, Lindsey and I had to come to terms with the fact that we'd officially outgrown our admittedly always-a-bit-cramped 1984 Toyota Pickup that had seen our family through 6 years of adventures together. The transition process to a more roomy, yet (hopefully) equally capable truck wasn't going to be easy for me, having a near life-long love affair with classic Toyotas and a good bit of hesitance around traveling at length with a more modern and mechanically complex vehicle (despite their creature comforts, like cup holders). But nevertheless, onward and upward!

After considering a variety of budget-friendly used vehicles, we whittled the choice down to either an Access Cab 1st Gen Toyota Tundra with the venerable 4.7L V8 or a Double Cab 1st Gen Tacoma with the equally reliable 3.4L V6. Ultimately, the Tacoma's mini-truck-esque form factor, better overall fuel economy, and non-interference engine design won out.

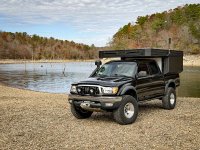
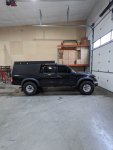
The hunt for an acceptable first gen tacoma platform was on! Like any other vehicle, the first gen Tacoma has its list of quirks, and frame rust issues were on the top of our go/no-go search criteria. Thankfully the overland gods smiled upon us, and we found and quickly procured a beautifully well-cared-for, completely-stock, never-off-roaded four wheel drive 2004 Double Cab TRD Limited with a frame so clean you could practically eat off of it.
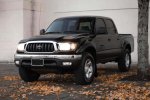
the-new-truck.jpg (before)IMG_0378.jpg (currently)

Once home, I quickly dove into getting the mechanics up to date. This included:
  • Fresh Fluids throughout:
    • Redline Front & Rear Diff Oil
    • Redline Transfer Case Oil
    • Redline 5w-30 Engine Oil
    • Redline D4 ATF
    • Toyota Coolant
    • Brake & Power Steering Fluid
  • Replaced the Timing Belt, Tensioner Pulley, Idler Pulley, Front CAM Seals and Front Main Crank Seal
  • Replaced AC Compressor, Power Steering, and Alternator Belts
  • New Water Pump & Thermostat
  • Adjusted the Valves and Replaced Valve Cover Gaskets, Cleaned Throttle body and intake and replaced associated gaskets
  • New Toyota Plugs and Plug Wires
  • Cleaned MAF and installed new Toyota Air Filter
  • Replaced Front Wheel Bearings and CV Axles with Toyota factory components (in conjunction with manual hub components)
  • New Slotted Rotors and Ceramic Brake pads
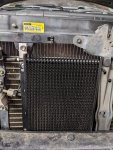
  • New Radiator
  • New Inner & Outer Tie-rod Ends, Swaybar End Links, and Steering Rack Bushings

At every turn I found little signs of past maintenance, previously replaced non-stock parts or off-brand gaskets, all signs that she’d seen her share of TLC from the previous owner.

Manual Hub Conversion

Since we were replacing the CV axles and Wheel Bearings it was a good opportunity to convert the spindles and hubs to the traditional Aisin manual-locking variant to decrease the potential for premature CV axle wear under non-off road driving (especially once the new coilover suspension is added and there’s a bit more angle on the CVs). Plus old school manual locking hubs just look rad!

New Wheels & Tires
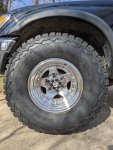
manual-locking-hubs-bfg-ko2-installed.jpg
We wanted something that had the same vibe as our old 84 Toyota Pickup’s factory SR5 steelies and found the American Racing AR23 wheels fit the bill while providing a slightly wider track and also allowing us to run a set of BFG KO2s in our favorite size: 33x10.50r15

New Stereo & Speakers
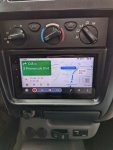
PXL_20220418_164051970-2.jpg

The stock stereo and speakers had seen better days and we wanted some modern features like bluetooth, back-up camera compatibility (for when the GFC is fitted), and the ability to use Android Auto, Apple CarPlay, or Satellite radio if we wanted. We found a Pioneer BT-160 head unit and matching speakers that were cheap and available (a rare combo we’ve found, in this post-pandemic era) at our local big box.

ARB Onboard Air Install
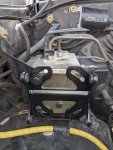
PXL_20220304_162953152.jpg PXL_20220306_161759155.jpg PXL_20220306_161807211.jpg
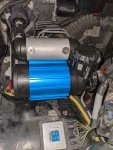
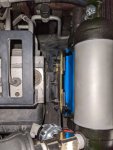
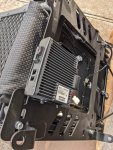
The Tacoma is equipped with ABS, thankfully it’s the less-bulky variant as space “under the bonnet” is fairly limited. I had wanted to go with the larger twin compressor but that simply was not in the cards with the real estate the ABS takes up, and after looking at methods others had used for mounting the smaller CKMA12, I was still pretty unsatisfied. Then I took a closer look at the ABS bracket and came up with a super simple mounting plan that only required drilling three small holes in the side of the ABS bracket. Just had to rotate the compressor’s mount plain and outputs and it fit like it was put in at the factory.

Toyota TVIP Security Install
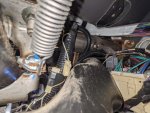
PXL_20220316_150314331.jpgPXL_20220316_224631270.jpg
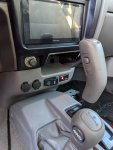
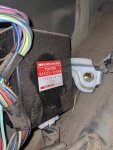
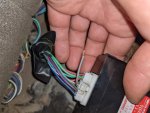
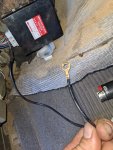
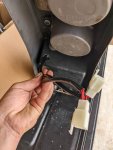
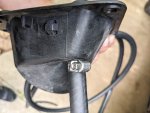
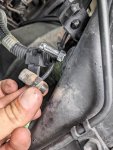
I’ve always had an affinity for Toyota’s little factory/dealer options, and the TVIP was a cool little one I’d had my eye out for as ours wasn’t equipped with it. Essentially, Toyota included the RS3200 Security ECU into any 03-04 first gen Tacoma that had keyless entry and then dealers had the option to upsell the TVIP security alarm upgrade to customers which consisted of a little glass break sensor (GBS) and LED module that plugged into an existing harness in the dash and once a single wire plug - usually white (pictured above left taped off to another harness) - under the steering column base was disconnected the security system was fully activated.

You can simply disconnect the white wire plug under the steering column and activate the security system (sans the glass-break sensor capabilities) - this is referred to as the “free alarm mod.” But I kept an eye out and managed to track down the GBS module for $40 on a FB group, wired it up, and cranked the sensitivity on the back of the RS3200 to 11. Presto! Fully functional alarm system. The RS3200 provides forced entry and glass break detection, ignition switch tamper monitoring, and starter disable when the alarm is activated.
 
Last edited:

takethetruck

Active member
The Infamous “Gray Wire” Mod
PXL_20220301_191752333.jpg PXL_20220301_195510976.jpg PXL_20220301_200942968.jpg PXL_20220301_201345706.jpg
Toyota limited the factory electric rear differential locker to only be able to be activated in 4LO. The well-documented gray wire mod is the equivalent of the Konami Code for 1st Gen Tacoma owners, allowing for the full activation of the factory rear diff locker in both 2WD and 4HI. It requires the removal of the driver-side kick panel, accessing the 4WD ECU, cutting the #8 pin position wire (which is typically gray, but not always) and connecting it to ground. Took about the same amount of time as entering the Konami Code too.

External Transmission Cooler
hayden-678-first-gen-tacoma-transmission-cooler-install.jpg
The factory transmission oil cooler in our tacoma is only a light-duty variant that is built into the bottom of the radiator, after flushing the trans and refilling with fresh synthetic ATF I monitored the trans temps using our bluetooth OBD2Link MX+. I wasn’t happy with the temps, seeing 210-215 in heavy stop-and-go traffic on one occasion, so I decided to install a Hayden 678 cooler and fabbed a piece of aluminum bar stock as a mounting bracket using the existing driver’s side horn mount and lower radiator support. I decided to route the Hayden cooler in-line after the factory trans cooler in the radiator before the oil returns to the transmission, this would still allow for warming of the ATF in cold weather.

So far, temps have remained below 175, often falling in the 150-160 range, a great improvement. The coming summer temps and a trip west into some real mountainous terrain will be the official test.


And I think that catches us up! We have a mountain of parts awaiting a home that will get sorted out once the new ADS suspension comes in and the Go Fast Camper gets installed (hopefully in that order), and I'm sure I'll find some little projects to pick away at in the meantime.
 

takethetruck

Active member
Got a few more odds and ends wrapped up ahead of our trip to Montana for our GFC install. Unfortunately, looks like our suspension components won't be in in time for the trip so we'll have to travel light on our maiden voyage. ?

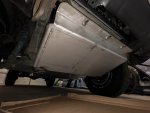
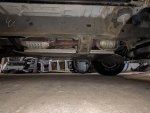
BudBuilt Stainless Skid Plates
I had originally kicked around the idea of fabbing up a custom set modeled after the set @Box Rocket made for his old first gen tacoma. But the goal of getting this truck mostly dialed in prior to the arrival of our son in August pushed me towards Budbuilt's solution. It's a solid 3-piece bolt-on kit and we're really happy with the decision. Plus not having to mess with touchup paint on the stainless will be nice too.
PXL_20220416_160437900.jpgPXL_20220416_160124679.jpg

Scheel-mann Vario F Seat Upgrade
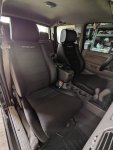
Lindsey has suffered from lower back issues for the last several years (likely not helped by tens of thousands of miles exploring and off roading in an old leaf sprung solid axle toyota pickup ?), plus neither of us are getting any younger. So we decided, reluctantly, that it was time to invest in some quality seats. We'd heard multiple rave reviews about Scheel-mann's Vario F/R seats from fellow travelers with back issues, and bit the bullet. Toby and the rest of the team at Scheel-mann USA were a dream to work with and helped get our seats to us in time for our trip.

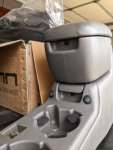
We opted for the optional heated seats, and I initially debated on tying into an existing 12v source for the estimated 10amps required. After hooking up one of the seats to our Watt Meter to get an accurate read on the "real life" power draw (as I couldn't find this info anywhere online) we found that the seats draw 20 watts/~1.5 amp on LOW and 65 watt/~5 amp on HIGH, but ultimately ended up running a new dedicated fused power source into the cab for piece-of-mind. We were able to fit the wiring and relays under the center console and found a good location there to mount the switches as well. With both seats out, this was also an opportune time to run the power, antenna, and controller cables for our ham radio too. I found a decent spot on the bottom of Planted Technologies seat bracket to mount the new Yaesu FTM-400XDR ham radio body to before bolting the seats back into the truck.
PXL_20220421_205625301.jpgPXL_20220421_205928854.jpgPXL_20220421_225633979.jpgPXL_20220422_155705628.jpg

The immediate difference in comfort with the Vario Fs is night & day, and we're looking forward to giving them a proper test and break in over the next several months.
 
Last edited:
takethetruck

Active member
Go Fast Camper Install
Took a trip up to Montana to see our friends at GFC and get our new camper installed
PXL_20220512_180327137.jpg PXL_20220512_182022325.jpg

And then boogied down to SW Utah for a couple weeks to break in the camper and give the new truck her official red dirt baptism?
20220521194016_R6__5959.jpg

Had a ton of fun despite the limitations of our very old, and very worn OG stock suspension. Thankfully the awesome folks at Durobumps had gotten us some cushy front bump stops in time to install prior to leaving and they made a HUGE improvement and helped compensate for the inadequate stock suspension.

ADS Suspension Install
PXL_20220527_161636631.jpg

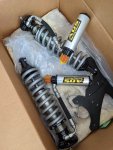
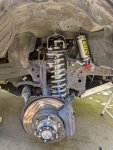
When we returned home from Utah we were met with an awesome surprise, the 2.5" Extended Travel Coilovers and Rear Shocks with Remote Reservoirs and Adjusters that we ordered from Arizona Desert Suspension in February had finally arrived! We had debated suspension choices pretty heavily, eventually narrowing it down to either ADS or an Icon Stage 5 kit; after extensive research and hearing nothing but praise from others on their ADS suspension, we threw down (their shorter than average lead-time helped too).

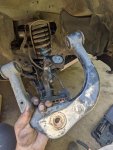
The front coilover install was very straightforward and basically bolt-in. However, the SPC upper control arm required breaking out the balljoint puller and temporarily removing the front airbag sensor brackets in order to slide out the long UCA bolts.

PXL_20220527_151510704.jpg PXL_20220527_173445674.jpg

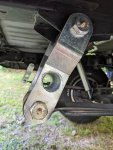
Eventually I'll be welding in a crossmember between the bed and frame for the rear shocks to be mounted on properly, but for now I managed to utilize the stock shock mount locations using some slightly longer 60mm 12x1.25 grade 8 bolts - not ideal and sacrifices a good bit of up travel but it's functional. I also installed the Icon Progressive AALs and some Daystar +1.25" greasable shackles.

original_9e70c2fb-e5c4-44d0-a115-68b50358aeb7_PXL_20220615_150245737.jpg PXL_20220615_150424689.jpg
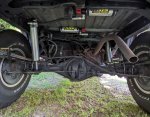
The stock exhaust is due for a cat back refresh and since it interfered with the new spring position it got the chop chop. After an alignment and a couple weeks of testing, I couldn't be more stoked on this setup and the ride improvement is incredible!
 

takethetruck

Active member
Mo Powah Bebeh!

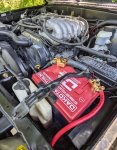
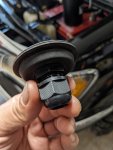
Before our trip out to Montana & Utah we bought and installed the new Dakota Lithium DL+ 135ah Deep Cycle Starting Battery, which just so happened to be a group 24 size and a literal drop-in replacement for the stock battery in the truck. We ran power to the bed of the truck using an ARB wiring kit, some MC4 connectors, and a pair of marine 12v outlets for running the fridge and charging devices, etc.

For the trip we just monitored voltage off our OBD2 Bluetooth reader and compared it to a Lithium Iron Phosphate voltage chart to make sure we were never dipping lower than 13.1v (we never even got close ;)) and carried a NOCO Boost jumper pack as backup just in case. This setup worked amazingly well! But when we got back we decided to install a Victron Energy 1000amp SmartShunt to monitor the power into and out of the battery more accurately and in more detail.

DL+-135ah-battery-shunt-monitor-power-system.jpglithium-starting-battery-installed-first-gen-tacoma.jpgwaterproof-cable-gland-tacoma-truck-bed-grommet.jpg12v-power-outlets-installed.jpg

Long story, short: we're SUPER happy with this power setup, and it has officially replaced the need for a traditional dual battery setup for our power usage and demands while traveling.
 

takethetruck

Active member
Hood Louvers!

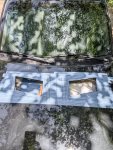
After adding the Bud Built 3-piece skid plates we noticed a slightly higher build-up of heat in the engine bay, especially in slow-moving/4low instances in the sweltering 100 degree summer heat. Despite the fact that engine coolant temps remain perfectly healthy and static at 190.4℉, we didn't want this degrading plastics or negatively impacting the under-bonnet lithium battery.

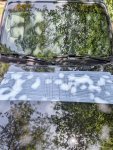
So we decided to muster up the courage and install some hood louvers to improve engine bay ventilation (and hopefully increase cooling system efficiency as well). I found this set of 12" louvers that fit almost perfectly between the hood's structural supports, broke out the reciprocating saw, and got after it.

masking-template-for-1st-gen-tacoma-hood-louvers-vents.jpg cutting-openings-for-hood-louvers-first-gen-tacoma.jpg first-gen-tacoma-hood-louvers-installed.jpg

So far it appears to have accomplished everything I had hoped it would - lowering engine bay temps by 20-30 degrees. Still curious to see the impact to cooling system efficiency, if any, on the next trip.

Safari Snorkel Install

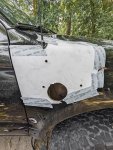
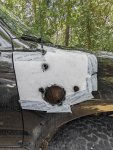
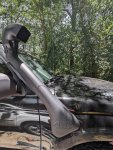
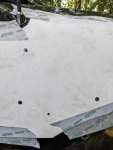
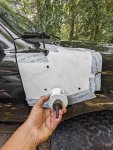
While elevated intakes are highly effective at reducing dust/debris/water inhalation by the engine, we've always despised the aesthetics. We avoided installing one on our old '84 Pickup because the carbureted intake was set very high under the engine bay just below the hood. However, the first gen tacoma's intake drafts much lower - just above the passenger wheel behind the fender well liner. After our previous trip to Utah it was apparent that we'd probably have to bite the bullet and install a "dorkel" (as our family typically refers to them) to prevent changing the factory Toyota air filter more frequently than the oil. And with the louver cutting and install behind us - what's another few holes in the body ?.

safari-snorkel-template-pilot-holes-first-gen-tacoma-install.jpg measure-twice.jpg no-going-back-now-raised-intake-install.jpg painted-openings-for-1st-gen-tacoma-snorkel-install.jpg snorkel-installed-first-gen-tacoma.jpg

....ugh :sick:. It's done. Maybe we'll throw a Sy-Klone pre cleaner on to put some lipstick on this pig.
 

takethetruck

Active member
Hidden Winch Mount & Warn M8000 Install

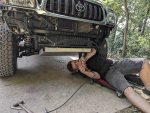
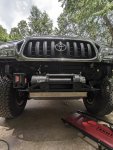
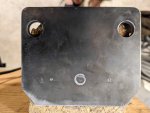
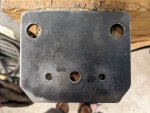
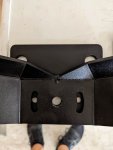
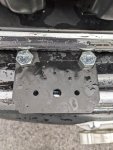
Despite the fact there's a perfectly good Trail Gear Rock Defense bumper sitting in the garage and the slightly improved approach angle it would provide, we kinda love the stock front bumper on these first gen tacos. So after a bit of digging we found an awesome hidden winch mount made by a one-man-band fab shop up in Idaho called Amp'd Up LLC. The install was a pretty straight-forward bolt-on affair, using factory recovery point and crossmember bolts - though you do have to drill & tap (M8-1.25) the mount for skid plate attachment.

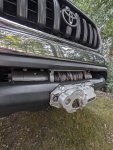
We stuck with the same tried and true Warn M8000 winch we've been running for the last decade, but opted to convert it to Warn's synthetic Spydura winch line with a Factor 55 Ultrahook this go around for the weight-reduction/safety/field-repairability benefits. We also opted to install Warn's thicker Epic 1.5" hawse fairlead to help clear the factory bumper plastics and decrease stress on the line on angular pulls.

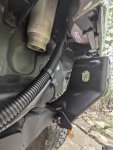
We wanted the finished look as clean and close to factory as possible, so notching the cut-out in the bumper for the fairlead was definitely the most time consuming and tedious part of the install. Also finding a suitable spot to mount the fancy new contactor-based control box where it wouldn't interfere with the stock bumper was also a challenge.

drilling-and-tapping-skid-plate-mounting-holes.jpg winch-control-box-mounting-location.jpg first-gen-tacoma-hidden-winch-mount-install.jpg running-wiring-to-battery-for-warn-M8000-winch.jpg hidden-winch-mounted-and-installed-first-gen-tacoma.jpg

In the end we were happy with the fit and finish of the install, and even happier that our lithium battery has absolutely no problem putting up with the higher-amperage power demands of the winch under load!
 

takethetruck

Active member
Let There Be Light
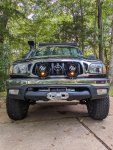
We were super impressed by the Baja Designs LP6 Pros we'd installed on the old '84 Toyota Pickup, they provided more than enough coverage for our purposes, the hi/low option was nice for tighter trails or a faster pace, and the amber running lights are pretty cool. This go around we opted for the larger LP9 Pros for no other reason other than they just seem to look better on the first gen ?.

However, since we're sticking with the stock bumper for a bit, our mounting options were either up high on the front of the GFC (not ideal, and we had concerns of glare issues in poor visibility weather), or fabricate a custom mount for the stock bumper (because the factory LP9 mounts would't fit).

We opted for the latter - I had found some old rock slider L-brackets I'd had laying around in the garage and cut them down flat to 3.25" x 4"; then we marked and drilled the mounting holes for the LP9 brackets:

first-gen-tacoma-stock-bumper-LP9-mounting-bracket.jpg LP9-mounting-bracket-drilled.jpg 1st-gen-tacoma-stock-bumper-off-road-light-mount-LP9s.jpg first-gen-tacoma-stock-bumper-off-road-light-mount.jpg

We drilled two 1/2" holes in the top of the bumper for each bracket to mount to, and used M12x1.75 bolts backed with thick 2" washers and Nylock nuts on the underside to secure the mounts. Then it was time to wire everything up!

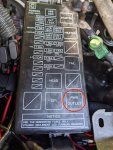
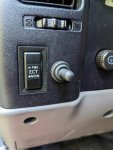
We used Baja Design's wiring harness and shortened the light leads, 12v power & ground cables to fit our application. We tapped our 12v ignition-on source (after some trial and error with a volt meter) from the lowest prong on the "power outlet" relay in the fuse box for the amber running lights. Then we installed the DPDT switch in the left side of the dash next to the ECT button using a step drill to make the required 1/2" opening. This is my favorite spot for an off road light on these trucks because it sits just past the headlight controls on the steering column and feels very natural.

amber-running-light-power-source-first-gen-tacoma.jpg LP9-switch-installed-first-gen-tacoma.jpg first-gen-tacoma-stock-bumper-off-road-lights-installed.jpg

The kit we got included rock guards for the lights (something we had wished we had for the LP6s on the old truck). These LP9s are more than enough for our purposes and we're really happy with the way the install turned out.
 
Last edited:

takethetruck

Active member
Exhausted
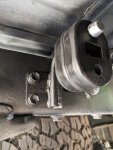
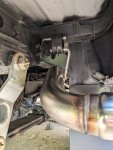
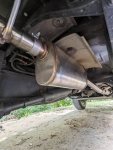
Finally got around to replacing the cat-back exhaust, the original factory muffler was on the last of its legs and one of the seem welds had finally let go. After some research, we decided on Magnaflow's bolt-on kit.

After procuring two replacement rubber hangers, a new downstream O2 sensor gasket, and a new flange gasket (all things that really should be included in the kit to begin with as they only cost a total of about $12...they were, however, kind enough to include a new elevated rear hanger and bracket though), the install was extremely simple and straight forward.

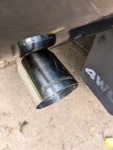
first-gen-tacoma-magnaflow-exhaust-hanger.jpg magnaflow-exhaust-installed-first-gen-tacoma.jpg shiny-new-muffler-1st-gen-tacoma-magnaflow-bolt-on-kit.jpg exhaust-tip.jpg

The kit improves clearance for the spare, ground clearance for the muffler, and elevates the tailpipe to a better location that won't interfere with the leaf springs or shackle. And the truck actually sounds like a truck at idle now!
 
Last edited:
takethetruck

Active member
Raised Rear Axle Breather
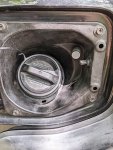
The stock rear axle breather on the first gen Tacoma, as with all our previous Toyotas, is right on top of the axle housing leaving it vulnerable to water ingress, namely when entering a deep water crossing with a warm axle/diff. So we raised the diff breather using about 6ft of 3/8" Gates fuel line, a Toyota union fitting (PN 90404-51319), a Toyota Breather (PN 90930-03136), two hose clamps, and a step drill to make a 3/8" opening in the fuel neck shroud to house the new breather. Cheap little peace-of-mind project ✔

PXL_20220808_173343948.jpg PXL_20220808_172227492.jpg PXL_20220808_174137488.jpg PXL_20220808_175911296.jpg
 
Last edited:
BajaSurfRig

Well-known member
Awesome build really dig your attention to detail!! Don’t forget to raise your front diff, tranny and transfer case breathers too.
 

AggieOE

Trying to escape the city
Love the updates. I don't know how you got the courage to cut into the hood. Although it is definitely practical, I don't know if I'd have the courage. Kuddos to you!
Any side profile pics of the Tacoma since the suspension refresh?
 

bkg

Explorer
Eventually I'll be welding in a crossmember between the bed and frame for the rear shocks to be mounted on properly, but for now I managed to utilize the stock shock mount locations using some slightly longer 60mm 12x1.25 grade 8 bolts - not ideal and sacrifices a good bit of up travel but it's functional. I also installed the Icon Progressive AALs and some Daystar +1.25" greasable shackles.


The stock exhaust is due for a cat back refresh and since it interfered with the new spring position it got the chop chop. After an alignment and a couple weeks of testing, I couldn't be more stoked on this setup and the ride improvement is incredible!
[/QUOTE]

quick favor... what's the center to center on those shackles? i can't seem to find any specs on the interwebs.

thanks!
 

takethetruck

Active member
Sorry for the delayed responses, our new kiddo (Atticus) was born August 15th! Needless to say, we've had our hands full ?.

Awesome build really dig your attention to detail!! Don’t forget to raise your front diff, tranny and transfer case breathers too.
Thanks! The front diff, tranny, and transfer breathers are all routed up high enough (at least for my comfort level...for now) in the engine bay / trans tunnel on these first gens. So may save those for future/as-need-arrises.

Love the updates. I don't know how you got the courage to cut into the hood. Although it is definitely practical, I don't know if I'd have the courage. Kuddos to you!
Any side profile pics of the Tacoma since the suspension refresh?
It was definitely a no-guts-no-glory type of ordeal ?, worst case scenario I figured we could pickup another hood if it didn't work out. I'll try to add a side-profile either here or on our insta soon - the lift is pretty modest 2" up front and 1.5" in the rear. Will likely put a set of Deaver J59 springs in the back soon, as the Icon AAL on the pretty worn stock springs isn't really adequate for the weight we carry on longer trips.

@bkg just ran out and checked, looks like 6 3/8" center-to-center on the shackles
 

Forum statistics

Threads
188,031
Messages
2,901,421
Members
229,352
Latest member
Baartmanusa
Top