The Dirt Sherpa Build

GCecchetto

Adventurer
Got the jig built to position the roof over the body so I can connect the lift panels. The jig, with some minor modifications, will get reused when I install the softwall. I'm hoping to get the roof up on to the jig tomorrow, but it's just me and my 15 year old son so I don't know if we will be able to pull it off. Over the last couple of weeks I've gotten some misc other loose ends done as well. Installed the eyebrow over the door and started the permanent wiring of the running lights.

The jig ready for the roof. The 2x4 in the middle is just there to act as a ridge when I pull the tarp back over the camper, still getting a lot of fog.

P1000816.jpg

The eyebrow on the door.

P1000817.jpg

I'm quite pleased with the solar panels. They put out 48 volts +- in direct sun.

Fully shaded 5:30 PM.

P1000815.jpg

And at 7:30 PM. I should have no problems keeping the battery full.

P1000818.jpg
 

GCecchetto

Adventurer
Well, roof went up today. I'll be out of town, in vail Colorado, Tuesday through Friday this coming week so I won't get anything else down before the weekend. Hopefully by the end of this coming weekend the lift panels will be connected.

P1000819.jpg

P1000820.jpg
 

bphang10

Observer
even the jig for the roof looks well built! i'm currently working on my roof also and it's quite a big surface to deal with. what i like about those panels is their efficiency when shaded. however, with surfboards and racks on the roof, i don't have space for them. that scanstrut deck seal looks like the ticket. you're getting close!
 

westyss

Explorer
Got the jig built to position the roof over the body so I can connect the lift panels. The jig, with some minor modifications, will get reused when I install the softwall. I'm hoping to get the roof up on to the jig tomorrow, but it's just me and my 15 year old son so I don't know if we will be able to pull it off. Over the last couple of weeks I've gotten some misc other loose ends done as well. Installed the eyebrow over the door and started the permanent wiring of the running lights.

The jig ready for the roof. The 2x4 in the middle is just there to act as a ridge when I pull the tarp back over the camper, still getting a lot of fog.

View attachment 173930

The eyebrow on the door.

View attachment 173931

I'm quite pleased with the solar panels. They put out 48 volts +- in direct sun.

Fully shaded 5:30 PM.

View attachment 173932

And at 7:30 PM. I should have no problems keeping the battery full.

View attachment 173933

If you have an ammeter instead of volts it will give you a better idea of charge rate, the panels will show rated volts with almost no sun but the amps will be the main component to pushing power into batteries and if there are no amps showing you will not have much if any power going into the battery even though you see 50 volts, you probably already knew that but just saying anyway.
I also have a few of the unisolal panels and in real world use they seem great and wish they were still available, they do produce a charge in low light and I believe they can match the output of a conventional panel for the whole day but thier size becomes the problem, especially for a camper with limited space on the roof. Maybe just stick them all over the camper and forego the aluminum siding:) Nice work on this rig too!
 

GCecchetto

Adventurer
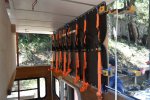
Got the lift panels connected to the roof today. Trying to get a friend to stop by tomorrow to help me remove the jig and drop the roof down on the body to confirm the positioning. If it looks good we'll raise it back up, complete the rivet installation, and then drop it back down so I can install the latches that hold the roof down and get it ready to go to FWC to be measured for the new soft wall. Hopefully that will happen next week.

I didn't take any photos today but my son snapped a few.

DSC_0110.jpgDSC_0116.jpgView attachment 175244
 
Last edited:

GCecchetto

Adventurer
Guys, I'm having problems with the previous post. Even though I have deleted the third image there is a dead link there. I also have another image I would like to add but it won't upload for some reason. I'm done screwing around with this.
 

GCecchetto

Adventurer
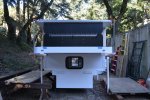
Well, here it is, finally! Still have some work to do to get it ready for the trip to FWC but I can't tell you how glad I am to finally have the roof on the body.

P1000821.jpgP1000822.jpgP1000823.jpg
 

GCecchetto

Adventurer
Spending some time in the evening working on the miscellaneous items that need to be taken care of to be road ready for the trip to FWC.

The rear latches are a tight squeeze between the corner trim and the running lights.
P1000824.jpgP1000825.jpg

The front is a roomier fit.
P1000826.jpgP1000827.jpg
 

bphang10

Observer
are those stainless steel rear latches, and if so, where did you get them? looks like the bracket and catch are aluminum.
 

Forum statistics

Threads
188,440
Messages
2,904,952
Members
230,360
Latest member
TNielson-18

Members online

Top