The Restoration And Build Thread For My 1992 FJ80

rickashay

Explorer
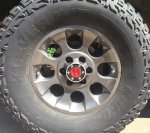
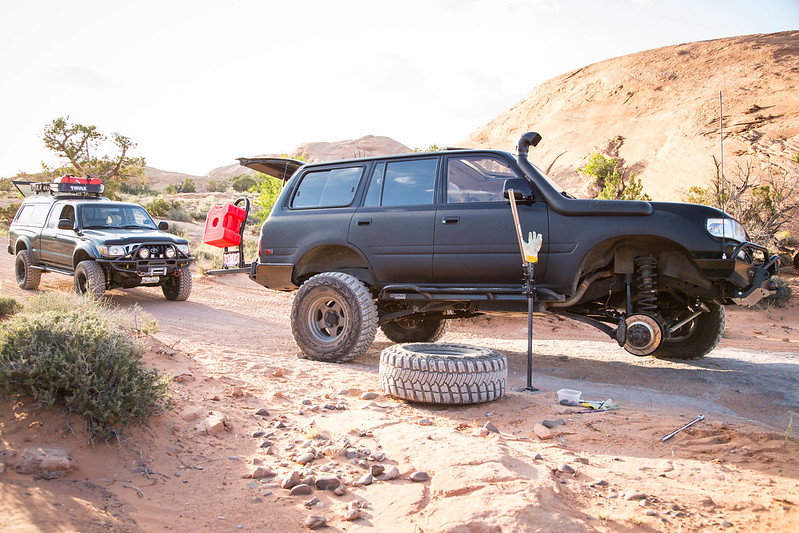
Holy cow! So happy you both are ok. That is incredible and seems very unlikely that it would happen to you both at once. I had the exact same thing happen to me while in Moab. Loose caliper and some minor wheel damage like you... but luckily caught it before anything crazy happened.

20130507-IMG_2442.jpg by Addison Rickaby, on Flickr

Side note. Will Gentry? He's coming to hang with me and my brother in Nelson BC in a couple weeks. If your ever planning on coming up to the Northern Rockies (ie. Canada) make sure to hit me up. Love the cruiser too. Keep it up!

Addison
 

Bojak

Adventurer
Cruiser Jr, I've been keeping up with this thread for a couple of years and have to say I love your rig. Your attention to the details is very impressive. Its awesome to see you build it, use it, break it, and fix it. Especially for a young guy. Keep it up, keep the pics and adventures going too.

Sent from my Pixel 2 XL using Tapatalk
 

Summit Cruisers Jr

Well-known member
Holy cow! So happy you both are ok. That is incredible and seems very unlikely that it would happen to you both at once. I had the exact same thing happen to me while in Moab. Loose caliper and some minor wheel damage like you... but luckily caught it before anything crazy happened.

20130507-IMG_2442.jpg by Addison Rickaby, on Flickr

Side note. Will Gentry? He's coming to hang with me and my brother in Nelson BC in a couple weeks. If your ever planning on coming up to the Northern Rockies (ie. Canada) make sure to hit me up. Love the cruiser too. Keep it up!

Addison

Yeah I really dig your cruiser too! And yes, Will Gentry. He's told me about you and your trucks and his plans to go up there. I'm super jealous of that trip. Looks like the Rockies I've seen, but better. I'll definitely hit you up if I ever find myself up in your neck of the woods!

We are super lucky to be okay. I guess I was lucky I didn't hit the brakes until I was at a lower speed which may have spared me a broken wheel and all that carnage. I seriously thought he was going to roll on the off ramp. It was definitely freaky and still weird thinking about. No other brake bolts were loose on either of our trucks and I've never had one come loose ever. I keep trying to draw logical conclusions about it but my mind just comes back blank.

Cruiser Jr, I've been keeping up with this thread for a couple of years and have to say I love your rig. Your attention to the details is very impressive. Its awesome to see you build it, use it, break it, and fix it. Especially for a young guy. Keep it up, keep the pics and adventures going too.

Sent from my Pixel 2 XL using Tapatalk

Thanks I appreciate it! I'll probably still be updating this thread in 20 years as long as the cruiser isn't taken out by some other motorist haha
 

Summit Cruisers Jr

Well-known member
And this weekend I got a chance to install all new door seals, my oem hand throttle, and the FZJ80 front swaybar from the LX I pulled.

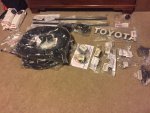
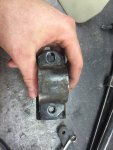
New motor mounts and body mount parts also ready for install
IMG_0936.JPG

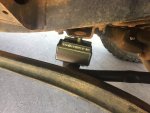
The bigger swaybar is 29mm OD vs 24mm, and after just trying to bolt it in, I realized I was out of luck. It sits further back and has wider bolt spacing than the early model swaybar so my drop brackets and even mount locations were off. I went straight to building mode. I always like these quick little fab jobs since they yield instant results.
IMG_0942.JPG
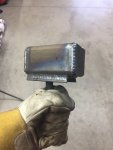
What I did was take some 2x2x3/16 square tubing, cut it to length, trimmed one edge to the nut on the factory upper swaybar mount, and then off set it in order to get the proper spacing and drilled out new holes and welded nuts inside the 2x2. Then I capped the ends and primed and painted them. I don't know why I didn't do this earlier especially considering all the windy rural roads I was on last weekend. The truck feels so much more planted on the corners and can actually get the tires creating sound before even feeling like rolling whereas it used to be quite the boat.

Kind of looks like a mini Thor hammer
IMG_0961.JPG

IMG_0973.JPG


The hand throttle install was really straight forward. Just used Slee's installation guide and had it on in 15 minutes...once I had swapped my gas pedal for my brother's with the bracket for the cable...(he will never know...I guess unless he reads this which he probably won't)

IMG_0989.JPG
IMG_0991.JPG

I also did some serious cleaning in the shop in order to get ready for the next batch of swing outs I'm starting this week. When I got home, maybe 1/8 of the workbench surface was open. Those Lean/Six Sigma classes I've been taking are definitely motivating me to keep areas cleaner and more organized. Even though I tried to be before, it's now much more satisfying.
IMG_0986.JPG
 

Summit Cruisers Jr

Well-known member
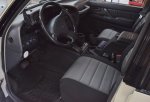
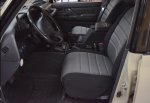
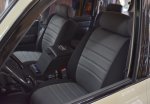
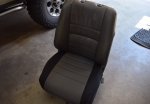
Been cranking on swing out kits over the past several weeks, but today while waiting for some more spindle caps to come in, my new Wet Okole seat covers came in. Decided to go with the charcoal color this time around and opted for the adjustable lumbar in both seats and the two little storage pockets on the front edges of both seats. Really looking forward to having those two little pockets so I can drop my wallet into one of them on longer drives where I would normally rest it against my transfer case shifter.

IMG_1373.jpg

IMG_1374.jpg

IMG_1375.jpg

Pretty close color match
IMG_1379.jpg

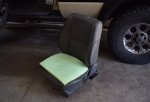
Extra extra comfort. Just about every time someone new rides in my cruiser, in the front seat, they comment on how comfortable my seats are. This is whyIMG_1380.jpg
 
Last edited:

Bojak

Adventurer
I'm a big fan of the wetokolea covers. Pretty sure I just misspelled that but anyways. They are a premium product imop. Also with a premium price, but "buy once, cry once." Looks great.

Sent from my Pixel 2 XL using Tapatalk
 

Summit Cruisers Jr

Well-known member
I'm a big fan of the wetokolea covers. Pretty sure I just misspelled that but anyways. They are a premium product imop. Also with a premium price, but "buy once, cry once." Looks great.

Sent from my Pixel 2 XL using Tapatalk

Yeah they definitely are. My dad purchased his first set a long time ago for his fj62, which my cruiser replaced in like '99 and he's had them on a 40 for awhile as well.

I briefly looked at new seats, but that's a lot of work and generally probably won't be as comfortable as the set up I have going. I also looked at some alternatives like Coverking, but they use an imitation material on theirs whereas Wet Okole is 100% high grade neoprene. After considering how well the past set of wet okoles held up and protected the leather underneath, I honestly can't complain so I decided not to take any chances...so I bought twice and cried twice.

Apart from the quality and features, I also really dig how the sides of the covers are black. It really transitions into my black center console really well. I'm kind of itching to go with a fresh alcantara covered Momo racing wheel after seeing one in the Maltech Sackwear rig, but something about a clean OEM wheel is great too.
 

redthies

Renaissance Redneck
I’ve got the same Wet Okoles (same color too) in my 3500. Real sheep skins in the 100. I’d go Okole there too, but my wife drives the 100 most of the time and prefers the dead lambs.

I had a reputable shop do the front brakes on my 100 a few months back and found one of the caliber pins was sliding out into the wheel. They didn’t spend the $3 on a hardware kit and instead bent little pieces of wire to hold the pins in place. Total BS!
 

Summit Cruisers Jr

Well-known member
I’ve got the same Wet Okoles (same color too) in my 3500. Real sheep skins in the 100. I’d go Okole there too, but my wife drives the 100 most of the time and prefers the dead lambs.

I had a reputable shop do the front brakes on my 100 a few months back and found one of the caliber pins was sliding out into the wheel. They didn’t spend the $3 on a hardware kit and instead bent little pieces of wire to hold the pins in place. Total BS!

Geeze that's cheap. I'd be pretty livid if I took my cruiser somewhere for something (and paid to have work done) and they tried pulling some crap like that on such a critical component of the vehicle.

Finished up the fresh body mounts yesterday. I ended up replacing all 6 of the cab mount cushions. The fronts are NLA, and mine seemed fine so I'm not worried about that. I had purchased new rear mounts, but due to the way that they slide in, my body would have to have gone up a lot more thus requiring a lot more work to replace. Not to mention the bolts holding them on had never been loose and they weren't coming off easily so I passed on them.

Basically I ended up using four 52205-60010's. These go under the B pillar and under the middle row. Then I used two 52203-60042 to replace the front two cab mount cushions in the driver's and passenger's foot wells. The ride is definitely better and little chatter that I used to feel with the straight up poly body mount cushions is mostly gone. It also eliminated the 1/2" body lift I had gained when putting in the new poly cushions so my front bumper gap looks really nice once again.

IMG_1441.JPG

IMG_1426.JPG

The fresh cushions also have enough height to keep the pinch weld from hitting the sliders, which was the entire reason I put polyurethane cushions in that were 1/2" bigger than what I had pulled out.

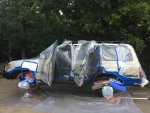
I've started taking off the flares, hood vents, etc today in order to redo the bed liner on them hopefully within the next week. I'm also going to do some serious power washing underneath so the rear axle swap will also be a little cleaner and I will bed line the inner wheel wells too. Really looking forward to getting all this stuff done.
 

redthies

Renaissance Redneck
Oh I was beyond livid. It is a friends shop, and the only reason it was there is I was out of town and one of the front brakes seized up. I got my wife to limp it in to his shop. I had some choice words for the “tech” who did the work.
 

Summit Cruisers Jr

Well-known member
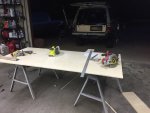
Been working on a lot of various random projects lately. The cruiser is about as stripped down as it can be right now.

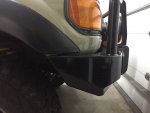
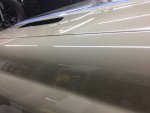
I've gone through 3 stages of 3M buffing compounds and I'm getting ready to wax it, but it's finally nice to see smooth and glassy paint once again. I'm probably in 10-15 hours just on buffing over the past several days. I've still got some work to do, and I'm going to be wet sanding the hood black out and door stripes to bring back the really matte look as they've become a little shiney and scratched up over the years. I've also done a little bit of buffing to the front bumper, but I'm still considering selling it and building one so I haven't spent too much time on it.

Freshly buffed on the left, old scratched up on the right.

IMG_1502.JPG

IMG_1505.JPG

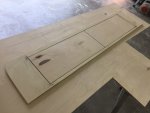
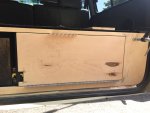
I also am working on a new faceplate set up for my drawers. I was originally really pressed for time and out of birch ply so I made the wings and faceplates out of MDF last summer. The wings were a little flexy and the faceplates kept getting chipped up on the top edge and occasionally would rub my tailgate since it's all bent up and dented (need a tailgate lid to fix this). Using the full outline with gain the clearance I need to fit a lid, and I will be able to screw down the rubber topper on the edge with a piece of angle iron all the way across. This will also be much more durable than MDF and look a lot cleaner.


IMG_1571.JPG

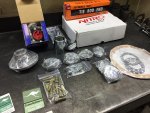
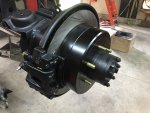
Parts have started arriving and I will be headed out of town next week to go pick up a full floater axle. I've got my Harrop rear locker in, terrain tamer diff rebuild and locker carrier install kits, Stoptech slotted rear rotors for the FF axle, Powerstop Carbon ceramic pads for the rear, Moto Farkles rear diff armor, and a couple other little things. Tomorrow, my order from Cruiser Outfitters should be showing up which includes a rear axle rebuild kit with Koyo bearings, fresh lug studs for the rear axle, Allen key drain plugs, a HD Part time kit, a tie rod kit, Nitro 4.88 gears for the new axle, and some hub sockets for the front and rear axles that I can leave in my vehicle full time.

I've also pulled off the sliders and will be sandblasting them along with the new rear axle and throwing down some fresh paint and clear on them since they are pretty trashed and have been rattle canned several times now.
 
Last edited:

Summit Cruisers Jr

Well-known member
Whoop whoop fresh parts. It's been feeling like Christmas around here lately. I'm just trying not to look at my bank account.

This time from Cruiser Outfitters they hooked me up with a free shirt and some decals tooIMG_1637.JPG

Aside from buying the axle this weekend, I think all I have left to purchase are some reman calipers from Napa. And maybe some things for the parking brake...

I've spent too much time working on the new drawer faceplates. Now an 1/8" gap all the way around and they have been trimmed out for the accuride levers.

IMG_1622.JPG

IMG_1628.JPG
The only downside, in terms of usability, with my drawers was that I had to flip forward the middle row in order to open the side wings. After spending way too long once again, I made some new supports that mount to some third row seat mounts to support the edges of the side wings where I cut them. The front pieces will just pop out of place via velcro while the rear wing portions will continue to hinge upward.

This was before the mount was done and the top piece was just resting on
IMG_1626.JPG

I also ordered another rear camera. The last one I bought looked the same as the original esky, but the wires were too short to plug in. Ordered another esky this time, but the wires are too short. Guess I will need to figure out how to splice into concentrical insulated wires.
IMG_1624.JPG

Assuming the sand blaster's hose holds up tomorrow, all of my swing outs and sliders should be mostly pretty metal. I definitely need to figure out what to initially coat them with though.

Maybe some sort of epoxy primer?
 
Last edited:

Summit Cruisers Jr

Well-known member
Seems like I have been running into setback after setback lately. The sand blaster has been extremely finicky and time consuming to operate. I ended up having to scrape 90% of the bed liner on the yeti cooler swing out. I also had to wire wheel pretty much all of one slider. I haven't even had a chance to start working on the second slider.

Sanding down all the flares and rocker panels etc took forever and I ended up fully removing the old rustoleum on everything but the rockers.

IMG_1656.JPG

IMG_1668.JPG
Here's how the rustoleum held up to 4 years in the sun. Despite being either garage kept or under a large car port a lot of the time IMG_1675.JPG

Wheel wells have been really getting on my nerves lately.
IMG_1746.JPG

IMG_1751.JPG
Wheel wells shot with several coats of monstaliner thinned with 10-15% of MEK to be shot from an HPLV gun.
IMG_1761.JPG

IMG_1757.JPG
Part time hubs on. Center caps modified to fit for a clean look.
IMG_1690.JPG
 
Last edited:

Summit Cruisers Jr

Well-known member
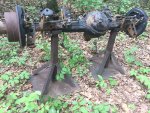
Last Saturday, we made the trip out to a rural area south of Ft. Smith, AR and I bought a full float rear axle that supposedly had 180k miles on it out of a '95 Cruiser. It was a little crusty but not bad. $500 done deal.
IMG_1720.JPG

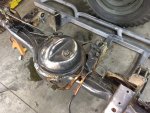
I then started cleaning it up with a wire wheel in order to install the 9.5" Diff Armor pieces from Moto Farkles.

Turns out the pieces are designed for FJ40 axles despite the ad saying it was for "older land cruisers". Oh well, it took a little more time to modify it, trim it down, and play around with the angles
IMG_1778.JPG

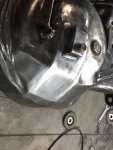
Anyways, I ended up spending more time than I should have and smoothed it out completely so it didn't look added on. Doing this required being up a piece of rebar, cutting it in half to end up with a long hemispherical cross section, and welding it into place between the bottom and top pieces of armor. Then I ground it all smooth and carried the top pieces lines down.
IMG_1812.JPG

Spent a day sand blasting 90% of the axle.
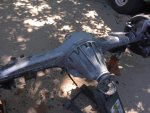
IMG_1823.JPG

Then tore into disassembly. Axle shafts look OK. Besides the e brake pads, which look new, the axle shafts are the only things not being replaced.

Hot as crap outside
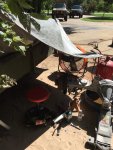
IMG_1831.JPG
Once the shafts were out, I started pulling the third member. At this point it was probably 7pm, and I had a 9am appointment the next day to have the gears/locker installed.

Great...
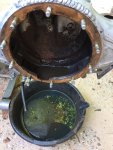
IMG_1835.JPG
IMG_1837.JPG

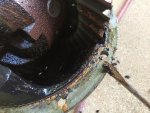
So I tore the diff apart, scrubbed it as best as I could, powerwashed it thoroughly, wirewheeled it, and then treated it with Ospho. Repeated this process for the housing minus the pressure washing.

This picture is just after pressure washing.
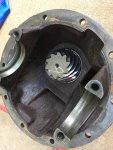
IMG_1842.JPG

The following day I made the trip up to the shop in Tulsa had the diff all set up. By 1:30 and $200 later I was on my way home. The only thing they told me that they wouldn't do was drill the hole for the e locker. I'm not sure why, but it might have been because I just brought them a third member and they weren't able to fully see how it needed to be done. I wasn't sure if this was something that could have done after the fact due to not being able to reach the wires to push them through, but after a short post on mud, I was told it didn't really matter as long as I keep shavings out of the pinion bearings durrr.

Late last night, I pressed in new races and new lug studs. Didn't want to take any chances with those so figured I'd go new.
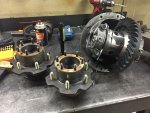
IMG_1870.JPG
I should have the axle finished up today and ready for paint. Then I need to start routing my new e brake cable, sandblast and wire wheel the second slider, and prep the flares for bed liner.

Edit: Axle is ready to be prepped and painted as of last night. I also cleaned off the FZJ80 rear swaybar and prepped it for paint along with the mounts. I figured while I'm spraying black paint that I would redo my hi lift jack. I've stripped the handle, base plate, top plate, and notched bar down to metal.

Currently on my way to Arkansas, but hopefully be back tomorrow and get this stuff sprayed.
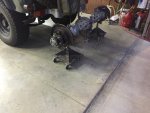
IMG_1880.JPG

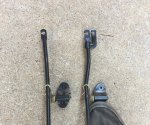
And in case anyone who is reading who has swapped a SF for a FF, or someone knows why the ebrake cables and handles need to be swapped I am very curious. I haven't found a reason why, and from looking at it all, it looks the same and attaches in the same way. I have an ebrake cable/handle set up from the LX, but it's rather nasty and I would rather not have to drop my fuel tank and spend time installing one.
 
Last edited:

Summit Cruisers Jr

Well-known member
Teaser of the axle. Waiting on some brake lines and then I'll be able to install it. IMG_1948.JPG

I wanted to use the OEM locker dial to activate the Harrop because I like the look and the safety it offers compared to a rocker switch that could be accidentally bumped to the on position at the wrong time.

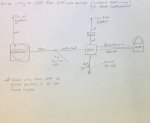
In case anyone is in the same boat as myself (1992 FJ80) and you don't have any OEM wiring/dash indicators in place, but want to use the OEM dial, here is a wiring diagram I drew up to operate a rear locker only. Ignore the wires leading to LED if you don't want an indicator light.

In the diagram, I used a wiring plug with snipped wires from a 97 LX450 to plug into the magic dial. The pin out from left to right is:

Pin 1: blank
Pin 2: blue
Pin 3: blank
Pin 4: green
Pin 5: red

IMG_1912.JPG

I'm also working on new inserts for the curved portion of my dash since I don't care to hack up my gauge cluster. I am hoping to have a graphics company produce some OEM type switch labels for these and place a single red LED in the back to indicate that the locker has been turned on/activated
IMG_1913.JPG

Also started stripping down all of the paint and bed liner on my flares for the fresh recoat. This will ensure the best adhesion possible and nothing underneath will affect the final texture of the monstaliner.
IMG_1951.JPG

Current goal is to have all of this finally wrapped up and finished by the end of this weekend.
 
  • Like
Reactions: bkg

Forum statistics

Threads
188,349
Messages
2,905,972
Members
229,958
Latest member
bdpkauai

Members online

Top