furbucket
Building my van!
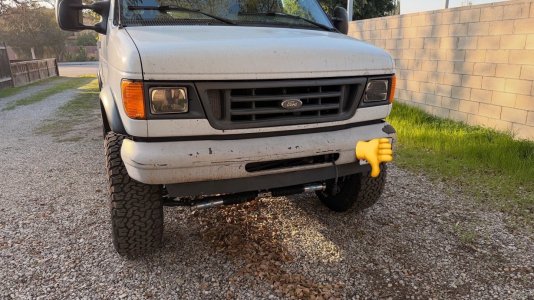
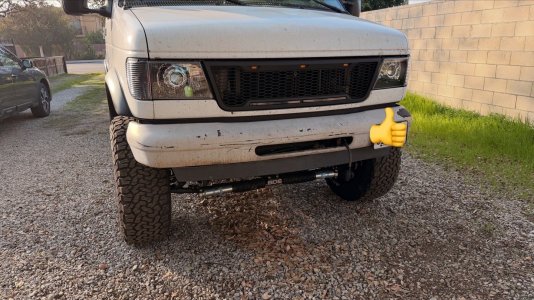
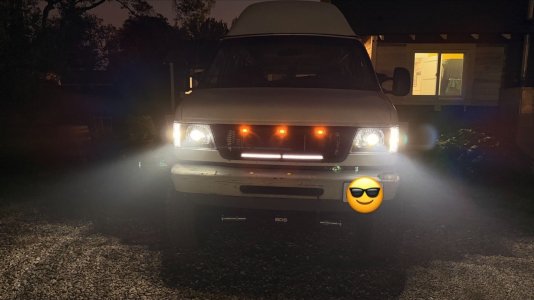
New headlights, new marker lights, new grille!
The headlights and markers (with switchback LEDs) came from vantageoptics and the grille is no-name chinesium special from eBay. Install was fairly easy- markers/turnsignals are just a straightforward swap, and they come with a new turn signal really that prevents the hyperflash that can happen when switching to LEDs.
Switching from the sealed beam style headlights to the composite shape ones involves removing the old lights and the metal cradle thing, adding in the metal slide locks (included) and adding the LED driver wire harness (also included). The only slight hangup was that the provided metal slide lock things didn’t want to fit over the plastic adjusters - I had to file the upper key slot hole wider on both outside pieces. Then I spent some time aiming them (don’t be the lifted truck guy that blinds everyone on the road).
All of the great things people say about Vantage Optics are true- these things are so much better, should’ve bought them ages ago.


The eBay grill turned out great also. It even has features - the top marker lights were obvious but the bottom light bars were a surprise, they are white in parking light mode and chase orange with the turn signals. There are zero directions included. After making sense of the included wiring harness and testing with a battery to learn what everything does, I secured/loomed it all and then installed the grille. You have to reuse the top screws and bottom metal clips from the old grille. The van’s wire harness is behind the passenger side headlight- I used tap splices to connect the marker lights (brown wire), and turn signals (right is white/blue and left is white/green). We’ll see how long they last, but I like the grille even without the lights. Not quite sure how sharing videos works but here's a couple short ones.
The headlights and markers (with switchback LEDs) came from vantageoptics and the grille is no-name chinesium special from eBay. Install was fairly easy- markers/turnsignals are just a straightforward swap, and they come with a new turn signal really that prevents the hyperflash that can happen when switching to LEDs.
Switching from the sealed beam style headlights to the composite shape ones involves removing the old lights and the metal cradle thing, adding in the metal slide locks (included) and adding the LED driver wire harness (also included). The only slight hangup was that the provided metal slide lock things didn’t want to fit over the plastic adjusters - I had to file the upper key slot hole wider on both outside pieces. Then I spent some time aiming them (don’t be the lifted truck guy that blinds everyone on the road).
All of the great things people say about Vantage Optics are true- these things are so much better, should’ve bought them ages ago.


The eBay grill turned out great also. It even has features - the top marker lights were obvious but the bottom light bars were a surprise, they are white in parking light mode and chase orange with the turn signals. There are zero directions included. After making sense of the included wiring harness and testing with a battery to learn what everything does, I secured/loomed it all and then installed the grille. You have to reuse the top screws and bottom metal clips from the old grille. The van’s wire harness is behind the passenger side headlight- I used tap splices to connect the marker lights (brown wire), and turn signals (right is white/blue and left is white/green). We’ll see how long they last, but I like the grille even without the lights. Not quite sure how sharing videos works but here's a couple short ones.

