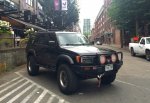
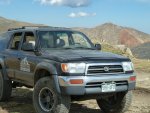
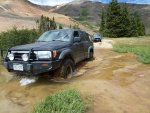
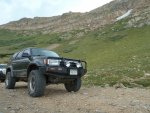
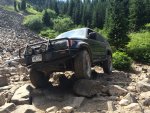
The_ExploreMore_4Runner - The Go Everywhere 3rd Generation 4Runner

Cascadian_Matt

Observer
Hey! Been lurking ExPo since the early days.
I'm Matt. Adventure and work have taken me across the Pacific Northwest and Colorado. And this 4Runner has been a major part of the story.

Hoping that creating this thread will help inspire and invigorate the next steps of the build. Also hoping to share some innovative ideas that have been rattling around for awhile.

The Prado platform isn't an ideal ‘overland/overload', like the Land Cruiser where bringing the kitchen sink with you isn't an issue. Going to have be strategic in continuing the 'go everywhere/do everything' idea. Other complication is that I daily drive the rig and life in the city is not going away in the near future.

For me, the 3rd Gen platform is a great middle ground that balances size for the street and trail, capability, and drivability. Looking forward to ‘Phase II' and the adventures ahead. I will keep posting any updates as they happen and make sure to share whatever is new with the project, along with where it takes me around Cascadia.

Current Set Up:

28680135471_7c83d6e3e3_b.jpg


‘New' To Me Stage - The Origin Story:
This 4Runner has had a long history, having passed hands among some well known personalities of the Denver 4x4 scene...
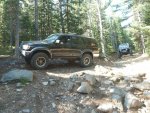
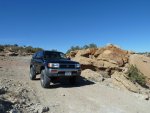
Luckily for me, My work duties allowed me to use this great little rig on the trail all over Colorado though the Stay The Trail program (check it out!). Work took me on the most popular trails around the year to assist with trail maintenance and preservation.

20914350819_d29f693a71_c.jpg


Build Spec Sheet:
OE Gear:
Factory E-Locker
Brake Upgade - Tundra S13WE w/ Slotted/Drilled Rotors

Suspension:
Old Man Emu Kit
Prado 90 Diesel Heavy Coils- 2882
Sport Struts - 90004
Rear Coils - 2890
Rear Nitrocharger Shocks (to be updated to Sport soon)
Icon Dynamics - Uniball Upper Control Arms

Protection:
ARB Winch Bumper - 1st Gen Tacoma Model - 3423020
Winch - Warn XD9000
All Pro Rock Rails

Lighting:
Headlights - The Retrofit Source - FX-R Kit
ARB Intensity LEDs - AR32S, AR32F

Tires:
Hankook Dynapro ATM (Current)
Nitto Terra Grapplers A/T (Previous)

Planned Projects:
Warn Spydura Synthetic Rope -
Blue Sea Fuse Block
ARB Outback Solutions Drawer
ARB Roofrack
ARB Compressor
Odyssey Battery & ‘Big Three Upgrade'
 

Attachments

  • IMG_1401.jpg
    IMG_1401.jpg
    557.5 KB · Views: 94
  • P1000168.jpg
    P1000168.jpg
    620.1 KB · Views: 95
Last edited:

Cascadian_Matt

Observer
The past 3 years brought about a handful of improvements to the ExploreMore4Runner. Time to catch up on the projects I have managed to pull off in that time.

When I purchased the truck, it was relatively stock. One of the previous owners had installed an Old Man Emu suspension, consisting of an obscure Heavy Load Diesel Prado 90 front coil and some limited high angle CV boots. Rode a little stiff, but the additional height was very helpful on the rocky trails of Colorado.
20913053470_79e0c33329_c.jpg

20913044850_fef98c9fda_c.jpg


The biggest addition and my first priority was to get the ARB Deluxe Bull Bar for the Tacoma (3423020). The added protection and the ability to mount a winch and lights are the most basic needs in a bumper. On the protection front, there is no other system that can compare.

For this truck, when the winch was added I trimmed the front surface of the frame horns off and replaced them with thicker steel along with a horizontal bolt to replicate the Tacoma frame. This provides 2 axis fasteners and prevents the bumper from tilting or moving under heavy winch loads or in the case of large impact.

The suspension on the truck was able to soak up the additional weight that the bumper and winch would add. Actually made it ride better on the street.

21101111205_4af9b57ca2_c.jpg

20913043730_71fe833ac5_c.jpg


With the bumper on, driving lights were the obvious next piece of the puzzle. My first set were some IPF Rally Sport lights. Great basic halogen lights with some really nice metal housings and a good beam pattern. I was later gifted a set of IPF 900 HIDs. The larger size fit the bumper nicely and the HID power was hard to beat. The warm up time was a little annoying. That may have been because the lights were fairly old at the point they were given to me, so the ballasts had seen some running time.

21101133815_cb7f199e1a_c.jpg


Since then, I have upgraded to the ARB Intensity AR32 set, which ARE AMAZING. Yes, the price tag is a shock at first. The dollar per lumen is the best out there. Nothing like flipping them on out on a back road and seeing everything for days!!
 

Attachments

  • P1000321.jpg
    P1000321.jpg
    545.1 KB · Views: 76
  • P1000629.jpg
    P1000629.jpg
    564.6 KB · Views: 75
  • P1020083.jpg
    P1020083.jpg
    582.8 KB · Views: 80
  • P1000855.jpg
    P1000855.jpg
    587.6 KB · Views: 73
  • IMG_0501.jpg
    IMG_0501.jpg
    608 KB · Views: 78
Last edited:

Cascadian_Matt

Observer
My other big project has been the retrofit headlights. It was a big, needed upgrade as the light output from stock headlights is just atrocious. Thought about upgrading the H4 bulb, but after seeing some other retrofits being done to 2nd generation Tacomas, I wanted to give it a shot. Bought a new set of the 98+ headlights (specifically for the clear front glass), popped them in the oven to soften up the epoxy glue. Pulled them apart, cut a hole in the back, fitted up the HID bulb housing and wiring after the paint dried. Chose to go with the flat black paint to carry over the look from the rest of the truck. Used some silicone and the standard bolts to lock it in place. Aluminum backed tape helps make sure there isn't any light leakage.

If I could do it again, I would leave the reflectors along and keep the stock look around the new retrofits. One of the big annoyances is that the epoxy is grey and interrupts the perfectly black interior. Yes, it's a picky detail but something for anyone else to be aware of if they want to try this.

20913258408_dd775e6e88_c.jpg

21074950516_f3a8fc7912_c.jpg

20478543534_524fe785f2_o.jpg


All in all, this may be one of the best upgrades I have done. It gets dark up here in the PNW early in the winter and I spend so much time driving to and from work in the dark, this helps immensely. Got all the gear through The Retrofit Source. The FX-R Kit had everything for this project (included projectors, bulbs, ballasts). Was really happy with the overall project. Fairly complicated to get the setup correct, but the total price is absolutely worth the additional performance and the amount of light the retrofits put down the road. The Retrofit Source is a great place to look for the the raw pieces.
 

xwazmtb

Lost and Found at the same time.
nice read so far can't wait to read the rest. And maybe ill see you on the trail in Colorado some time.
 

Cascadian_Matt

Observer
Thanks! Appreciate that. I am out in Seattle permanently now, so all my new photos will likely be PNW related. Hope I can get back to CO and Moab with this rig again at some point! Just picked up a new Odyssey battery today. Going to knock out a few more lingering projects over the weekend and continue to post up my previous work too.
 

rickashay

Explorer
Cool Runner! Those ARB Intensity lights are so ************. Love the retrofit too.... I can't believe retrofits are not done on every rig that get's modded, they are such a great upgrade. AND you can use them on a daily basis, where the armor and other mods don't usually help you much around town.
 

Cascadian_Matt

Observer
Easily something the first thing I would suggest to anyone with a standard halogen style headlight. Are you still doing your retrofit service? Pretty sure your old 4Runner was what got me diving into the rabbit hole of research on how to pull it off myself.
 

eli

Observer
Nice Rig and what a place to use it! Thank You for sharing. Love the 4Runner platform . . especially when I try to pack my Fj ugh . .
 

Cascadian_Matt

Observer
Bumper & Winch

Thanks guys! Very happy about how the truck is coming along. Just had some time to work on it yesterday. The Warn XD9000 winch was in dire need of some Spydura Synthetic Rope. And the terrible old battery was much in need of replacing.

The Winch Work...
Luckily I haven't actually needed to use the steel line! For me, the added safety of using a rope and the weight savings. (Weighing the steel on Tuesday to get a final result on that front)

Some info for other 3rd Gen owners... I had to modify they ends of the 4Runner's frame horns to reinforce them for the additional winching loads. From what I can tell, the 3rd Gen 4Runners had 3 different versions of frame horn ends that changed throughout the model year changes.

Since ARB doesn't have a bumper specifically for the 3rd gen, the changes were needed to replicate how the Tacoma frame ends. The important part was having both a horizontal and vertical mounting bolt. The vertical one was there already, so the end of the frame needed the horizontal added. To do this, I cut off the very end of the box, trimmed up a some new flat steel to fit, then drilled a hole in it for the bolt. Added it in then the ARB brackets went back on and then the bumper with the winch in it. I unfortunately didn't get any pictures of the process though. Still kicking myself about that one! If I have a reason to take the bumper off, I will certainly get some photos of it.

21022404110_4390011c7c_b.jpg


The Battery
Had the 4Runner's battery die on us on one of our last camping trips while we were cooking lunch, with the stereo and dome lights on. Figured that should never be something that happens. Picked up an Odyssey 35-PC1400. Turns out these things have double (800) the CCA as what I had in the there before hand. Pricey, but I have only ever heard good things about these. Never want to be in the situation of being dead in the water like that again.

Took the opportunity to reorganize the accessory wires and add in some new terminals. Blue Sea System fuse box is going to be next.

21184176946_3fcca6bf4f_b.jpg
 
Last edited:

j.stramler

New member
Sweet 4Runner man! I'm from the PNW myself and just picked up a 1996 limited edition. It's already been treating me well exploring the back roads of central Oregon.
 

Cascadian_Matt

Observer
Checked off a few other projects this weekend.

The Blue Sea fuse block is such a great addition to any rig that runs multiple accessories that need power. I've personally used these blocks on my previous builds and really liked how easy it made adding extra piece of gear without needing to turn the battery terminals into a rat's nest.

One of my biggest hang ups was determining where to actually mount the fuse block under the hood. I've seen other builds use the cap of the factory fuse block. I was going to do that, but thought if I needed to actually get into the factory fuses, all the wires of the aftermarket fuse block could create a pseudo tiedown of the cap.

Using a random bracket and some flat sheetmetal, I built a little system to mount it up on the firewall. Ran the main power wire from the battery and around the firewall. Going to use that pathway for a few more wires in the future.

22952576713_75b5d1fae9_b.jpg

23211699219_1820f262c8_b.jpg


The clearance with the underside of the hood is VERY tight. Used a paint pen to see if there would be any transfer between the surfaces. Looks like the washer fluid line only barely brushes up against it. Lucked out on that one!

22951425674_cbc41f4037_b.jpg
 

A.Wilson013

Adventurer
Checked off a few other projects this weekend.


The clearance with the underside of the hood is VERY tight. Used a paint pen to see if there would be any transfer between the surfaces.

I really like your take on the fuse block placement- I may need to use (steal) your idea.

Next time you're checking clearance- a piece of play-dough works really well, and will show you exactly how much contact is being made, or how much room you have to work with.
 

Cascadian_Matt

Observer
Steal away! Completely spaced on the play-dough / clay idea. Hell, had a clay bar in with my tool bag! Something for next time certainly. I'm pretty stoked about the placement. Thinking it should be a really big help for the next series of electronics going in (fridge wiring, CB, air compressor) and cleaning up the existing layout on the terminals.
 

Cascadian_Matt

Observer
Drawer Solutions

This could end up being the best and simplest addition to the build!

I’ve been fed up with the mismatching of bags and storage boxes when I head out to the trail. Each time I load up, I try different ways of stacking stuff hoping something will work better than the previous trip.

And that is where the ARB Outback Solution Drawer comes into the picture. I was looking for something that would be strong, lightweight and easy to slide when it was full of gear.

23212123319_8321040df4_b.jpg


Really impressed by the construction and precision of this thing. Little bit of a pain to install, but it was worth it. Basic rundown of the install…

Remove the top, remove the drawer stops and remove the drawer from the frame. From there, bolt the frame to the body of the vehicle. I used some big Grade 8 bolts and huge washers. Once the frame is in, the drawer and the top panel goes back on.

24406114882_b0baa86f6c_c.jpg

24432034721_6d1fbcb683_c.jpg

22953003833_804a1e6541_c.jpg

24488205806_cc86be53c7_c.jpg


I still need to finish trimming out the side of the drawers with with the help of some CAD (cardboard assisted design).

24218837740_0a57618499_c.jpg


From there, the plan is to turn it into part of a sleeping platform. Also going to add some additional tie down points and a fridge slide.

23471517152_ee5cb1ce29_b.jpg

22951851984_db12e4850a_b.jpg
 

Forum statistics

Threads
188,000
Messages
2,900,873
Members
229,233
Latest member
cwhit5
Top