TMC'S XJ project "Fire-Road Runner"

TMC-113

Observer
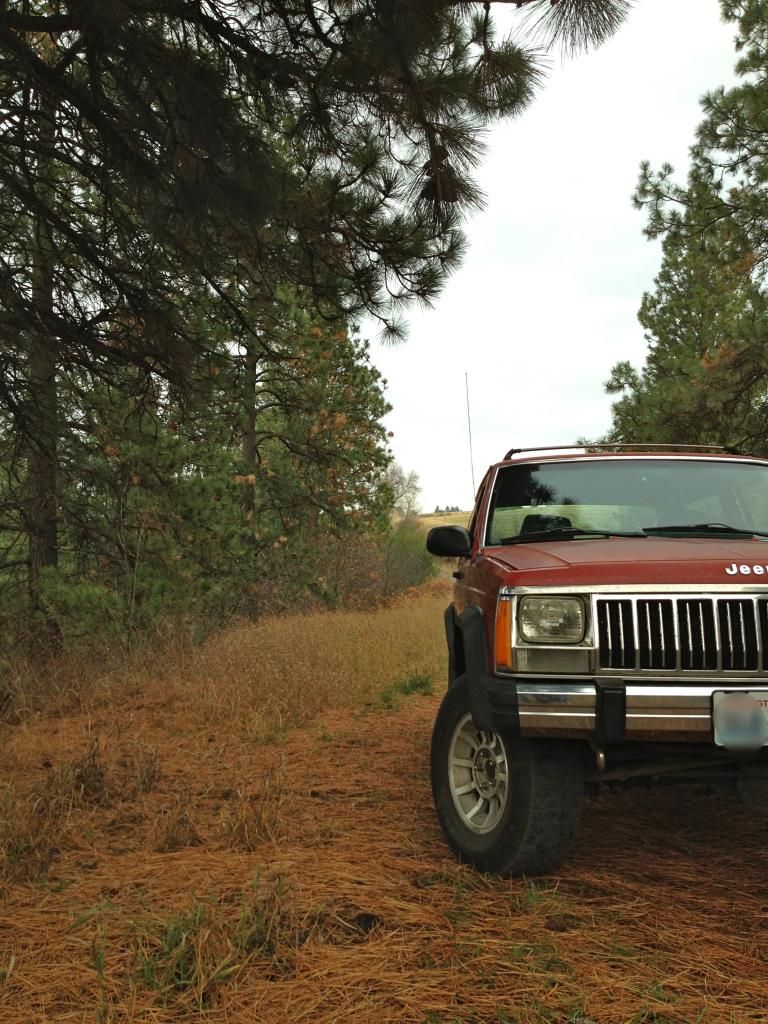
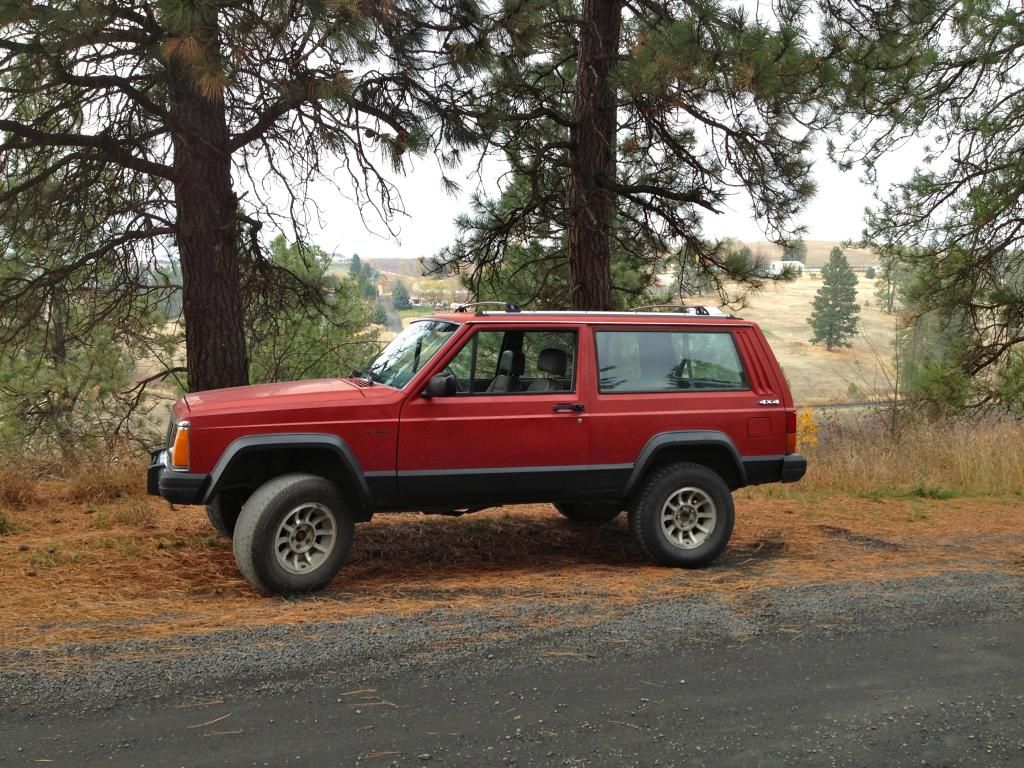
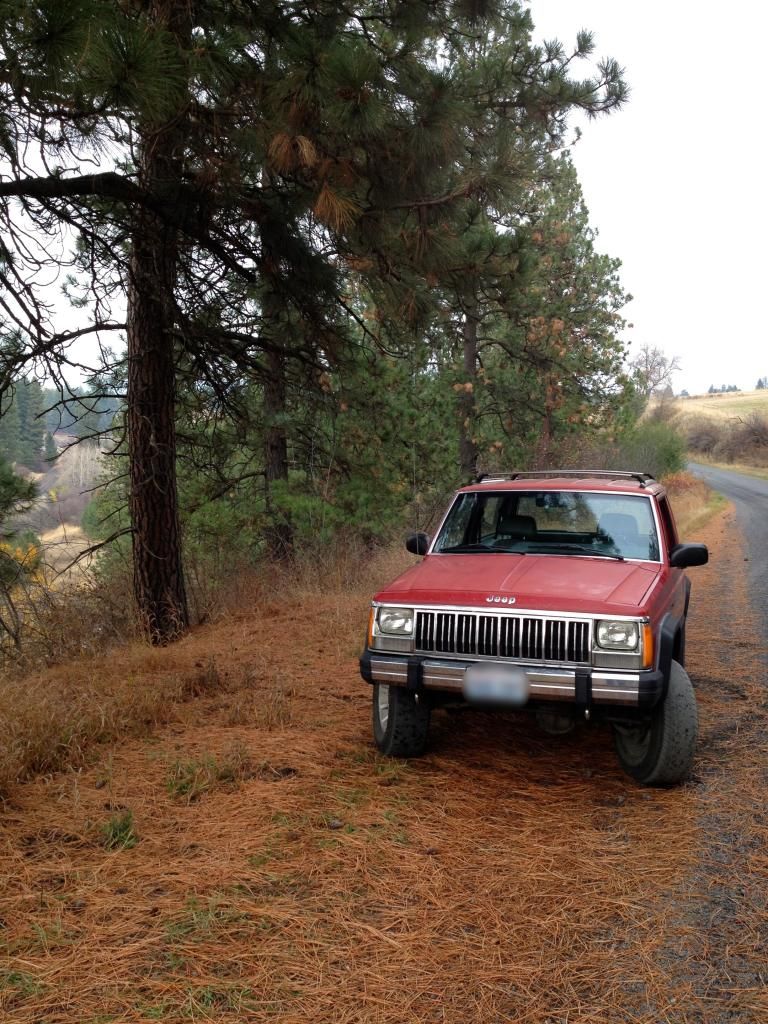
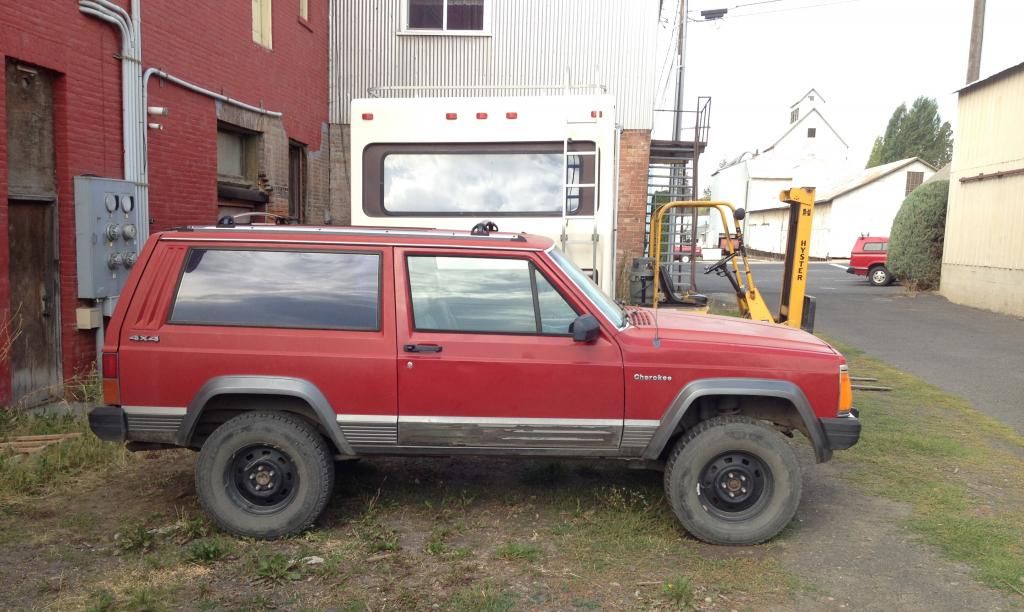
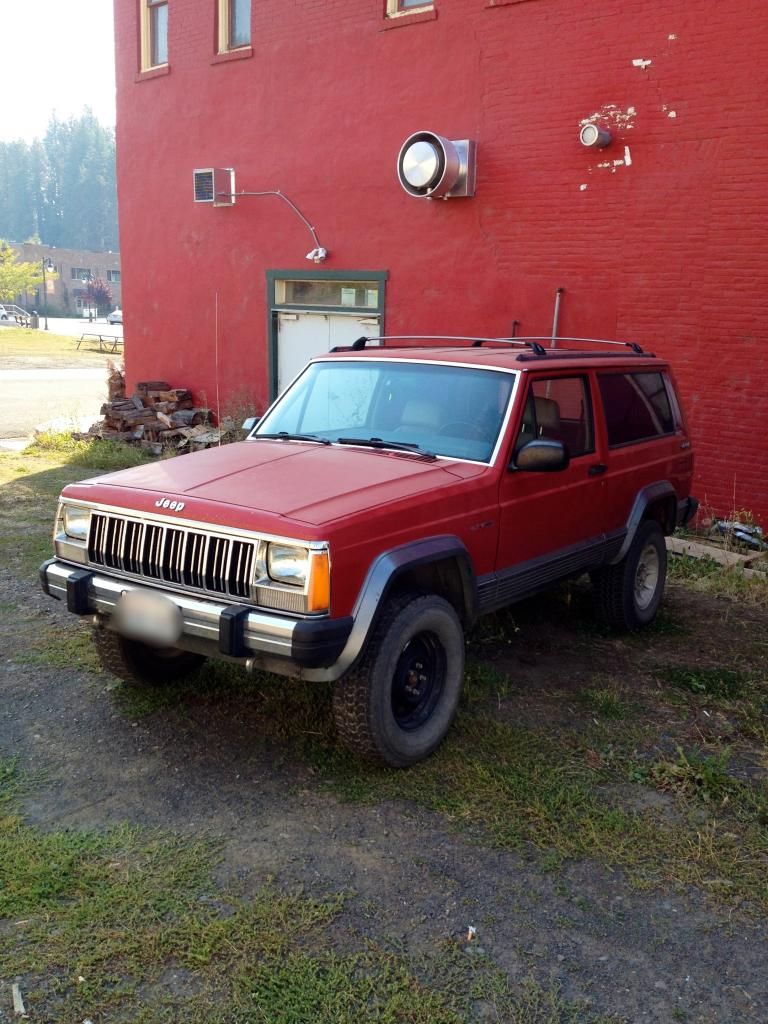
Ive been meaning to join and start a build thread ever since I got the Jeep, but on my time off I tried to get as much done as I can, since I work 45-50hrs/week and have a 2 year old son. :D After many months of searching and waiting I finally got another Jeep. This one is a 91 2 door with almost no rust and only 165K on the clock. (PO actually rebuilt the engine about 20k ago) Also from what I can gather, it does have the Upcountry add-ons, but the engine skid plate got removed at some point. It has the Upcountry 1" lift and 2" spacer/aal on 235/75/R15's. It actually rides and drives quite well for a 23 year old vehicle, but I will be upgrading the lift in the future.


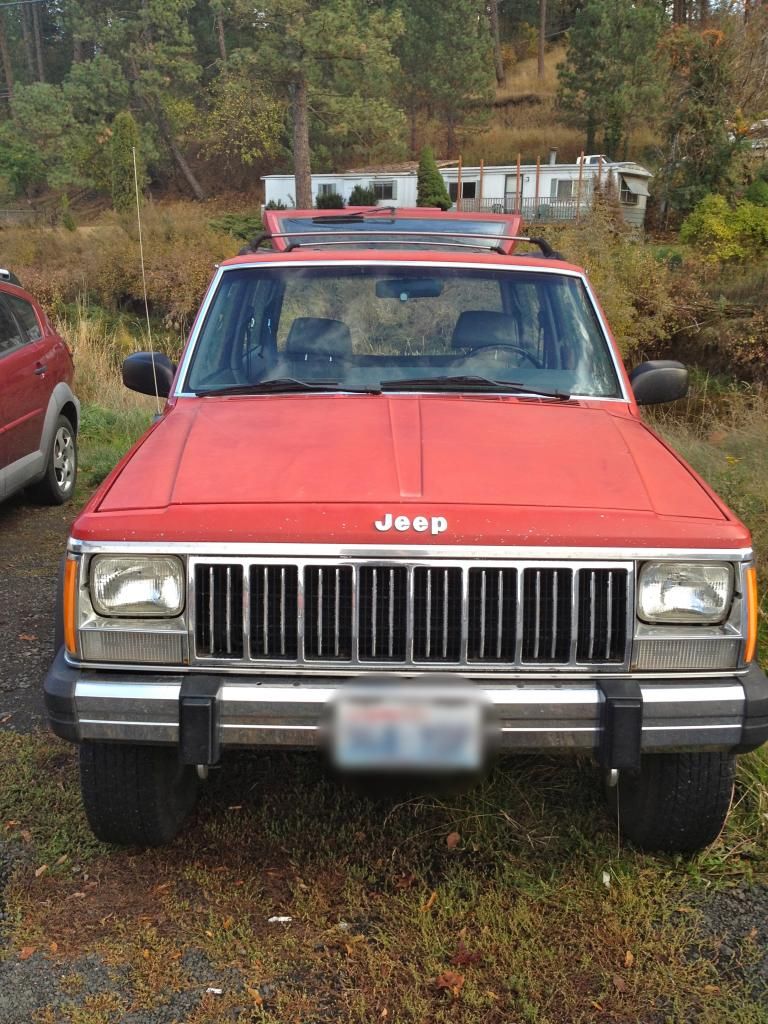
Here it is shortly after I got it:


A week after I got it I made a JY run (which is an hour away) and it was a HUGE success.

I found:
-Driver & Passenger Mirror from a '98
-entire Center Console (lid, air duct, and bracket) from a '98
-hand brake assembly from a '98
-gauge cluster from a '91
-oil pressure and temperature sensors from a '91
-front passenger seat belt buckle

Grand Total? Only $68


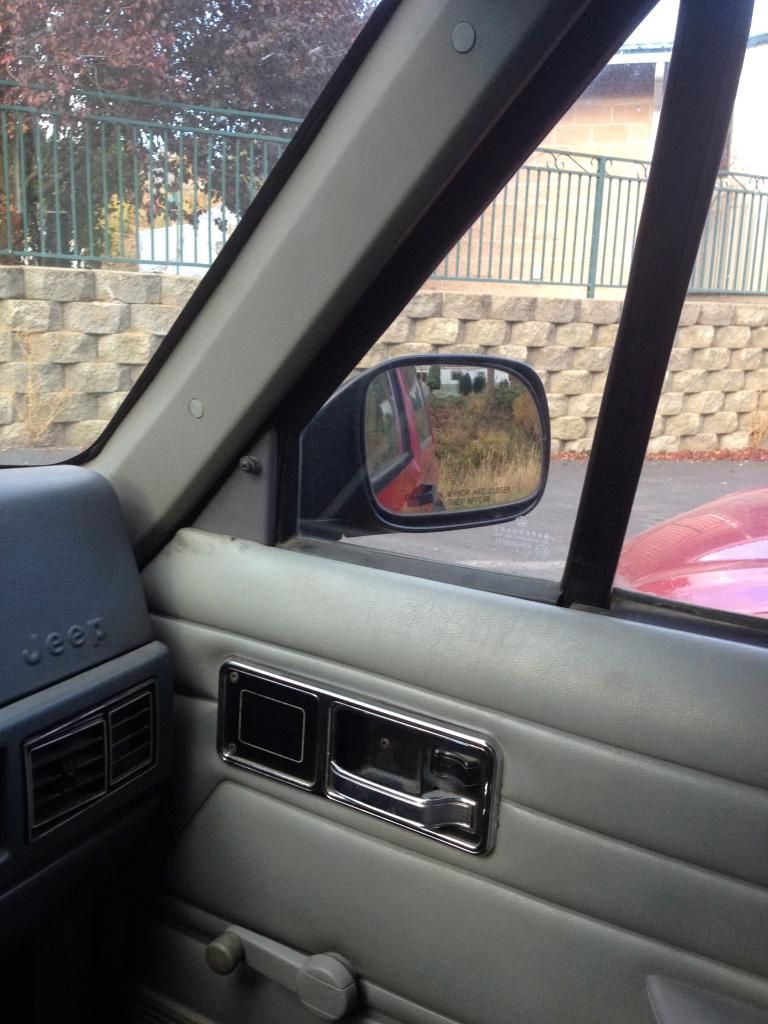
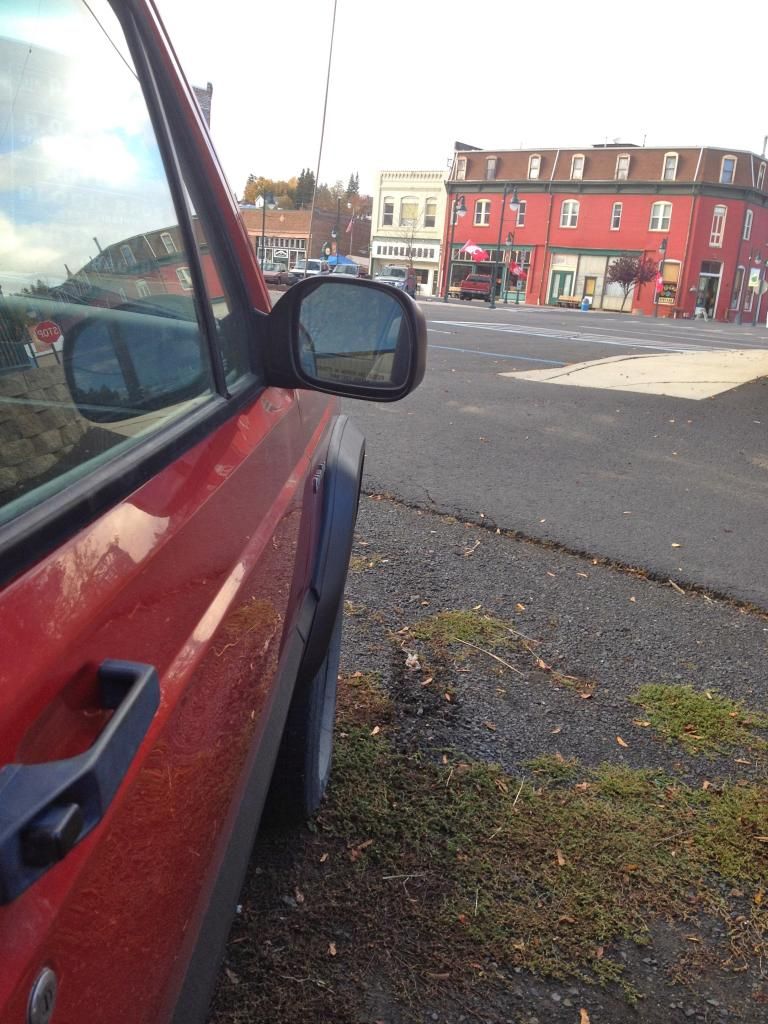
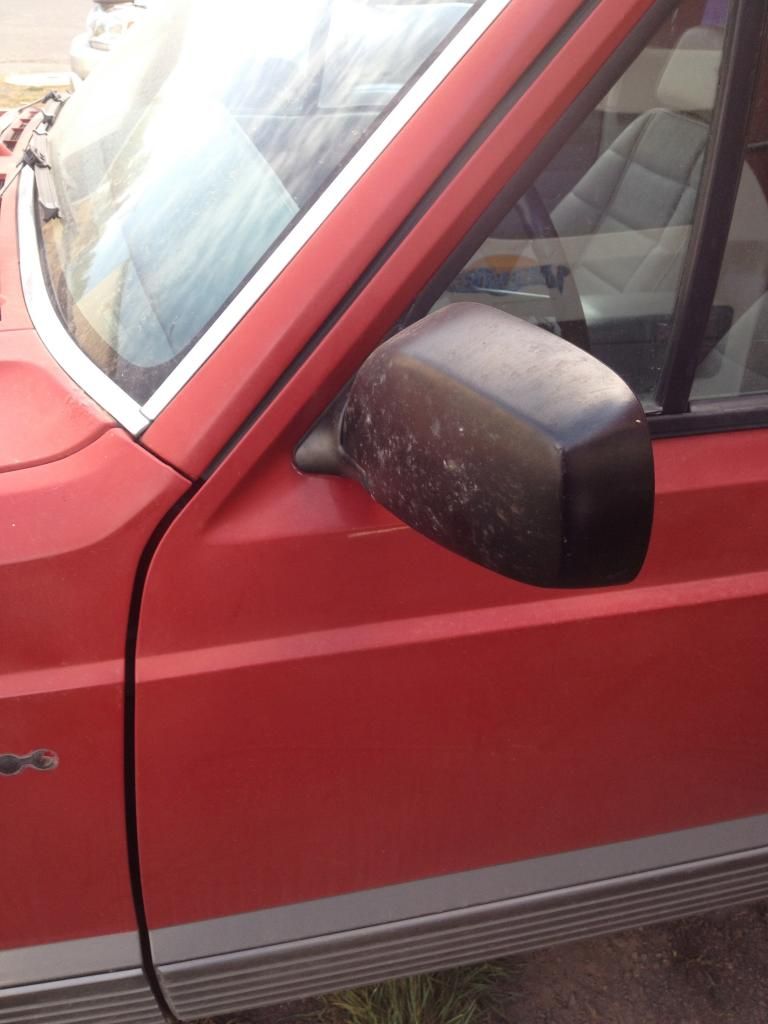
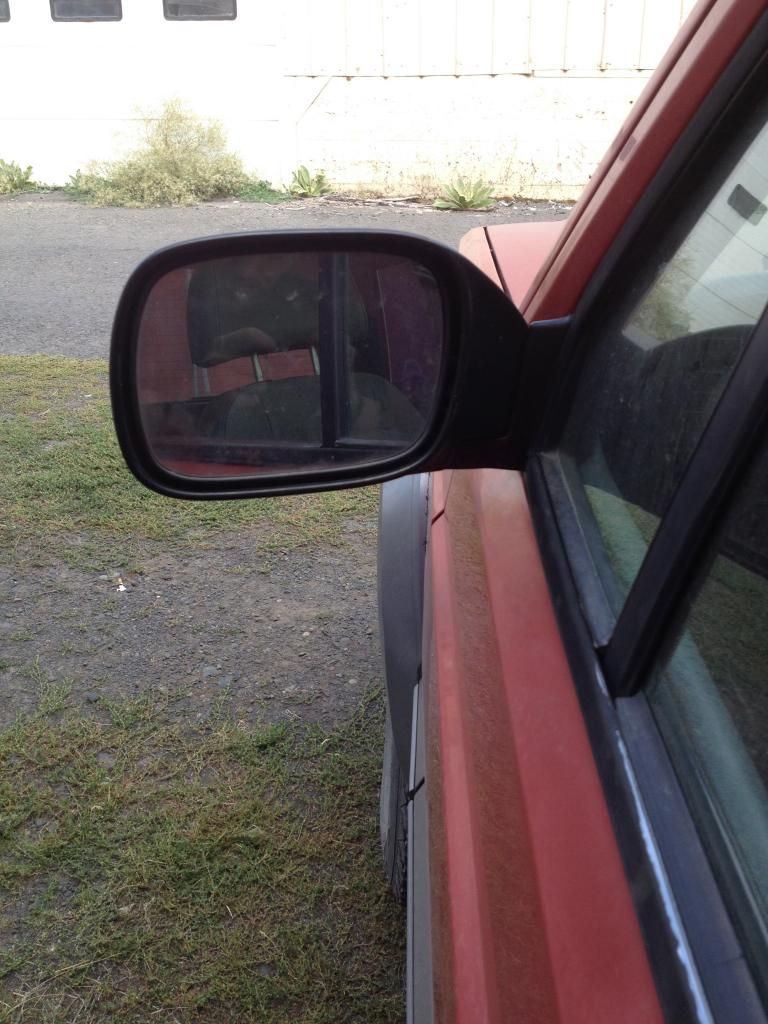
My driver mirror was missing the glass when I bought it, and here it is with the bigger '98 mirror:


As you can see, it lines up almost perfectly and has definitely more overall viewing surface than the older square style. The mirrors I found were power, but right now the wiring is just tucked away. I may still add it later on.


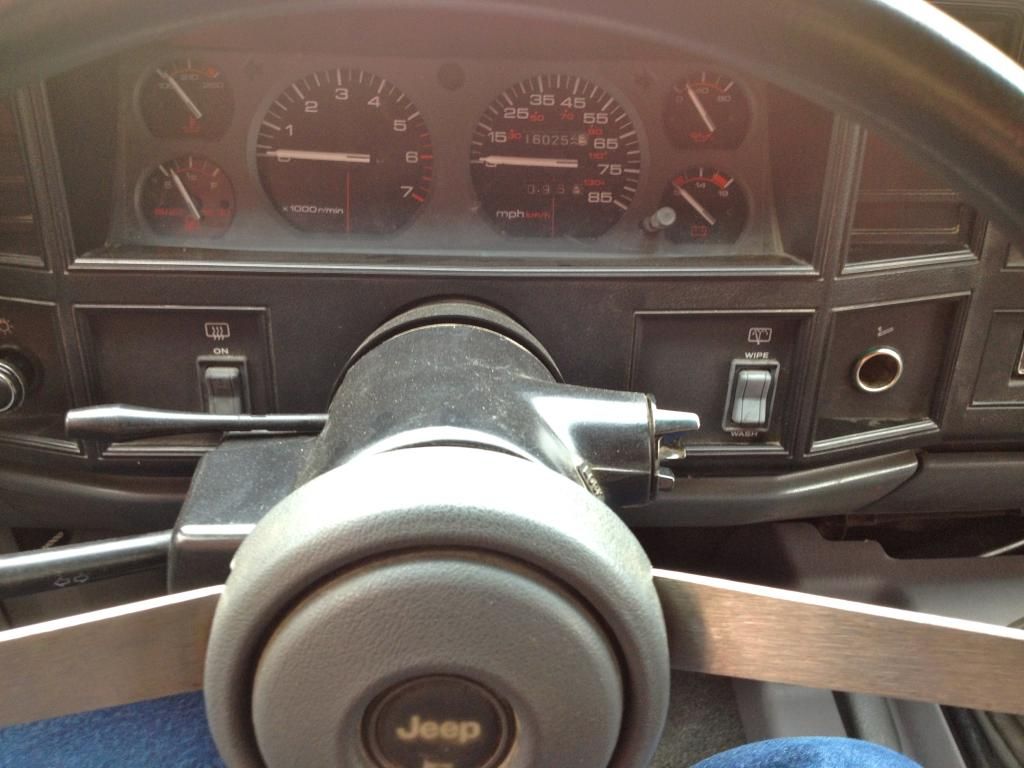
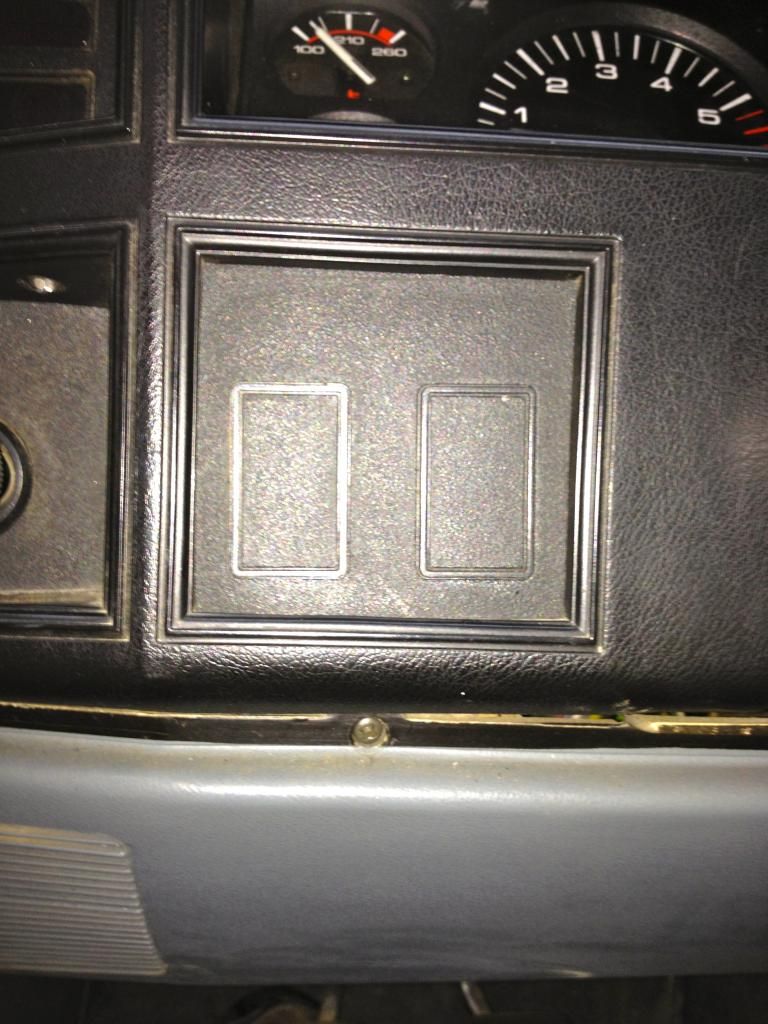
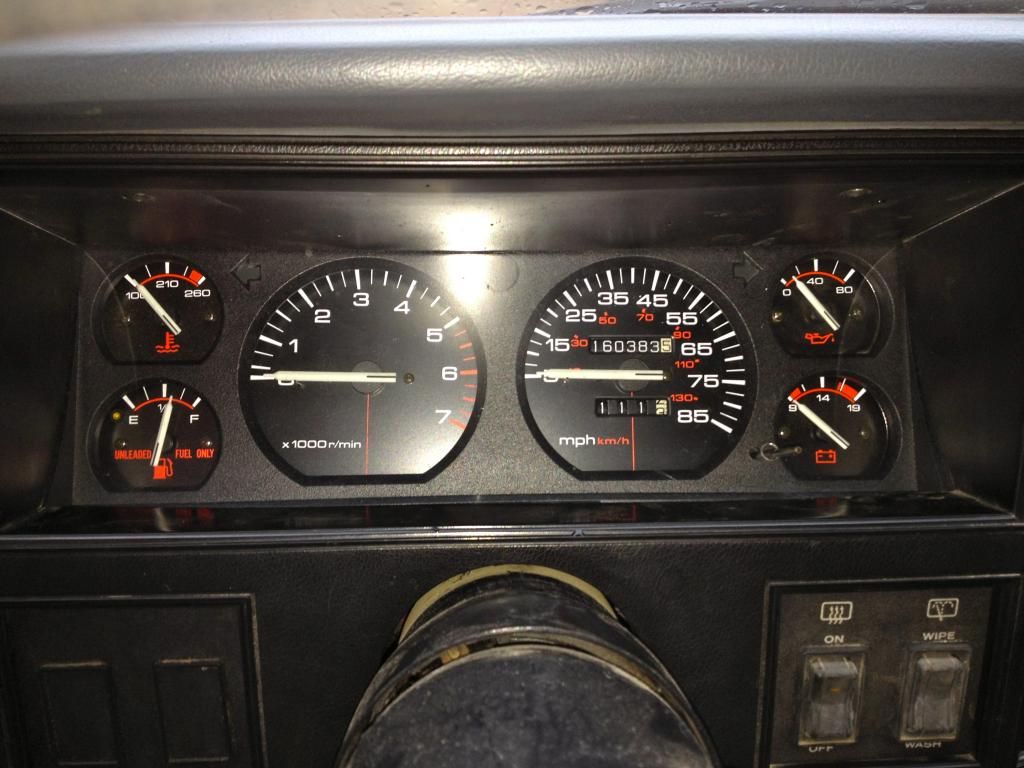
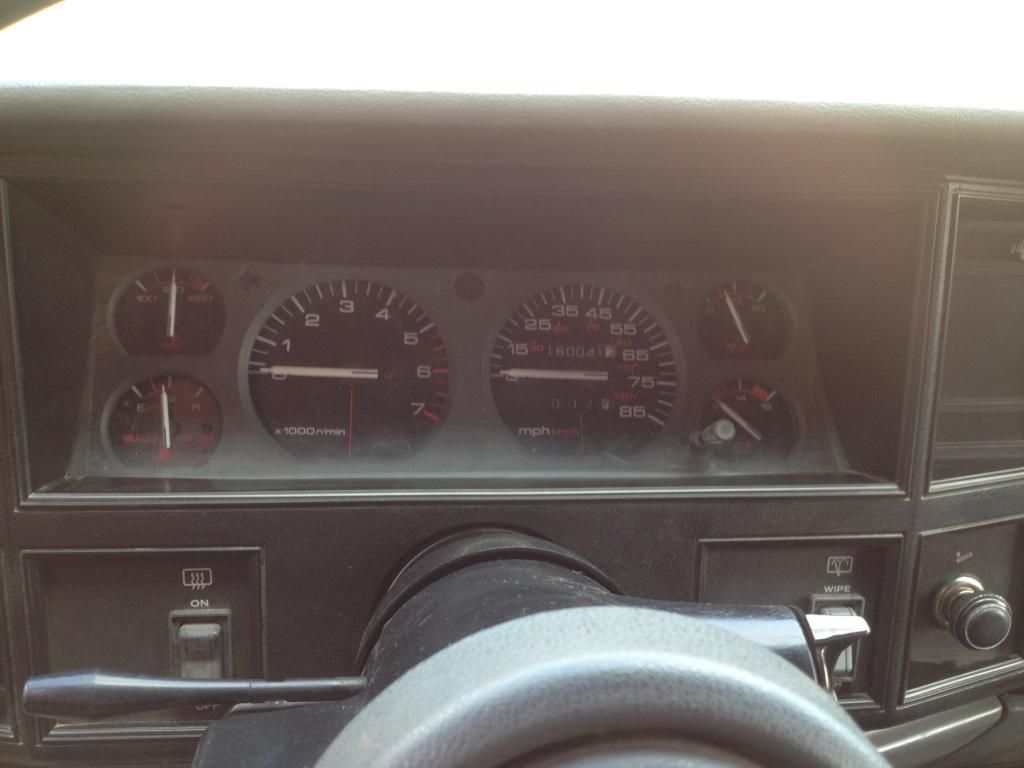
My next goal was to swap my idiot lights for actual gauges. I had read several threads on this and it actually was as straight forward as everyone says it is. I was even able to find one that was very close to my miles. The only problem I ran across was when I went to swap the temp sensor on the head, at some point in the Jeep's past the connector and wire were cut and/or tore off. I was able to find the wire in the harness and make the necessary connections. Here are my two gauges side by side before the swap:


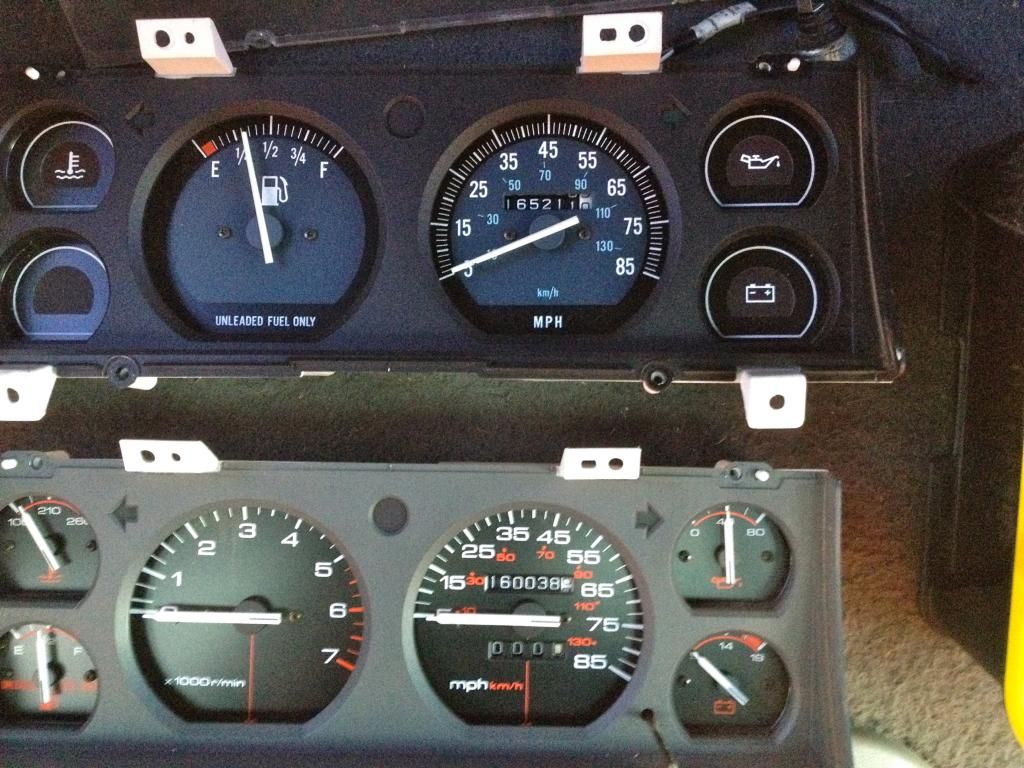
Those of you that know about/have installed the idiot light-to-gauge swap or already have gauges factory know what they look like. But for those of you who don't (or want to try it) it literally is plug and go other than swapping the oil pressure sensor near the oil filter and distributor and temperature sensor on the back of the head. Its one of my favorite mods so far.


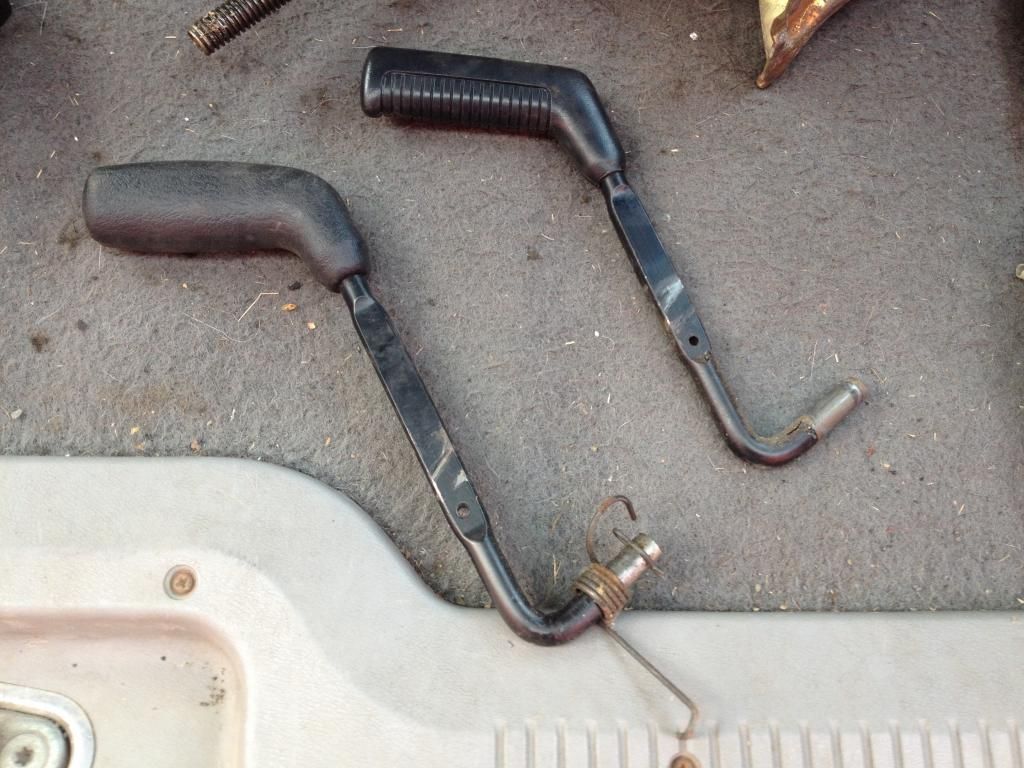
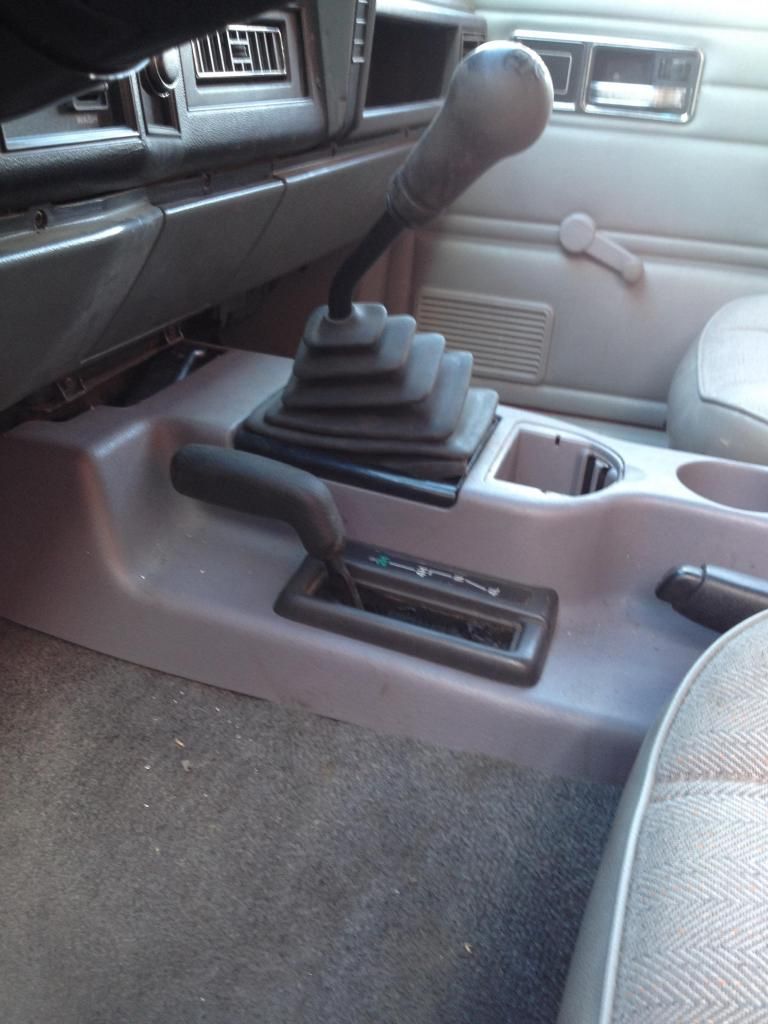
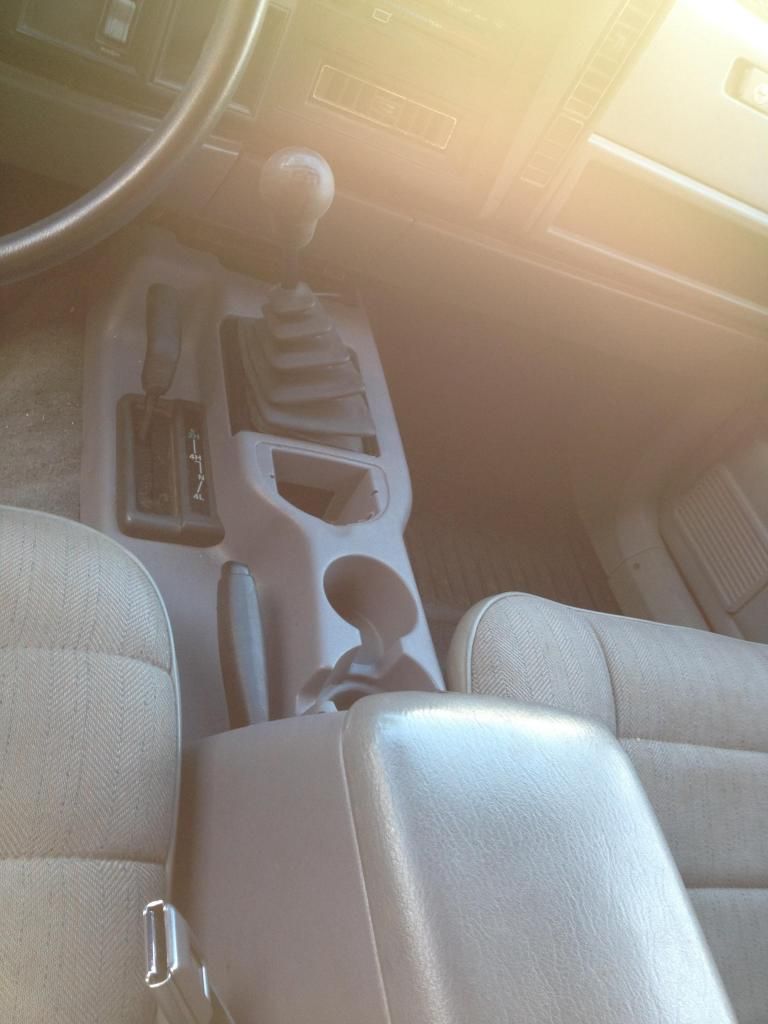
The factory hand brake was broken because the button no longer worked and when you pulled on the handle it would just slide back down. So since I found a full newer style console and hand brake assembly I just swapped both from my older style. So I now have a working hand brake AND the elusive cup holders (that don't look like they came from the discount cart).
I still need to attach the front part of the old air duct to the new one so I don't have weak rear air. I also need to figure out the shift boot and the gap at the front of the console. As far as the newer style hand brake goes, I just used a small turnbuckle and attached it to the original linkage and it works great. Here is the (mostly) finished product:


I feel like having the two factory cup holders and newer console design really made this swap worth it in the end.


I've gotta say.....I am extremely happy with all of the changes I've made so far and how well they look/work. I would recommend them to anyone with an older XJ that want some newer style upgrades.

![WARNING]!
This will be a fairly slow build because it will be based on how much time and money I have available. Also I don't have a garage or shop and since winter is fast approaching it may slow down even more.

My goals for this long term:
-budget minded
-31" max tire size
-only 3-4" of lift
-MILD build minded
-all simple, yet useful mods
-daily drive/weekend explore
-nothing I dont need, yet everything I do
-family minded
-able to handle the MASSIVE amount of fire roads/back wood trails of North Idaho

Coming soon:
-passenger mirror
-finish console details
-exterior trim removal/cleaning
-painting lower body/fender flares


Well thats all I have for now. Those of you who are/will be following along (if anyone even is) there should be some more in the next few days or so.

Thanks for reading!
 
Last edited:

TMC-113

Observer
I wanted to work on removing my lower exterior trim and cleaning off the remains, but I ended up working on removing my front valance and trimming the front flares while my son played in the front seat. :smiley_drive:


There are several ways of removing the valance:
-removing the bumper, then unbolting the valance
-if your patient reaching up behind the bumper and unbolting it (through a 1" gap)
-use a reciprocating saw
-use a utility knife and cut it at the mounting points
-use a pry bar or screwdriver and pop the plastic off
-some have said they just pulled it off if broken/loose


Because of time constraints I didn't want to remove the front bumper however, mine had all 5 front bolts and 3 of the 4 side clips so I used a combination of the above. Well minus the reciprocating saw because I had the windows down and didn't want to scare my son.


So I first used the utility knife to cut around the 4 (3 in my case) side clips and tow hooks. Then I used a screwdriver to pop out the 3 clips as well as prying the valance over the 5 front bolts. I then removed the "center section" of the valance.


I then used the utility knife to trim the side and front of the flare as well as the rubber backing trim of the flare. When thats done you will notice the bracket for the valance hangs down. Here it can be seen to the right of the driver's side tow hook:


I was going to just unbolt the bracket, but in my case I realize it was bolted twice to the subframe and to the fender. So I just quickly used the reciprocating saw to cut just the vertical piece off.


After that just repeat the process on the other side. Heres a before and after:


BEFORE:

AFTER:


Despite the odd looking angles from the above pictures, I really feel like it makes the whole front of the Jeep look better. As well as improving the approach angle, even though the valance only hangs down about 2". I also feel it falls right in line with the "simple, yet useful mods" theme of this build.

Near future mods:
-finishing touches on console (air duct/shift boot/front gap)
-remove lower exterior trim and clean up residue/remains
-paint flares and lower body
-pickup the 2nd set of wheels/tires that came with Jeep
-misc. small details :shifty:

Future mods:
-real 3" lift replacing spacers/AAL
-31" tire
-install front/rear hitch
-figure out if I want new bumpers
-figure out if I want to build or buy said bumpers
-on board air


Decisions, decisions, decisions......
:drool:
 
Last edited:

91AzXJ

Adventurer
Nice start! I had a 91 and removed all the side trim and valance so I know what you're going through. I now have a 2K and love both the mirrors and console so those are great additions.
 

TMC-113

Observer
Nice start! I had a 91 and removed all the side trim and valance so I know what you're going through. I now have a 2K and love both the mirrors and console so those are great additions.

Thank you! Yeah if I had a choice I would have gotten a 97+ 4 door because I love the newer style of them, but this became available and I bought this from a family friend for a steal.
:D
 

TMC-113

Observer
Well I've gotta say, ........this weekend was a HUGE success because I got several things done on the Jeep.


First off, I got the center console air duct fixed so now I don't have weak rear air for any passengers. All I did was cut 1 1/2" off of the '91 air duct and attached it to the front of the '98.
(sorry no pics)

I also replaced several bulbs that were out throughout the Jeep, as well as did some other routine maintenance.


NEXT:

I started the lower body trim removal and cleaning. Here is a shot of my lower trim:


So when I purchased the Jeep the passenger door trim strip was off, but came with the Jeep. I thought, "well I could clean up the door and reattach it or I could do something else"......well guess what?! "Let her rip!"


You know, people say when removing the factory fender flares there is a chance you'll find some rust. Well its the same chance when you look under the trim. It's just the nature of the beast. I luckily didn't have any what so ever, but there was quite a bit of dried mud and muck next to the double sided tape lines and I'm sure doing this whole project helped ward off rust, on a vehicle that still doesn't have hardly any.

Anyway....

like most things on a Jeep, there are several ways of removing the trim:
-use a heat gun/hair dryer then remove the trim
-use fishing line to slide behind the trim
-pull the trim off by hand if loose or old

then:
-roll the old double sided tape (dst) on newer models
-use fishing line again on dst
-use goof off/goo gone to remove dst
-use a razor blade to remove dst
-use an automotive eraser wheel to remove dst and residue

I went with 'pull trim off and razor blade' because I couldn't find an eraser wheel near me without having to special order it, and my trim was old/loose enough to just remove by hand. I did however use some goof off to help ease things up. My lower body is painted silver behind the trim pieces, so I knew I wanted to just get it all off and clean. Then I could prime/paint, bedline, plastidip or what have you. I gotta admit, my way probably wasn't the fastest or easiest, but it worked fine for what I had in mind. There were several spots where I did get into the paint layers, but like I said, I knew I'd have to sand and prime anyway.


I decided to go with Rustoleum Truck Bed Coating in black because I knew I wanted something that could hold up to the forest roads that are all over where I live. I scraped, then sanded, then added a light coat of primer, then the liner. I probably didn't need to sand or prime because it's suppose to stick no matter what, but better to be safe than sorry later on.


As you can see, I should have done a better job at first taping/covering more because there was overspray that got on the upper body, but I was able to come right behind and clean it off with a little bit of mineral spirits.


I used my recently learned knowledge and applied it to the other side.


Then I started the fun task of taping and masking. I just happen to have a year old 4WD Hardware catalog on hand.


Then I sprayed two coats and then removed all of the tape and paper.


Well, you can't really tell from the pictures, but there are a few run spots and a couple of "off" lines near the flares, but all in all I am very pleased with how it turned out. Here is the before and after....is it just me or does it look taller?


BEFORE:

AFTER:


I have used Herculiner in the past in the bed of my old truck, but I really liked how the Rustoleum Truck Bed coating was not as rough as the Herc. Granted, the Herc liner was a roll on, but still I think it looks pretty sharp no matter how close or far you are standing. The whole project only took about 1 and a half cans, so this was all done fairly cheap. I also used one of the spray paint trigger caps. I didn't really feel a difference, but maybe I will on larger, future projects on the Cherokee.


Honestly, the more I look at it..........the more I like it.
:D


NEXT!

My back two windows has some old tint on them. I really prefer tinted windows, but this had become purple with time and needed to go. I actually was able to just use a razor blade and slowly, strip by strip, remove the old tint. It thankfully wasn't the old kind that was super sticky or just fell apart when trying to remove it. So other than just being time consuming, it went rather well.

Again, you can't really tell from the photos (my fault) but it actually is even more purple colored in person. It makes it weird to look through while driving.
Here is what it looked like before:


And here is what it looked like during the removal. Its quite a difference that I think helps make the Jeep, as a whole, not look so old.


I actually didn't get a completed done picture because by the time I finished it was dark. But, I will try to get one ASAP with the new lower bedliner and cleaned rear windows. Thanks for reading and as always,

Keep exploring.....get out there.
 
Last edited:

TMC-113

Observer
Thanks stolz! I thought the same thing lol.


I would recommend it if your lower body is rough, or really clean. Seeing as how my rockers are rust free, I wanted to keep them that way.
 

njjeepthing

Explorer
Looking good, love the two door XJ's. My first one was a 96 two door Sport, with the rear vent windows. Hard to find those. I would have loved to find another 2 door in my search, but the pickings were slim!
 

TMC-113

Observer
Update!

I went to the Pull-N-Save second location. It was a pretty decent haul. I got:

-new lower shift boot (mine was cracked several places)
-newer shift knob from a Suzuki (Sidekick/Samurai?)
-factory switch and bezel to move my rear window wiper and defroster together so I can put switches on the other side

From the main location I also got:
-97+ shift boot bezel (not broken! :Wow1:)
-97+ e-brake cable (to tweak mine a little)
-97+ console ashtray
-97+ transfer case knob and lever
-passenger mirror glass (from a Caravan and fits perfect)
-barely used gun rack (for rear window storage)
-factory blank panel for switches above

At the secondary location they had several S-10 Blazers that I wanted to pull leafs from to make a pack....2 even had new Bilsteins that I wanted to pull SO bad (Id use all four rears for all four corners on the XJ) but my socket extension wasn't long enough to reach the upper mounts.

The main location had a newer 2 door XJ with a nice factory hitch that I want to pull as well but I ran out of WD-40 and it was getting later in the day.

Lets just say I will be back for both the springs, shocks, and hitch just ASAP! :D


I got the newer shift knob, shift bezel, and TC lever/knob installed before we left.

image_zpsc1b49794.jpg


image_zpsd7daa75c.jpg


image_zpse5c4a873.jpg


The pictures above make the new shift knob from the 'Zuke look huge, but its the perfect size and height while Im driving. Plus once its cleaned up a little it will look newer like the console.


I was finally able put on my 97+ passenger side mirror. When I got both mirrors, that one was missing the mirror glass. After scouring online and part stores, I basically found out that I could either:


A:buy a brand new entire unit ($40+)
B:have a glass shop cut a custom size mirror
C:JY hunt for a stocker/close fit


The last option ended up working out and costing like $4. The mirror glass is from a Caravan (year unknown) and it is almost the perfect size. It is slightly larger than the stock XJ mirror and I did have to do some trimming on the sides, but it is officially installed. :smiley_drive:


The results from the drivers seat are ten-fold compared to the tiny stock 96- mirror.


IMG_0786_zps6313c026.jpg


IMG_0785_zpsccc8b05e.jpg


And it looks good too since it matches the other side finally :wings:


IMG_0784_zps14a670b8.jpg


Next, the Jeep got a nice fresh oil/oil filter change. After much back and forth (reading online/my own personal experience) I decided to try out Shell's Rotella T 10w-30 with a Napa Gold filter. The Rotella oil was on sale at the time so I figured even if the newly rebuilt engine doesn't seem to like it, I'll just swap to something else. No problem.

I gotta say though, I am VERY curious how it does with it....:smiley_drive:


After that, I wanted to swap in the combination switch panel and remove the one on each side panels. The combo panel came out of a 89ish so I was pretty sure the wiring would be different, which obviously it is cause it wouldn't reach to the right side of the steering column. All I had to do is extend the wires. The main goal in the this was to keep it looking fairly stock as well as have a nice clean space for future switches without cutting into the dash in random places. :cool:


Here is a before:


IMG_0781_zps3cef7417.jpg


The 89 had what was basically a blank panel on the left side which I took off and used in mine after the switches were swapped over. [PS: dont mind how the switches and stuff look dirty, I still gotta detail clean all that stuff.]


Here is an after:

IMG_0937_zps41f2687a.jpg


IMG_0939_zps8326e9cb.jpg


IMG_0938_zpscf33accb.jpg


My final thoughts on this mod.....I love it. I love that it looks factory (because technically it was). And I love how simple it changes the dash. I also went ahead and removed the clock/blank panel from above the cigarette lighter. The clock didn't work and now I have a nice spot to use however.


On to the next one,


After doing the gauge swap the faceplate on the "new" set of gauges is gray while my "old" set was black. It's been bugging me ever since. :nerd:


Here was before:


gaugeinstalled_zpsad608fa8.jpg


To paint it to match the other black of the dash I used a nice coat of Rustoleum Bed Coating. Now I know what your thinking...

"Great. Another one of those idiots who bed coats everything on his Jeep. :rolleyes: "

...BUT...

...the nice thing about the Rustoleum stuff is that its only turns out "slightly" textured depending on how many coats you do.


Check it out:

IMG_0940_zps1be30be9.jpg


How sharp looking is that!?!

You gotta admit, it looks pretty nice. I love how great it turned out.


And finally, awhile back I was able to score this awesome plastic cover from an electrical truck. It was a cover for what seemed to be some type of scanner or receiver. Anywho now I just gotta decide where to mount it.

IMG_0941_zpscaa226f7.jpg


Here's what I'm thinking so far, attach it to any of the places listed below and use it to mount switches, gauges, cb, and just to expand my options. It literally fits perfectly in almost ANY of these spots.


Here are the spots Im trying to decide on:

A) flat on the front of the 97+ console in front of the shifter to cover the gap

B) on the roof right above the mirror

C) trim it down slightly and use it in place of where the removable ash tray is

D) trim it down slightly and cover the spot from the clock

Any thoughts or suggestions?
:coffee:
 

XJcherokee

New member
Hey TMC! It's GreenXJ98 from cherokeeforum, just went with a different name here. Nice to see your build thread here too. I've recently been inspired to do some overlanding with my Jeep, so I want to outfit it in that way and I came here for good info. :D
 

TMC-113

Observer
Hey man! Welcome! Lol :D

Yeah there is an AWESOME amount of good info here. I love it. Im here, CF, and NAXJA. So much good info on all three.
 

TMC-113

Observer
I finally got the turbines and second set of tires from the PO shop. I swapped them out. Im kinda liking the look of the turbines so far, although I wonder if I could sell the turbines for more $$$ than the black steelies.
:drool:


One of the tires is pretty bald :Wow1: so honestly....I just need to get a whole new set of tires. That way I can just start fresh. :D


I took the Jeep out on some back roads to get some better pics and to see how the different wheels/tires felt out on the highway. Here are some shots I got once I was up above the river:


IMG_0903_zps4b43c5a7.jpg


IMG_0902_zps09947834.jpg


IMG_0901_zpsbeb00560.jpg
 

Forum statistics

Threads
188,460
Messages
2,905,277
Members
230,428
Latest member
jacob_lashell
Top