You are using an out of date browser. It may not display this or other websites correctly.
You should upgrade or use an alternative browser.
You should upgrade or use an alternative browser.
Toby the Turtleback Trailer Build Thread
- Thread starter JCDriller
- Start date
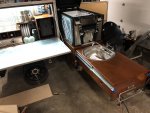
I'm not really sure what the weight is. It's pretty light as it's mostly 1/2" ply, the tops and a few select pieces are 3/4, and the smaller verts are 1/4". What I haven't shown yet because I don't have the tires installed so It sits to low, there are fold down adjustable table legs under the fridge section. you can just barely see them in the 4th picture down. I used these Folding legs


Getting closer, thought I would share a few photos from tonight along with more details on the build.
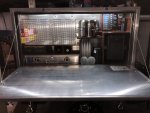
Showing the electronics panel on the passengers/kitchen/under Alu-Cab Shadow Awning. I received my custom Blue Sea labels got them installed along with the Sun Saver solar remote monitor. Also the flashlights are Olight Warriors. They recharge with a fantastic magnetic base which is mounted under the Kydex flashlight holders so when stored they can charge and always be ready.
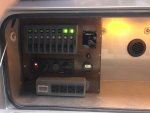
Same as below just showing that both sides have white and amber lights. Also the little black knob above the voltometer is a dimmer that dims either the white or amber lights (whichever is on).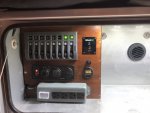
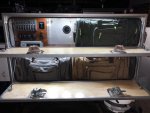
This is one of the 2 factory long Turtleback boxes mounted on the drivers side, they are accessible while in the annex room and will house our clothes, kids toys and living items. The top box houses the electronics and the propex propane heater output, the bottom box only has the cool air intake vent. Once the tent is open and annex is attached, you open the boxes (ensure vents not blocked) and the doors to the tent. The heat will rise and heat the tent. The thermostat is in the tent so it should be comfortable. Also you’ll notice both electronics panels on passengers and drivers side can turn on the water pump and heater (3 way switches), the drivers/house side also has a propane heater (propex heater) and tent power switches. The tent power switch will feed another electronics box in the tent allowing us to charge our iPhones/iwatches/tablets/laptops etc... I didn't want to have to hook up the heater hoses each time I wanted to heat the tent and I figured if it was cold I'd want the annex room so mounting the vent hoses in the boxes made it simple.
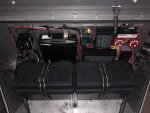
Not much new in the tongue box other than the Blue Sea labels for the switch panel. You can also see the cables for the 50w solar panel I mounted to the lid of the tongue box coming through via cable glands.
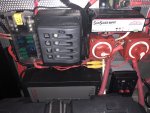
The switch panel is a separate circuit from anything else in the trailer. This way I can turn on the refrigerator, tongue box lights, trailer's exterior national luna lights and rock lights independent of the rest of the trailer. I also recently added the top breaker, above the sun saver. This breaker is the trailer side of the tow vehicle power cable which uses a 50a anderson plug to connect to the 4R.
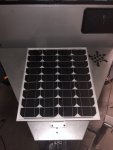
RENOLOGY 50w mono panel. I don’t like parking in the sun, but it happens. I may as well get some energy out of it. I also have 2 remote 100w folding panels that can be plugged into a Zamp port on the drivers side of the tongue box without disconnecting the 50w. My 4R has 100w on the rack full time (but runs its own ARB fridge full time). The 4R and Turtleback are connected via 6awg wire with 50a Anderson plug.

In this photo the lifting roof rack is about 35% raised, its balanced and just rests there until 20lbs or so is applied so it rotates up to its full extent of 18". You can also the quick pitch shower tent mounted on the front of the lifting roof rack. It slides 36” to the drivers side on a 500lb locking slide. Takes about 30 seconds to set up and provides a 36x36” shower/bathroom. The Turtleback shower wand mounts on the inside of the quickpitch for a hands free shower. Another cool feature is you can walk right out of the tents annex through the front door into the quickpitch shower without going outside. It’s like having a separate room sitting out side the annex. I have a 36x36” stainless steel basin that rides on the trailer's roof rack under the collapsed tent rack for water collection to keep shower water from entering the tent's annex room. A simple hose directs our run off somewhere else.
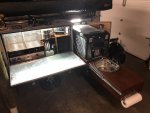
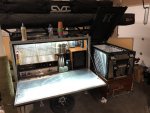
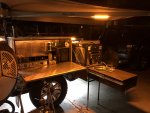
Kitchen all pulled out, National Luna light on above the fridge.
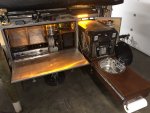
Kitchen pulled out with all the amber lights on to discourage bugs.
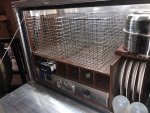
Added a knife magnet and found some great/colorful cutting boards that fit above the Keurig K-cup holder.

Showing the electronics panel on the passengers/kitchen/under Alu-Cab Shadow Awning. I received my custom Blue Sea labels got them installed along with the Sun Saver solar remote monitor. Also the flashlights are Olight Warriors. They recharge with a fantastic magnetic base which is mounted under the Kydex flashlight holders so when stored they can charge and always be ready.

Same as below just showing that both sides have white and amber lights. Also the little black knob above the voltometer is a dimmer that dims either the white or amber lights (whichever is on).

This is one of the 2 factory long Turtleback boxes mounted on the drivers side, they are accessible while in the annex room and will house our clothes, kids toys and living items. The top box houses the electronics and the propex propane heater output, the bottom box only has the cool air intake vent. Once the tent is open and annex is attached, you open the boxes (ensure vents not blocked) and the doors to the tent. The heat will rise and heat the tent. The thermostat is in the tent so it should be comfortable. Also you’ll notice both electronics panels on passengers and drivers side can turn on the water pump and heater (3 way switches), the drivers/house side also has a propane heater (propex heater) and tent power switches. The tent power switch will feed another electronics box in the tent allowing us to charge our iPhones/iwatches/tablets/laptops etc... I didn't want to have to hook up the heater hoses each time I wanted to heat the tent and I figured if it was cold I'd want the annex room so mounting the vent hoses in the boxes made it simple.

Not much new in the tongue box other than the Blue Sea labels for the switch panel. You can also see the cables for the 50w solar panel I mounted to the lid of the tongue box coming through via cable glands.

The switch panel is a separate circuit from anything else in the trailer. This way I can turn on the refrigerator, tongue box lights, trailer's exterior national luna lights and rock lights independent of the rest of the trailer. I also recently added the top breaker, above the sun saver. This breaker is the trailer side of the tow vehicle power cable which uses a 50a anderson plug to connect to the 4R.

RENOLOGY 50w mono panel. I don’t like parking in the sun, but it happens. I may as well get some energy out of it. I also have 2 remote 100w folding panels that can be plugged into a Zamp port on the drivers side of the tongue box without disconnecting the 50w. My 4R has 100w on the rack full time (but runs its own ARB fridge full time). The 4R and Turtleback are connected via 6awg wire with 50a Anderson plug.

In this photo the lifting roof rack is about 35% raised, its balanced and just rests there until 20lbs or so is applied so it rotates up to its full extent of 18". You can also the quick pitch shower tent mounted on the front of the lifting roof rack. It slides 36” to the drivers side on a 500lb locking slide. Takes about 30 seconds to set up and provides a 36x36” shower/bathroom. The Turtleback shower wand mounts on the inside of the quickpitch for a hands free shower. Another cool feature is you can walk right out of the tents annex through the front door into the quickpitch shower without going outside. It’s like having a separate room sitting out side the annex. I have a 36x36” stainless steel basin that rides on the trailer's roof rack under the collapsed tent rack for water collection to keep shower water from entering the tent's annex room. A simple hose directs our run off somewhere else.

Kitchen all pulled out, National Luna light on above the fridge.

Kitchen pulled out with all the amber lights on to discourage bugs.

Added a knife magnet and found some great/colorful cutting boards that fit above the Keurig K-cup holder.
Last edited:
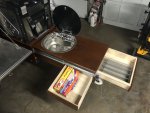
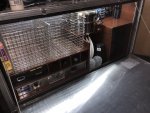
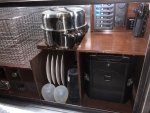
Drawers, just because I’m proud of how they turned out.
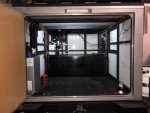
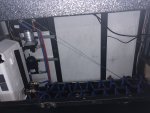
Here is the inside of the Turtleback. The loose wires will be placed inside of fire resistant wire loom once I’m done and won’t be running any more. The Propex propane heater is on the left, its combustion intake and exhaust exit under the trailer (you can barely see the shiny exhaust to the right of the reverse light and the left of the hitch. The 24 gallon water tank sits just forward of the axle leaving me a ton of rear storage space. I still need to make the brackets that will secure the tank to the floor of the trailer and the cross bar. I will also make a birch plywood barrier that divides the front of the trailer from the rear to keep cargo from interfering with the fridge, water heater etc. the Propex should be fine as it’s the heavier duty unit that was designed for mounting under your vehicle.
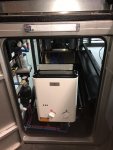
This is the front door on the drivers side, it is where I chose to mount the water heater. While I’m committed to this location, I’m not in love with this location. However, I really had no choice as I wanted a hard mount, inside the trailer that was still accessible. I’ve got its power remotely wired (no C batteries required) to the drivers side electrical box. I have 2 closable door vents that I’ll be installing shortly to exhaust the heater when the door is closed. I'll add a couple powered fans which will draw the air from the annex room through the drivers side door vent and out a door vent mounted in the rear of the trailer. The water heater won’t be used at night while we sleep, plus I’ll have CO detectors. Hopefully, it’ll work well.
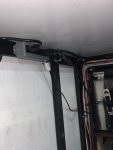
Shows the fridge is plugged into both 110v and 12v, it’ll auto select 110v if I’m plugged into an outlet and running on shore power.
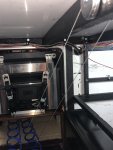
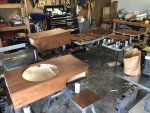
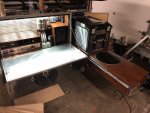
I had a challenge figuring out how to run the water lines since it extents a combined 64” when the sink and fridge are extended. There are fold down legs under the fridge section for support. I ended up using 15’ coiling drinking safe garden hoses (one hot, one cold) and spring loaded retractable cable pulls to help “guide” the hose when it’s all collapsed.
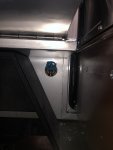
I added a hose bib to the kitchen side, it’s connected to the water heater so when it’s on I’ll have warm water to bath my German Shepherd. it’s also how I’ll drain the tank
Attachments
Last edited:
I got the trailer out last night to install a few more National Luna lights around the outside. I put one on the roof of the tent so it illuminates the annex room when the tent is open. I also put 2 on the alu-can shadow awning. One over the sink and one over the fold down table that will be used for the BBQ grill. The tent and awning just have SAE cables that plug into weatherproof recepticles on the roof of the trailer, under the raising tent rack. Each sides utility box has a switch to turn the recepticles on and off, then each individual light has a power button built in. I really love these lights, there are 6 on the trailer now....
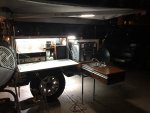
Each exterior door has a National Luna light mounted which is nice for illuminating the area around the trailer. In this photo you can see the rock lights and the new light installed on the awning over the sink. All the wiring is ran inside the aluminum arms of the awning.
No bug amber mode
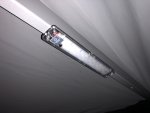
Lights are a little wider the awnings arms but there is plenty of room when folded up.
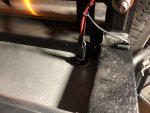
Shows the SAE recepticles on the roof, there is one on each side for the tent and the awning.

The awnings power cable
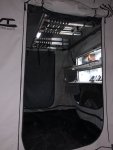
The overhead tent light.
Shows the light over the Foldong table/BBQ area.

Each exterior door has a National Luna light mounted which is nice for illuminating the area around the trailer. In this photo you can see the rock lights and the new light installed on the awning over the sink. All the wiring is ran inside the aluminum arms of the awning.

No bug amber mode

Lights are a little wider the awnings arms but there is plenty of room when folded up.

Shows the SAE recepticles on the roof, there is one on each side for the tent and the awning.

The awnings power cable

The overhead tent light.

Shows the light over the Foldong table/BBQ area.
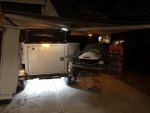
Also wanted to share a few photos of the trailer during the day So you can see the quick pitch shower tent.
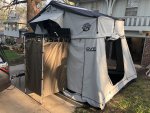
Shower is on a 36” 500lb locking slide that slides to the drivers side so it clears the tongue box when opened.
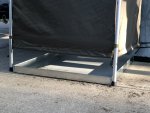
36x36” basin to catch the water. I’ll build a wood floor so your not standing in the water and plumb in a hose to let it flow away from the tent. The basin sits on the trailers roof under the lowered roof rack for transport.
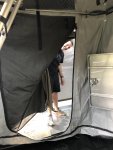
While it’s an outside shower it’s directly accessible from inside the tents annex room
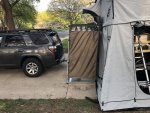
Shows the shower and how close it is to the tent. This will also house the Porta potty when not used as a shower.
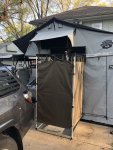
Shows wand set up and ready for use
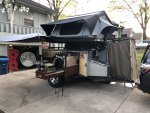
Notice the shower wand and the hot/cold mixer on the front of the trailer
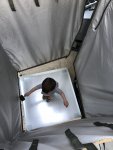
My son testing it out

Shower is on a 36” 500lb locking slide that slides to the drivers side so it clears the tongue box when opened.

36x36” basin to catch the water. I’ll build a wood floor so your not standing in the water and plumb in a hose to let it flow away from the tent. The basin sits on the trailers roof under the lowered roof rack for transport.

While it’s an outside shower it’s directly accessible from inside the tents annex room

Shows the shower and how close it is to the tent. This will also house the Porta potty when not used as a shower.

Shows wand set up and ready for use

Notice the shower wand and the hot/cold mixer on the front of the trailer

My son testing it out
FlightMedicJP
Active member
What brackets/supports did you use to mount the drawer slides for the pull out kitchen? I am also doing a side pull out kitchen and just wondering if there was something already out there or if you had to fabricate something. Awesome build!!
What brackets/supports did you use to mount the drawer slides for the pull out kitchen? I am also doing a side pull out kitchen and just wondering if there was something already out there or if you had to fabricate something. Awesome build!!
I just fabricated them, they are pretty simple. Just make sure you mount them square to the trailer, door and each other.
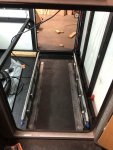
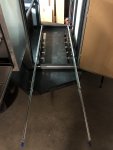
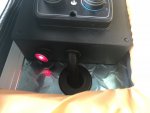
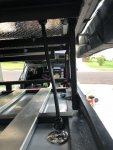
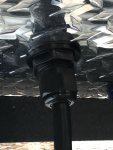
Also wired up the tents power and propex thermostat this weekend. I ran 7 pin trailer cable through the tents floor using a bulkhead fitting and a couple cable glands. The 7 pin cable was perfect as it has 12awg wires for the power and 5 16awg wires for the thermostat.
I notched the mattress so it all folds up nicely and stays permanently installed in the tent.
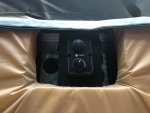
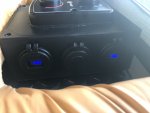
The project box houses 4 2.1a USBs, 1 12v, one output for the factory CVT tent light and one quick disconnect for a 12v box fan.
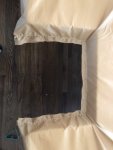
I notched the mattress so it all folds up nicely and stays permanently installed in the tent.
The project box houses 4 2.1a USBs, 1 12v, one output for the factory CVT tent light and one quick disconnect for a 12v box fan.


Similar threads
- Replies
- 20
- Views
- 3K
- Replies
- 2
- Views
- 672
- Replies
- 31
- Views
- 5K
- Replies
- 8
- Views
- 1K
- Replies
- 0
- Views
- 748

