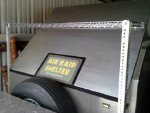
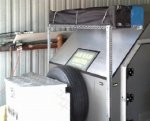
trailer front rack; using non-standard materials for purpose-built functions

workingonit71

Aspirantes ad Adventure
  • I'm having a storage problem, trying to get my squareback trailer ready-to-go with all my gear stowed in advance. I have waterproof/critter proof storage boxes that i can throw into my truck bed at a moments notice, containing pantry, EDC gear (just in case my trailer fails me), and miscellaneous parts & tools I haven't got room for in my big crossbed tool box. There's room for spare gasoline jugs, porta can & spare filler, big cooler, and plastic tables (made from Keter storage shelves). I already have my Hi-Lift stored there, so I've run out of room in the truck bed.
  • The front half of my 4'x8' trailer is used for cargo transport, until I arrive at my camp. I fold back my mattresses (2), strap them in position to D-rings, and then I have 35-36" in front, to carry two 7-gallon Aquatainers, and two smaller coolers. I strap these items to an E-track I mounted on the front wall, and put overhead straps to D-rings (to keep the cooler lids closed). I also carry detached side-tables (in a canvas bag), a Coleman camp chair, two bagged sling chairs, and a twist-to-set-up potty tent, all on top of the mattresses. As you can see, I've got a full load, but there's really no space left (the rear storage/galley is already full).
  • That leaves the storage of my two canopies as the problem.Too long and heavy to put in my truck cab, so they need to stay with the trailer (even when at home, in the garage bay). I was going to dispense with canopies in favor of tarps and awnings, but canopies (yes, I bought a second one) are cheaper, with less elaborate rigging (I spent months trying to fabricate an all-purpose tarp/awning, but it would've required $200+ in parts, and drilling 48 holes in my trailer; no-go), so two canopies fit my requirements, for now.But, without a rack to carry them, I just pile them in the truck bed with the other gear.
  • I've been looking for a small, inexpensive rack, for my trailer. Everything is just a little too expensive, large, or requires more holes drilled in my rooftop (I have too many already).
  • I was going to get a rear hitch mounted carrier, and adapt it to the sloping front on the trailer, but I spotted some industrial shelving in my mother-in-law's storeroom, that would fill the same purpose. They are very sturdy wire shelves, 48"x18"x2" (sorta shallow, but many people use even flatter racks to strap things to), and would be easy to make a sturdy framework for, at little cost. My Mom-in-law didn't want to sacrifice her shelves for the cause (I didn't like the chrome anyway), so I found some on Amazon that would work.
  • industrial shelves 600lbs capacity for mini-rack.jpg silver/zinc (my #1 choice) or powder coated black
  • If I used 1/8" thick aluminum angle to build a simple framework, the colors of shelf and framework would fit in with my low-tech scheme, require few more holes in my trailer (less tan a rooftop rack, or my awning scheme), and have suitable attachment points for the intended load (two 45 lb canopies), and the open wire mesh would have good drainage.Since I'm trying to keep all my trailer weight as far forward as possible (I built it too heavy in the rear, with A/C unit, an on-board generator with extended run fuel supply, and cooking and lighting gear, back there. Lashing my canopies to a front rack, will help balance it even more so.)
  • proposed industrial shelf as a mini-rack.jpg rough drawing of simple mini-rack & framework
  • As usual, I may get the parts, assemble them, and find something better or simpler to do, but I figure I can make it work for $50-60 outlay, less than the racks, carriers, and re-purposed conduit or load ramps or ladders that some have used (I was measuring up a spare aluminum ladder, when my wife sensed what I was going to do with it, and said no...).
  • I looked among my metal supplies, leftover from previous projects, and found a 60" piece of slotted angle. I had used more of this as a stabilizer for my tongue box, doubled-up to brace the box for road shocks (box is sitting on a slide-out mounted to a 3x3 beam). When doubled, I can stand on it, so the slotted angle will be strong enough to hold up the foreseen loads I wish to carry on the rack.
  • I only had the one piece left, so while I was out the other morning, I swung by Home Depot to pick up another piece. I decided to order the shelf, but at a reduced price, in case it turns out badly (non-functional, I mean; appearance doesn't really matter much to me, since it will match the low-tech semi-industrial motif of my trailer).
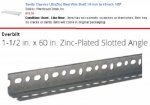
  • killer price for experimental rack components.jpgwire-shelf-clips.jpg rack, support, wall clips
  • Stay tuned, this might work out-or not-, pictures of the results to follow...same Bat-time, same Bat-channel. (whoops, a slip back into the 60's, again).
 
Last edited:

workingonit71

Aspirantes ad Adventure
simplistic design, function over form

  • I received the wire shelf yesterday, and gathered all my parts together. I found that it was rather difficult to measure, mark, and position the 15 lb. shelf where I wanted it, with only one arm able to work alright (bad thumb and rotator cuff injury on my left arm). But, I figured out the general locations and marked them ok.
  • Today, I started by placing the wall/front slope clips in place, on the 45 degree front of the trailer, and snapped them over the bottom rear edge of the shelf, to hold the shelf in place, so I could measure ans set the support arms, prior to cutting the slotted angle. After the angle stock was cut (2 x 32" each), I drilled out the corners of the front of the shelf, to accept 3/8" bolts (the nominal size of the slotted angle holes, too). With eah front corner drilled, I attached a slotted angle piece to both, then lifted one side at a time to "level", and used #9x1.5" Simpson Strongties structural screws to fasten to the trailer front wall. The screws were used because there was insufficient space to use nuts and bolts (I could've drilled the holes, inserted the bolts, but not the nuts). So, I used the screws with bonded rubber/steel washers under the angle, next to the wall, to prevent water intrusion (I used the same washers under the clips, with 10-24x 1.5" stainless bolts and nylocks).
  • Tightening down the rear clips was the hardest part of the job. Inside the cabin, hanging from the front slope, is a wooden shelf for my cooling fans (3), stereo and speakers (including hidden marine antenna), LED lighting (one of three sets in the cabin), and all the associated wiring. I could barely reach inside, to put on the backside washers and nylocks, kneeling on the mattress, and had to wedge the bolt heads to keep them from turning, while I tightened the nylocks from inside (if both my arms were working, it wouldn't have been a problem. Tightening these four took me four hours! After that was done, I used left-over angle to reinforce the support arms, by bolting a second thickness inside the supports. I don't expect any problem with them, but extra strong is better anyway.
  • I spent $14 for one 60" angle (I already had one on hand), and $19 for the shelf (Amazon Warehouse deal -like new, in original box-, and I already had the steel clips, and the other hardware I needed. Total cost, $33 (probably $60, if I had to buy everything). Not fancy, a rudimentary design; but it's just what I was intending to make, for a specific purpose. I'm not going to paint it, the zinc/stainless look will weather fine (it sits in the garage between trips anyway).
  • rack 1.jpg 48x18 shelf, to serve as a rackrack 2.jpg zinc/stainless/aluminum theme all overcanopies strapped to rack.jpg specifically made for my two canopies
 

workingonit71

Aspirantes ad Adventure
continuation on a theme; bracing for more cargo

  • True, my trailer isn't the most beautiful one out there, nor was it ever intended to conform to any conventional design...it is what it is, an attempt to pack in the necessities for one-person camping, in or out of the usual camping locales, on or (slightly) off-road. The "attempt" is a continual process, and I modify the trailer to meet my needs, or at least try, between every outing Some mods are better than others, and remain, while others are less successful, and are discarded.
  • My latest modification, a front rack, made from cheap and/or re-purposed leftover materials, is a logical (to me) step towards my goal of being ready to pack up and go, in an instant, without finding space to stow my gear, or having to check for what is and isn't aboard. Not satisfied with just having my canopies stowed on the new rack, I decided to add bracing with more leftover scrap, so I could add a folding chair (in a bag) on top, bringing the total suspended weight to 100 lbs.
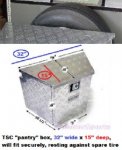
  • After the rack was braced to my satisfaction, I thought that the flat top of the tongue box would make a great spot to carry my pantry-in-a-box (a Tractor Supply storage box), provided that I add tie-down locations to the rack. I added three D-rings to the reinforced rack, and added a forged 3/8" eyebolt to the TSC box as an attachment point for motorcycle straps, and voila...my pantry will be ready to go, whenever I need it (it is always stocked with Spam, beans, and greens for two weeks, and I can carry a small bag of perishables in my truck, from my home stores).
  • When I built the trailer, I made the front slope at 45 degrees, to lessen wind resistance. That was when I thought my HHR Panel would be the tow vehicle, but my TTT, now at 2000+ lbs, was too heavy for it. I use my Chevy 2500 HD pickup as my TV, and wind resistance of the trailer doesn't matter, at all, so I can partially block the sloped front, with no deleterious effects. And, there is still an air gap allowing flow up the slope, anyhow, if ever I get a less capable tow vehicle.
  • upper and lower bracing for rack.jpg used scrap metal to reinforce the rack for extra loading
  • pantry box secured on tongue for travel.jpg with D-rings to attach to, pantry box can ride on the tongue box
 

workingonit71

Aspirantes ad Adventure
ELUCIDATION OF THE THINKING BEHIND IT ALL

  • My wife just asked me why I keep on changing the configuration of my trailer (I no longer hold any hopes of her using it, though I designed it for her use, at first). She doesn't understand why I must modify things, constantly, when nothing is really wrong with them. I changed my load and loading procedure after every drag race I participated in, for years, never getting it "just right", even after two decades (trying to cover all eventualities, but keeping it simple and fast to load up). But, it never worked out for me, since I had to load from scratch, and completely unload after coming home, because I had no enclosed space for truck, trailer, and gear (only the race car got covered in the garage. I loaded boxes of tools and gear, only having to remove it all, before going to work. It wore me out, eventually, and I don't miss the racing much, because of the hassle. If only I had everything ready-to-go, at all times!; it would've been a joy, comparatively.
  • Now, I don't race anymore, but I've switched over to camping, and the outdoors, having retired 17 months ago (I started building the trailer 68 months ago, in anticipation, and have been using it sporadically, for 45 months). And I have the same problem, packing up for a trip, setting up once there, and unpacking back at home. Admittedly much easier, since meeting my living requirements for camp are much less than for supplies and tools for my race car (and for much of my team's cars, as well). I don't have to unload the trailer from the trailer, as ridiculous as that sounds; it just gets stowed in the garage, alongside the unused Chevelle. But, the gear sitting uncovered in the bed of the truck remains, and I'm not as mobile as I once was, so I've put everything I could, into weatherproof storage boxes, again.
  • My trailer sits loaded, in the garage, with water, a Coleman folding chair, and side tables and side tents inside the cabin, strapped to the front wall (using an E-track system), with only the rear ice chest waiting to be loaded (I keep the cold/frozen meats and perishable foods there, in the "galley"). But, I was still having to load up my canopies, other chair, spare fuel, porta-potty and spare supplies for it, and my two other coolers, into the bed of my truck. Also, tools and parts that I like to carry, in addition to those in the truckbox and trailer tonguebox. And, my EDC box, with get-home bag and certain supplies, that goes with me in either of my vehicles, whenever I travel 50 miles out. So, it seems that I am in the same situation now, packing for the outdoors, as I fell into while packing for racing.
  • I have just made a functional, but not pretty, rack, to hold the canopies and extra chair, and attached my pantry box to that rack, sitting on the tonguebox. I strapped it tightly to four points with motorcycle straps...it's not going anywhere; I always put it on my tailgate or on a side table at camp, so it's not in my way, in this location. I've decided to leave the extra toolbox in my truck, fulltime, and the light EDC box, moves from one vehicle to another, as needed. Just the fuel, porta-potty equipment, and coolers need to be unloaded, now, but since they are all waterproof, it won't be a pressing need, anymore. Slowly, but surely, I'm getting closer to the goal of instant readiness, but a dedicated outdoors vehicle and a 12v-120v cooler (or two) are still on my wishlist.
  • securing the pantry for travel.jpg rack secures canopies and now the pantry
  • storage boxes always carried in truck bed.jpg truck bed extras stay in the truck bed
  • PREPPED & READY.jpg getting closer to ready; more stuff always packed up
 
Last edited:

Forum statistics

Threads
188,206
Messages
2,903,767
Members
229,665
Latest member
SANelson
Top