Trestle 2022 Ram 3500 Cab/Chassis Build Thread

Trestle

Active member
Victron battery monitor

They say you don't manage what you don't measure. With 300 amps of lithium, and 600 watts of solar, a 30 amp battery to battery charger, and only camping during Summers, the original owner simply left on the inverter full time (during season), and did not have much need to monitor the battery.

Living and workout out of this rig for more extended periods, some of which won't have the benefit of the sun for perhaps days, and what was once overkill would benefit from a good battery monitor.

The cooktop is a single induction burner, we'll run two refrigerators, and daily use of a Breville espresso machine (yes, we're a little bit spoiled...ok a lot when it comes to coffee), combined with two remote work setups...not a problem in Summer...potentially taxing over days in Winter. We managed just fine with a smaller system (240a lithium/320w solar/25a b2b charger), but only because we were able to monitor and thus manage accordingly.

Once we started using Victron monitors, it is standard fare to have them installed in any rig we own. I find the BMV-700 is adequate for our use with a single battery bank. They make other models for dual banks, and other. We simply haven't had the need to go higher than the 700.
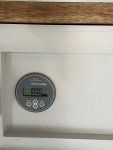
Victron battery monitor.jpg

The key to installing these is to have EVERYTHING to/from the battery go through the supplied shunt on the negative side. This way all energy going in our out is counted down to the individual watt.

They are programmable for the size of your battery capacity, the type of battery, and much more. This takes into account how different battery systems charge (some are more efficient than others, or even at different points in their charge cycles), and discharge at various loads so long as you select the correct settings. Example: a sealed lead acid (SLA) or absorbed glass mat (AGM) battery will have a significant loss in efficiency when pulling a high load from them vs. a much lighter load. Lithium are much less affected by this. Victron incorporates Peukert's law into its various algorithms to account for the scenario per your specific battery setup as just described.

It's also nice that you can pair most Victron devices with their VictronConnect app to set, control, and monitor what the various systems are doing. We have ours set up with the inverter, solar charge controller, and will add in this monitor too once we have a free minute. A quick screen shot take from the house to the camper where we were barely in bluetooth range.
VictronConnect Inverter Switch.jpgVictronConnect 2.jpg

They are also very helpful when diagnosing issues, such as a blown fuse, etc. No solar in...check that breaker. Solar in, but not to the battery...check the other breaker. Camper plugged in to shore power, but no A/C coming in...better check the camp sites GFCI to see if it popped. How much sun are we getting today vs. expected...time to go up and clean off some panels maybe? You get the idea.

There are other monitors that use voltage, and they are often inaccurate at best. These are worth the price of admission.
 
Last edited:

Trestle

Active member
Enjoying the build so far. Sucks about the your truck order that shows up to be shipped right after you buy your buddy's truck.

It will cost us a few grand, but we're making progress instead of sitting on our thumbs. My buddy did not have his tray on order, which would have led to it sitting in a storage lot for months before he got to it. He was making truck payments, and paying storage fees for something he could not use...despite him already having a 4WC Hawk.

In the end it will work out, and the push button 4wd is probably a better choice for the wife.

Thanks.
 

RAM5500 CAMPERTHING

OG Portal Member #183
Looking good!

Are my eyes deceiving me or did you hard mount the tray right to the frame without any sort of flex or torsion relief system?

The Ram CC flex like mad, so you may want to address this somehow.

In one of my videos, i flex the frame with a forklift under the tire and it blew my mind how much the CC frames flex vs the regular pickup frames.
 

Trestle

Active member
Looking good!

Are my eyes deceiving me or did you hard mount the tray right to the frame without any sort of flex or torsion relief system?

The Ram CC flex like mad, so you may want to address this somehow.

In one of my videos, i flex the frame with a forklift under the tire and it blew my mind how much the CC frames flex vs the regular pickup frames.

RAM 5500 Camperthing: Your inquiry raises a good point. I have an industrial design background, but I am not an engineer. I know enough to know that it's a concern, but don't know enough to quantify the actual risk. I have put some thought into this and here is the info I have right now. I've watched countless threads on this topic here and on other forums throughout the years, and am surprised it took this long for someone to bring this up.

Section 1 - what I can measure

Truck frame at rear is 3/16" C channel with a 6" tall web by 3" wide flanges (not technically an I-beam so web/flange may not apply perfectly, but good enough for descriptive purposes). When you move just forward of the axle the "web" increases in height to 8", then massively (probably 12" of truck frame vertically) just in front of the forward leaf spring mount. So the truck frame is indeed progressive, and likely to flex more at the aft end than at the back of the cab.

The tray frame is 1/4" thick aluminum C channel with a 7" tall web by 3" wide flanges along its length. It is boxed at the aft end laterally with multiple 1/4" and 3/16" pieces for a box section of 10" tall laterally.

The total distance vertical between the truck frame and tray frame at its rear most point is 15", plus an additional inch of decking, so let's say 16". It obviously gets taller where the truck frame gets taller as described above. This vertical "box section" of combined material is going to exhibit significantly less flex as a system than the truck frame section alone. I do not have an FEA program to determine how much less, where the stress points are at, etc. so we're not able to quantify.

The tray mount points are hard mounted vertically to the tray in the factory recommended holes at 4 points along the frame. The tray should not stress the truck frame, but the question remains...is it going to be an issue for the camper? I took 200 words to say "yes" to your question. Yeah, sorry about that.
Screenshot 2023-03-14 at 5.10.44 PM.png

Section 2 - what I can ask

I see information on the 4WC site indicating that their campers are designed to flex. There is no info on limitations in truck selection, modifications for mounting onto a flatbed, mention of C channel truck frames vs. boxed on their site anywhere that I can find.

So I asked the question. I also asked if it would be a good idea to spring mount the forward two of four total mounting points? Will see what they say. I've had it in my mind that I may want to add springs to the two forward mounts specifically to accommodate flex, but I haven't really flexed anything yet. The truck has done some road work, but is basically a driveway queen for the time being while I work on it. I'm curious to what they say. The way the Granby is mounted are the two rear most are about 10" forward of the curved rear portion of the camper. Thus equally distant from the rear of the truck. The front mount on the driver side is mid camper (if you don't account for the cabover portion. The front mount on the passengers side is in the propane box area (not fully forward, but further forward than the driver side). So neither is at the front portion of the camper, and both are different distances from the rear points.

Here is copy from some of their marketing (FWIW):

"Build a very strong, cage like aluminum frame fabricated from aluminum tube and extruded channel. Much like an airplane frame it has the ability to flex, providing greater strength and durability, provide longer life, and the ability to handle the torque experienced on mountain and desert roads. Optimum off road capability demands the lowest center of gravity. The minimal height over the cab of the truck is essential, and as much weight as possible is on the floor of the camper."

Section 3 - what I can see elsewhere

I have seen the underside of several cab/chassis 3500s and F350s with aluminum trays installed, and 4WC hawks or granbys mounted on top. Of all of them, the most flexible setup personally witnessed is to have a 1" tall delrin puck (may as well be aluminum when it comes to compression), stacked atop a 1" tall urethane puck. The amount of flex in that system would serve more as vibration dampening than anything else. It may allow as much as an inch of movement between the tray and truck frame at best between the furthest corners of the truck. Most did not even have this much flex in their system and were essentially hard mounted. These are trucks built out by 4WC dealers, on cab/chassis trucks, and the same system they use on other hard mounted/hard walled composite flatbed campers. These companies have been doing this for years, and are well known brands. I am not comfortable going into detail on the who and what, but this is what I am able to verify with my own eyes after attending a half dozen different years of Expo West. This this is "what I can see elsewhere" as a barometer of this possible flex risk. Note: this is not the only type of system I have seen, but the systems seen as it related to mounting flatbed campers which bolt onto flatbed aluminum trays (i.e. similar situation) into both traditional pickup boxed frame and cab/chassis truck models. I'm trying to keep it specific to a like situation and not dilute the relevance by adding in a composite camper mounted on a spring system or 3 point/4 point system on a European or Japanese truck.
IMG_1691.jpg

Section 4 - what I can do

Once to the point where I can flex this thing out in a controlled environment, I can measure and adjust accordingly. Adding longer front mount bolts with springs to account for flex is an easy remedy.

I can also take the feedback I get from 4WC on the subject and act accordingly.

Section 5 - what I suspect given all of the above

I think 4WC camper will tell me their frames are designed to flex, and it's not an issue. Their frame warranty is 5 years, and only applies to the original owner anyway so they have an easy out.
I will probably not be satisfied with that, and add captive springs to the front two points as a result.
It is likely that within a year of the completed build, that the 4WC Granby will be replaced with another hard walled camper. It is, and has always been a temporary solution until we land on/end up with a camper that servers our needs more long term. Whatever camper we end up with will have to be designed for this type of flex (aka a space frame design), or have provisions to remove the issue from the equation (modification of bed mounts, or a spring mount system).

Conclusion

I hope this comes off as me having thought about, and taking your suggestion seriously vs. arguing on the internet. I am not wed or sold on any specific idea other than this is where I am at today with the information I have processed thus far. I find these forum posts to be both useful and confusing, so I think the more information I can present about this build, the more other can learn what to do, and likely what not to do. Both forms of information are valuable, sometimes the latter more so.
 
Last edited:

RAM5500 CAMPERTHING

OG Portal Member #183
Glad to see it’s on your mind. It’s important

I will spare you my rant on FWC gross incompetence and my experience with my 2018 Hawk I bought brand new. There’s enough rants on here about my experience.

I’d be more concerned about the frame flex damaging the tray.

A friend with a brand new F550 CC hard mounted a very nice CM aluminum flatbed to it and it’s cracking up front and did so very quickly.

Unfortunately I don’t have a “fix” but I’d most definitely suggest something to allow flex in the front.


For what it’s worth, my 2020 5500 frame flex is almost all RIGHT behind the cab

To add to the confusion, I’ve had mine 2 years now and STILL trying to dial it on. My subframe moves TOO much.

DISCLAIMER: I have no idea how different or similar the 3500 frame is to the 5500 frame, but I THINK they’re both the same for the CCs

Here is my 5500 frame flex. Fast forward to about 5:30

 
Last edited:

Trestle

Active member
RAM 5500 Camperthing: The frame is similar, but not exactly the same from what I can see in the video. Having said that, the profile looks similar enough. It's mostly the factory penetrations in the webbing and some finer details. For all practical purposes, I'd say it is the same.

Curious what your cab to axle length is. The rig I have is 60". I know they have 60" or 84" variants. Likely more deformation over longer distances, so that is why I'm asking.

Also curious as to where the tray failed that you mentioned on your friend's truck, and his cab to axle length as well.

The response from 4WC was that their campers are not made to mount directly to a cab/chassis truck (not the question I asked) and must be put on top of a tray. I replied with a (hopefully) clarification of what I meant so will have to wait for an updated response.

Using my iPhone level as a crude tool, I measured about a 9 degree difference front to back from your video. I am sure there is some distortion due to focal plane of the camera taking the video, but that's a fair amount of flex either way.
Screenshot 2023-03-15 at 9.12.42 AM.png

Thanks.
 
Last edited:

RAM5500 CAMPERTHING

OG Portal Member #183
My truck, and my buddies are both CA84s

His tray/flatbed cracked right at the front, on both sides. I will ask him for pics and post them up.

As for a reply about anything technical whatsoever from FWC, good luck.... I have ample rants on here about my experience with those hacks.

Anyway... Glad youre looking at it as only a temp solution..
 
Last edited:

Trestle

Active member
Closing out the frame flex issue reference the aluminum tray, as well as the response from Four Wheel Camper

-Engineer from FWC: They deferred to the tray manufacturer, which is a bit weak given the tray manufacturer doesn't have FWC's engineering specs. So I went to the tray manufacturer.

-Engineer from SET: Not an issue with a 60" cab to axle, but is an issue with longer frame lengths. Went so far as to say you could put a Total Composites unit on this setup without issue. My setup is good to go, but your longer frame not so much.
 

RAM5500 CAMPERTHING

OG Portal Member #183
-Engineer from FWC: They deferred to the tray manufacturer, which is a bit weak given the tray manufacturer doesn't have FWC's engineering specs. So I went to the tray manufacturer.

Of course. They don’t/won’t accept liability/responsibility for anything.

I had issues with my furnace, hot water heater AND fridge on my brand new hawk and they politely told me to pound sand and contact the manufacturer.

-Engineer from SET: Not an issue with a 60" cab to axle, but is an issue with longer frame lengths. Went so far as to say you could put a Total Composites unit on this setup without issue. My setup is good to go, but your longer frame not so much.

I would get that in writing
 
Last edited:

Trestle

Active member
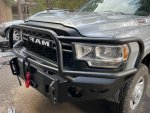
Winch and Expedition One Bumper

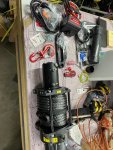
Installation of the winch into the bumper began by laying out all the parts. Everything seemed fairly strait forward, if a bit slow due to fitting tools/hands into small spaces.
winch parts.jpg

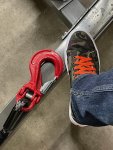
The hook is massive. My foot is exactly 12" toe to heal in these shoes.
Winch Clevis.jpg

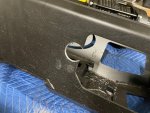
First issue (not shown) is that the 16.5k winch has eight mounting bolts, and the bumper internal plate has four holes. If I drilled the additional four holes, the newly introduced bolt heads would require some internal drilling into the bumper.

I sent a note out to Expedition One asking for guidance. After some back and forth, pictures sent, etc. their engineers said it is appropriate to use only the four mounting bolts. The winch is being used in compression the way it is mounted. If it was under tension, then all eight bolts would be required. Note: Expedition One sold me both the bumper and the winch at the same time.

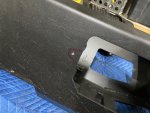
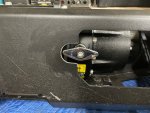
Issue two is that the spool release handle overlapped a portion of the bumper. Some measuring, drilling, cutting, and a bit of filing got things to fit nicely. I am handy, so no issue conducting the work, but not so chuffed that I have to paint it after the bumper was powder coated. Still, no harm, no fowl. not to mention the powder coating was chosen for its ability to be touched up with a specific easy to get spray paint.
Winch T Clearance 1.jpgWinch T Clearance 2.jpgWinch T Clearance 3.jpg

Lifting the bumper and getting it into place with the help of a cherry picker.
Winched Prepped.jpg

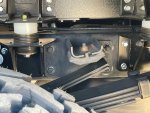
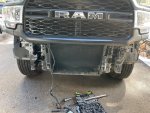
First remove the front bumper. Then use a supplied template to cut two corners off of the lower frame rails. Drill a few additional holes, then prime and paint. Drying in this cold weather was achieved with judicious use of a heat gun.
Winch bumper removed.jpg

Once the bumper was in place, adjust then torque down all hardware. This pic is pre trimming of some of the fender liner which has since been trimmed.
Winch Bumper Installed.jpg

One of the anticipated benefits of the upper bull bars was to be able to better gage the far corners of the truck. Unfortunately you cannot see any of them from the cab, so we will be mounting a camera up front for use in tight situations. It should also help when cresting a blind hill off-road.

All in all we are happy with the lines and finish. The controller, wiring, and fusing were all done at a later date. We may post about that, but probably not.
 
Last edited:

Kingsize24

Well-known member
Although I'm not an Expedition One fan anymore after my rear bumper fiasco with them, that bumper does look like a mix of AEV and ARB, which IMO looks fantastic. Great job following up with them to get questions for issues. And at least you got some responses. Sucks about the powder coat.

Truck looks FANTASTIC ?!
 

Trestle

Active member
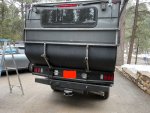
Rear Bike/Gear Rack

Goals for the rear rack are to:
  • Hold two mountain bikes...they must not stick out above the roof or past the side walls when driving, and be as high up as possible to reduce the likelihood of damage in a rear end collision. I've been rear ended three separate times in previous vehicles (mostly slow speed in city traffic), and one was a hit and run.
  • Hold some maxxtrax.
  • Not obstruct access to the rear drawer, or require moving something out of the way for access.
  • Not obstruct any of the lights or markers.
  • Hold some external portable storage, in this case a trasharoo that we already have.
  • Possibly hold the second of two FWC propane tanks, up high to reduce the likelihood of being hit if rear ended.
  • Have some support so that the weight is partially distributed onto the flatbed, and some isolation to allow minimal flex/some vibration dampening.
  • Least stick out possible when bikes are mounted, yet not require loosening the stem and turning bars.
  • Some provision for a cellular booster antenna.
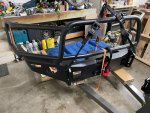
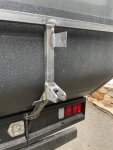
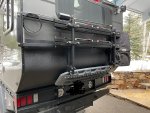
With that in mind we started with the camper corner jacks as the camper connection point, much like the aluminum rack FWC sells. There is a 1/4" thick piece or rubber between the camper side and the rack side to allow minimal flex and some vibration dampening.

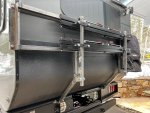
At the bottom I sourced some rubber isolated engine mounts fabricator brackets from Ruff Specialties. The proceeded to hole saw and weld square tubing to them for the lower supports. This bracket is attached to the tray. Some additional tabs from Ruff Specialties fabricator parts were added for the bike tray supports. A few tabs added on for holding maxxtrax, and other assorted functions. This is what it looked like at that point.
Rear rack 1.jpgRear rack 2.jpg

Then bike horizontal supports were fabricated, along with measurements for the 1-up bike trays until the two bikes could be as close to the camper as possible, yet avoid banging on the camper as there is some movement in the system.
Rear rack tray fitment.jpg

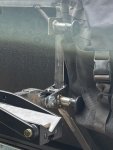
We wanted an easy fold/latch in the stowed and carrying positions, so some handles were ordered from Amazon then added in. To drop the trays down, you pull the top handle out for release, and pull the bottom handle out to allow the trays to settle in the carry position where they lock in place. To stow them you only pull the lower handle, and they will automatically click into the locked/stowed position. In practice it works amazingly well.
Rear rack up down latches.jpg

We added tabs up top to hold the folding antenna for the cell booster, and a single quick fist to hold it when stowed. We added some heavy diagonal round tubing, which adds some lateral bracing, but is really there for a place that one can secure a cable. The tube diameter is too large for most bolt cutters, so they would have to cut the lock or cable to get the bikes. The plan is to cover them so that they are less visible, and thought to be a beater or commuter vs. something more valuable. Time will tell how that plays out, and there is of course insurance if it doesn't.

Painted for now, with maxxtrax added. Four 1/2-13 all thread sections to secure the maxxtrax, one uses the HiLift jack lockable threaded handle to help keep them secure.
rear rack near complete.jpg

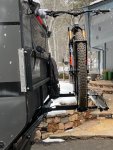
This bike rides close to the camper when it is just one bike, and if two, this bike is further out. My bars are wider than the wife's, so with two there is a bit more clearance between her bar and the camper.
Rear rack bike mounted.jpg

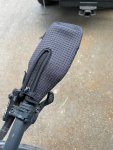
Just in case, we ordered this coozie set from Amazon. One can slipped into one bottle version. Since we both use the wider Ergon grips, the zipper works to hold the two nested coozies on, and it provides padding so the bars don't damage the campers spring lift piston while bouncing down a rough road or hitting a g-out.
Rear rack handlebar coozie.jpg

All in all it works well. It is easy to load, unload, stow the tray, etc. Access to the maxxtrax is easy, nothing blocks the slide out drawer (you do have to duck under the bikes for unlocking/unlatching the drawer though) or any of the lights. I plan to make a propane tank bracket to fit on the upper left side for when we do bigger trips and want the second tank on hand.
 
Last edited:

Trestle

Active member
Although I'm not an Expedition One fan anymore after my rear bumper fiasco with them, that bumper does look like a mix of AEV and ARB, which IMO looks fantastic. Great job following up with them to get questions for issues. And at least you got some responses. Sucks about the powder coat.

Truck looks FANTASTIC ?!

Thanks King. We like the aesthetics of this setup. We looked at everything out there last year at Expo West, and were both in agreement this is the setup we wanted. AEV with the full upper would have been our second choice based upon aesthetics alone.

It did take a while to hear back from Expedition One on the winch fitment. I sort of guessed the answer during assembly, and got lucky that their engineers confirmed it about a week later. It would have been a major PITA to tear it all apart and modify it if they ruled differently.

I think every manufacturer has their issues. Especially when demand has been so high as of late. I reached out to AEV on several occasions when purchasing things for this build. They did not respond in any form to two of three inquiries. Being busy is not an excuse, but persistence has been necessary this past year with most vendors. My gut reaction is to get pissed, but I find that you get better results if you take a more measured approach.

I will say that my experience with SET has been great. I call on a weekend (when I have to do a lot of this work) to leave a voicemail and end up talking to someone who sends me the info in less than an hour. I call for two questions, end up asking a dozen, and they just stay on the call and answer them with patience and thoroughly. I was going to build a tunnel box between the cab and camper. After my last call, I ended up having them do it instead. Equipt was great when I had questions on a fridge that I ultimately ordered from them. There have been a few other companies that I have yet to receive product from to see how it performs that have been great. I don't want to mention them until I get to try the finished product though.
 

UglyViking

Well-known member
@Trestle I'm waiting on the identical bumper from Expo 1. After reviewing your post I'm thinking that I made a mistake getting the factory powdercoat as your light mounting solution looks like it will be super clean. Eager to see what lights you end up with and how it all looks, I'll probably just find a clamp option for the time being.

It's a real bummer reading about the FWC issues.
 

Forum statistics

Threads
186,851
Messages
2,888,734
Members
227,377
Latest member
blkcad
Top