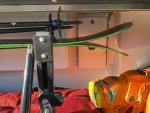
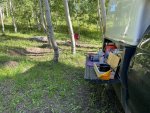
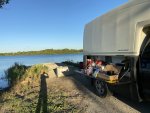
Tundra + SpaceKap + SherpTek

phritz

New member
About three years ago I started building a recreational vehicle. I had no consistent master plan for a long time. And there has been more than one redo along the way. But it has been a fun experience and Expedition Portal was a huge help. Other DIY projects have been a source of ideas, especially the other SpaceKap builds. So I decided to share my project here.
 
Last edited:

phritz

New member
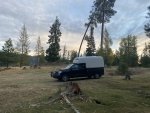
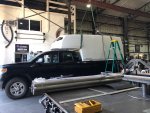
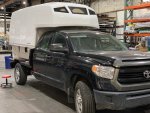
To family and friends, my rig is known as "Dreamcatcher". Built on a 2016 Toyota Tundra, it has evolved during extensive use in the Rocky Mountains and Pacific Northwest. I've traveled throughout New Mexico, Colorado, Utah, Idaho, Montana, Wyoming, Washington, Oregon, California, and a bit of Arizona. Dreamcatcher has even been to parts of Kansas and Nebraska, including the the Dirty Kanza route outside of Emporia, Kansas.

Before diving into the details of the build, here is a quick summary:

1. 2016 Toyota Tundra extended cab + 8 foot bed
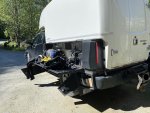
2. Sherptek fitted aluminum flatbed
3. SpaceKap Diablo fiberglass service body
4. Rebuilt rear leaf packs to handle the weight
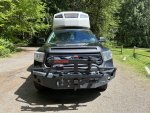
5. Hammerhead Pre-Runner front bumper (I added this body armor after a nasty collision with a deer in Wyoming)
6. A front mount hitch and Yakima HOLD UP bike rack
7. 33 inch 10 ply Mazama tires
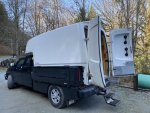
8. A sweet fold-up "Easy Hitch Step" (Don't underestimate the value of simple things that you use a hundred times a day.)
9. 200 AH Gel Batteries
10. Planar diesel heater

Other than that the truck is completely stock!
 

Attachments

  • 1.jpg
    1.jpg
    432.4 KB · Views: 239
  • 2.jpeg
    2.jpeg
    686.4 KB · Views: 243
  • 3.jpeg
    3.jpeg
    556 KB · Views: 253
  • 4.jpg
    4.jpg
    785.5 KB · Views: 220
  • 6.jpeg
    6.jpeg
    591.1 KB · Views: 203
  • 7.jpg
    7.jpg
    350.3 KB · Views: 191
Last edited:

phritz

New member
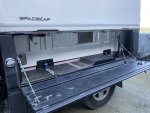
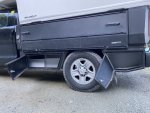
The flatbed is by SherpTek, a small outfit in Eugene, OR. They design and fabricate vehicle modifications for overlanding, camping, and outdoor adventures. The SherpTek flatbed system is all aluminum with fold down/detachable flanks that are fitted to enclose the space under the "wings" of a traditional truck camper. This creates extra outboard storage and a place to prep food and stage gear.

I really appreciate SherpTek's mounting system for the camper. The shop added mounting brackets to the camper that attach to the flatbed via spring bolts to tolerate body flexing on 4x4 roads. This was one of my biggest concerns. The standard SpaceKap installation kit really should not be used off road. I experienced a tremendous amount of bouncing and shifting even on simple forest roads. It banged up the original truck bed very badly and frankly made me nervous while driving. The direct mount to the flat bed beautifully resolves all of those issues. With the spring mount system the rig is very capable both on and off road.

The flank sides are amazingly functional. I use one side as my kitchen (it folds up neatly when I'm done cooking and I have a countertop for meal prep) and the other for gear storage and, when the flank is folded outward, staging. The flanks can be folded all the way downward or removed entirely when needed for accessibility.

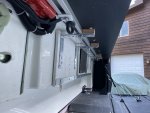
You will also notice the aluminum channel that is installed everywhere - flanks, flatbed, camper. These are incredibly functional and I use them to run cable, install gear hangers, or add my own modifications.

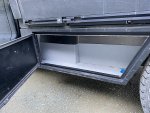
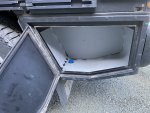
The under-storage boxes are an optional add-on but totally worthwhile. Every bit of storage space is precious.
 

Attachments

  • 1.jpg
    1.jpg
    521.4 KB · Views: 158
  • 2.jpeg
    2.jpeg
    436.3 KB · Views: 154
  • 3.jpeg
    3.jpeg
    390.9 KB · Views: 143
  • 4.jpeg
    4.jpeg
    315 KB · Views: 142
  • 5.jpeg
    5.jpeg
    515.5 KB · Views: 140
  • 6.jpeg
    6.jpeg
    569 KB · Views: 136
  • 7.jpeg
    7.jpeg
    561.1 KB · Views: 127
Last edited:

phritz

New member
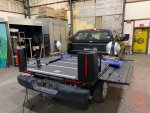
The installation of the flatbed was fun to see. The owner designed the fitting using CAD software and worked with his entire team for the project.

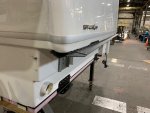
During the installation, the shop added aluminum flaring to the SpaceKap to accommodate a wider bed, more storage space, and rain gutters. The shop added insulation between the SpaceKap and flatbed, saving space inside the unit. Overall, this is a big rig - but no where near as unwieldy as a traditional camper unit (tradeoff between size and interior space and outfitting).

In theory, the camper can come off the flatbed and the truck then becomes useable as a flatbed. But there are no jack mounts. To lift the SpaceKap, steel beams fit through the unit, providing a means to elevate it. In real life, this is a big job and I would never do it on my own.
 

Attachments

  • 1.jpeg
    1.jpeg
    367.8 KB · Views: 116
  • 2.jpeg
    2.jpeg
    243 KB · Views: 115
  • 3.jpeg
    3.jpeg
    337.2 KB · Views: 115
  • 4.jpeg
    4.jpeg
    317.9 KB · Views: 112
  • 5.jpeg
    5.jpeg
    383.9 KB · Views: 109
Last edited:

phritz

New member
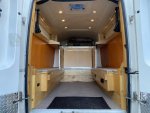
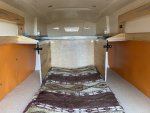
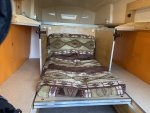
For the interior, the philosophy is simplicity. Simple, functional, flexible, reconfigurable, low maintenance, easy to clean, quick to replace bits and repair bobs, extensible, 50% for me, 50% gear hauler. This is sort of a living space. It's also sort of a shed. I can fit it out for ski season as a heated lounge. Or I can stuff it chock full of kayaks and bikes and sleep on the top bunk. I can also still fit several sheets of plywood on the 4 x 8 foot floor.

One of the main features is a fold out sleeping platform in the center of the unit. Fully extended, it fits a standard, twin-sized futon. It can be partially folded to form a chase lounge. Folded still further it is a simple bench. And folded up completely the entire living space is made available.

Independently, there is a simple slide out top bunk (really just two finished plywood pieces). When not in use, the entire bunk can be pushed into the overhang opening up interior space. It's tight up there, but I sleep there most of the time when I'm traveling alone.

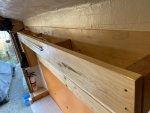
The side benches are multi functional. They can be used for storing gear, clothing, cooler/fridge, etc. There is a lot of space, about 8.5 feet, and they can accommodate most whitewater kayaks. When not covered in gear, they are also great for sitting and, in the rain, we can pack people into the camper for a cozy hang out.
 

Attachments

  • 1.jpeg
    1.jpeg
    367.3 KB · Views: 169
  • 2.jpeg
    2.jpeg
    405.3 KB · Views: 166
  • 3.jpeg
    3.jpeg
    467.2 KB · Views: 161
  • 4.jpeg
    4.jpeg
    511.4 KB · Views: 157
  • 5.jpeg
    5.jpeg
    301.1 KB · Views: 161
Last edited:

phritz

New member
There are a few extra interior features that have worked out well. I will highlight four of them.

The shelves are one of my favorite features of this build. I use them for toiletries, sunscreen, electronics mostly. Items I like to grab or stash quickly.

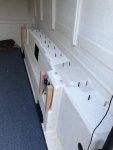
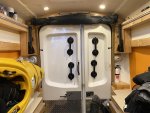
The bike mounts where incredibly difficult to get right. They are another of my favorite features of this build. The bike mounts will accommodate most full suspension mountain bikes (or road/gravel bikes) on either side. With two bikes ingress/egress is more awkward but manageable. Of course I can carry bikes on my Yakima rack on my front bumper, and I can fit a gravel bike in the back seat of the Tundra. Bikes are always awkward. With this approach I can store them in several different ways (all without popping off wheels). When I'm most interested in security, I use the mounts inside the SpaceKap.

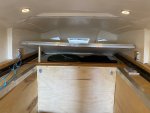
Under the top bunk, hanging over the cab, is a shallow space that can be accessed by lifting up the sleeping platform. Of course this requires clearing the bedding and I only store infrequently used items in there. But it is super useful to have any extra space in a camper, and this area is quite good for certain oddly shaped items.

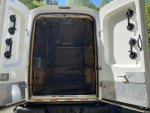
Finally, the mosquito screen rolls down to cover the entire rear opening of the SpaceKap. I've used it to sleep through the night unmolested many times. When not in use it rolls up neatly above the doors.
 

Attachments

  • 1.jpeg
    1.jpeg
    344.1 KB · Views: 107
  • 2.jpeg
    2.jpeg
    349.3 KB · Views: 106
  • 3.jpeg
    3.jpeg
    328.4 KB · Views: 112
  • 4.jpg
    4.jpg
    401.1 KB · Views: 108
Last edited:

phritz

New member
The SpaceKap came as an empty shell. The interior build was time consuming. It was also a process of trial and error. The first build was short lived (but still time consuming). For the second version, I took a lot more time to design it in advance (I actually used SketchUp) and I corrected most of the deficiencies in the first pass.

The main structural elements are the rails that run the length of the unit and the benches. The bare shell has narrow benches of course due to the pickup bed design. But these were too shallow front to back making it awkward to sit on. Also, too shallow for useful gear storage

Also, Insulating this beast was a terrific chore. I did not want to put a single hole in the fiberglass. I accomplished this by using aluminum bar to create a skeleton along the ceiling of the camper. (Sadly I never took a picture of the aluminum skeleton.) The skeleton supports the ceiling, which is just XPS foam board. In fact, the ceiling and upper walls, essentially everywhere that is white (except where there is bare fiberglass on the doors) is just foam, covered with screen, and finished with primer and enamel. I didn't want to finish the ceiling with wood because I was trying to minimize weight up high in the camper. The all foam walls look rough but, finished in a nice example it nails that elusive DIY aesthetic. I've often take this truck on very rough mountain roads and I've had no problems with the strength of this approach. The camper interior is bomber.

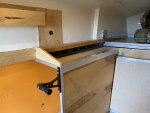
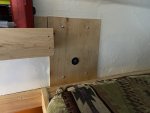
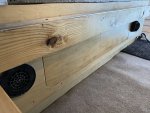
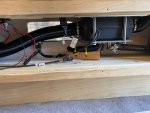
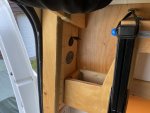
To provide more sitting space, I extended the bench tops with plywood. This created cabinet space and would house the heater and electrical components. Both of these compartments are normally covered, isolating any off-effects from the batteries or heater and keeping the cabin somewhat protected.
 

Attachments

  • 1.JPG
    1.JPG
    54.7 KB · Views: 110
  • 3.jpg
    3.jpg
    277.6 KB · Views: 110
  • 2.jpg
    2.jpg
    282.7 KB · Views: 115
  • 4.jpeg
    4.jpeg
    326.8 KB · Views: 105
  • 5.jpg
    5.jpg
    358.9 KB · Views: 105
  • 6.jpg
    6.jpg
    283.1 KB · Views: 104
  • 7.jpg
    7.jpg
    373.4 KB · Views: 100
Last edited:

phritz

New member
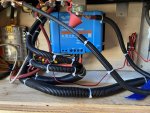
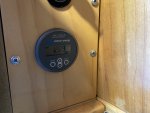
The electrical system is nice and simple. The truck alternator charges the house batteries when running. There is no other form of charging. I have never run out of power. Admittedly my electrical needs are pretty lightweight and I rarely "boon dock" for more than a few days without driving. I have never run short on power (ignoring my experience with the defective Renogy charger). I run heater, fan, lights, fridge, and charging my laptop, phone, and all sorts of gadgets. The system is all DC.

The system consists of the following components:

1. Victron DC to DC charger (I started with a Renogy charger but it was defective)
2. Victron BMV monitor
3. Eight individual on/off LEDs
4. Two Renogy gel batteries 100 AH each
5. It's a DC system only (no inverter), so USB and cigarette style outlets throughout the interior
6. CO2, smoke alarm, fire extinguisher

The most painful experience with regard to the electrical was the Renogy DC to DC charger I initially chose (not shown). It took me ages to figure out that it was not properly charging my batteries, which of course caused all sorts of other problems. Luckily, I was able to restore the batteries by properly recharging them with an external AC powered charger. In the meantime I tried to work with Renogy support, but after a couple week of tests, buying test equipment, and talking to them repeatedly on the phone I just decided eat the cost. I trashed the Renogy, and bought a Victron charger. It has finally worked flawlessly ever since.
 

Attachments

  • 1.jpeg
    1.jpeg
    478.4 KB · Views: 79
  • 2.jpeg
    2.jpeg
    509.2 KB · Views: 79
  • 4.jpeg
    4.jpeg
    325.5 KB · Views: 77
  • 3.jpeg
    3.jpeg
    278.3 KB · Views: 73
  • 5.jpeg
    5.jpeg
    356.7 KB · Views: 72
  • 6.jpeg
    6.jpeg
    453 KB · Views: 71
  • 7.jpg
    7.jpg
    389.7 KB · Views: 71
  • 8.jpg
    8.jpg
    395.1 KB · Views: 71

phritz

New member
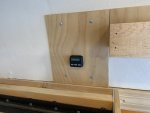
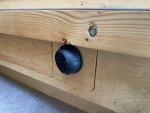
This is a ski rig. The heater is mostly used at elevations between 6,000 to 10,000 feet. I opted for the Planar 2D-12-HA "High Altitude" Diesel heater rated to 8,000 feet. But I routinely use it above that. After talking to Planar support about it, I started using kerosene in place of diesel. Part of the concern at higher elevations is be poor combustion causing maintenance issues. Kerosene runs cleaner and minimizes this concern. This heater (probably true of all diesel heaters) can be finicky in all sorts of ways. But this Planar doesn't seem to be bothered by the elevation.

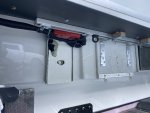
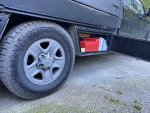
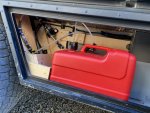
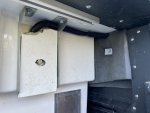
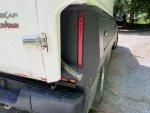
Opposite to the electrical, the heater is mounted under the benches on the passenger side. When closed up, the plywood cover provides isolation in the living space from the heater. Exhaust runs out the back of the camper. And the fuel tank for the heater is located in one of the boxes under the flatbed. The "plumbing" took me a while to settle on, but I'm really happy how unobtrusive it all is.
 

Attachments

  • 1.jpg
    1.jpg
    507.2 KB · Views: 75
  • 2.jpeg
    2.jpeg
    408.8 KB · Views: 77
  • 3.jpeg
    3.jpeg
    349.3 KB · Views: 75
  • 4.jpg
    4.jpg
    393.8 KB · Views: 79
  • 5.jpg
    5.jpg
    675.3 KB · Views: 79
  • 6.jpeg
    6.jpeg
    408.9 KB · Views: 82
  • 7.jpeg
    7.jpeg
    331 KB · Views: 78
  • 8.jpg
    8.jpg
    474.1 KB · Views: 77
Last edited:

phritz

New member
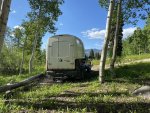
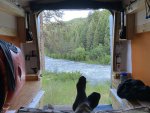
That wraps up the build details. I'll post a few pictures of the rig in the wild. Thanks for checking it out!
 

Attachments

  • 1.jpeg
    1.jpeg
    550.6 KB · Views: 139
  • 2.jpg
    2.jpg
    414.9 KB · Views: 141
  • 3.jpeg
    3.jpeg
    483.5 KB · Views: 143
  • 4.jpeg
    4.jpeg
    301.3 KB · Views: 134
  • 5.jpeg
    5.jpeg
    584.7 KB · Views: 133
  • 6.jpeg
    6.jpeg
    509 KB · Views: 145
  • 7.jpeg
    7.jpeg
    322.5 KB · Views: 147

ITTOG

Well-known member
That is a great looking build. I like the natural wood look. Are you going to wrap the spacekap or keep it as is?
 

phritz

New member
I have been thinking about it for quite a while. I don't think I want to do a full wrap but maybe some stripes or a design or something to break up the wall of white... any suggestions?
 

mattlemoo

Member
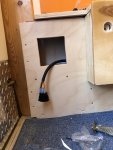
Nice build man. Glad to see somebody else built one out. Mines up for sale but have a look, you might see some ideas. If you're chasing snow storms and winter camping, I can't say enough about the Propex 2800. Hang out in your chonies with it 0* outside :D
 

Slimdog72

New member
Looks amazing man. I am half way through my bike centric spacekap build. Those rear inside corners are a huge pain in the ass for me to fit the wall at the moment. Is the bug screen just velcroed to the inside of the door frame?
 

Forum statistics

Threads
187,898
Messages
2,899,712
Members
229,072
Latest member
fireofficer001
Top