You are using an out of date browser. It may not display this or other websites correctly.
You should upgrade or use an alternative browser.
You should upgrade or use an alternative browser.
Tunook Build Has New Life
- Thread starter Tank5
- Start date
Sorry for the delayed responses, work took me out of town for a little while.
Chris, Send me a pm message with your e-mail and I will send you some pictures of the windows. The side windows had a wooden frame that filled the space on the inside. The wall panels fit snugly behind the interior window frame for a nice fit. I will send pictures to your e-mail that I hope will help.
Truiz, The bumper was originally an ARB Sahara model. Irbis Off-Road who started the build added the tube work and made a few other modifications to it. Then I got it, when I looked into installing the lights I found that ARB had discontinued the original surrounds that fit the wholes in the bumper. So through the tech department at ARB I was able to get a template for the surrounds on the new ARB bumpers. The template overlapped the original holes in the bumper. So I cut out new holes to fit the newer ARB light surrounds for the turn signals and running lights. I used a jigsaw to cut the holes in the bumper and it worked out great. Last I painted it with multiple coats of Black Rust-Oleum Hammered finish paint. Pictures to follow.
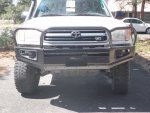
 Sorry no clean pictures of the completed bumper but the one attached is from our last Colorado trip to Silverton. I also installed a Warn VR 10,000 Winch. I got rid of the VR 10000 winch remote and replaced it with warns toggle switch remote. The original one was finicky.View attachment 183701View attachment 183702
Last edited:
Athansinis
Member
Looking forward to seeing updates. I would love to do something like this with my T100. Thanks for sharing!
deadbeat son
Explorer
I have some updates coming.
:luxhello:
Built a new Swingout attachement for the box.
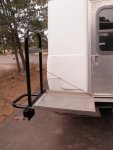
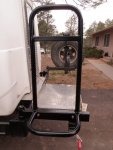
I have been busy but I have made some changes to the Tunook. So the first to show is a new swingout attachment that holds the box. I got a hold of some cheap (cost) material and decided I could make it better and cut some weight. The material I built the first one from is 1/8 inch thick 1.5 inch square tubing and the new one is made of a thickness between 1/8 and 1/16 inch 1.5 inch round tubing. The new design was very much the same as the first but shorter and I changed the backup light/work light mounting. The light can still be turned for used in multiple directions. In the end the new attachment weighed 20lbs less than the first one.
I have been busy but I have made some changes to the Tunook. So the first to show is a new swingout attachment that holds the box. I got a hold of some cheap (cost) material and decided I could make it better and cut some weight. The material I built the first one from is 1/8 inch thick 1.5 inch square tubing and the new one is made of a thickness between 1/8 and 1/16 inch 1.5 inch round tubing. The new design was very much the same as the first but shorter and I changed the backup light/work light mounting. The light can still be turned for used in multiple directions. In the end the new attachment weighed 20lbs less than the first one.
Attachments
Last edited:
Rear Suspension Lift
When I purchased the Tunook, Oleg had put a suspension lift on the truck already using a heavy duty spring coil in the front and a short addaleaf in the back with airbags. At the time the truck sat nice but the inside of the camper was gutted / empty. So when I completed it the weight caused the rear to sit low and I used the airbags at max capacity to keep it where it was. I had been doing some research to fix this and got quotes from Alcan and Downey Springs. The quotes after shipping were out of my price range so I just waited until I could afford it. My other concern was, (nothing against Alcan and Downey), that they would be building a custom spring pack for a rig they had not seen and could test fit the springs to make sure they where the right height. The additional cost of having to send them back even once if they did not fit right and the time to do the extra work worried me.
Recently I was told about a place called Mcbrides Springs in Albuquerque which is about 2 hours away from me. When I talked to them they said they could use my current spring pack re-arch the springs and add a leaf or two to get me where I needed to be and they could do it all in one day while I waited at half the price of the other quotes I got. So I thought about it for a couple weeks and decided to go to Mcbrides and let them do the work.
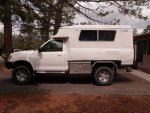
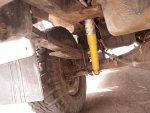
What I ended up with when they were all done was about 4 inches of additional lift without using the airbags. This way I can use the airbags to adjust the ride if needed. They pulled both leaf packs, re-arched them, added one full length leaf, and reinstalled them. After looking at it I told them I was hoping to get a little more lift and they suggested 1inch lift blocks rather than adding another leaf since I had already added 2 to the original leafpack. So they did that and I feel it turned out pretty good. I took if for a test run over to the overland Expo. and it road great no issues. So far I am happy with it. Before after photos below.
Attachments
I have wanted to add a step for the cab doors to make it easier to release the latches for the poptop, knock the dirt of my shoes, and reach over the window for a while. I didn't want anything heavy so slider type designs were out. I kept looking for something I could make work. I found some steps at the salvage yard on a Nissan Xterra. I was surprised at how light they are (all aluminum construction as well as the brackets) so I figured I would try to make them work. When I got them home I cut the back half of the steps off. I drilled new holes to bolt the bracket back to the step. The bracket arms were about 1.25 inches short of where I wanted the step to sit. I cut the bracket and bolted a 1/4 aluminum extension on both sides to connect it back together. I will weld this if I decide to keep them. I created some brackets to interface between the step Bracket and the frame using existing holes in the frame so I did not have to drill any in the frame. Some of process pictured below.
Attachments
steelheadbum
Adventurer
Rig looks great!! I have been trying to talk my father into doing something like this to his Tacoma.
Buck
The Redneck Mexican
2002 E350 7.3 PSD 4x4 8inch lift pop top conversion....
Buck
The Redneck Mexican
2002 E350 7.3 PSD 4x4 8inch lift pop top conversion....
lostworldexpedition
Explorer
One of my favorite rigs from Overland Expo this year Tank5. Glad I found this thread with more info.
Similar threads
- Replies
- 4
- Views
- 1K
- Replies
- 36
- Views
- 5K

![DSC05673[1].JPG DSC05673[1].JPG](https://forum.expeditionportal.com/data/attachments/133/133836-1d97f92d8a167b8dad4ec5b20954f1ca.jpg?hash=HZf5LYoWe4)


