Ursa Minor Porch Lights

shays4me

Willing Wanderer
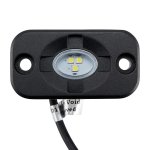
I thought I'd Start a little thread on a DIY project that I just completed. I was recently in a Harbor Freight store and noticed these lights.
57205_W3.jpg
I thought they'd work perfect for porch lights on the Ursa Minor top. I realized how handy porch lights would be one night while camping up in the Wallowa Mountains. It was pitch black out and I woke up to the sound of pots and pans rattling. Something was definitely looking through my cookware! I searched around until I found my flashlight and turned it on to find a herd of cattle had come by to satisfy their curiosity. They were as surprised as me when I turned on the light and I'm still in awe how they navigated around my awning poles and guy lines. The whole thing got me thinking how I'd fumbled aound in the dark looking for my flashlight when I could have just went for a switch in a predetermined location, and since I'm the kind of guy who has to mess with stuff and I figured this would be a fun project.
 

shays4me

Willing Wanderer
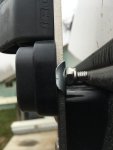
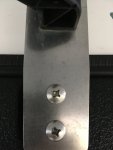
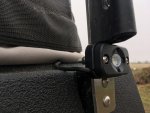
After some measuring of my awning brackets and the lights in the store I realized that the bolt spacing on these lights was perfect for a no drill installation. I simply bent some flat washers with a hammer and my vice to use as backers for bolting them up.
IMG-1499.JPG
If you have a top that has the newer awning brackets, there's a hole in the middle lower bracket that's a perfect pass through for the wiring. The older style bracket doesn't have this hole. Dont sweat it though, there's a no drill workaround!
IMG-1500.JPGIMG-1501.JPG
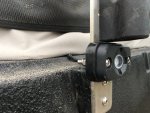
If you have the hole, route the wires through the hole, If you don't the lights have a provision for the wires coming out the side of the rubber mount. I filled that side hole with black rtv for one side, and ran used it on the other side as I have both types of awning mounts on my top.
IMG-1492.JPGIMG-1491.JPG
 

shays4me

Willing Wanderer
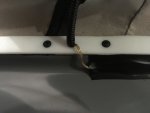
I ran my wires under the tent by unscrewing the white plastic base, and sliding them through. I did cut the outer rubber off of the wires for the pass through to make them thinner, being careful to avoid cutting the shielding on the two wires inside. I then taped them up with some electrical tape to give them some extra protection. Make sure that the wires on the exterior have enough slack to sit flat on the surface of the top so your bulb gasket can seal when running them under the tent!
For switches I found some lamp switches at the hardware store. I liked them because they were fully contained and had plenty of surface to attach them to the fiberglass. I placed them on either side by our pillows where the wires enter the top and I plan on attaching them to the top with some double sided sticky mounting tape when the temperature warms above freezing. I got the Gorilla brand heavy duty for this job. I've used the clear stuff that they sell in the past and wasn't completely satisfied so I bought the black which supposedly has twice the holding power. We will see.
IMG-1493.JPG
As for the wiring and securing it I dug around in my box and found some light gauge speaker wire and some wide vinyl tape. I used it because it was a joined pair of wires and would be easier to keep together for the trip to the terminal board and I didn't want to have to drive all the way to town for other supplies. It isn't elegant but it's hidden under the mattress and nothings permanent. You might consider buying some wire loom and clamps and attach them using the tent mounting screws at the base if you want a prettier solution.
IMG-1494.JPG
The trip downstairs was accomplished by sticking the wires through the top in the factory drilled location on the passenger side.
IMG-1497.JPG
The terminal board is located above the sound bar in the JKU. A 10mm socket, extension and ratchet will be needed to take it loose. Remove the two bolts on the passenger side, two bolt in the center and loosen the two bolts on the driver side to tower the sound bar without removing it so you can gain access to the terminals. There are two busses on the terminal board. The side with all red wired is the positive side and the side where most are black (I had a red one there too) is negative. I attached my wires for the lights on each side, paying attention to the polarity of my added harness. I didn't fuse these lights since the top is already fused. They don't draw much power so it shouldn't affect the Ursa Minor factory supplied fuse. So anyway, this is an easy mod, didn't cost much and gave me something to do on a cold winter day. Now I want spring to come so I can go camping and try them out!
 

campertramper

Active member
@shays4me I really like this mod - attaching the exterior lights to the awning bracket makes so much sense! I wish that Ursa Minor had a factory solution for this, but until that day arrives this is the next best thing! A few thoughts - even though I like your 'no-drill' solution, I would be tempted to drill into the hard top and run the wiring along the trunk roof area along with the wiring for the loft USB plugs and then for a switch use one of these: HOTSYSTEM New 5PC Car Truck Rocker Toggle LED Switch Red Light On-Off Control https://amzn.to/3ICSTXW , drilling the floor of the loft for a finished looking switch solution that matches the switches above the rearview mirror. Of course, that's way more permanent and invasive, but I thought it might be helpful to suggest for you and others who might be contemplating this.

Nice work and thanks for sharing! Can't wait to hear how you like this one in the field! (the cows and other critters sure will be surprised!)
 
Last edited:

shays4me

Willing Wanderer
@shays4me Of course, that's way more permanent and invasive, but I thought it might be helpful to suggest for you and others who might be contemplating this.
That's what forums are all about. Sharing information and brain storming to come up with good solutions to the various problems that plague us. I've learned so much over the years from people I'll never meet and I'm very appreciative of any and all input and ideas!
 

Forum statistics

Threads
188,337
Messages
2,905,698
Members
229,959
Latest member
bdpkauai
Top