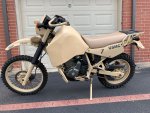
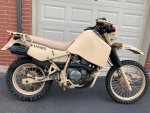
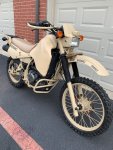
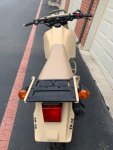
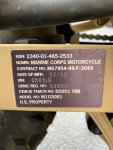
USMC M1030B1 Restoration

Johnnny13

Observer
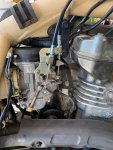
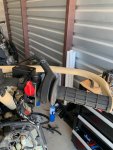
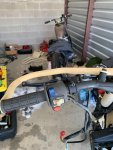
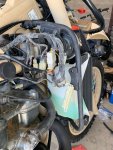
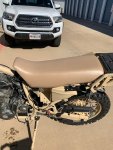
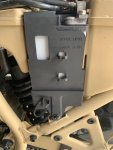
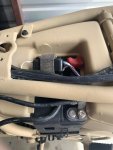
I moved the rear turn signals to front (since they are shorter) and used the stalk delete (from 3D Cycle Parts) on the front signals and moved them to the rear (won’t break in a layover). Put the on the X-ring chain, rear brake pedal, rebuilt carb (capped vacuum port for raptor fuel petcock direct flow and Eagle Mike screw upgrade to hex head), cable-less choke (from stead engineering), handle bar controls (new start switch), front brake (with master cylinder hex head screw upgrade), and the wiring harness is done. I also lubed and installed new throttle cables, speedometer cable, and clutch cable. I got the headlight / gauge housing in and started to route the front harness through there. I also replaced all coolant hoses, new coolant, and over flow bottle. I also got the seat reupholstered in tan marine grade vinyl. It’s the only thing on the bike I didn't do myself.
1.jpg2.jpg3.jpg4.jpg5.jpg6.jpg
 

Johnnny13

Observer
Nothing really fancy today. I got the Deka ETX-15L battery. It’s an AGM battery that I use in my bike and all of the bikes I restore. It’s only about $75 on Amazon. I also replaced all of the fuses. In the main I use 20 and 15. I know it calls for a 10 but sometimes when you switch the headlight from low to high it blows the fuse. It’ not really an issue with a 15. I also changed out the fan fuse with a 15 and put a spare in there. Just waiting on some of the headlight bracket hardware to hook up everything on the front end and a doohickey kit from Eagle Mike. Then I’ll be ready to fire it up.
1.jpg
2.jpg
 

Johnnny13

Observer
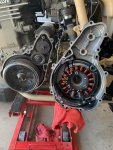
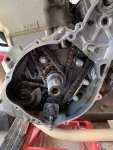
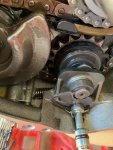
Decided to get the doohickey (balancer chain adjuster lever) done today. The stock spring and lever were all in one piece and still hooked up. I used the Eagle Mike lever, torsion spring, new rotor bolt, and a new inner and outer gasket. Took about 3 hours while taking my time. I also refilled the oil, installed the foot pegs with new IMS springs (always a10 minute fight). The Marines had the upgraded IMS pro series foot pegs. Got the toe shifter on and the front sprocket cover. Tomorrow I’ll get the lower engine mount on, front skid plate, and Marine specific rear metal skid plate on.
1.jpg2.jpg3.jpg4.jpg
 

Johnnny13

Observer
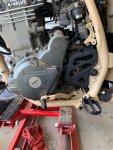
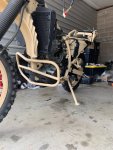
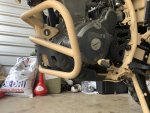
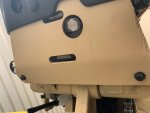
Was working on my bike today completing the doohickey, oil change, replaced oil filter, and installed some foot peg lowering brackets I found in my stash from JNS engineering. After that I installed the USMC specific rear skid plate, OEM front skid plate, and USMC specific lower brush guard. It was really a pain in the ass to get everything lined up. You can see where the two skid plates over lap and the Eagle Mike low pro / magnetic drain plug.
1.jpg
2.jpg
3.jpg
 

Johnnny13

Observer
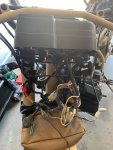
Started hooking up the front wiring and gauges. Once the headlight was plugged in the headlight and taillight came on without the key even in or turned to on. Seems like there’s a big electrical wiring issue. I’ll be working on that this week with a multimeter.
jjj.jpg
 

Johnnny13

Observer
Finally got back to the restoration bike today. I’ve been building a few other non-Marine Corps bikes. The electrical had the most issues. Prior to starting Bike 6’s restoration it wouldn't even attempt to start and none of the lights worked.

I finally got the headlight and tail lights to function. I noticed the brake light wasn't coming on. I just swapped out the bulb and problem solved. The rear blackout light, rear blackout light brake light, and front black out light all function.

Some people mistakenly believe that it illuminates (light the regular headlight) so that the rider can use Night Vision to ride. It actually just puts out enough light so that others wearing night vision goggles can see the rider. The rear has a functioning blackout light break light so that those following the rider can see when they are slowing down. See the videos below if your interested in how they function.

Rear blackout light
Front blackout light

Nothing was happening when I hit the start button. I’ve found that the clutch safety switch is usually the issue. Most of the time you can clean the brass connections on the bottom of the switch. I’ve also had to replace one since it was broken. I tested this by making a jumper on the harness side where it plugs in. Then it attempted to crank and it fired no problem. Once I disassembled the switch I noticed that the top clutch metal portion wasn't sticking out as much as it should. Upon disassembly I saw that it was missing the spring. You can see in the picture below how much higher the version with the spring is. Swapped that portion out and now the bike will crank.
1.JPG

I was getting ready to start it up using my testing fuel bottle but the battery didn't have enough juice to really crank it over. I’m charging the battery now and will try again later in the week. Other issues when starting the bike for the first time could be an issue with the carb (I rebuilt it), no spark (I tested and its good), and I moved the choke from the handle bars to the carb itself. I use the Stead Engineering choke. Sometimes the spring is a bit tight.

I also tested the fan by removing the wire that plugs into the lower portion of the radiator and grounding it to the engine block. Then turn the key to “ON” and the fan should kick on.
 

Kmrtnsn

Explorer
Not sure what your asking here. If you mean what do these sell for when I’m done restoring it? I just put them on eBay and it goes for what it goes for.

Sorry, I was curious how much Kawasaki had changed beyond the lighting and tank for these. It looks like most commercially available parts are a quick match. I didn't know if Kawasaki changed the wiring harness significantly or not, etc.
 

Johnnny13

Observer
Sorry, I was curious how much Kawasaki had changed beyond the lighting and tank for these. It looks like most commercially available parts are a quick match. I didn't know if Kawasaki changed the wiring harness significantly or not, etc.
I think the below paragraph explains it. I always get a good amount of questions about this bike so I think this sums it up pretty good.

I've been getting the same questions about these bikes so I will try to explain it. The original M1030 was a KLR250 in the late 80's. Then Hayes Diversified Technologies (in 2000) won the contract for the USMC motorcycle. They purchased civilian KLR650's (year 1999 / 2000). Then modified them (KLR250 front fairing / headlight bracket, front and back IR / NVG lights, bottom metal skid plate, black out light switch, Progressive 420 shock, removed kickstand safety switch, CARC paint, front goggle bag, IMS 6.6 gallon plastic tank, spill proof gas tank cap, handle bar brush guards, foot brush guards, installed a IMS shifter, IMS pro series foot pegs, made major changes to the wiring harness, installed a blackout / no light / regular light switch, key epoxied into ignition, Dunlop D606 tires, etc). The Marines used these until around 2005. These bikes were designated M1030B1. Hayes Diversified Technologies then took these same bikes back, freshened the paint, added a diesel motor, upgraded to the new IMS tank, removed the bottom brush guards / skid plate and added a aluminum skid plate, switched the Progressive 420 shock to the F1 Engineering shock, etc. They then became designated the M1030M1. These are the ones you see at government auction lately selling for around $8,000 to $12,000. They are often titled as year 2000 since they are the original gas version M1030B1's. The Marines wanted bikes to run on diesel just as the rest of their vehicles. Hayes Diversified Technologies has gone out of service, Fred Hayes has passed away, and diesel parts are not available. Hope this explains it.
 

Johnnny13

Observer
Got the bike started today. It shifts through all of the gears and the radiator fan works as well. Just have to sort out some gauge light issues, paint the tank, and get the plastics on.
 

Johnnny13

Observer
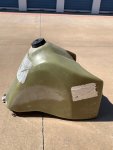
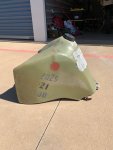
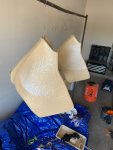
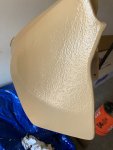
I went ahead and painted two tanks with Monstaliner. It turned out ok but was a huge pain in the ass. Taping off the bolt holes / fuel petcock area was difficult since it required removing the tape after the second coat without touching the still wet tank. One is for the current bike (pictured) and one is for my tan bike (didn't get a before pic but it was a train wreck). On my bike, I originally used some cheap spray on bedliner from autozone that has subsequently chipped off. This coating is super tough. It will become more of a matte finish once it dries.

Originally these tanks were a natural tan color (like Bike #1) then there were some more green ones. The left over tanks have turned a bit rough in color. I was able to get some new old stock tanks for bikes 2 and 3. When the Iraqi invasion kicked off the method was to rattle can the bikes tan along with the tank. I’ve obviously painted the bikes tan but getting the correct and most durable color required Monstaliner for the tank. I’m going to let the Monstaliner set up for about 9 days before I install it.
1.JPG
2.JPG
3.JPG
4.JPG
 

Johnnny13

Observer
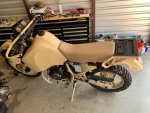
Got the tank on the bike. I installed the Raptor fuel petcock so it's now direct flow. Capped off the vacuum port on the carb. The IMS supplied tank mounting straps are always ill-fitting so I’ll be modifying them. Just need to rewire the gauge to work properly, get the faring and side plastics on, and then its done. I also went riding in Carson National Forest this weekend.
1.jpg
2.jpg
 

Forum statistics

Threads
188,178
Messages
2,903,418
Members
229,665
Latest member
SANelson
Top