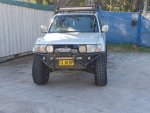
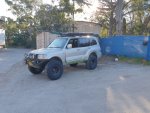
"Yoshi" - 2005 Limited Build & Adventure Thread

SONICMASD

Adventurer
A few months back, I also wanted to see what a new black grille would like on the front so again I pillaged the Luso Overland stock and gave it a spin. I kinda liked it, and most people that I asked did too, but at certain angles the contrast from silver to black just seemed off to me so I stuck with the original silver in the end. I think I'm going to try spray painting the inner section of the silver grille black and see how that looks instead.

PWVB5461.JPG

LHWA4666.JPG


WZYB7131.JPG
 

SONICMASD

Adventurer
6/21/20: Got around to fixing an oil leak coming from the top of the oil fill cap, just a 2 second job to replace that gasket.


6/27/20: After not having the front sway bar on for like 6 months, I decided to put it back on. The Gen3 is plenty stable with it removed but you definitely do notice the increase body roll without it and the 1" of extra compression doesn't seem worth it for a non-rock crawler type of rig. I took the opportunity to repaint the bar, install new PolyTuff bushings, and new OEM endlinks since one of them was clunking (which is what caused it's removal in the first place.)

Somehow I managed to turn this simple job into a 5 part short video series:

 
I know I have not posted in a loooong time. My last update on this build thread was on 2/26/20 and I launched LusoOverland.com on 3/1/20 so that explains my absence as work has been super busy. But in a good way, you guys have been keeping me busy with orders and I certainly appreciate it.

Let's get back to the story of Yoshi.

6/19/20: I made a mistake when ordering the Lovells EHD front springs, a mistake that the Lovell's engineers also did not catch - The EHD springs are for Diesel Pajeros only and if you put them on a petrol Montero like me it's very difficult to get them into spec. Even with the ARB bumper, 3 skids, rock sliders, and winch I was still 130lbs shy of the minimum weight needed on the front end for these springs to be in their load range. The ride was extremely harsh, the lift was way too high, and the overall performance of the truck both on and offroad suffered as a result. On the plus side, it was almost impossible to bottom out the shocks no matter how hard I hit a bump or hole. It also explains why my truck rode soooo much better whenever my big 300lb brother in law would sit shotgun.

Now that I'm a Lovells Springs dealer, I finally got around to switching out the EHD front coils for HD ones. I also took the opportunity to put on a pair of PolyTuff poly lower coil spring pads because the pads take a lot of abuse from the HD springs and added weight. I filmed the entire process in case anyone wants to do their own lift/strut assembly: https://www.instagram.com/stories/highlights/17872947343748613/

View attachment 614342

The difference is amazing. The truck now drives soo much better, it's faster, brakes faster, handles better, and actually performs offroad like it is supposed to. Gen3s are fickle beasts and there is such a thing as too much lift on these trucks...and it does not take much. 2" is about as high as you want to go in the front. You can go a little higher if you have racing coilovers (like King Shocks) or if you have a subframe drop, but on just a standard coil spring lift going about 2" is the max before the lift starts creating more problems than advantages.

Firstly, the stress you'll be putting on CVs and steering components is greatly increased. Staying below 2" and the angles are totally fine and shouldn't affect longevity much at all.

To complicate matters, my front end was not just too high but oversprung as well. For someone with the correct load spec'd springs in the front but then more than 2" of lift with the addition of spacers for example, this wouldn't be as big of an issue. Assuming of course that their rear end was just as high as the front or higher. But for me, I was oversprung on the front and these EHD coils were causing my front to sit 1" higher than the rear.

Which you can see here:

View attachment 614338

This caused a lot of problems outside of a harsh ride- from reduced braking effectiveness, slower acceleration, and most noticeable - terrible traction. With the front not having enough weight on it, the traction control would kick in all the time offroad even over the slightest obstacle or undulation. I noticed that my traction control was kicking in a lot more frequently in Yoshi than on my previous Gen3 but didn't really give it much thought until I went winter wheeling in the snow and mud and got stuck for my first time ever! The mud was deep and soft and I picked a terrible line but still, I had my rear locker on and should have made it. It was shortly after this that I realized I was basically driving around in 2wheel drive as the front wheels were not making significant enough contact with the ground and were not helping much. You can even see in these photos how high my front wheels are above the ground while my back wheels dug deep into it:

View attachment 614339

View attachment 614340


The truck drives so much better now with the HD springs and traction offroad is back to the way it should be. The traction control doesn't kick in unless I'm really getting after it.

So in the end, I went down from a 2.8" lift to 1.4" lift by switching out the incorrect springs. The only negative is that now I can get the front driver side wheel to hit the inner wheel liner if I hit a bump/divot with force and cause it to go full compression. This is not possible when going slow up a ramp as the passenger side will just lift off the ground, but when you hit something with speed it forces the tire up fast and hard enough to hit the inner wheel well/fender liner at the very top well before the lower arm bump stops hit the frame.

You can see the tire rub marks and how it removed the push clip in the fender liner hole here in this terrible photo I took with a potato:

View attachment 614341

It's a very minor issue, waaaaay less annoying than being oversprung, but one that I'll be fixing soon. It is only happening on the driver's side even though both sides have the same lift height measurement, I think this is because of the extra weight of driver and battery on the left side that causes more force to come down on that side; but either way, I'll be lifting both sides equally but not past 2" this time. I'm at 1.4" of lift and am pretty sure that another .25" or possibly .5" at the most will sort it out. I tend to subscribe to the school of thought that you only want as much lift as it takes to clear the tire size you want to run, especially on a Gen3 that already has gobs of ground clearance. Oh and the reason I'm only getting 1.4" of lift out of the Lovells 1.5-2" lift kit is because the HD springs are rated for up to 250lbs maximum constant weight and I'm a little over that with 275lbs of added constant weight (the ARB bumper alone is 110lbs!).
Im thinking of having someone local custom fab some lengthened and strengthened upper and lower control arms for my gen 3 so I can do 4in of lift...

What other parts would you recommend to custom fab/replace?
 

SONICMASD

Adventurer
Im thinking of having someone local custom fab some lengthened and strengthened upper and lower control arms for my gen 3 so I can do 4in of lift...

What other parts would you recommend to custom fab/replace?

Hrmmm, I'm not so sure making custom arms would be necessary. The OEM arms are already very strong. I can see making custom UCAs though if you just put a large strut top hat spacer to achieve the lift to solve the shock contacting the arm problem but I would not recommend that lift because of the extreme CV and Tie Rod angles it will cause.

I think for anything over a 2" lift, the only proper way to go is with a subframe drop kit.
 

SONICMASD

Adventurer
07/19/20: Went back to Uhaul to fix an issue where I would blow headlight fuses whenever I was towing a trailer. They found an additional ground was needed and took care of it.

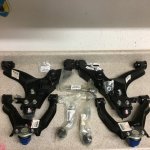
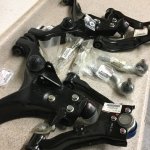
7/23/20: I decided to press on with the goal of replacing all original rubber. Having already accomplished 6 out of 8 diff bushings, motor mounts, shock/coil pads/bushings, and the transmission crossmember bushings, I moved on to the front end and replaced the Upper Control Arms, Lower Control Arms, Bushings, Ball Joints, and Tie Rods in one fell swoop. I went with OEM pre-assembled parts because I didn't want the hassle of pressing 8 bushings out and in during summer which is when Yoshi sees the most use as that would have kept the vehicle down for quite awhile.


IMG-1575.JPG

IMG-1576.JPG

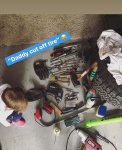
My daughter was very concerned about Yoshi's health when he was in pieces all over the garage and also stopped to admire the sheet amount of tools required for the job:

IMG-1744.jpg
Full install video guides here:


This is what my lower control arm bushings were like after 175,000 miles: https://www.instagram.com/tv/CC79ZbxgNvK/

So they were torn but not in the worst condition ever and I could have easily just ran until 200k with them.

It's a pretty straightforward job and not that bad at all, just give yourself a few days. In the end, not a big difference, because my joints and bushings weren't that bad but I'm just OCD like that and like the idea of replacing everything even before it's totally worn out. My biggest takeaway from this one: It is absolutely amazing how well made the OEM parts are. I've torn apart several high mileage Gen3s and it's always the same story - the original OEM ball joints and tie rods are usually usable for around 200,000 miles of abuse if the boots don't get torn and let moisture in.

So now my entire front end is done, just need to move on to the rear suspension arm bushings and ball joints in the hopefully not too distant future.
 
Hrmmm, I'm not so sure making custom arms would be necessary. The OEM arms are already very strong. I can see making custom UCAs though if you just put a large strut top hat spacer to achieve the lift to solve the shock contacting the arm problem but I would not recommend that lift because of the extreme CV and Tie Rod angles it will cause.

I think for anything over a 2" lift, the only proper way to go is with a subframe drop kit.

Well, I thought the point of the extended/angled control arms is to get the wheel camber on point, right?

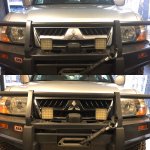
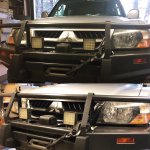
I installed a 2in lift kit on my 2002 Montero Limited, and 2 inch lift spacers, and now I have really screwed up camber angles, like the truck in the attached pics (not mine). I thought of the UCAs and LCAs to fix the wheel camber. Is there anything else I should replace/have custom fabbed?
 

Attachments

  • front montero 4 inch lift and 35s.jpg
    front montero 4 inch lift and 35s.jpg
    42.3 KB · Views: 74
  • montero 4inch lift and 35s.jpg
    montero 4inch lift and 35s.jpg
    890.1 KB · Views: 76

SONICMASD

Adventurer
I've never heard of anyone doing custom UCA/LCAs on a Montero to correct for alignment problems so I can't really speak to that. You'll also notice that your UCAs hit your shocks when the suspension is at full droop because of the spacers.

I would forget about running the spacers and then you won't have alignment problems. If you want more than 2" of lift then a subframe drop is the only way to go IMO. It will allow you to have the bigger lift without alignment or cv angle problems.

You're absolutely right, a subframe lift would be the best option, but there just aren't any for sale as of now, and the earliest one that I know of will only be available next year at the earliest.
 

SONICMASD

Adventurer
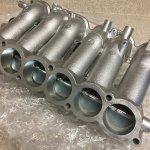
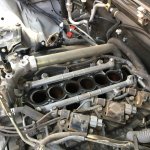
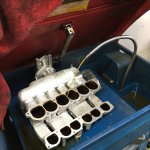
08/03/20: I got tired of the loss of low end torque with having my butterfly valves deleted. I sprung for a new OEM surgetank (MN135871) and had it installed with new OEM gaskets as well.

Red loctite on the bolt ends for 1% extra insurance...though they should be good for at least 100,000 miles anyways.

IMG_1540.JPG


IMG_1870.JPG

IMG_1871.JPG

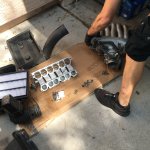
The upper intake plenum got a bath in the parts washer at the same time:

IMG_1872.JPG

Went for a spirited drive after install and definitely noticed that some pick up has been restored. Some people say they can't tell the difference with or without butterflies but man on this rig and the butt dyno, there's definitely a difference. Glad to have this done and crossed off the list.
 

Toasty

Looking for that thing i just had in my hand...
I think most people already are down on power or have other issues so it's less noticable. I say buy these things while they're available, might not be for much longer.
 

SONICMASD

Adventurer
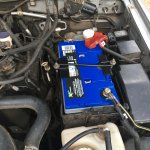
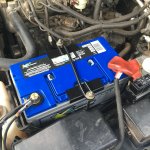
10/31/20: Woke up to a dead battery (of course the DieHard Gold lasted just 1 month past its free replacement warranty) so I finally had an excuse to pull the trigger on the battery I had been lusting over for a very long time. I had always planned on getting the Group 31M version of the X2 Power but changed my mind and went with the Group 27F instead because:

1. The 31M was not in stock at my local Batteries Plus so I could not test fit it and did not want to be stuck with a $450 paper weight since they don't allow returns on custom order items. Yes, I know a few other guys have managed to fit Group 31 batteries in their Gen3s but it looks like some custom cable work might be needed to reach the terminals so I decided not to risk it.
2. The warranty was 1 year worse on the Group 31 than the Group 27F.
3. The Group 27F was like $80 cheaper.
4. The Group 27F is the biggest size that will still fit in the OEM battery box.

This X2Power battery has insane specs and will help power my winch. I don't have many other accessories that draw much power but it's nice to know I have a lot of reserve battery power in case I start adding things (which I do plan to do).

  • Item Number: SLI27FAGMDP
  • Brand: X2Power
  • Voltage: 12
  • Format: BCI Group 27F
  • Lead Acid Type: Deep Cycle, Dual Purpose (Starting/Cycling), Starting
  • Capacity: 92AH
  • Cold Cranking Amps: 930
  • Battery Type: Ultimate
  • Capacity 20hr: 92AH
  • Chemistry: Lead Acid
  • Color: Blue Top
  • Lead Acid Design: AGM
  • Made in the USA: True
  • Product Category: Auto/Light Truck
  • Product Sub Category: Premium AGM
  • Terminal Type: SAE, Automotive Post
  • Warranty: 60 Month Free Replacement
  • Weight: 66.95 lbs
  • Length: 12.46 in
  • Width: 6.77 in
  • Height: 8.75 in
IMG_3117.JPG

IMG_3118.JPG
 

SONICMASD

Adventurer
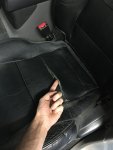
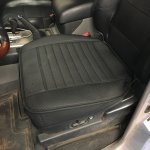
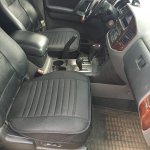
11/01/20: Like all Gen3s, my driver side seat has a couple small holes just above the power seat switch and recently one of the main horizontal seams split. Although my seat is still in quite good shape compared to most, I went ahead and ordered two seat covers to arrest the damage and keep it from getting worse. Additionally, the 15 year old leather is not very comfortable on the seat base even though I rejuvenate it with Griots Garage leather rejuvenator every 6 months in an attempt to soften it up. These covers also have a little extra padding which helps keep my butt from falling asleep on long drives.

IMG_2404.JPG


IMG_2405.JPG


Here's the eBay link where I got them. You'll want to select "Full Surround".

Much better, very happy with this $30 upgrade:

IMG_2406.JPG

IMG_3122.JPG

WARNING - you might be tempted to get some traditional seat covers that cover the back too but if your Gen3 has side airbags in the front seats that then would be a big no no. There are companies that make airbag compatible seat covers but they are expensive and for the price, you're probably better off paying to have the seats reupholstered at that point.
 

EpicPlanet

Member
1/13/21 to 5/15/24 - Thread resurrection after three years and four months! Just finished reading through all 11 pages. Lot's of great info that I am sure I will use on My Gen 3 Build! So fast forward all this time, what's up with Yoshi currently? What else have you done?
 

SONICMASD

Adventurer
1/13/21 to 5/15/24 - Thread resurrection after three years and four months! Just finished reading through all 11 pages. Lot's of great info that I am sure I will use on My Gen 3 Build! So fast forward all this time, what's up with Yoshi currently? What else have you done?

Yoshi is still going strong but I've been slacking on updating the thread with mods the last few years. Luckily, I just made a couple build breakdown videos:


Forum statistics

Threads
187,888
Messages
2,899,580
Members
229,073
Latest member
fireofficer001

Members online

Top