Converting a factory JK/JKU hardtop to modular

jscherb

Expedition Leader
So on to layer 1, the 1" strip of fiberglass mat layer applied with SMC-compatible resin...

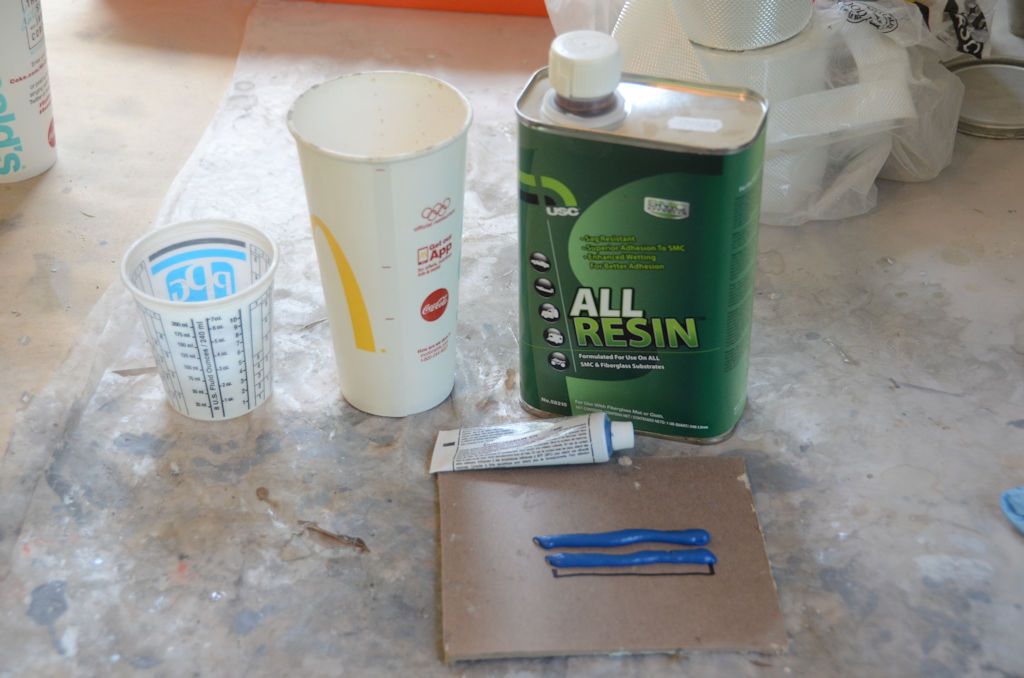
Catalyzing the resin takes some care; the instructions say to mix a 4" ribbon of cream hardener with each 1.5 ounces of resin. My judgement said that about 5 ounces of resin would do the job, and because it was 90 degrees in the garage and resins catalyzed with cream hardener cure very fast, I halved the amount of cream hardener - I used 2 3" lengths of hardener with the 5 ounces, where the instructions would have called for a little over 12". In the photo below I've got 3" marked on a piece of cardboard and I've squeezed out two lengths of cream hardener. The McDonald's medium cup has two marks on the seam, the bottom mark is 5 ounces, so I poured resin to that line and scraped the cream hardener into the resin and mixed it.
AllResin_zpstimojtiw.jpg


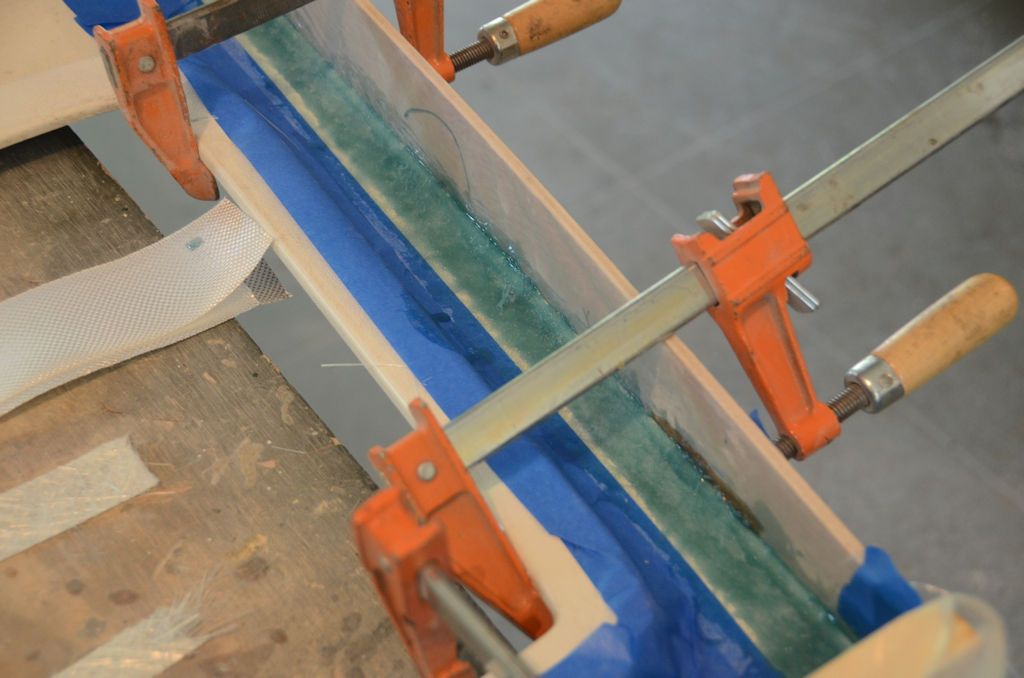
I laid the mat in place, and using a 1" disposable paint brush (a box of them is very inexpensive a Harbor Freight), applied the resin to the mat, being careful to soak the mat completely, and using a stippling action with the brush to push the resin into the mat and make sure the mat is in full contact with the inside of the hardtop and with the form.

The result looks like this:
SMCBondingLayer_zps4r0wiyez.jpg


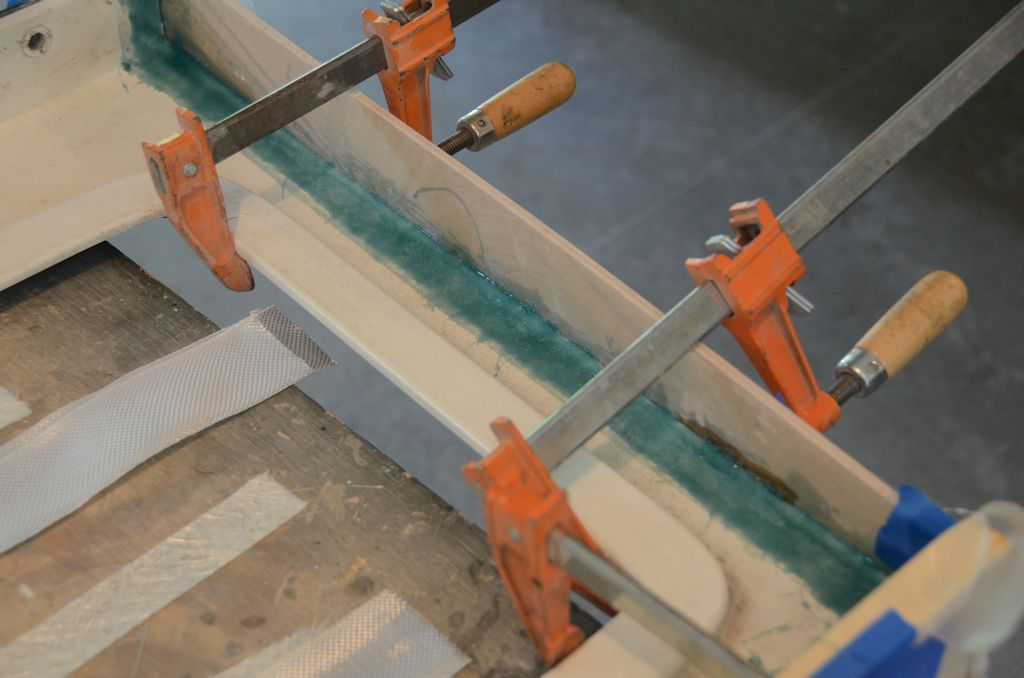
I then removed the tape so the curing resin didn't bond it in place.
SMCBondingLayerTapeRemoved_zpsxk4v3nec.jpg


It turned out that 5 ounces was exactly enough to fully saturate the mat on both side panels and the roof panel.

And even though I halved the amount of hardener, the resin was starting to gel in about 15 minutes, so there wasn't much working time.

Applying the fiberglass cloth tape layers is covered in the next post.
 

jscherb

Expedition Leader
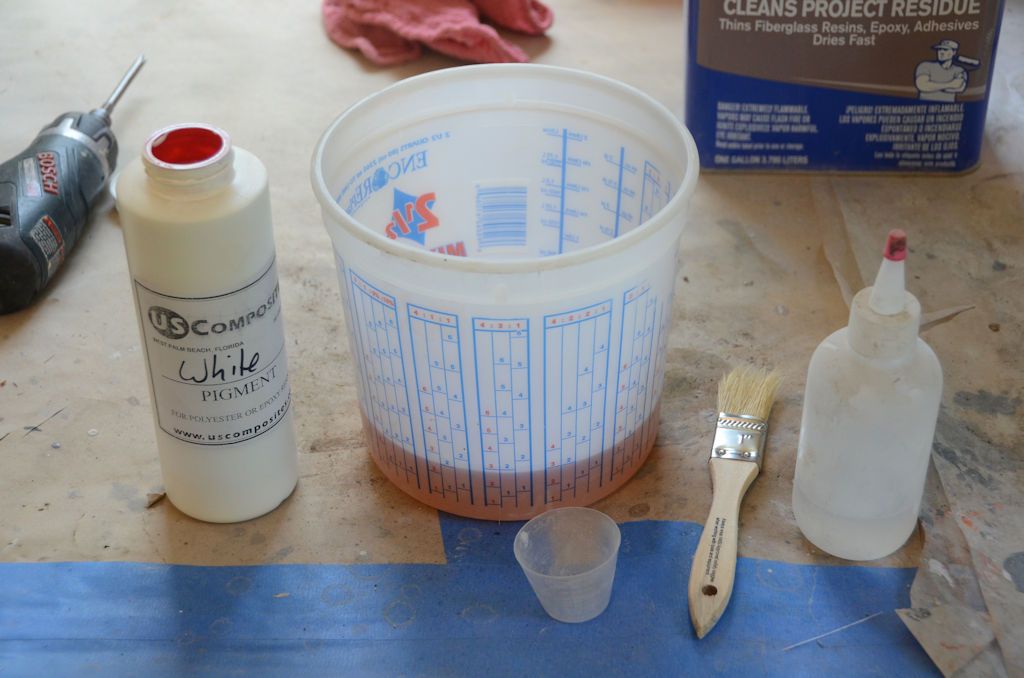
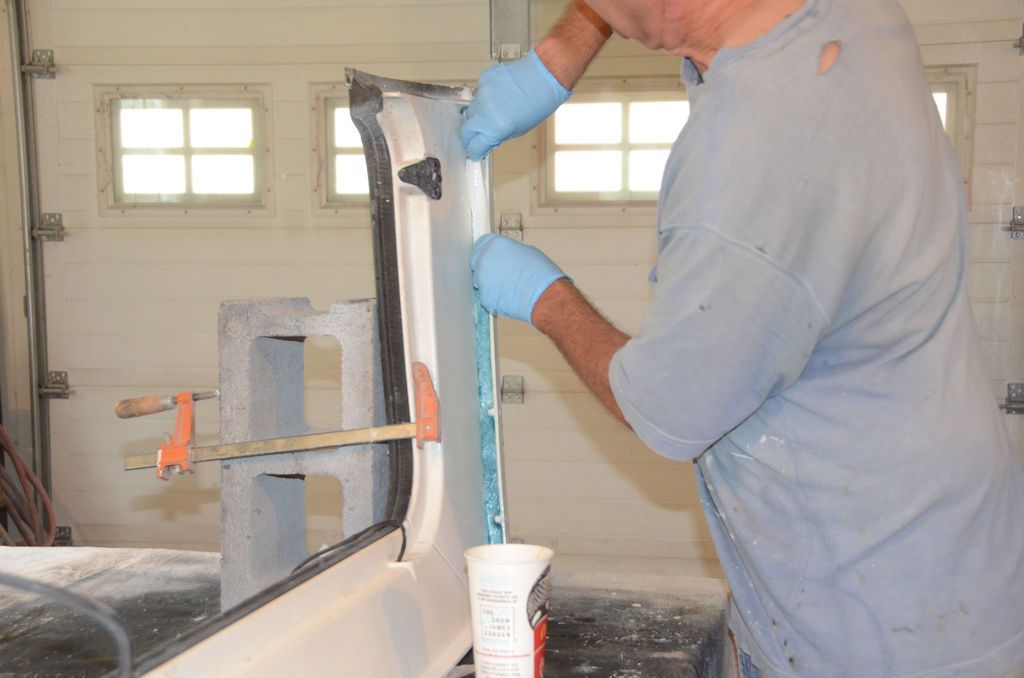
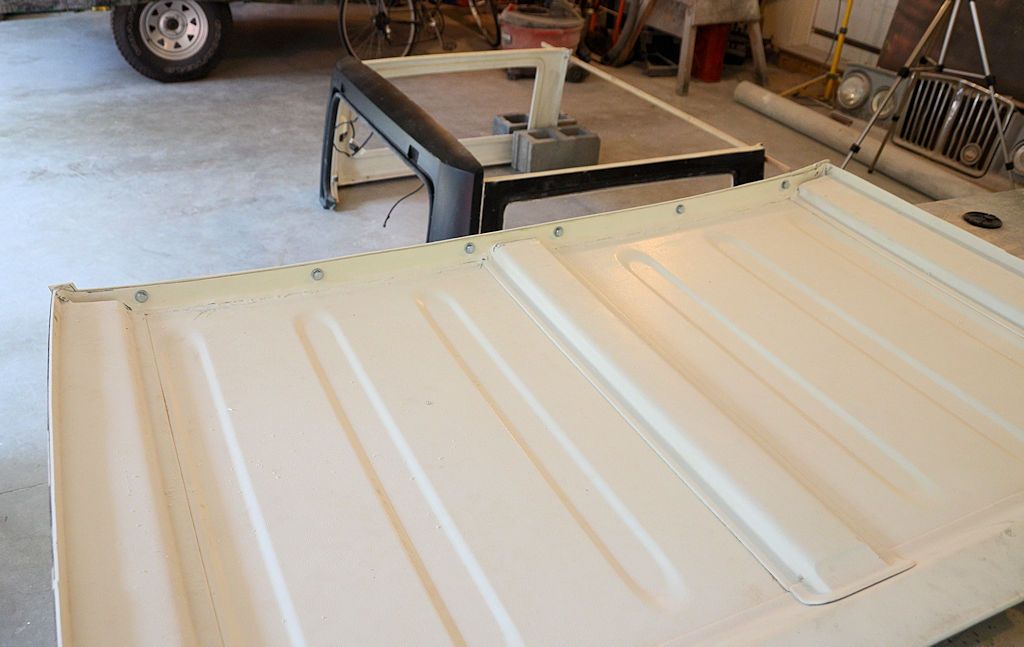
Next I mixed up 16 ounces of ordinary polyester resin, catalyzing it normally with 1/8 ounce of the liquid MEKP catalyst. I also added about an ounce of white pigment, as an experiment I wanted to see how close to a finished look I could achieve by tinting the resin the same color as the interior of the hardtop. Doing the tint is completely optional, it would be easy to paint the new parts white as a last step in the project instead of tinting the resin.
PolyesterResin_zpsdvisuoc8.jpg


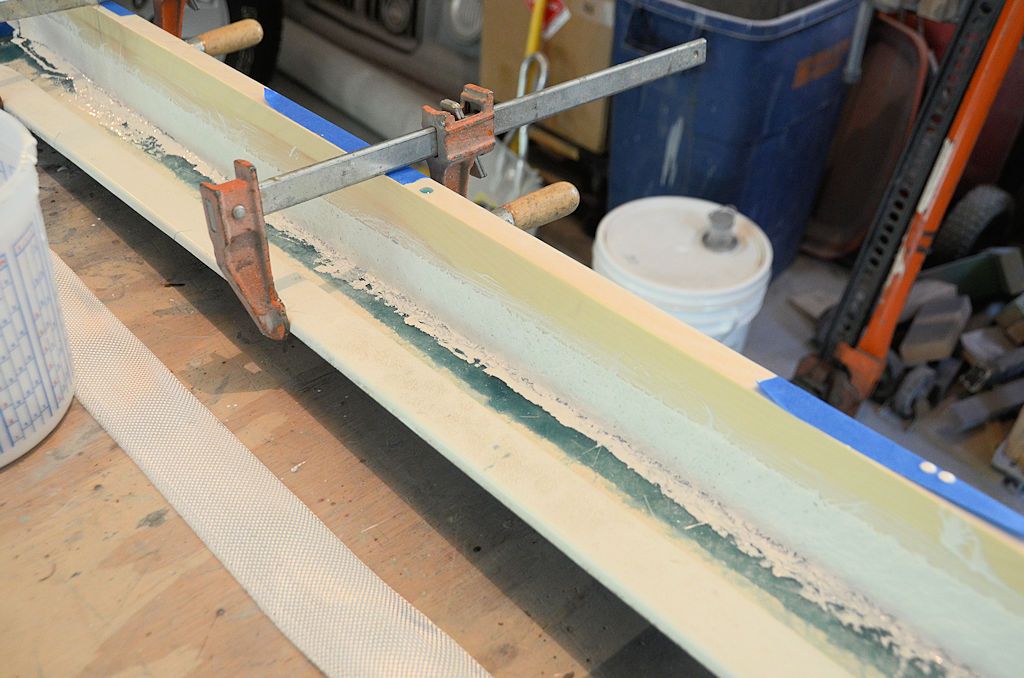
I first added a strip of fiberglass mat against the form, ensuring that it was pushed all the way into the corner of the joint. Here it is saturated with the tinted resin:
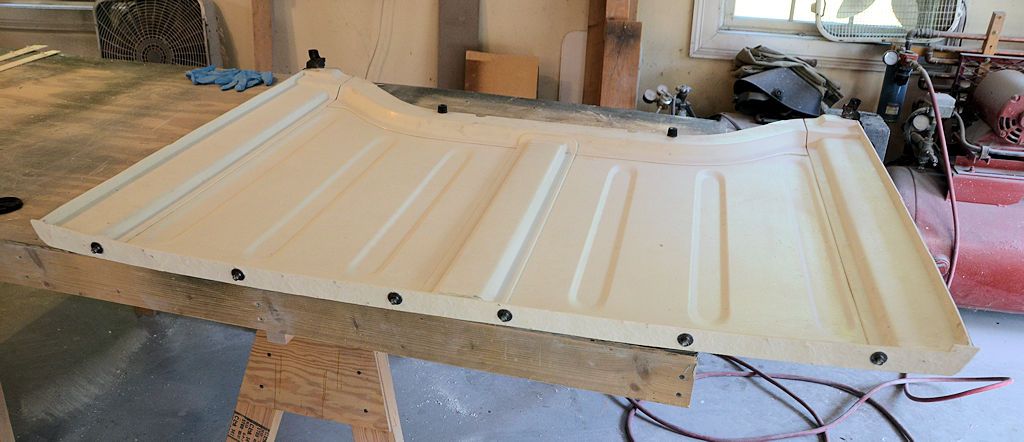
FlangeBaseLayer_zpsfwld0btm.jpg


Then multiple layers of 2" fiberglass cloth tape were added, folding the tape along the corner. I also added one more strip of fiberglass mat against the form, in between two of the layers of cloth tape, I did this just to build a little more thickness in the flange. This photo was taken after the first layer of cloth tape was applied:
ClothTapeLayers_zps1ufvj27f.jpg


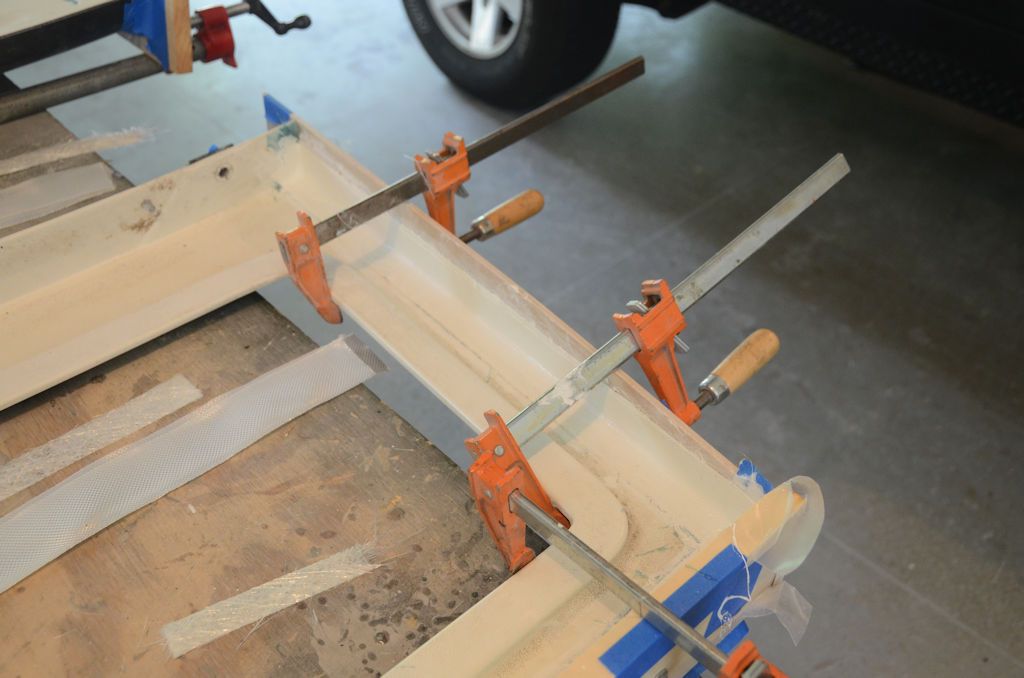
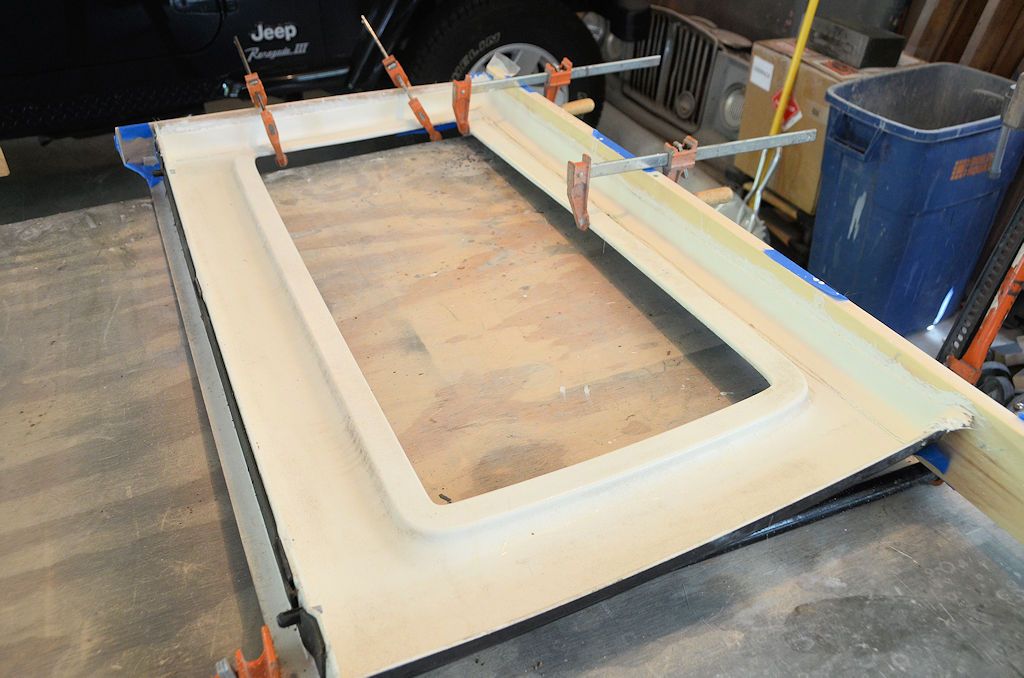
And when all the layers were applied here's what one of the sides and the roof panel looked like:

SidePanelFlangesDone_zps9clazrvo.jpg


RoofPanelFlangesDone_zpsysewr2y0.jpg


16 ounces worked out to be just enough to do all the flanges.

This should be allowed to cure overnight, then the forms can be removed.
 

jscherb

Expedition Leader
Once the flanges have cured overnight, the forms can be removed. The parts right after the forms were removed:

FormsRemoved_zpszmoypjky.jpg


This is what a flange will look like after the form is off, it looks a bit rough but part of that is the colors of the two different resins, and part of it is a few imperfections, either due to slight wrinkles in the waxed paper, or voids near the corner where resin didn't fill in. It's structurally sound though, so I'll do a cosmetic fix and then trim them flanges to width.

FlangeRough_zpswhmxaaqy.jpg


A skim of body filler is applied to smooth out any imperfections. Ordinary body filler can be used because it'll be bonding to either the ordinary polyester resin the flanges are made of, or to the SMC-compatible resin used to bond the flange to the hardtop panel.

FlangesFiller_zpsffz3olq8.jpg


After the body filler cures, the flanges trimmed to about 1 1/4" width and the filler is sanded. In this photo the flanges on both side panels and the back of the roof panel are done.

FlangesTrimmed_zpstf2djiwo.jpg


The next step is to add flanges to the mating sides of each joint. The goal is to have them mate perfectly with the flanges just made. Making them the same way the first set of flanges were made would be very challenging to have them mate perfectly, so a different approach will be used.

The second set of flanges will be made separately from the hardtop parts and bonded in place after they're made. The plan will be to make the new flanges from fiberglass sheet, trimmed to match and bolted to the existing flanges, then assemble the hardtop, bonding the new flanges to the hardtop parts while they're bolted to the original flanges. Then the assembled hardtop will disassembled and the new flanges will be reinforced.
 

jscherb

Expedition Leader
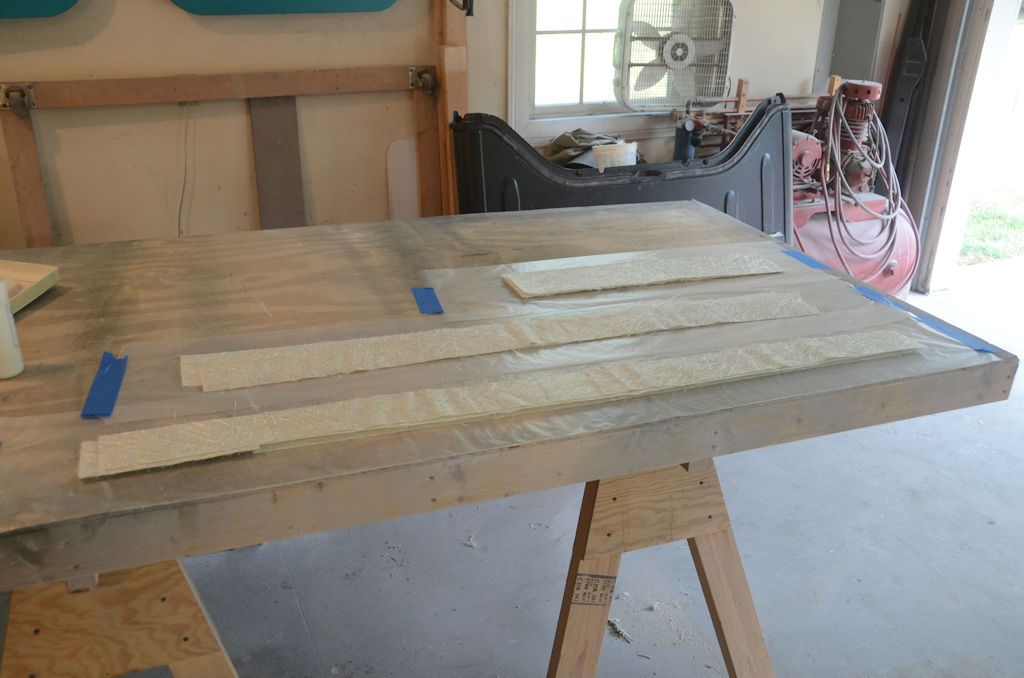
Fiberglass sheet stock for the new flanges can be made on waxed paper taped to a flat surface. Here I've got waxed paper taped to the workbench, and laying on top of it are several layers of fiberglass mat. One at a time the layers of mat will be saturated with resin on the waxed paper, and when 3 layers are done, it'll be left to cure. When it's cured the result will be fiberglass sheet stock. I've cut pieces of 1.5 ounce mat to make three layers for each set of flanges that will be needed; the fiberglass is oversize a bit to allow for sizing and trimming.

SheetStockSetup_zpspy2sr4p6.jpg


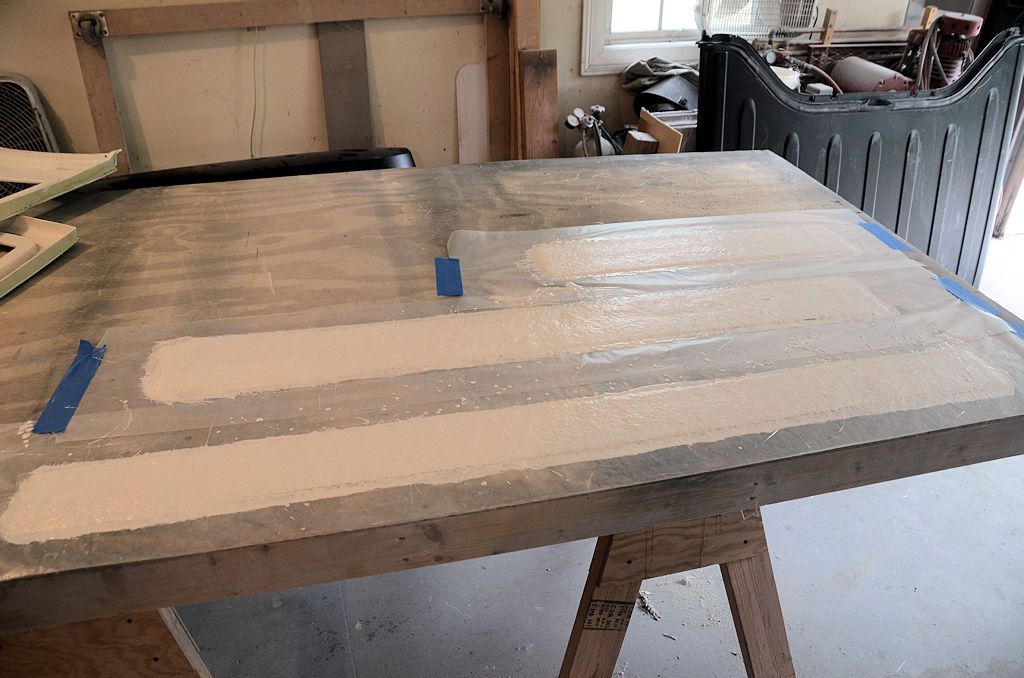
It's very simple to make, just saturate the first layer of mat with resin, then add each successive layer and saturate it as well. Three layers of mat will be sufficient to make a sheet that's the correct thickness for the flanges. This next photo shows the sheets all done, they'll be allowed to cure overnight. I've also tinted the resin for these white, but tinting isn't required - everything can be painted as the last step of the project.

SheetStockLayup_zpsf4msxdgo.jpg


I used 40 ounces of polyester resin to fully saturate all 3 layers of all 3 pieces. I did make the pieces a bit oversize, so if you wanted to economize on resin they could be made a bit smaller. Also on a JKU the side panels are shorter so you'd need less sheet stock, so 32 ounces of resin should make these for a JKU.

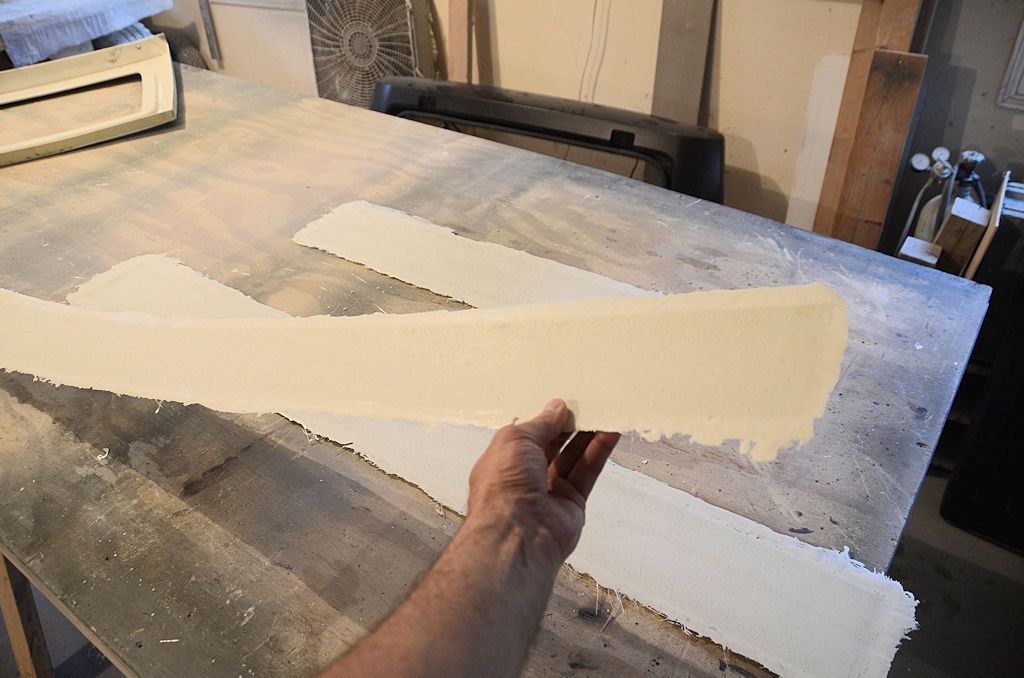
After curing overnight, the sheets are removed from the waxed paper and ready to use:

FlangeStock_zpsfbtcrwiz.jpg
 

jscherb

Expedition Leader
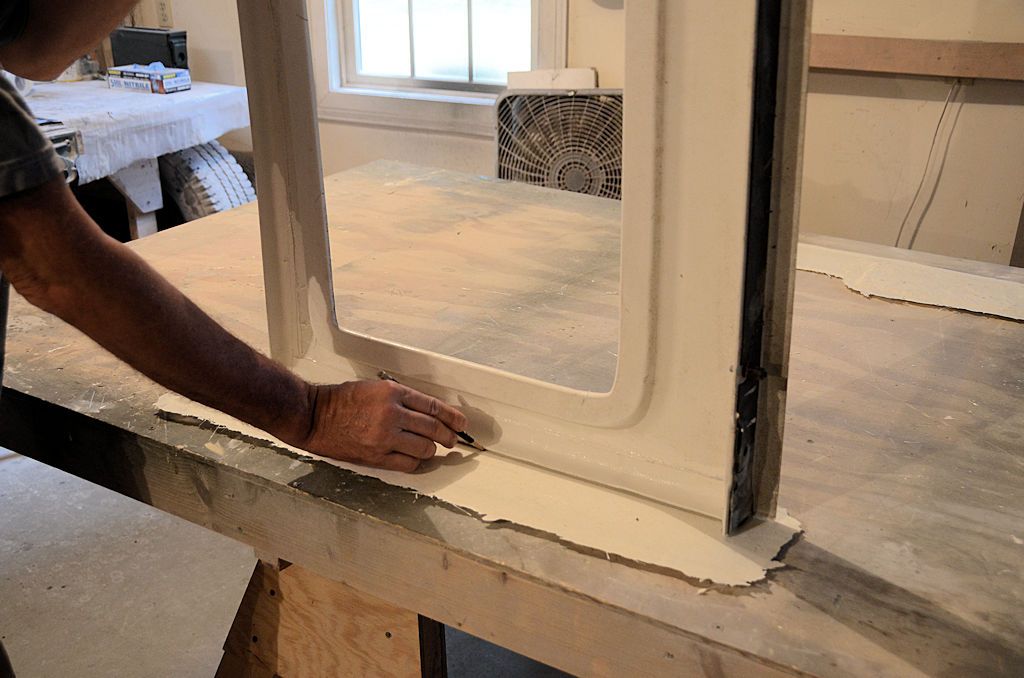
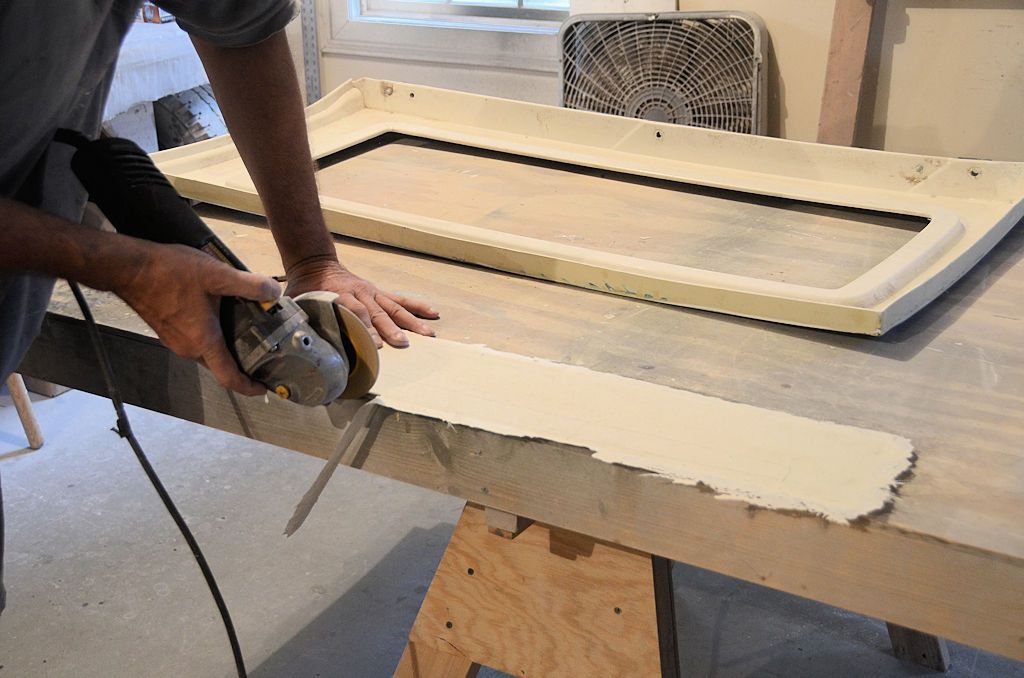
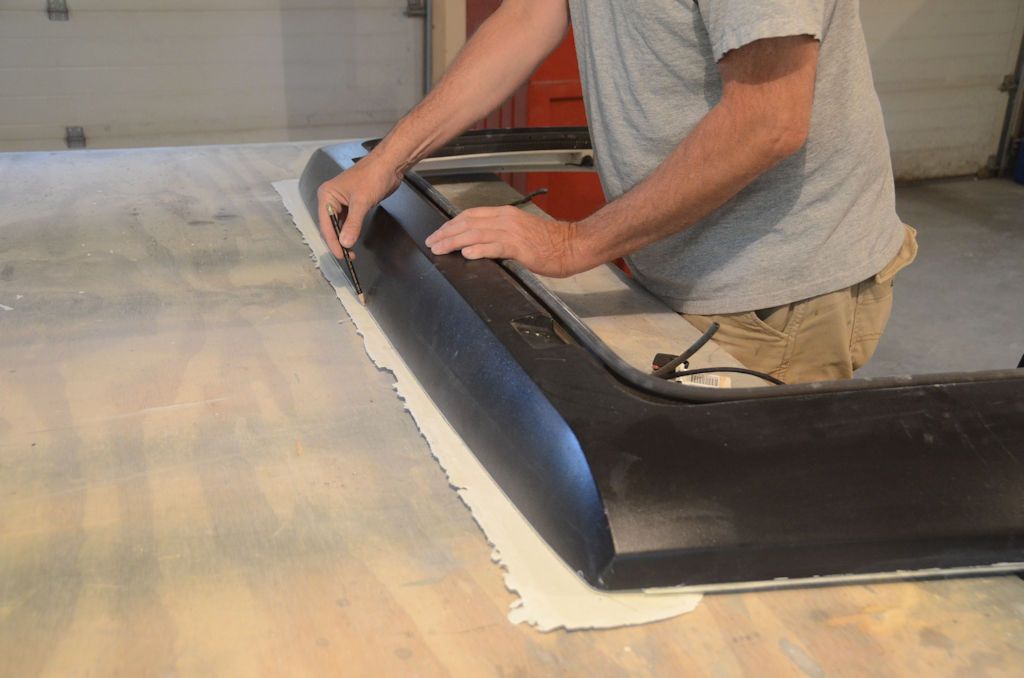
A piece of the fiberglass sheet will be cut to match each flange. I picked the sheets off the waxed paper after letting them cure overnight; here's a piece clamped to the flange on the top of a side panel. In this photo I'm tracing the outline of the original flange, I'll cut it to rough size with the cutoff wheel in my angle grinder.

FlangeTracing_zpsfpk2ehwf.jpg


FlangeCutting_zpsd8cym931.jpg


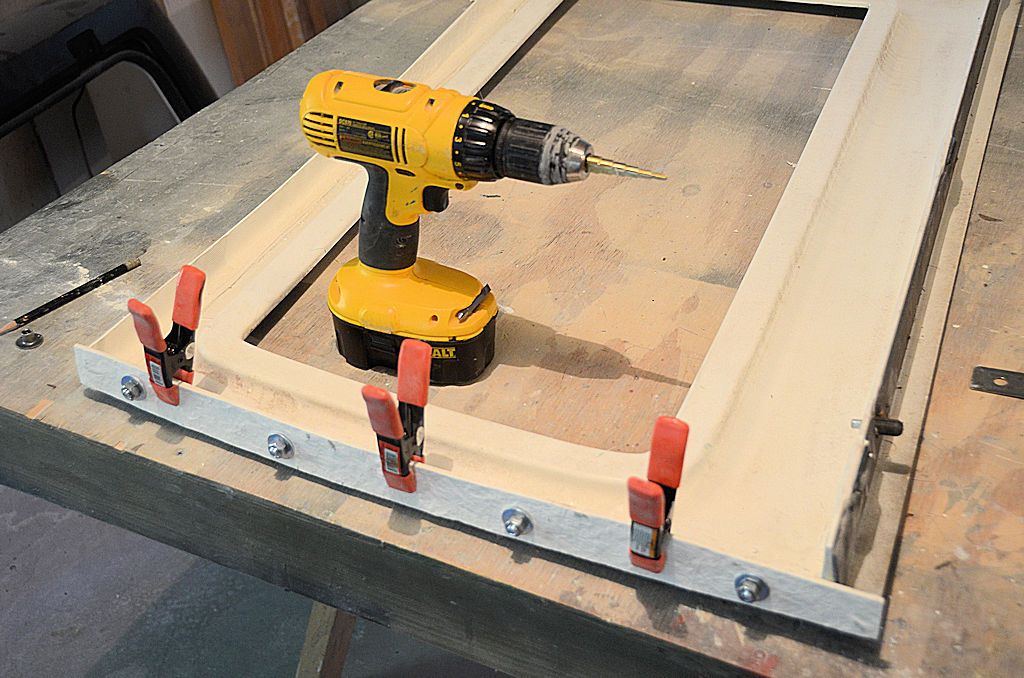
The rough-trimmed flange clamped in place. While it's clamped, holes for 5/16" bolts are drilled through both pieces, and bolts are then used to hold them together. I find that a step drill bit makes nicer holes in fiberglass than a twist drill.

FlangeBolts_zps99oyc1x9.jpg


One option would be to final trim the new flange to the flange it's bolted to, and then assemble the top, bonding the new flanges to the mating hardtop parts with epoxy.

That's a fine way to go, but I'm going to add one refinement to the new flanges - rather than use bolts and nuts to assemble the final hardtop, tee-nuts can be epoxied to the new flange, eliminating the need for separate nuts.

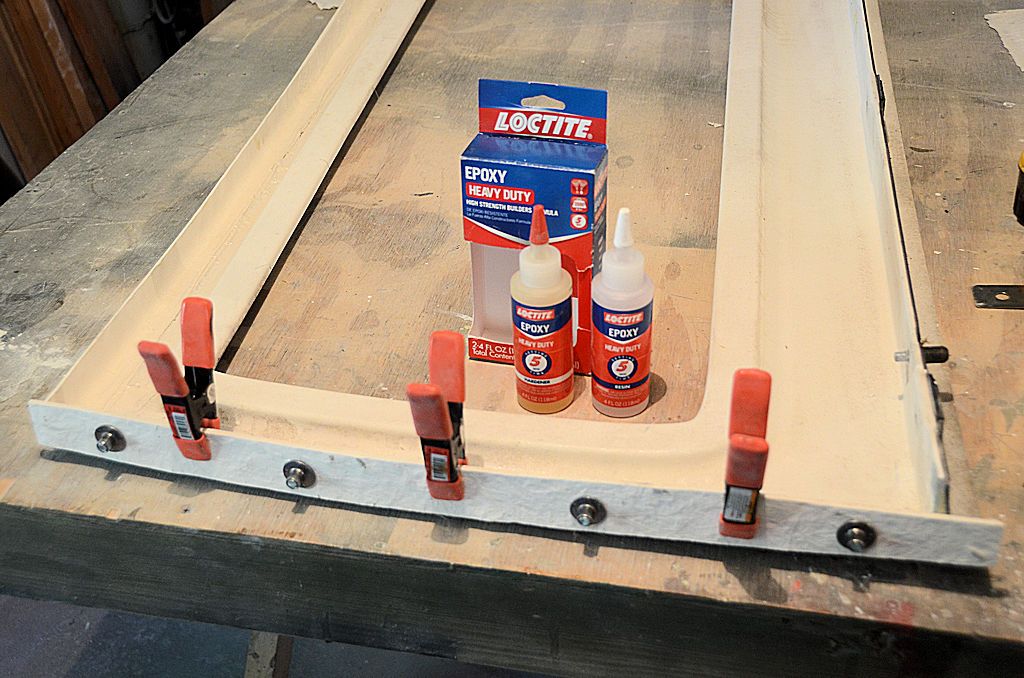
Bolt the flanges in place using t-nuts instead of hex nuts. Apply a little bit of epoxy to the back of the t-nuts to bond them to the fiberglass, and secure temporarily with bolts. Usually I'll put a little wax on the bolts just in case some epoxy seeps into the threads.

FlangeTNuts_zpsueaidxxs.jpg


Be sure to remove the bolts when the epoxy just begins to set - it's likely that some epoxy will seep over to the threads and glue the bolt in place, so if you remove them before the epoxy full cures you'll be fine.

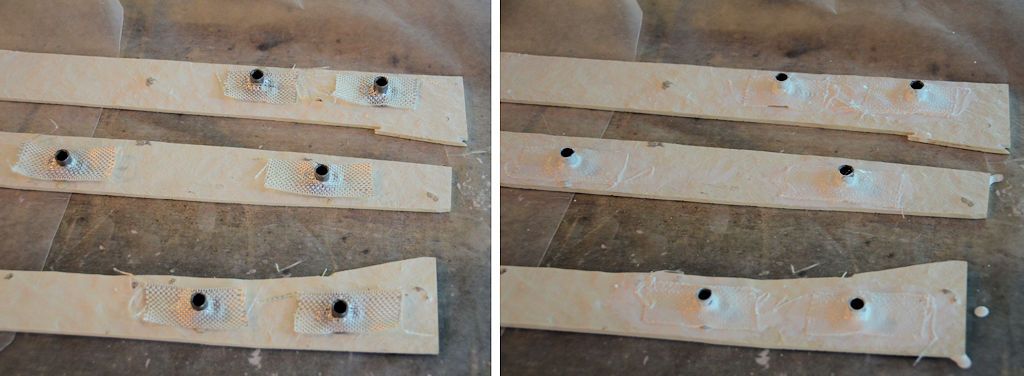
Then, to make sure the tee-nut never loosens, some fiberglass tape with a hole in it is placed over the nut and saturated with polyester resin. I've tinted the resin white as usual.

TNutsGlassed_zps44eutlvn.jpg


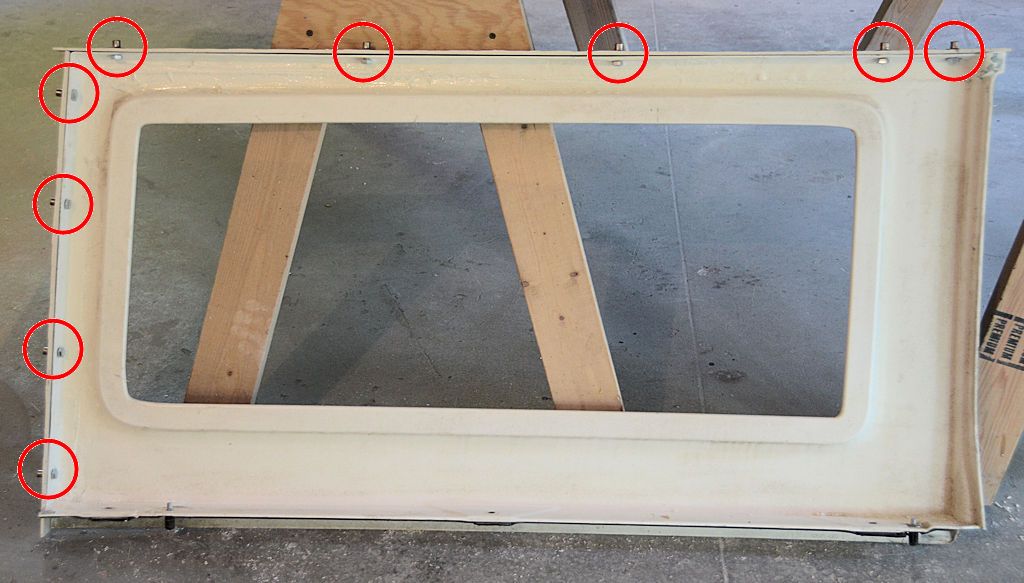
I'm using 9 bolts/t-nuts on each side panel - 5 across the top and 4 in the back.

FlangesBolts2_zpsqebqu38a.jpg


The frontmost bolts on the top of the side panels need to be at least 2 1/2" back from the front of the panel so that they doesn't interfere with the area of the roof where the freedom panels sit.

I've put two nuts towards the front of each side panel, only one is needed for reassembly of the top but if the top is to be used will roll-up side panels instead of the hard sides, two will be necessary, and I'll explain that later when I cover roll-up sides.

It is a little extra work to add the t-nuts, but every time the top is assembled or disassembled the t-nuts will make things a lot easier, so doing the extra work now is well worth it.
 

jscherb

Expedition Leader
Once all of the nuts are in place, the flanges are final-trimmed on the inside edges to match the mating flanges. The outside edge of the new flange should be left slightly big for now, it'll be trimmed after it's bonded to the hardtop panel.

It's best to finish up the flanges that attach the side panels to the back panel first, then do the roof flanges in a separate step, so next I'll bond the side-rear flanges to the back panel.

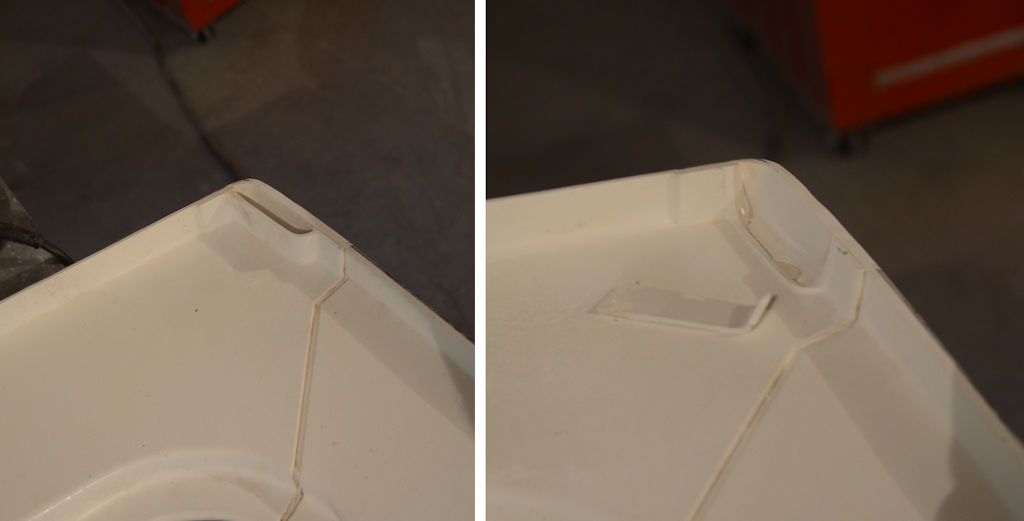
Earlier in the project I removed part of the hollow areas in the roof so that the new flanges could bond to the roof edge, there are remnants of those hollow sections that need to be removed from the end rear panel as well.

RearPanelHollow_zps9eb4ao5a.jpg


If you haven't roughed up the inside of the parts where the new flanges will end up being bonded to, do it now. Once the flanges are bonded in place it'll be a lot harder to access the area behind them for sanding, and you'll need to sand there to ensure a good bond for the reinforcing fiberglass that'll be going in.

RearPanelRoughing_zpsxu0aapcs.jpg


The above photo shows roughing up the inside edges of the rear panel, also do the inside along the top.

While roughing up the bonding surface, I discovered that the factory bond on one side of the rear panel had failed.

RearPanelDelam1_zpsyalwepqa.jpg


I fixed the problem with some 5-minute epoxy in the joint.

RearPanelDelam2_zpsa1qxlx6p.jpg


I made one more gauge stick to keep things correctly aligned. This one goes between the backs of each side panel, and spaces the side panels to match the width of the rear panel. It's held in place at rearmost bolt holes in the tops of the side panels. In this photo the gauge stick I made at the beginning of the project is across the front of the side panels, and the new one is at the back. The rear panel is setting against the back of the side panels to check that everything's the same width.

GaugeSticks_zpsskgtu3pa.jpg


The edges of the top of the rear panel, and the inside along the sides of the roof panel should be roughed up now if any of those haven't been done yet.

With the new flanges bolted to the back of the side panel, check the fit. The joint should be flush. If it doesn't fit exactly right, if you did t-nuts, check that the fiberglass that was used to secure the t-nuts isn't in the way of the inside edge of the rear panel and if it is sand/grind a bit to perfect the fit. Other than that, a little sanding on the rear panel side should bring everything into line if it's not already. I used a light on the inside to highlight any fit issues, and fixed them with my sanding block with 80-grit sandpaper. Checking the fit:

JointFit_zpsn1owy6vi.jpg
 

jscherb

Expedition Leader
Bonding the new flanges to the rear panel.

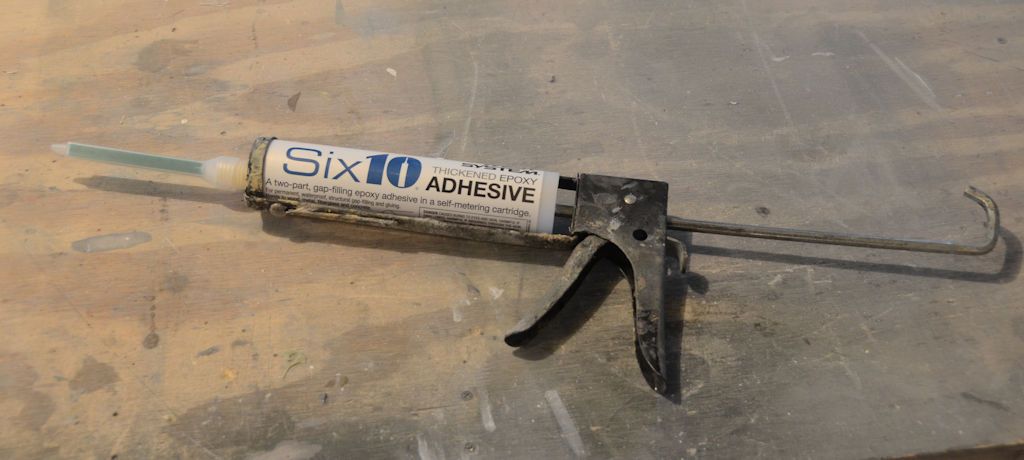
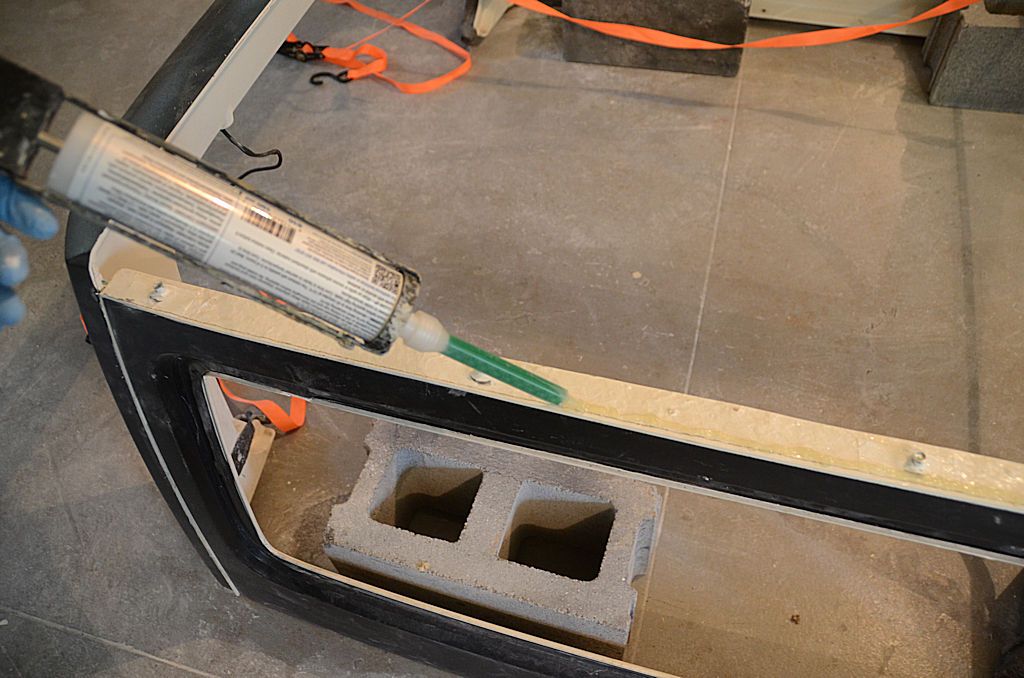
I used West System Six-10 epoxy to bond the new flanges in place - it's very convenient, fits in a standard caulk gun and the tip mixes the two parts of the epoxy as it's applied.

Six10_zpsrp2v6lhd.jpg


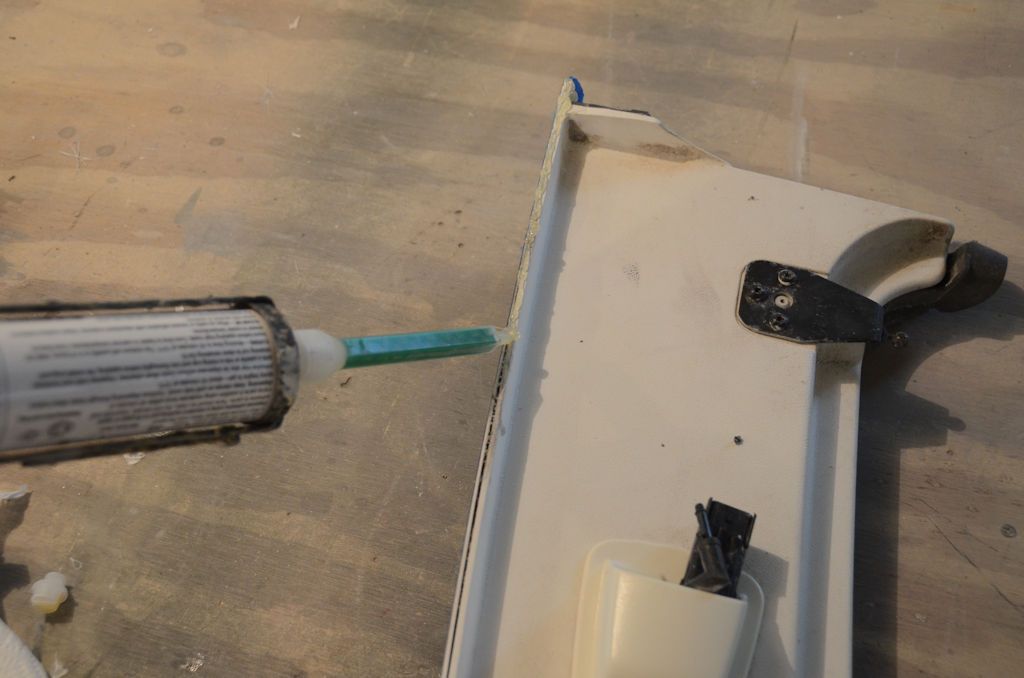
Assembly goes like this - run a bead of epoxy along the outside edges of the flanges at the back of the side panels where the rear panel will make up. Put the back panel in place, using tape to hold everything together.

I found it easiest to apply the epoxy to the rear panel while it was sitting on the workbench and then put the panel in place on the floor. Running a bead of epoxy:

Six10Bead_zpsl2roflzl.jpg


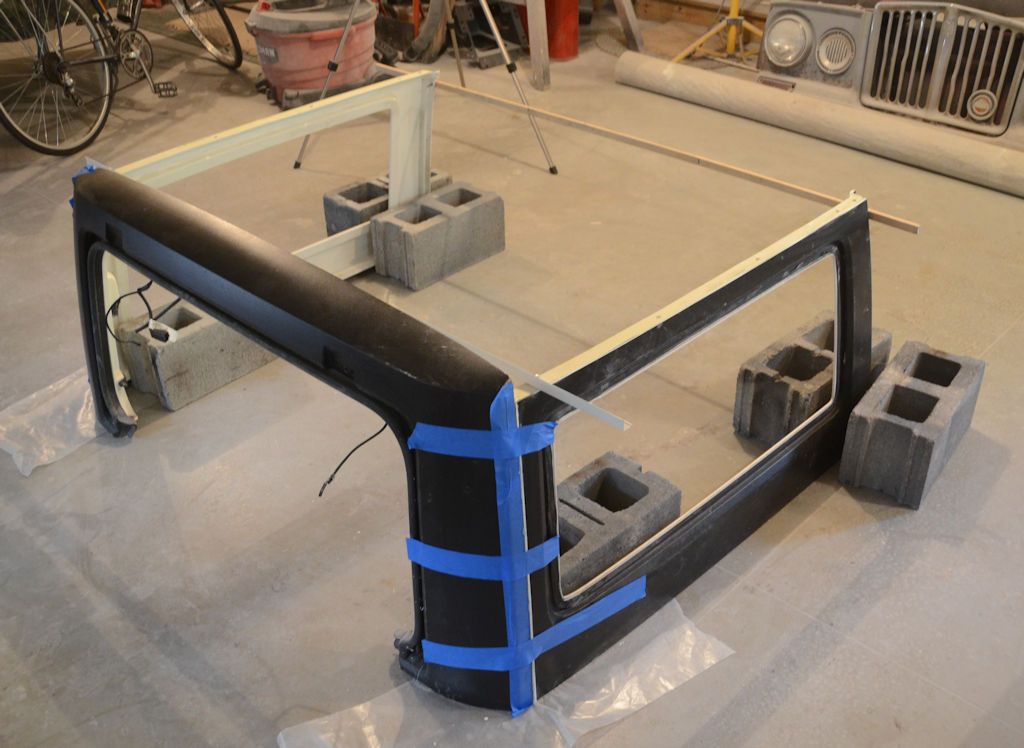
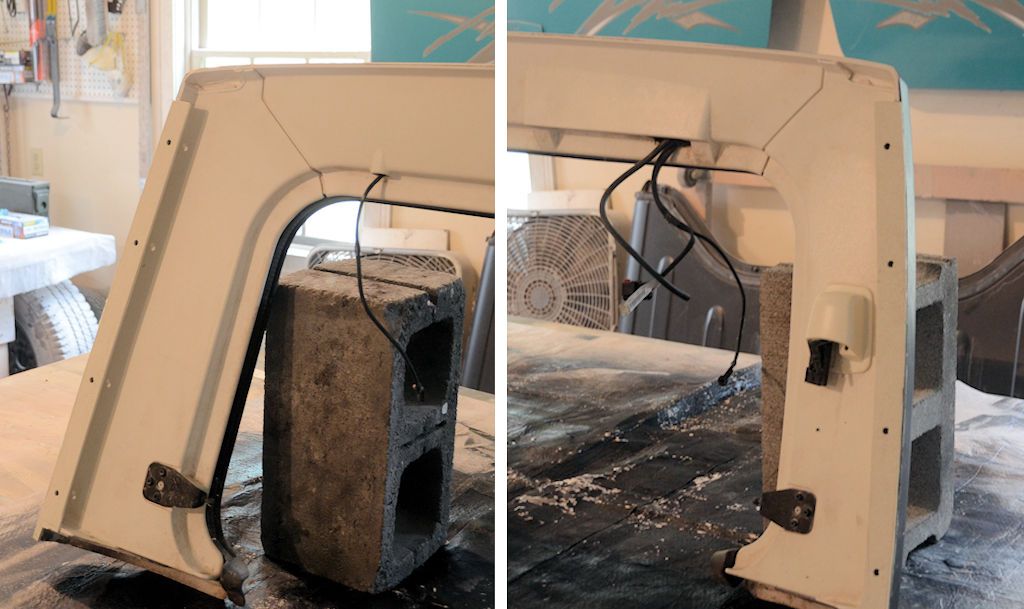
I taped the sides at the joint, and braced the side panels with cinder blocks. The tape running vertically was put there to prevent excess epoxy oozing out onto the exterior of the hardtop.

RearPanelBraced_zpsewf7wd0o.jpg


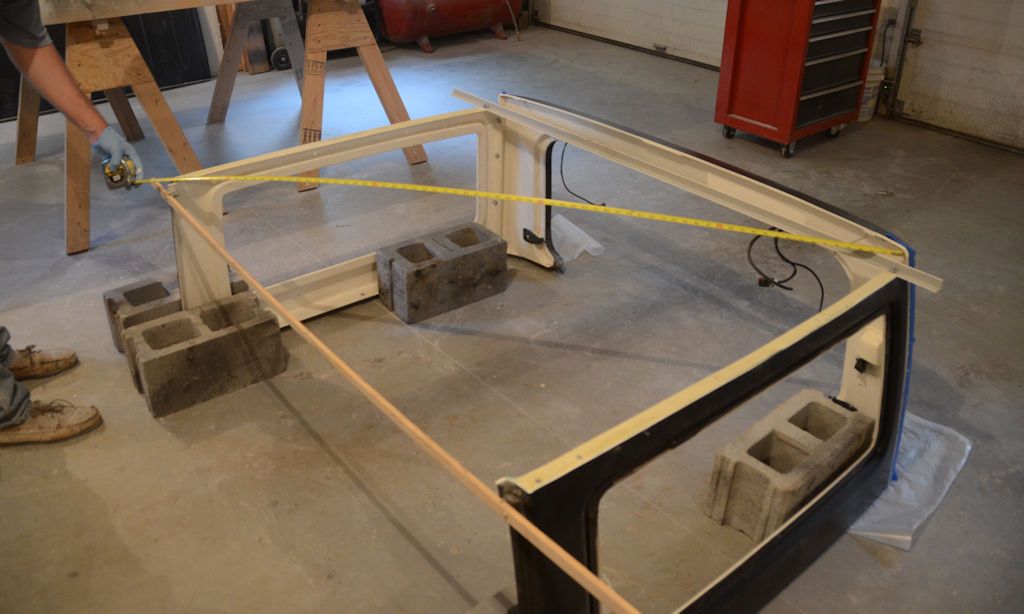
Once the rear panel is set into the epoxy and masking tape has been applied to hold everything in place, measure diagonally from the both rear corners to the opposite front corners.

DiagonalMeasure_zpsdw3guxph.jpg


If the measurements are the same, everything is square. If not, adjust the position of the side panels to make it all square. Recheck that the joints being epoxied are still lined up perfectly and let the epoxy cure overnight.

Usually the Six-10 epoxy will get to its initial cure state in 5-6 hours and it can be handled (gently) at that point, so if you applied the epoxy in the morning, by later afternoon/early evening you should be able to go on to the next step. if there's any doubt though, let it cure overnight to be sure.

Tip: when I work with an adhesive and I want to know how it's curing, I often do a test piece from scraps of the material I'm bonding. I can check the cure on the test piece without messing with the real project parts.

EpoxyTest_zpsdkgeumt0.jpg
 

jscherb

Expedition Leader
Once the epoxy has cured, carefully remove all the bolts to disassemble the sides from the rear panel. The new flanges will be bonded to the rear panel with the epoxy, although the bond may not be extremely strong, so handle the parts with care. This is expecially true if you're doing this step the same day that you applied the epoxy.

Once the sides are removed, the new flanges are part of the rear panel:

RearPanelFlanges_zpsc13pj06z.jpg


Once everything's apart, the new flanges will be reinforced by adding two layers of fiberglass cloth tape to the joint. The first layer needs to be put in with SMC-compatible resin, and the second layer can use either SMC-compatible resin or ordinarly polyester resin. As with building the earlier flanges, a strip of 1.5 oz. mat saturated with SMC-compatible resin is placed behind the new flanges, on the SMC side of the joint. Once that starts to cure, layers of fiberglass cloth tape can be built up on top of it, folded in the corner to cover both the inside of the new flange and the mat that was just applied with the SMC-resin; ordinary polyester resin can be used for the fiberglass cloth tape layers.

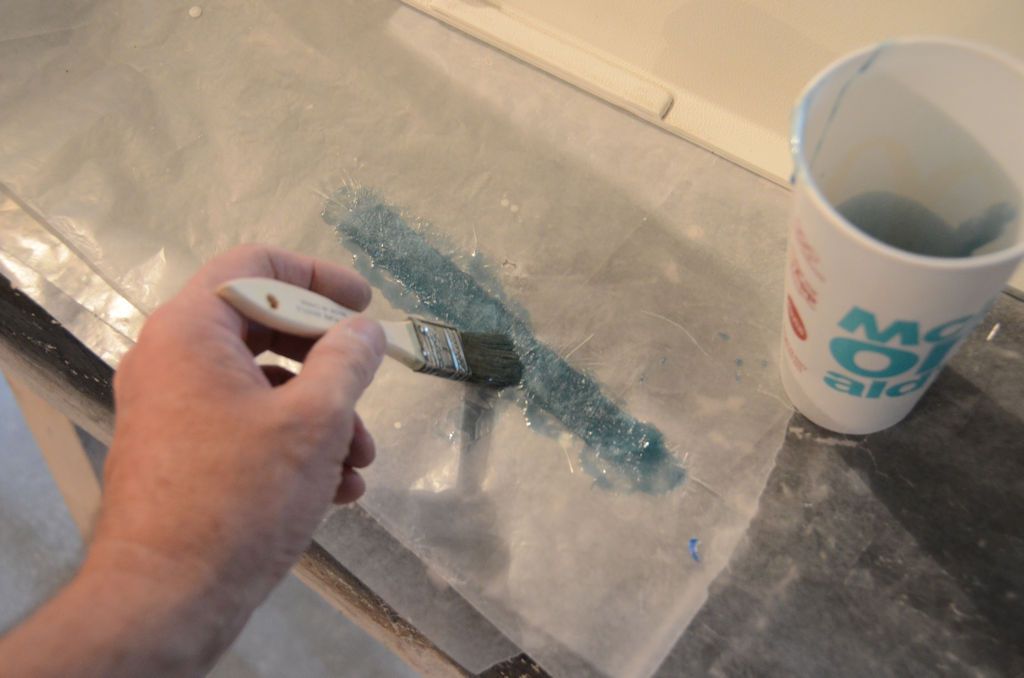
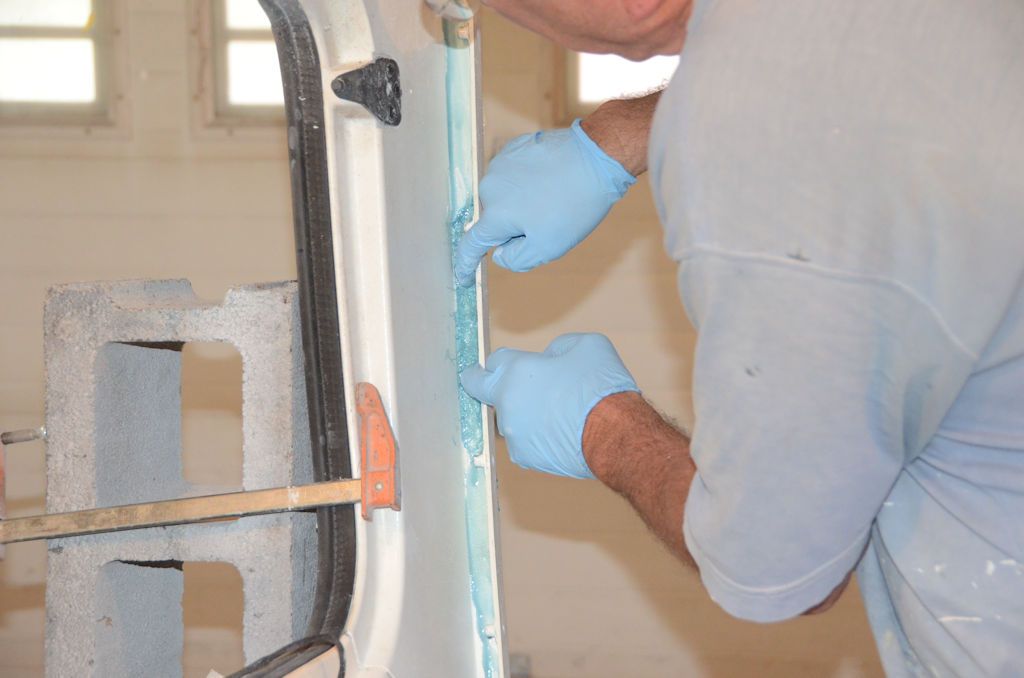
Because it's hard to fully saturate the fiberglass cloth tape once it's in place behind the flange, and because the SMC-compatible resin is very thick and doesn't saturate the cloth easily anyway, it's best for this step to saturate the cloth tape on a piece of waxed paper and then apply it to the inside of the flange.

Saturating it:

ReinforcementSaturation_zpsit2x6ang.jpg


Applying:

ReinforcementApplication_zpsk4aiv7sl.jpg


Once it's in place use the brush to apply a little more resin and to push the mat well into the corner.

When the SMC-compatible resin begins to cure, add 2 layers of fiberglass cloth tape, spanning both the mat that was just laid down and the inside of the flange. Ordinary polyester resin can be used for these layers. Again it's a good idea to saturate the cloth tape before applying it due to the difficulty of reaching everywhere behind the flange with a brush. I've tinted the resin white.

ReinforcementClothTape_zpsa2iuve0n.jpg


Once both new flanges have been reinforced, let the resin cure overnight.
 

jscherb

Expedition Leader
Next the roof needs to be prepared to be bonded to the sides and to the rear panel. Bolt the side panels to the rear panel, and install the front gauge stick. Test fit the roof with the rest of the parts and sand the joints if necessary to perfect the fit.

RoofTestFit_zpsgharfsze.jpg


Trace the shape of the roof flange on the fiberglass sheet stock, it's easy if you use the rear panel.

RoofFlangeTracing_zpsojerbksl.jpg


Cut the flange to rough size, bolt it to the flange on the back of the roof, and trim it to final size on the inside. Next trim the inside of the roof flange, and if you're going to add t-nuts like I did on the side panels, now is the time to add them. I used 6 bolts across the back of the roof, 3 on each side.

RoofFlangeBolts1_zpspcrc2dkp.jpg


The t-nuts are epoxied in place, but I haven't yet reinforced them with shot pieces of fiberglass tape, that's next.

RoofFlangeBolts2_zpswiesxmiz.jpg
 

jscherb

Expedition Leader
Once any adjustments have been made so the fit of the roof is satisfactory, remove the roof and bond all three flanges with Six-10 epoxy as before. Since Six-10 comes with only one mixing tip, if you're using the same tube of Six-10 that you used to bond the side flanges you'll need a new mixing tip (see the post on sourcing materials). Here I'm laying down a bead of epoxy to bond the new flanges to the roof.

RoofEpoxyBead_zpsujggtfi6.jpg


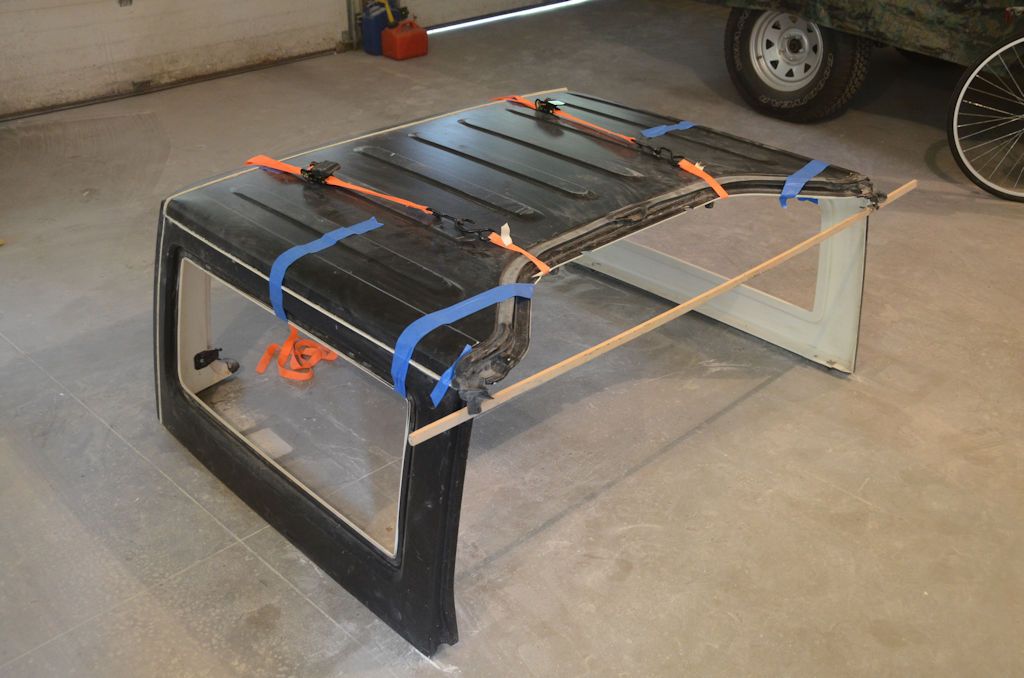
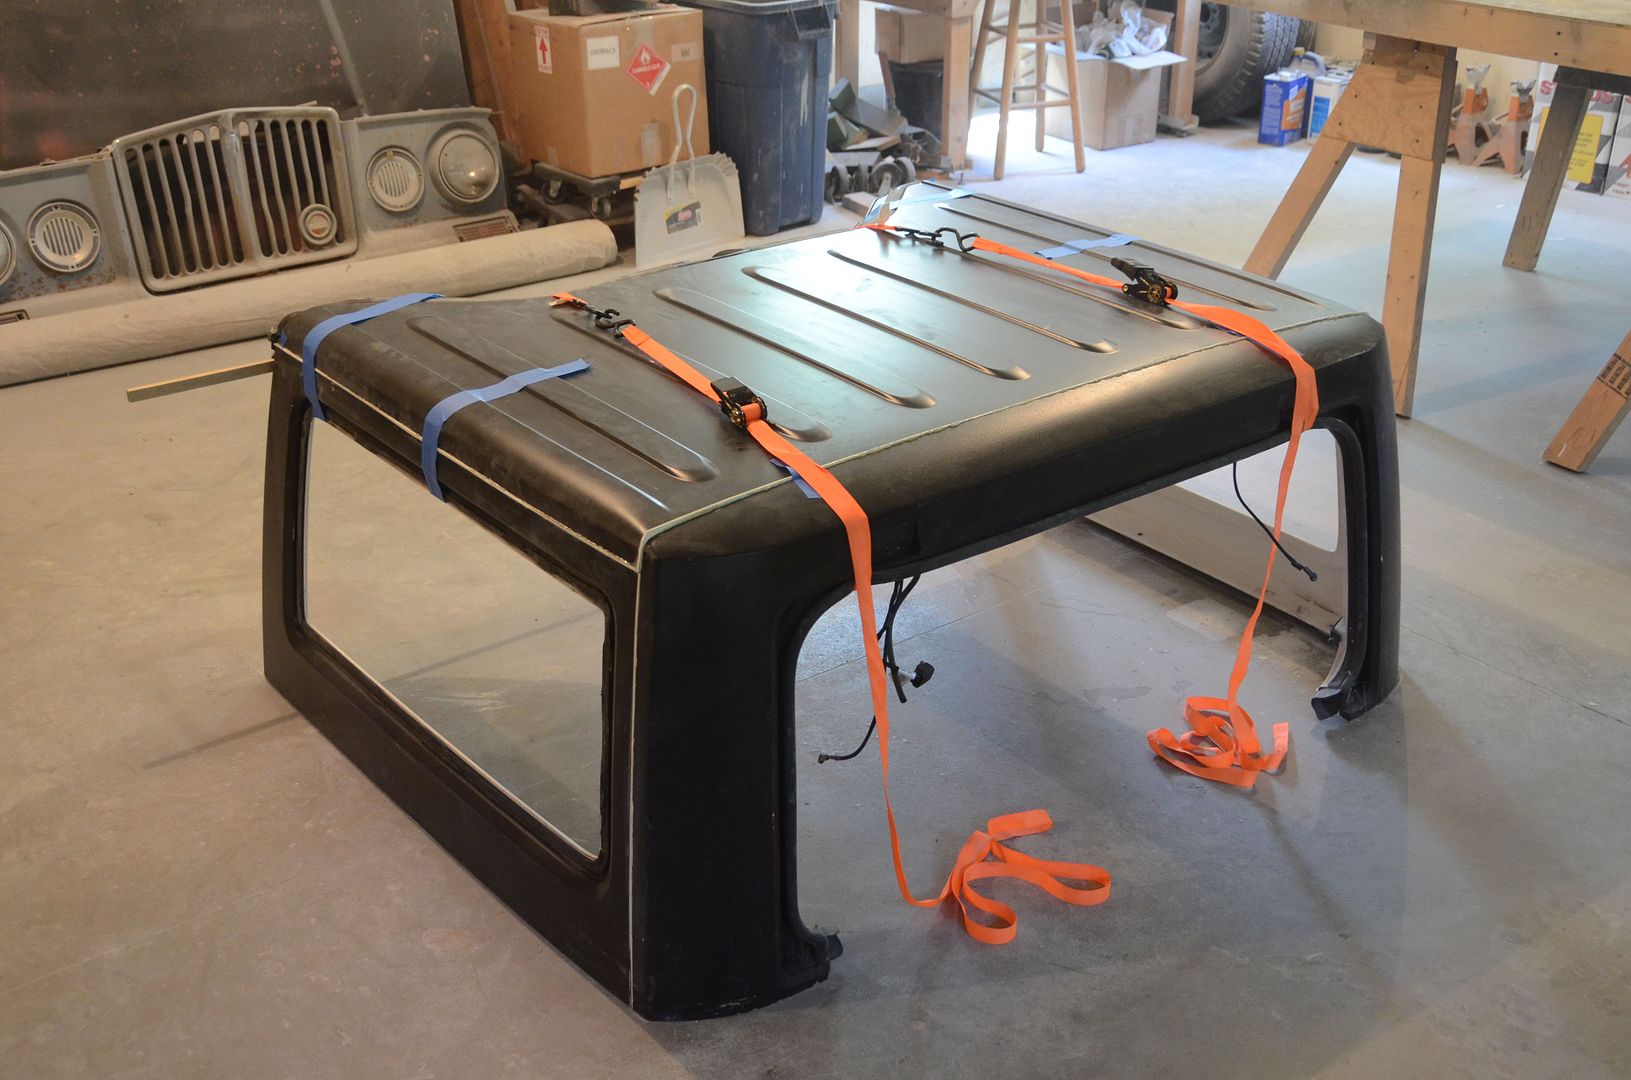
Once the bead is laid down, set the roof in place, align everything and secure with masking tape and let cure overnight. A little tape will help hold the roof snugly against the flanges it's being epoxied to. I also used ratchet straps to pull the roof tight against the back panel.

RoofEpoxyCuring1_zpssfincjkn.jpg


RoofEpoxyCuring2_zpstplmfqcg.jpg


Once the epoxy has cured, carefully disassemble everything and reinforce the new flanges that were just bonded to the rear panel and the the roof. The procedure is the same as for the side panel flanges that were reinforced in an earlier step.
 

jscherb

Expedition Leader
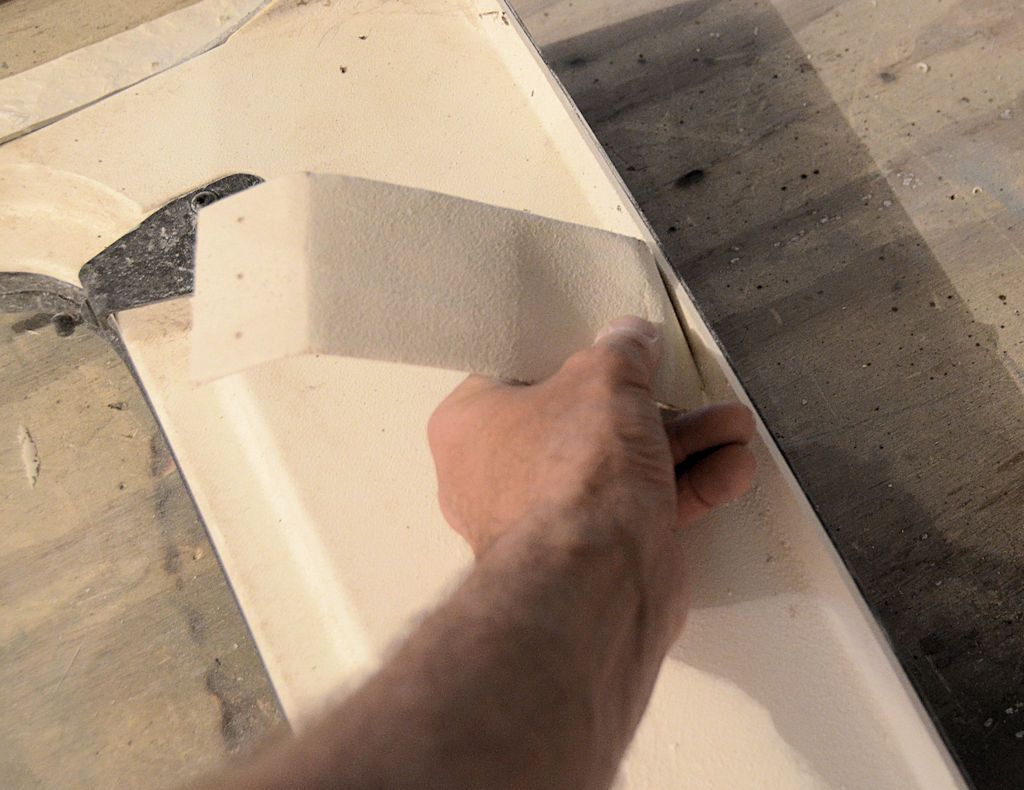
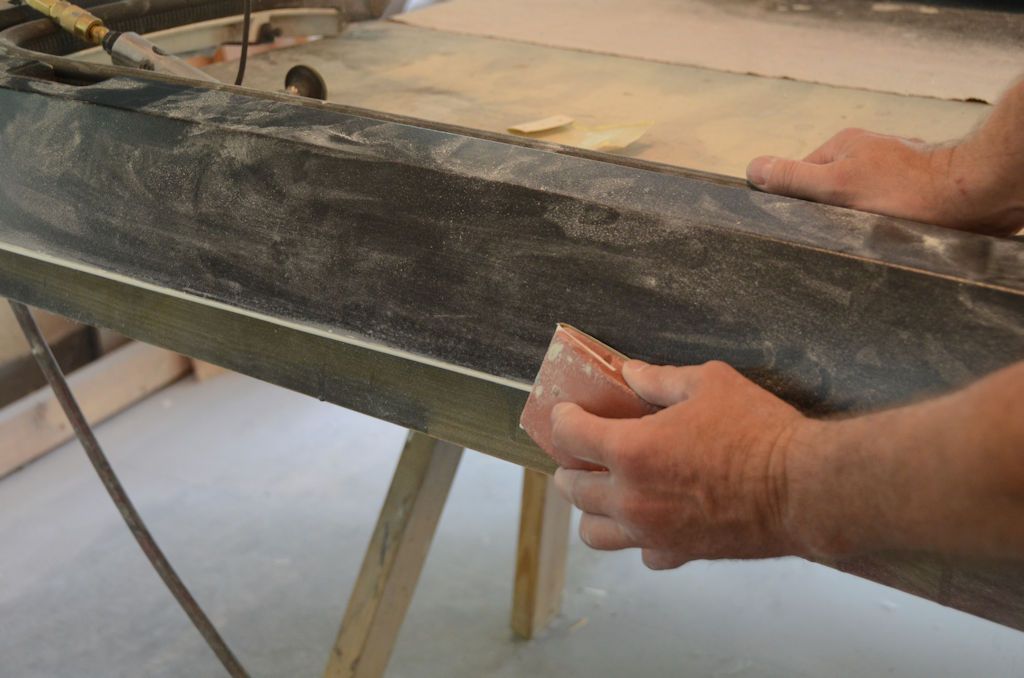
Once everything is cured, the outside edge of the new flanges can be sanded flush with the outsides of the panels. A sanding block with 80-grit followed by finer grits works well for this task.

TrimmingFlanges1_zps9hs70srt.jpg


If the sanding reveals any cosmetic voids in the epoxy joint between the hardtop parts and the flanges, a little body filler can be applied.

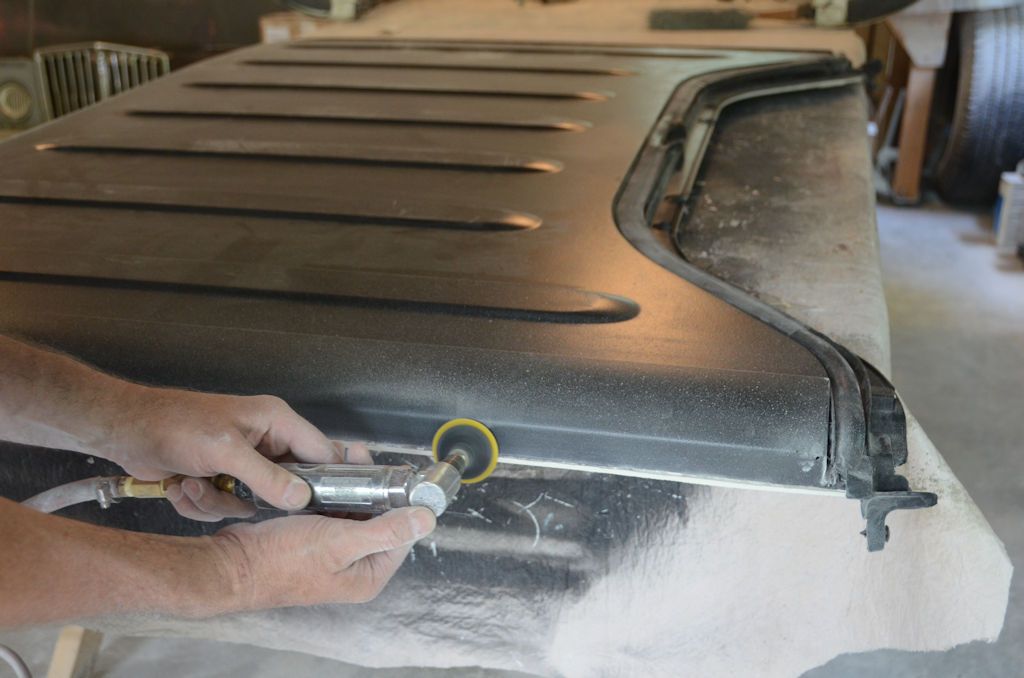
If you have a compressor, a lot of tasks in this project can be accomplished more quickly with an angle die grinder with 2" sanding disks. These are available for about $15 at Harbor Freight. In the photo below I'm trimming the excess of the flange off with the die grinder, but I'm still leaving a bit to be taken off with the sanding block - it would be easy to go too far because the die grinder removes material pretty quickly, so I go just so far and then finish it by hand with the block.

TrimmingFlanges2_zpssdwqjojv.jpg
 

jscherb

Expedition Leader
A few finishing touches

Since I've tinted all of my resin white, there isn't any touch-up required inside my project top (check out the photo of the inside of the assembled top I posted early in this thread), but on the outside along where the flanges were added needs to be touched up. Also, the mating surfaces of the bolt flanges, which are still raw fiberglass/body filler, should be painted, so I did some masking and for now sprayed the flanges white with some matte black along the edges where it could be visible when the parts are bolted together.

MOPAR hardtop touch up paint (part #68060406AA, $11.00 for a 5 oz. rattle can at Quadratec) is a perfect match.

The panel joints need to be weatherstripped. I won't do that until I decide if the full top will get a repaint, and anyway I don't have a 2dr JK to put this on so there's no rush :). What I'd use is an EPDM closed cell weatherstrip, probably 1/8" thick x 1" wide, with adhesive back. There are a number of sources for it on the internet, I usually use McMaster-Carr (http://www.mcmaster.com/).
 

jscherb

Expedition Leader
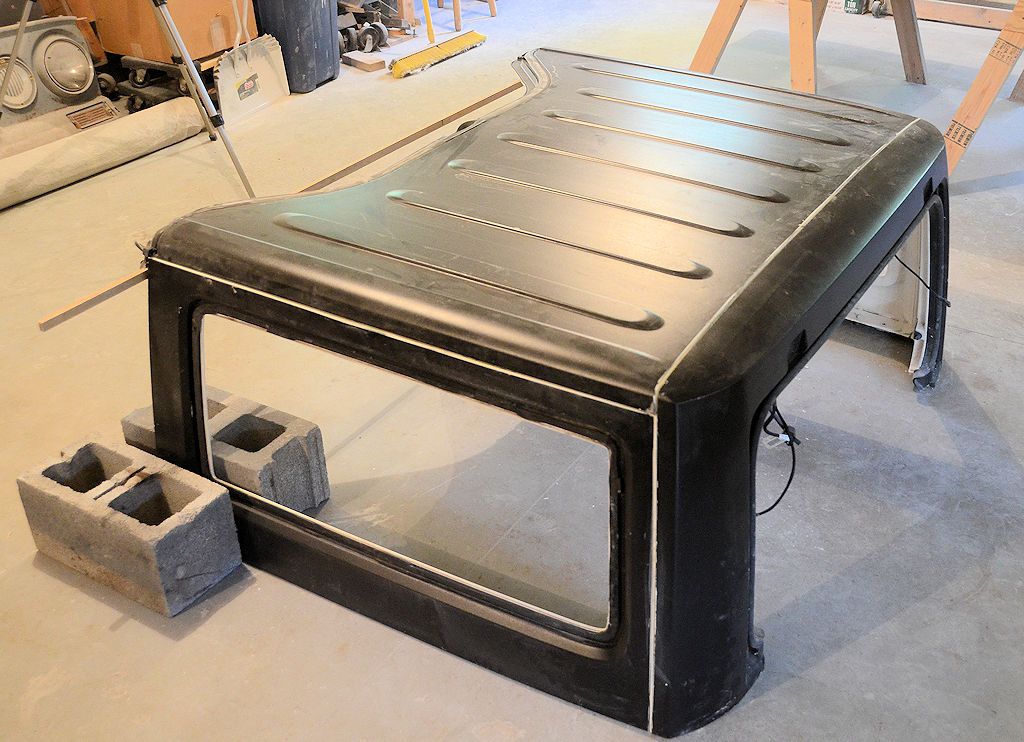
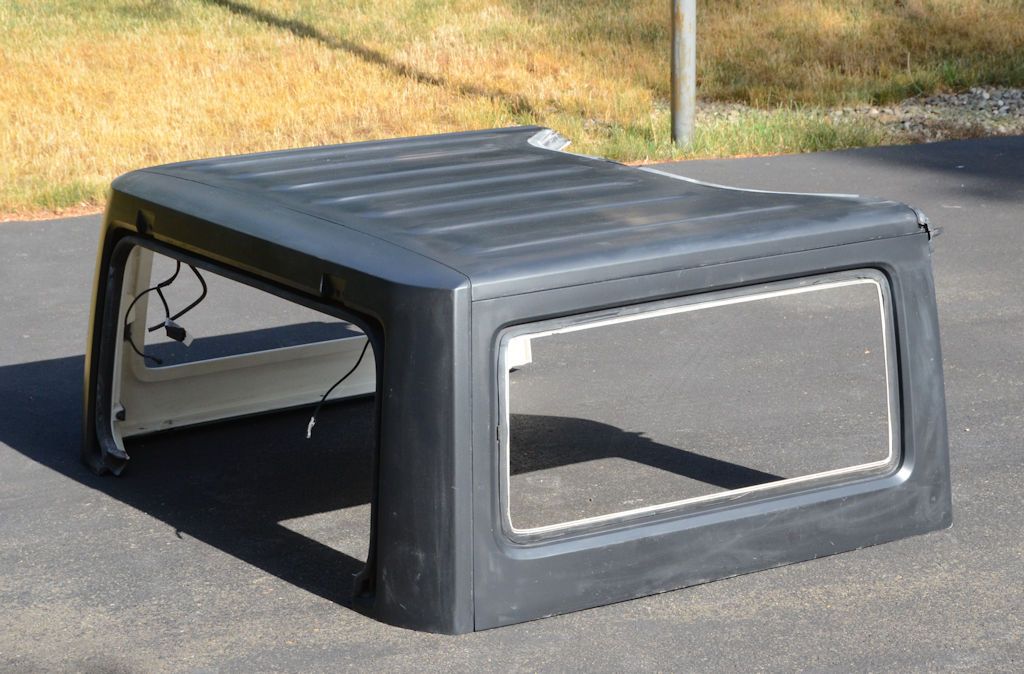
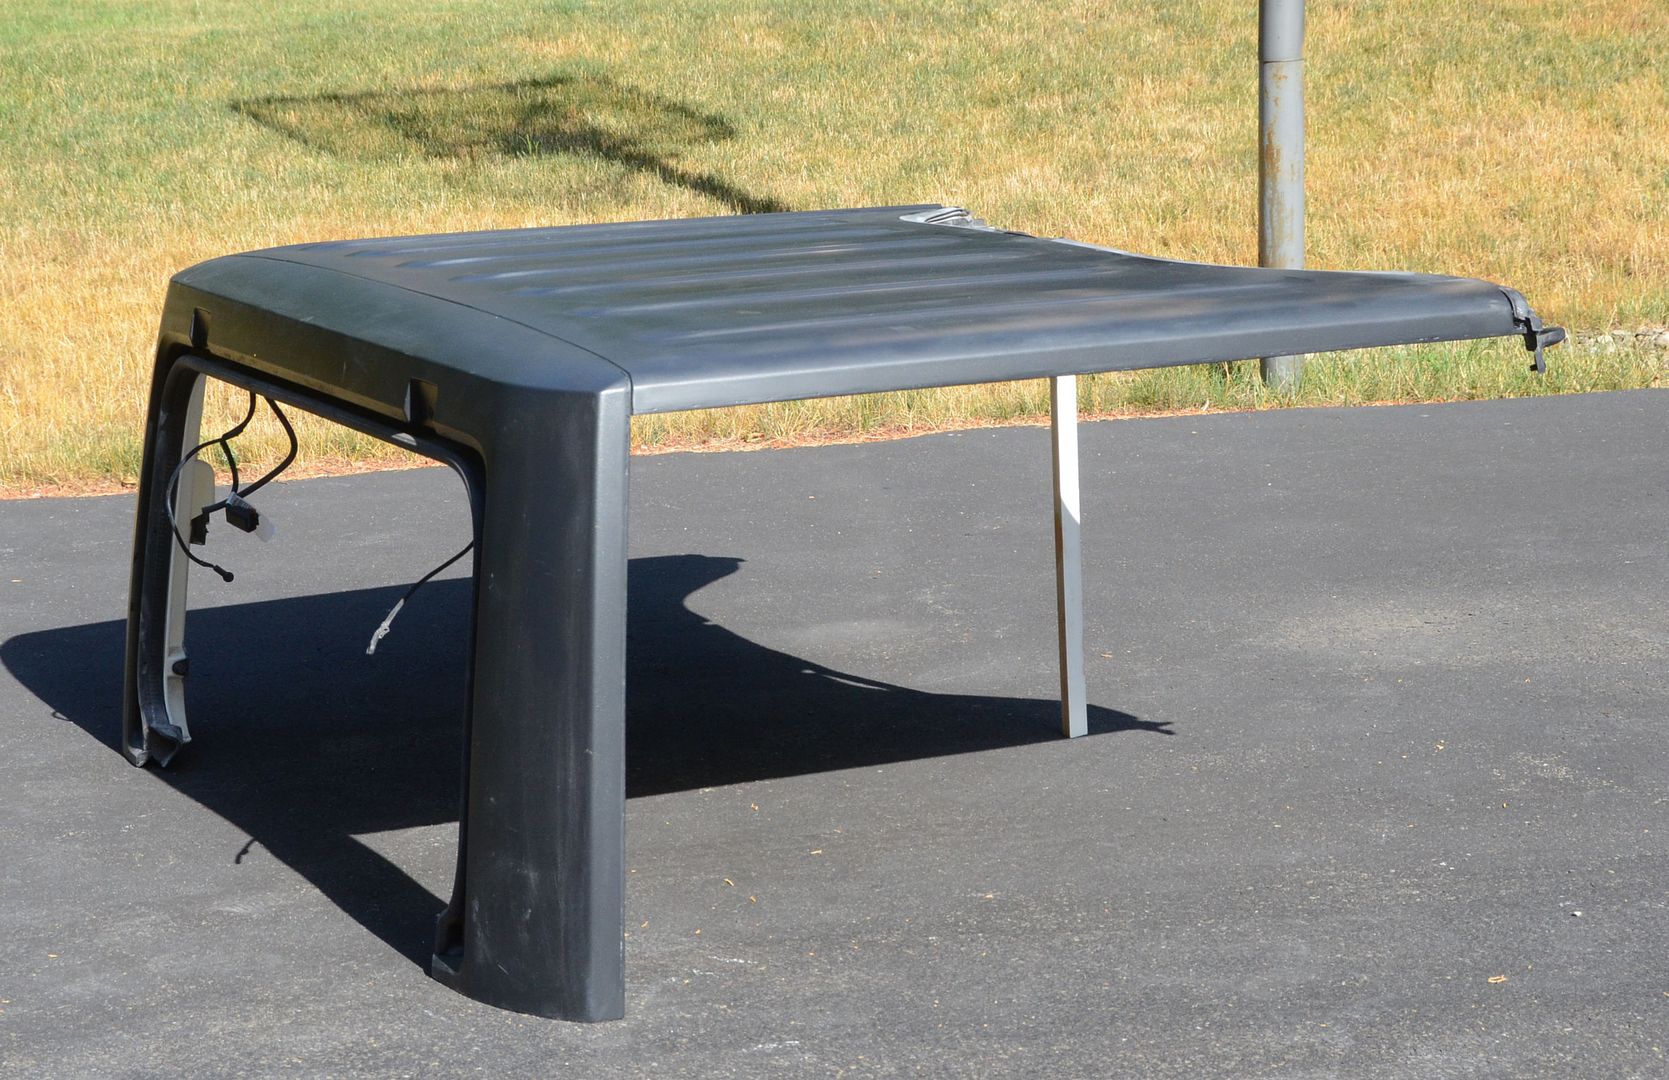
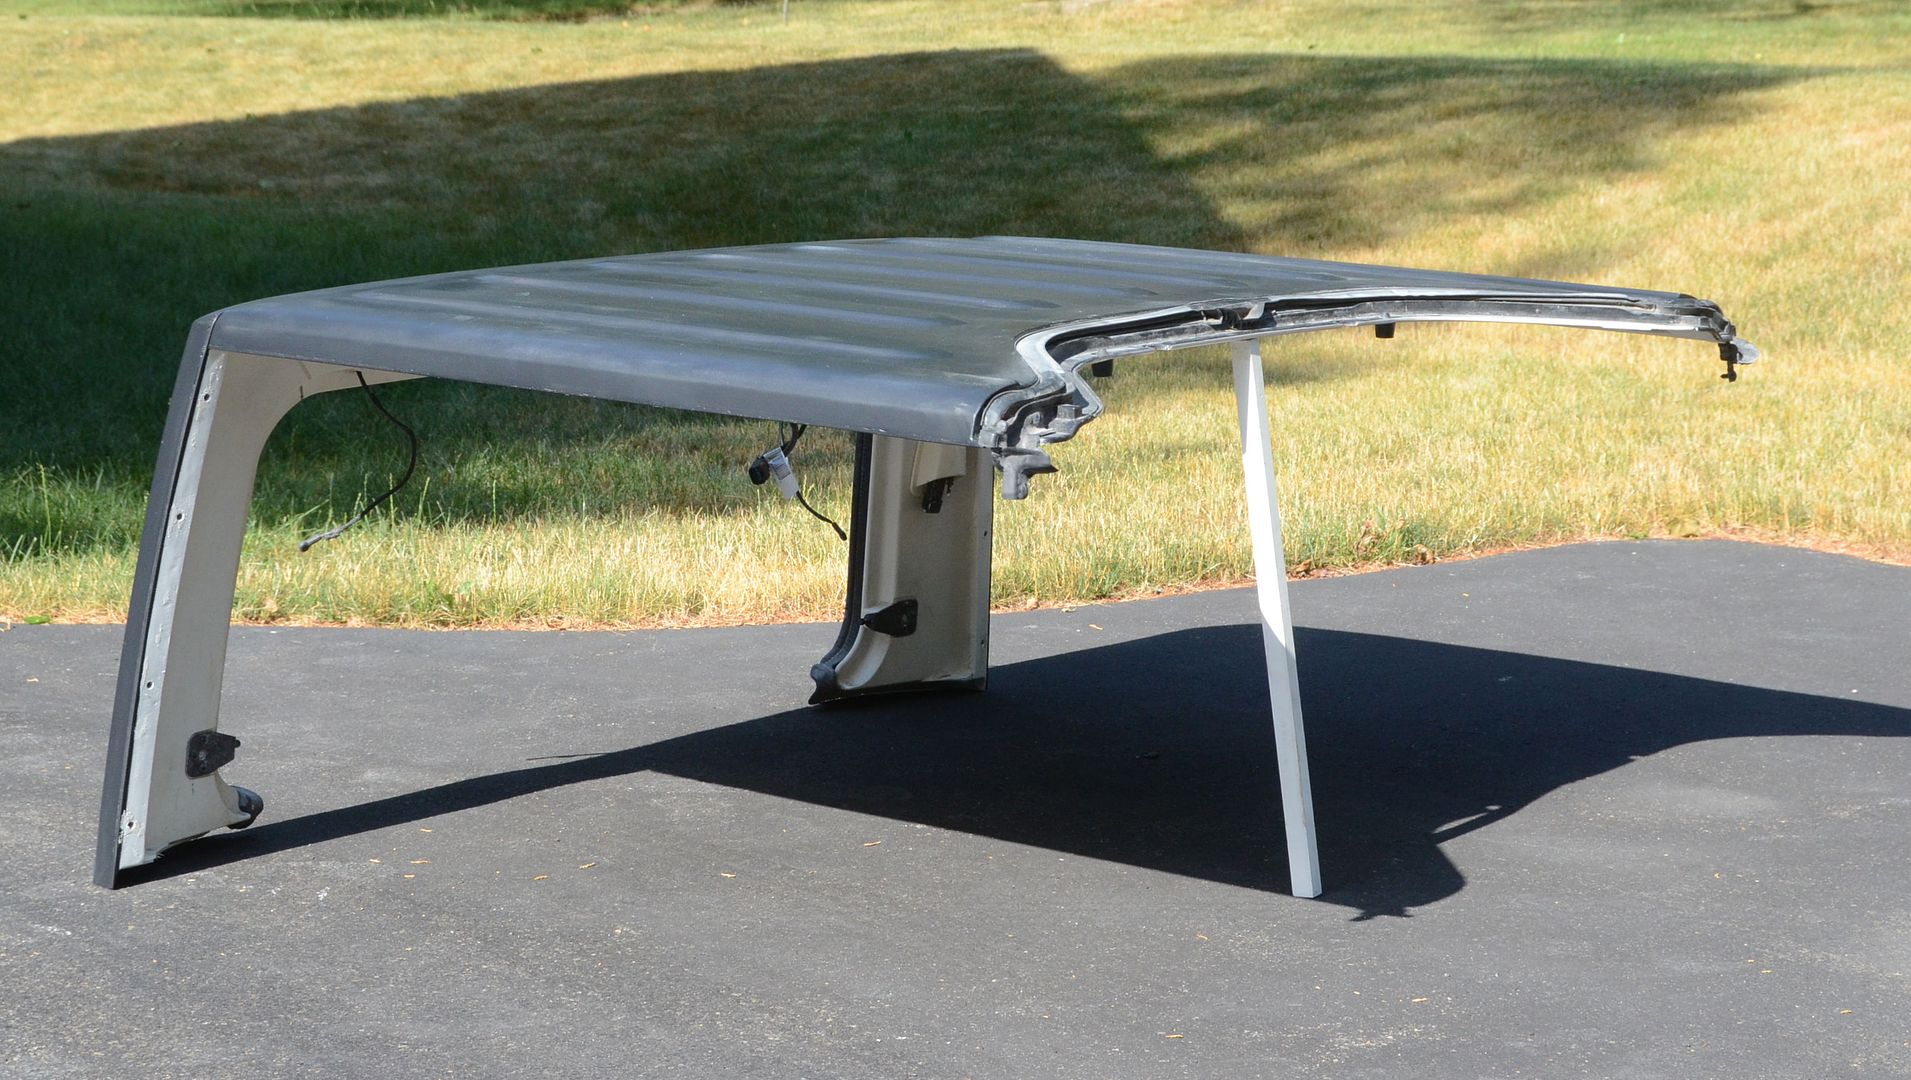
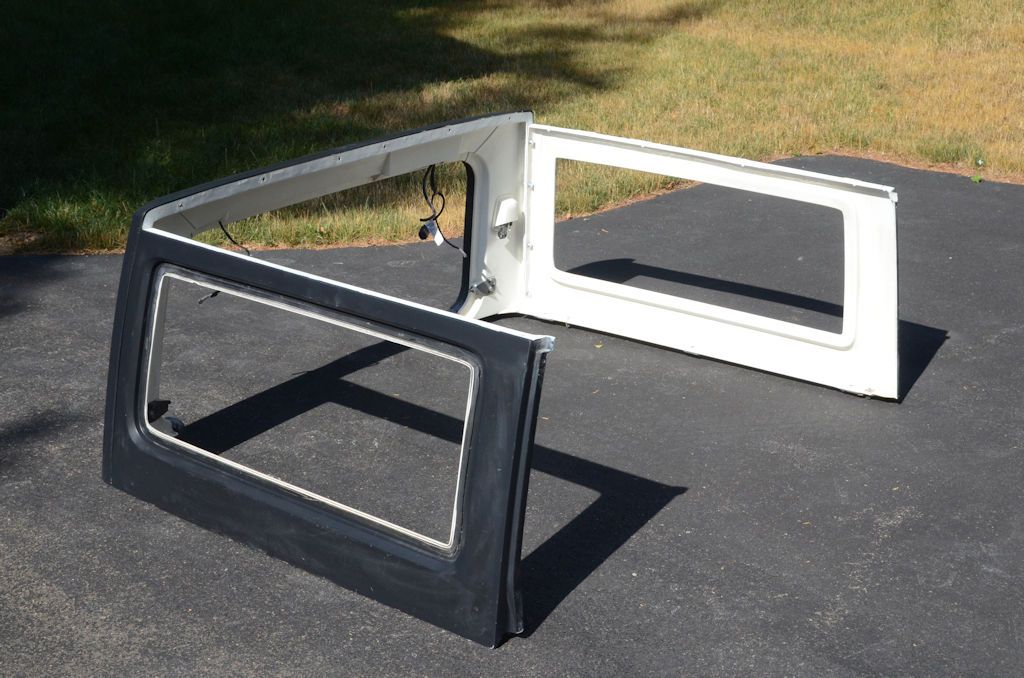
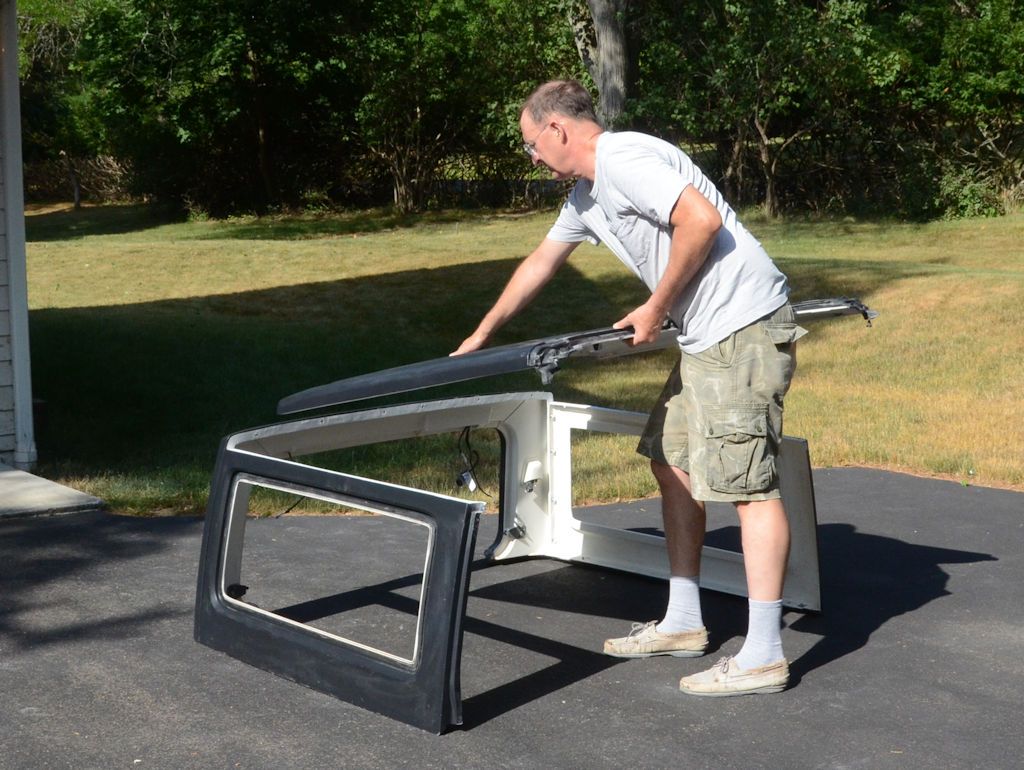
Some photos of the completed top. I posted some of these at the beginning of the thread, but now that all the steps are done I'll repeat a few.

As I've said, I don't have a 2dr JK to put this on, so we'll have to make do with photos of the top out on the driveway. Also this top came to me without window glass, so you'll have to imagine windows in it. Actually, the reason I have this top is to use it for protoyping a slider window retrofit kit - I've done the design work for a JKU slider retrofit kit that's on it's way to production and the company I did it for is likely to do a slider window kit for the 2dr next. Since I don't have any plans to get a 2dr JK, when I finish the work I need to do for the slider retrofit kit, I'll probably sell this top.

FacModAssembled_zpsve3xassw.jpg


FacModSidesOff1_zps6zoay844.jpg


FacModSidesOff2_zps9wiekfbp.jpg


FacModSidesRear_zpsl2ysarqm.jpg


FacModAssembly2_zpspy4t9en6.jpg
 

jscherb

Expedition Leader
A few shots showing the flanges which were added to all the parts.

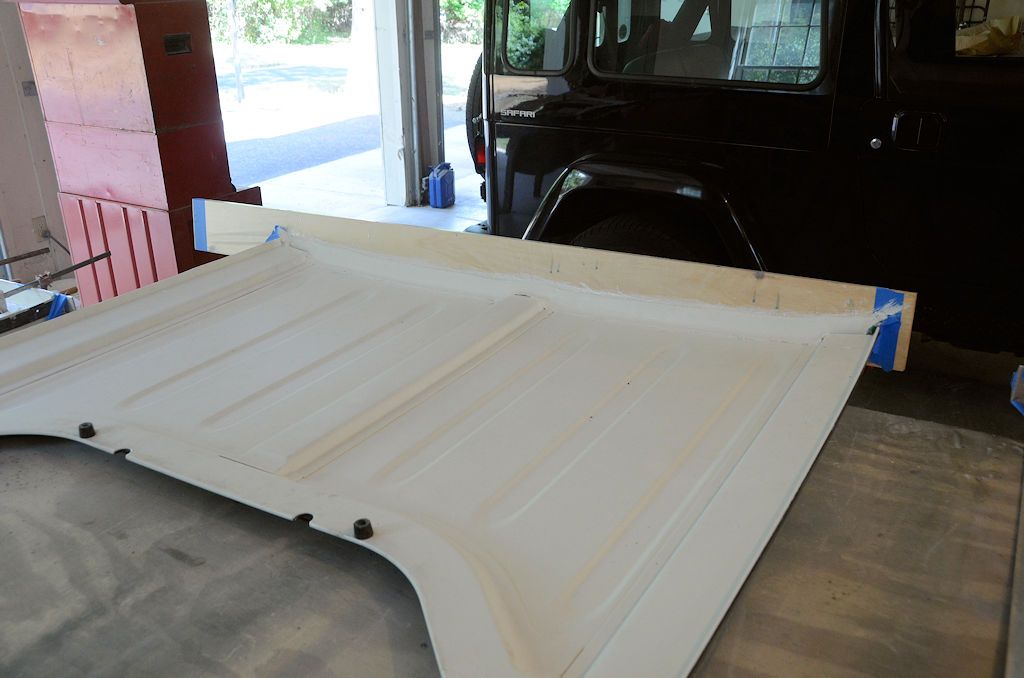
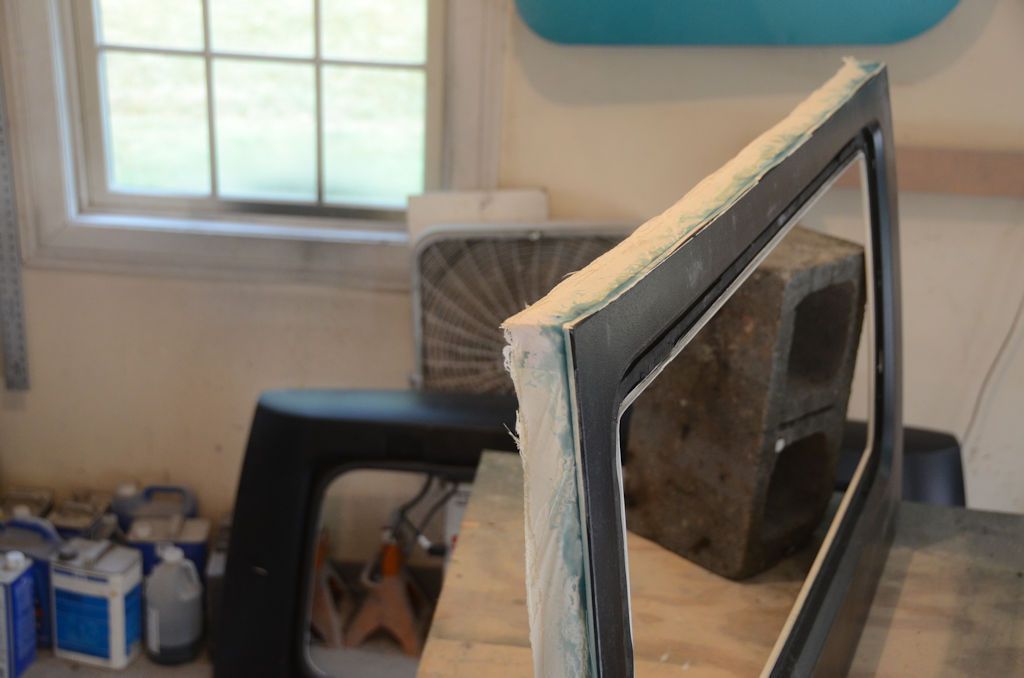
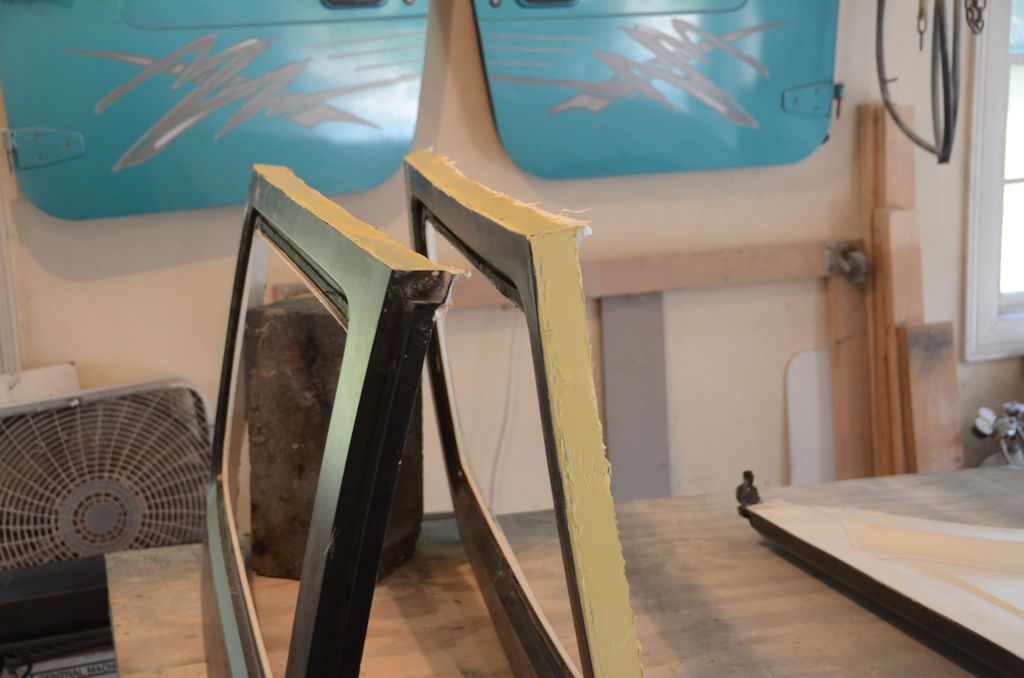
The side panels. These were added by clamping forms to the parts and laying up the fiberglass directly on the parts:

FlangesSidePanels_zpspm6942lj.jpg


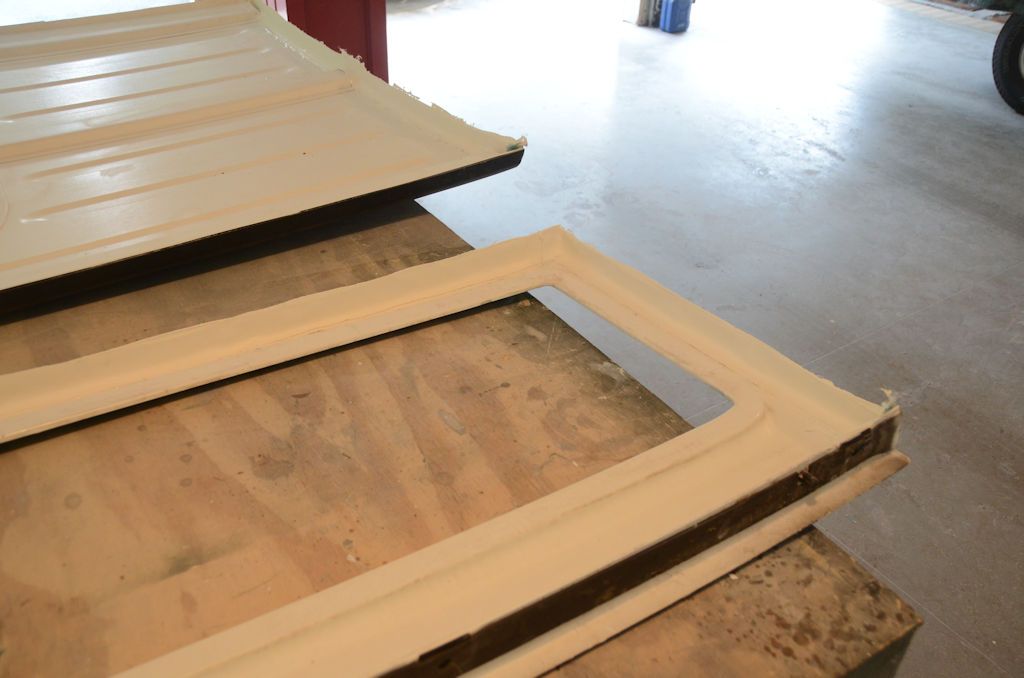
The rear panel. The flanges all the way around this one were made separately, bolted to their corresponding parts, epoxied in place and reinforced after the epoxy cured.

FlangesRearPanel_zpsffighqmn.jpg


The roof. The flange along the back edge was added with a form and laying up the fiberglass directly on the part, the flanges along the sides were made separately, bolted to the top of the side panels, epoxied with the roof set in place and reinforced after the epoxy cured.

FlangesRoof1_zpstjq6nuw5.jpg


FlangesRoof2_zpsbzpnmmte.jpg


Because at each joint one flange was laid up on the part and the corresponding flange was made separately and epoxied in place and the parts were assembled for the epoxy step, all of the flanges fit perfectly with their corresponding flange and minimal weatherstrip is required in the joints.
 

jscherb

Expedition Leader
If after reading this entire thread you decide to do this project on your hardtop, here's a little advice...

- The work involved in this project could be completed in a weekend if all of the resins and epoxies used cured immediately, but unfortunately some are best left to cure overnight, so expect this project to take a week or so of evenings.

- If you don't understand something I've written, or wonder why I've done something the way I did, please ask. I'm happy to explain anything you aren't clear on or explain why I chose a particular approach to something. Please ask your questions in the thread rather than privately - if you have the question chances are someone else does too so it's best to put the questions and answers in the thread.

- Take your time. There will be a lot of "down time" in this project while waiting for resin or epoxy to cure, so you can't rush things. Use the curing time to study the upcoming steps and plan your next task.

- It may seem like there are a lot of steps, but no single step is very hard. Doing this project is kind of like walking - putting one simple step after another until you get there :).
 

Forum statistics

Threads
188,332
Messages
2,905,539
Members
229,959
Latest member
bdpkauai
Top