2004 Tacoma SAS

Tonight I made more progress. It doesn't look like much, but we're slowly chipping away at the list.

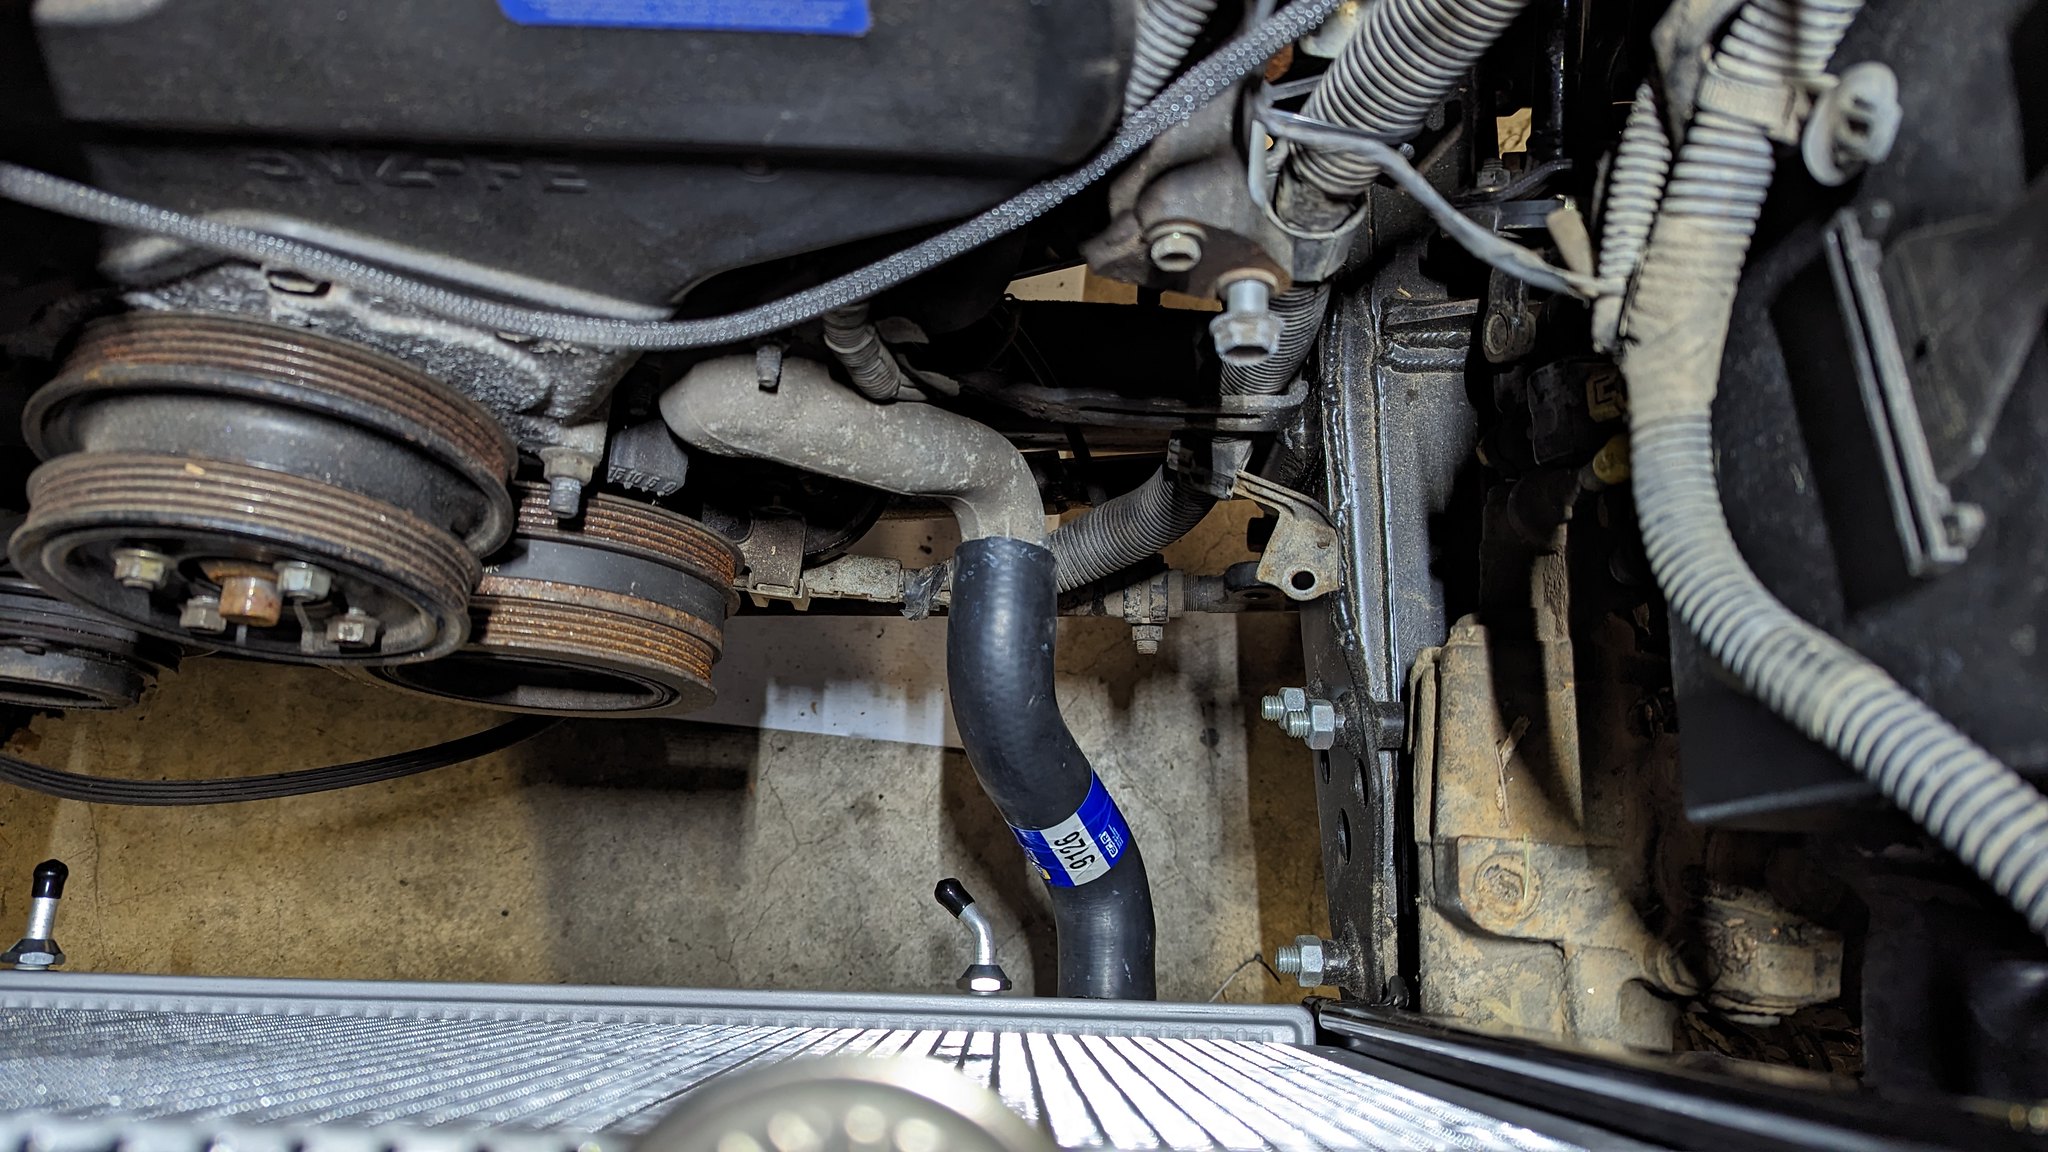
On my way home from work, I stopped by my local Napa for a lower radiator hose that fits better. The dude there was kind enough to take the stock one into the back and find me one that was a little better fit. I did have to trim it, but it seems to fit nicely. The stock upper hose seems to fit fine.

I dug out the fan shroud to get the gears rolling on that, and it looks like I will have to pull the radiator to get that modified to fit. So I am shelving that for another day.

Then, I moved on to fiddling with the power steering hose. Put the pump back on and the high pressure line I kept. I got some measurements and made a diagram for the shop I'm dropping stuff off at, to make me a high pressure hose, utilizing the stock banjo end. I want to retain that because it has a sensor in it and I'd like to keep that in tact.

That's about all for about a week or so.

53031249293_54e98c6e4b_k.jpg

53030182417_7cc08026bd_k.jpg
 
Last edited:
Small update time.

I was really hoping that I could balance a little work on this, with my dads project, and my house.... but my head just doesn't work that way unfortunately. My dads square body Chevy project has become more time consuming than I thought(typical).

Since the weather here in the PNW is starting to go south, I wanted to get his truck into the garage so I can wrap it up easier. With that came a little justification and motivation to work on the Tacoma finally.

53210258461_b25922c2a4_k.jpg


I left off needing to wrap up the fan shroud before I could do the final install on the radiator. Since I had to cut some stuff out of the bottom, the shroud was pretty flimsy. I decided to make these little aluminum pieces to fill in the gaps, and add some structure back.

They were a pain to weld because of how many clamps and blocks I used to hold them, and not having a smaller TIG rod on hand. Luckily the ugly welds won't ever be seen haha.

53206872457_cbfc9d0f14_k.jpg
53208054303_2ee435b1f8_k.jpg
53207752576_43557f7bc2_k.jpg


Wit that done, I was able to move onto getting things put back together under the hood. I did end up having to cut a little passage on the bottom drivers side of the shroud. One of the bolts for the steering box was interfering with it. Everything is a tight fit down there

I didn't install any of the power steering stuff, even though I did get all my custom lines made a little while back. I'm wanting to do that all at the same time I drill/tap the steering box for hydro assist.

It was nice to hear it run again! Hopefully I can dive head first into this after my dads truck is gone.

53206870512_0915fc5e46_k.jpg
 
Merry Christmas all!

I figured it was time to get the ball rolling on this dusty project. I've been gathering parts for a little bit to make a nice dent in this project. This coming week I have off from work and have "gifted" myself the time to work on it!

So far I have everything to completely rebuild the front axle, do the e-locker retro-fit, and sort the rear axle. The 3rds were re-geared with 4.88 Yukon gears with all fresh bearings, crush sleeve eliminator in back, and multi-drilled flanges. I got knuckle rebuild kits from Marlin, Power Stop rotors and pads, RCV's, and all the parts to rebuild the front calipers. Somehow I lost the brake pads lol.

With any luck, I will have the axles wrapped up this week. I'm shooting to have her back on the road sometime this summer...

53421437326_7831053a6c_k.jpg
 
Today seemed to go alright. Even with a later than desired start, I still managed to put down a solid 10 hours of work.

I got the truck in the driveway and situated the other day.

53423557271_182ad7861f_k.jpg


First order of business was to pull the axle. That seemed to go pretty quick

53423986590_ec0a3c2b1f_k.jpg


Then I blew the axle apart

53423557226_8530b126cc_k.jpg


From there I re-arranged the garage, and got the axle housing up on some saw horses. The next step was to work on the elocker retro-fit. I cleaned up the flange and started to eye-ball things. I've done a few of these retro-fits on rear axles, so this will be my first front.

53422633807_2bee832e77_k.jpg


I used a new gasket to mark where to cut and where to add some weld.

53423986500_4f1a3d5ccd_k.jpg
53423557096_a4e99211c2_k.jpg


Next I TIG welded up the un-needed holes and built up the corners. Then I carefully ground everything smooth, checking little by little that everything stayed pretty flat

53422633697_9286846c65_k.jpg

53423556911_f090f8931d_k.jpg
 
  • Like
Reactions: bkg
Next I dropped the 3rd in, so I could use a transfer punch to mark the holes.

53423986260_38293a2d01_k.jpg


From past experiences, drilling and tapping the holes can be tricky. So this time I machined a little drill bushing to help keep things straighter. It seemed to help out some. I learned a couple tricks to make the next one a little smoother, but all in all, it seemed to work alright.

53423715323_db7420d4d7_k.jpg
53423715333_dbb65ef384_k.jpg


After the holes were drilled and tapped, I got the plasma cutter out and notched the housing for the locker fork. Then I cleaned everything up and installed the long studs. The 3rd seemed to fit fine.

Tomorrow I will move onto cutting the unnecessary crap off the housing, and start making some diff armor.

53423556821_aa8a851518_k.jpg
 
Todays progress was slow, but still forward. First step was to cut off the tabs marked in pink, before moving onto cleaning. Then I spent several hours cleaning the axle housing to prep for more fab work.

53425462331_7e4b92a010_k.jpg
53425890365_8785db40c9_k.jpg


With the axle clean, it was time to move onto the diff armor. I looked on the interwebs for some inspiration and this is what I came up with. It was pretty time consuming because I have never worked with cones before. I think it should be pretty stout. I was able to rough cut the parts out of 3/16 with the plasma cutter before calling it a night.

53425462116_fb9e5f820f_k.jpg

53425462186_b7e0ada812_k.jpg
 
Today started out with getting the parts sanded to shape, and formed. It took me some time to massage things into place, but I'm fairly happy with the finished product.

53428046933_c970986167_k.jpg
53426963042_37cb23fc40_k.jpg
53428315590_5399f2f2e4_k.jpg


I also wanted to add some beef to the ring around the drain plug. In the past, I put a larger piece of tubing around the outside and welded it on, to add some beef and keep it from mushing over onto the plug. I didn't have the right size tube on hand, so I just welded in a "ramp" to the ring and called it good. It's a little ghetto, but it should work.

53426962922_ddfe74d9c5_k.jpg


After everything cooled off, I dug out my axle fixture for building axles or checking them for straight. Turns out there's a tin baffle ring or something at the ends of the axle tubes with a hole too small for my fixture. I was hoping to make sure the axle stayed straight during welding, but I will just have to go with it.

Then I finished the evening with cleaning/re-setting the garage and painting the housing.

53428315505_e92d8effac_k.jpg
img
 
The last couple days of progress weren't photo worthy. It was all just hours and hours of tedious cleaning and painting of all the knuckle parts. I ran into some issues with being an idiot and ordering the wrong parts, but that all got sorted out.

I got started on Friday with re-setting to clean. Until I actually get my parts washer rebuilt and find a home for it, what I have been doing in the meantime, is using gas in a catch pan as a poor mans parts washer.

53433247322_380b1de1c9_k.jpg


One silly little detail that's going to bother me is the dust shield on the hubs. One of them was a nice gold zinc color after cleaned, and will match all the new hardware I got for the hubs. I picked another one up from Toyota and its almost silver. So now I need to find a matching one so it doesn't drive me nuts haha.

53434318828_636b41325e_k.jpg


After probably 14 hours or so of cleaning and painting, I am left with this pile of clean parts. One thing I did, that I don't generally do is delete backing plates. However, these ones were pretty trashed. So I cut them down into "backing plate delete" plates. All I have left to do at this point before re-assembly is some last detail cleaning of the inside of the axle housing, and knock the trunion bearing races out.

I'm a little bummed I wasn't able to get this more complete and put back into the truck before my time off, but that's the reality when you're real picky about things.

Hopefully I won't be too hung over tomorrow to put a little time in on re-assembly. But we shall see.

53434319028_bf6eb22892_k.jpg
 

Jeremy P.

Adventurer
I did a similar swap last winter on my 2004 4runner. I used an fj80 front axle but cut the knuckle balls loose so I could flip the housing and I also added 4" to the width. Lots of cutting, fitting, adjusting, etc!
 

Attachments

  • 20221209_172950.jpg
    20221209_172950.jpg
    3 MB · Views: 13
  • 20230122_173846.jpg
    20230122_173846.jpg
    1,017.7 KB · Views: 13
Life's been pretty busy, and I have been itching to get back onto this project. We had some amazing snow in the hills locally, so I couldn't resist taking the opportunity. It was probably some of the best snow I've played in!

53477352643_31970ef53a_k.jpg


Shortly after that, we got hit with a pretty good snow and ice storm here in the PNW, and I had to work a ton to keep our local municipality rolling on maintaining the roads.

I was able to gather a couple more small parts here and there. Finally, I got a matching set of caps for the drive flanges. The brake pads ended up never being shipped from Rock Auto, so I got that sorted out and another set sent over.

53477521445_9f755a6b69_k.jpg


Last evening I spent a little time to get the radius arms cleaned and dusted in a little paint. The bushings were fine, so I left them.

53477251898_8bb17acfee_k.jpg


This afternoon I moved onto getting the axle put back together. It took a little time to finish off some last minute detailing and cleaning of the housing, before moving onto assembly. First thing I did was clean the mounting surface for the 3rd, and get that installed. I decided to use some Toyota FIPG in addition to an OEM seal. I figured since the e-locker modification wasn't machined, it would be nice to have a little extra assurance that things sealed up well.

53477521475_c3fa165aeb_k.jpg


Next I moved onto packing the trunion bearings and getting the knuckles installed and setup. I installed the new Marlin knuckle studs, and ran into a problem with them. While trying to torque them to spec, 5 of 8 stripped out. The other 3 that torqued to spec, didn't feel firm either.

53477424284_df197fc076_k.jpg


Feeling a little defeated, I decided to call it a night... Then changed my mind. I threw my work clothes back on and put a little more time in. I decided to clean up all the original studs and hardware, and re-install them. They all torqued to spec just fine and felt good and firm. I'm not sure if I will keep these in, or see if Marlin will replace the ones I purchased and try them again. I'm leaning towards just keeping the original stuff. Even though it was a late evening, I was able to hit the checkpoint I was shooting for before calling it a night.

Hopefully I can wrap this axle up soon and get it back under the truck. I'm pushing to get the truck back on its feet before moving back onto my house for a bit.

53476305202_5b00150f3d_k.jpg
 

Forum statistics

Threads
185,888
Messages
2,879,475
Members
225,497
Latest member
WonaWarrior

Members online

Top