Alaskan Camper '84/'14 Build Thread

ripperj

Explorer
There are two S locks about 16" apart at the top center of the roof. A standard roof vent or fantastic fan fits nicely between them.
According to the research I did, the S locks don't leak, I certainly saw no signs that the 30 year old roof I took off leaked at the S locks.

The roof is only fastened at the ends, both sides at the seam above the big side windows and where two 14" sqr roof vents or fans go thru.

Avoiding the compound curve is the key, I would not think the pattern would matter.

You can even taper the camper at the front if you are ok with the pattern being at an angle, just not a compound curve.

Hey thanks for the links, I'll check them out

Sent from my Passport
 

McGyver

New member
Great job on the rebuild so far. It is definitely inspiring to see someone tackle this and definitely not an easy job so thumbs up to you. I don't currently have a camper of my own but I am planning on hopefully building one from the ground up to use for surf fishing and outdoor camping! The biggest difference would be that I plan on completely removing the bed of my truck and making it a permanent part of the truck. Hopefully something that looks good and is worthy of this forum. Lots of great ideas and work done on here and this build/rebuild of yours is just another great job! :drool::Wow1:
 

ripperj

Explorer
Thanks!
It's a fun project, but it's a bit frustrating as it takes up my whole shop and I have other interests that I can't focus on until this thing is outside!
I have been distracted lately with shopping for a big Lathe( big for a Gig(guy in garage)) 16"x40 engine lathe with 24" in the gap, 3600#, found a real nice one, so back to the Alaskan.

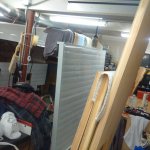
Here is the cabover. If you don't recall it's 1/4" marine ply with 3/4" foam in the middle. Pretty light and real strong.

Sent from my Passport
 

Attachments

  • uploadfromtaptalk1450174137179.jpg
    uploadfromtaptalk1450174137179.jpg
    96.1 KB · Views: 104

ripperj

Explorer
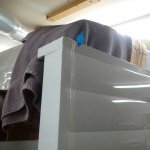
Here is the corner, as I mentioned above the front bottom pc is bent three times so there are no seams except at the sides. I gooped up the side seams really heavily with 4000 as the powdercoated support brackets cover the seam

Sent from my Passport
 

Attachments

  • uploadfromtaptalk1450174267471.jpg
    uploadfromtaptalk1450174267471.jpg
    79 KB · Views: 106
Last edited:

ripperj

Explorer
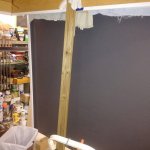
The inside, grey porch paint, three coats

Sent from my Passport
 

Attachments

  • uploadfromtaptalk1450174305443.jpg
    uploadfromtaptalk1450174305443.jpg
    86.1 KB · Views: 96

Scoutman

Explorer
It's a fun project, but it's a bit frustrating as it takes up my whole shop and I have other interests that I can't focus on until this thing is outside!

Boy I know that feeling. Having camper repair in the average garage takes up a ton of room and you feel that you can't really work on anything else until you get it out. Looks like you're in the home stretch. Keep at it.

I had an old 1927 14" swing 6' bed Hendey lathe for a number of years. I eventually got rid of it cause of the space it took up for how much I really used it.
 

ripperj

Explorer
I haven't forgotten about this thread, progress has just been slow. Designing while you work is not the best method, and results in having to play around a lot "let's see, if this goes here then this has to move here and...."

I made some progress, the cab over platform is mounted and the hydraulic cylinders are installed. I have the rear guides that the upper section slides up and down on installed.
This took a lot longer than it would seem as there is not much room for error with regard to the upper section actually lowering over the lower section . My plumb bob says it should fit :).
I need to get the hydraulics up and running so I can test it and more importantly, get the upper section off the temporary support, then it will be easier to roll into the driveway when I burn it :)
Pics as soon as I can get them

Sent from my Passport
 

ripperj

Explorer
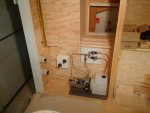
I need to spend some time cleaning the shop before I take any wide shots, but here is a shot of the hydraulic, just needs wires(big ones :)) . The pump is overkill, but only needs to be run once per camp session when the truck is running. The pump that Alaskan uses is much smaller, but cost 2.5 times more(even they admit it's expensive) and this thing is user rebuildable.

Sent from my Passport
 

Attachments

  • uploadfromtaptalk1455016824631.jpg
    uploadfromtaptalk1455016824631.jpg
    63.2 KB · Views: 140

Tennmogger

Explorer
I just 'discovered' this thread and completed reading it. You have done an impressive job rebuilding your Alaskan!!! My wife and I have been using an old 1971 10' NCO for about 8 years. It also has a lot of rot and our decision was to replace it with a 2002 we found.

You have done an awesome job to be proud of. Thanks for sharing. Admit it, you just wanted to buy the new tools!!

Bob
 

ripperj

Explorer
Bob, glad to hear you replaced the old Alaskan with a newer one, I'm going to be kind of attached to this one once it's done, but not so sure I would replace it with another, I would like to get something element proof, like a Northern Lite or Living Lite(aluminum). I just don't like the high profiles and I do like the warmth of the Alaskan's wood interior.
Edit, I don't need much of an excuse to buy a new tool :)
Sent from my Passport
 

ripperj

Explorer
Got the hydraulics fired up and raised and lowered the roof a few times, a bit of a relief to know it actually fits well. :)
It goes up faster than I calculated, the pump flow must have been specified at max load?, it basically sees no load in my application.
Got my Magnum Charger/Inverter mounted, along with 2 Full River 224AH AGM 6v GC2 batteries, hope to have it all wired tomorrow.

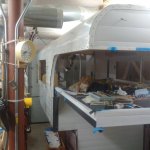
Here's a lousy shot of the roof full up.

Sent from my Passport
 

Attachments

  • uploadfromtaptalk1456534922444.jpg
    uploadfromtaptalk1456534922444.jpg
    85.6 KB · Views: 138

ripperj

Explorer
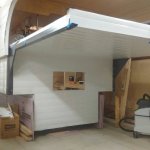
Here is the mounted Cabover from underneath. I still have lots of caulk and trim to go on.

Sent from my Passport
 

Attachments

  • uploadfromtaptalk1456568869957.jpg
    uploadfromtaptalk1456568869957.jpg
    64.4 KB · Views: 127

ripperj

Explorer
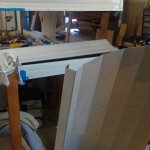
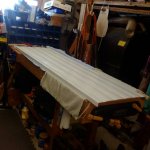
Spent the day putting aluminum on the flip cabover panels, didn't finish (typical day, get half of what you wanted done :) )
Was able to do it in one piece which is nice only caulk needed at the corners.

Sent from my Passport
 

Attachments

  • uploadfromtaptalk1457298782609.jpg
    uploadfromtaptalk1457298782609.jpg
    63.7 KB · Views: 83

ripperj

Explorer
I still need to do the ends, I have a 30" brake from Harbor Freight that I will use.

Sent from my Passport
 

Attachments

  • uploadfromtaptalk1457298861258.jpg
    uploadfromtaptalk1457298861258.jpg
    111.2 KB · Views: 89

ripperj

Explorer
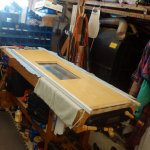
Top side, not too exciting :)
All 3 panels get a 12x24" Motion window with slider and screen

Sent from my Passport
 

Attachments

  • uploadfromtaptalk1457298952142.jpg
    uploadfromtaptalk1457298952142.jpg
    87.8 KB · Views: 73

Forum statistics

Threads
185,898
Messages
2,879,549
Members
225,583
Latest member
vertical.dan
Top