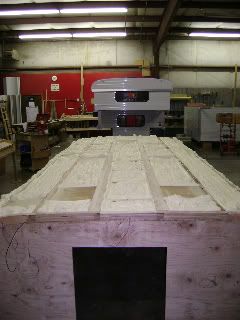
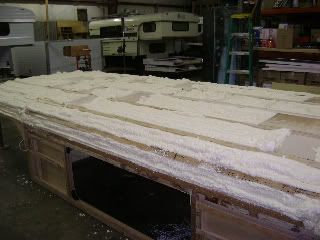
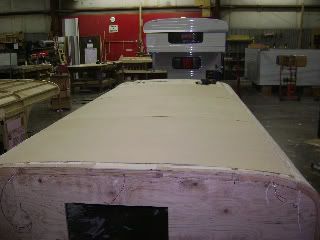
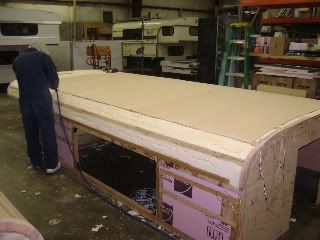
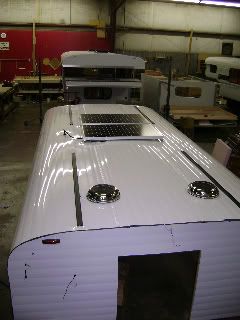
Alaskan Camper Build Up

wild1

Adventurer
roof rack system

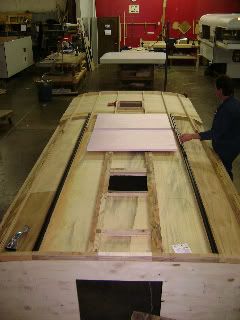
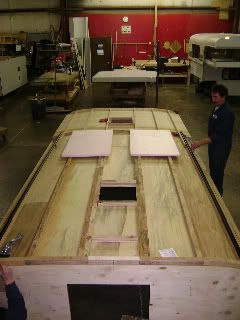
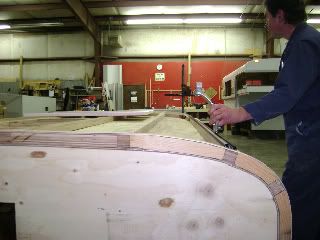
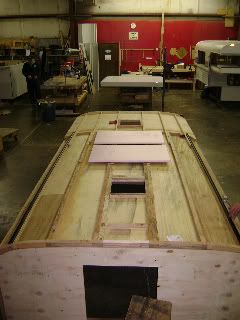
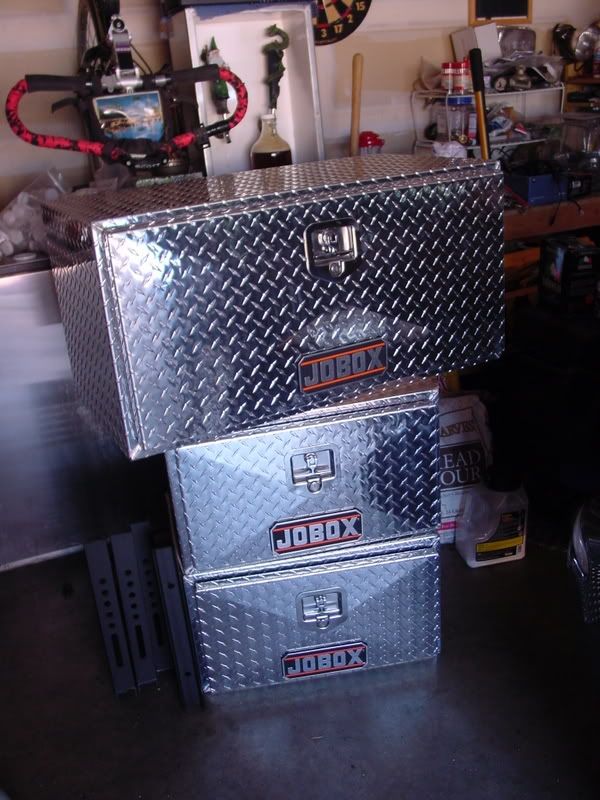
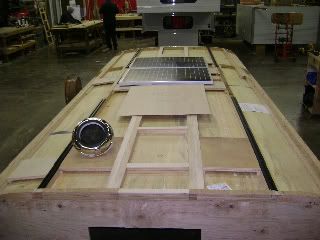
Great to see your camper taking shape. Looks like you are going to have tons of interior cabinet space. My cabinets are very narrow due to the utility box but it is nice to have the outside access to the storage areas. Looks like you will have the best of both worlds. Is the factory reinforcing the roof structure to accommodate the tracks for the rack system? Did they give you any idea of the additional load that the hydraulics could bear? I usually just tow my Jeep LJ and strap every thing to it's roof rack but I am going to need a rack on the Alaskan for some of the trips that are coming up.
 

Carlyle

Explorer
Alaskan campers stated that the roof will accommodate an additional 500 lbs. The ac will be off the roof, but food in the cabinets will probably take care of that weight savings. Our kayak and bike should not add more than an additonal
200 lbs including all the rack stuff and this weight will only be up there when we travel. The big mistake I made with the current camper is putting the top up one time with all the stuff, but additional wet March snow. It was never the same since then, a mistake that will not be repeated...
 

Carlyle

Explorer
I just talked to Alaskan Campers again this am and things are coming along slowly. I was considering getting four 6-volt Lifeline AGM's, but have changed my mind after the following was bought to my attention by Alaskan:
nsb210ft.gif

Two of these NSB210FT Energy1 batteries would hold 420 amp hours at a little over the size of one Lead acid 6-volt and last about ten years. Not cheap at $1200 for a pair, but cheaper than four Lifeline AGM's. Also like any AGM's no venting, can be mounted in many positions and zero maintenance.
 
Last edited:

Carlyle

Explorer
Well things are still coming along slowly on the camper. The pair of Energy One batteries are ordered and on their way to Alaskan along with two 85 watt solar panels and a digital voltage regulator from www.rvsolarelectric.com Because of another delay in getting the camper complete I have decided to use a portion of my vacation to drive to Chelhalis, WA and pick up the camper. Not only does this save a bunch of money, I know it is going to be put on right now and Bryan at Alaskan can go over all the systems with me. Road Trip!

Here are a few pics of various rack and solar panel arrangement that I was given a choice of. We went with the first as the Yakima rails would not be quite long enough for the wider stance and I didn't want to replace what I already have...
DSC00149.jpg

DSC00148.jpg

DSC00147.jpg

DSC00145.jpg


Today I'm taking the truck down to measure for under bed boxes. The under bed propane tank is on the way. It's a Manchester 16.2 gallon tank that should be more than adequate for our needs.

Any ideas on a skid plate under the propane tank? I don't think I can have one welded directly to the tank as this may impair tank integrity.
 

Carlyle

Explorer
One of the concerns that I have had since the inception of this project is how to have an ac unit that was not only off the roof, but of low enough amperage that it could be run off the Outback inverter/charger and the battery bank, and also be able to run while going down the road to keep the camper cool when we arrive to our destination. Also able to run off a Honda eu1000i propane generator that is ultra portable and light at 29 lbs.

Most of the marine units use water intake as a means of cooling, not only that that they start around $1200 and go up exponentially in cost. The portable high efficiency room units are nice and not too large, but are simply too tall for our application. The small window units are ok, but most of them are cheap and would need to jerry rigged to fit under a settee. The smallest roof unit will simply not run on a 1000 watt generator and will kill a battery bank faster than our Airedale on speed...:yikes:

Today, with help from my father in Canada, I ran across this unit made by Little Guy Trailers that may fit the bill:
littleguyac.jpg

"This environmental control system is built to exacting standards to last for the life of your teardrop camper trailer. It's so energy friendly that it consumes only about the same power as four standard light bulbs! It operates off 115 Volt AC on a 20 AMP circuit, so you'll need either an electrical hookup, a generator, or a suitable power inverter running from your vehicle."

Specifications:

* 2500 BTU
* Dimensions: 16.3" X 14.5" X 18.5"
* Weight: 40-50 lbs
* Voltage: 115
* Phase: 1
* Hertz: 60
* Efficiency (Watts): 380 for Air Conditioner / 600 for Heater
* Coolant: R134a Refrigerant
* Amperes: 3.4 for AC / 5.5 for Heat

Features:

* Built-In Return Air System
* Adjustable Temperature Range (63-90 Degrees F)
* Removable and Washable Air Filter
* Energy Efficient
* Indoor / Outdoor
* Portable / Adaptable
* Universal Adapter Kit

Cost $500, added bonus of heat when plugged in. This may be the answer.
 

Carlyle

Explorer
I decided not to go the DC Airco route for a number of reasons:
1. The unit is 9000 btu and a little larger than we need for a well insulated camper of this size.
2. The amp draw would be excessive on the battery bank and could not run off a 1000 watt generator.
3. Alaskan had serious hesitation on how to mount it because the split unit would be difficult to mount with the roof and upper walls covering the sides.
trucks_back_p2b.gif

The other DC Airco unit is roof mounted and I've been trying to stay away from that all along.
4. Very little information to be found on them.
5. $5500...
 

Carlyle

Explorer
More pictures of the build at the Alaskan factory:
DSC00158.jpg

DSC00157.jpg

The round chrome piece on top is one of the self contained solar vents, one over the stove, one over the Thetford toilet and one over the overhead sleeping area. More can go in, but I want to see how they compare to a Fantastic fan before going there. The less holes in the roof the better.
The solar panels are placed where they will be mounted along with the Yakima tracks. If you look in the top right hand corner you can barely see the bottom already skinned. I sure wish Chelhalis, WA was closer so I could take pictures and generally be in the way during the build.
 

mog

Kodiak Buckaroo
Carlyle said:
Today, with help from my father in Canada, I ran across this unit made by Little Guy Trailers that may fit the bill:
Specifications: 2500 BTU
Cost $500, added bonus of heat when plugged in. This may be the answer.

Nice find on the AC unit from 'Little Guy Trailers', you sure can't beat the price if it will work.
Do you have any information if the 2500 BTUs of cooling will be enough for your application?
I'm sure there must be a formula somewhere to figure that out... x(BTUs) = temp drop x area x time or such?

The only experience I have is heating using 4000 and 9000 BTUs in my Pinz 712 AMB shelter (230 cf), and Iveco box (470cf), with the 9000 BTUs raising the temp 20 degrees in 15 minutes on the Pinz, and 40 minutes in the Iveco (the Iveco is not insulated as of yet).
Companies like Earthroamer have a higher btu rating on their heating then cooling (13,600 BTUs heating, 6200 BTUs cooling) so perhaps the 1/2 ratio might work?
Also if you go with the 'Little Guy Trailers' AC unit, have you though about swapping the AC motor to a DC motor so you can run off batteries without an invertor?

Again thanks for the find, and kudos to your great build.
 

Carlyle

Explorer
I don't know what the formula is for btu's of cooling versus cubic feet, but I'm sure it's out there. It's also greatly affected by the amount of insulation in a camper and that is where the Alaskan will exceed. Between double paned windows with double layer shades, extra insulation, etc it should be cool enough. If not, then it's too damn hot and time to move somewhere else!

BTW, the Little Guy ac is ordered and on the way to Alaskan to be installed under the settee.

Good idea about switching out the motor for ac to dc, but I will wait and see how well it works drawing from the Outback charger/inverter before thinking an any alteration there. The next question will be how to wire it, the furnace and the catalytic heater into a digital thermostat that goes from 32 F to 90 +, but I'll wait until the camper is in my hands before I start in to that.

The following are pictures of the spray-in foam insulation that was applied this am:
DSC00159.jpg

DSC00160.jpg


The following are pictures of the foam insulation after it was shaved and an extra panel for support being applied to the roof:
DSC00161.jpg

DSC00163.jpg
 

Carlyle

Explorer
Latest photo from today with the roof skinned in aluminum, solar panels in place, led clearance lights and solar vents mounted. Things are coming along nicely.
DSC00164.jpg
 

fisher205

Explorer
Looking good. It'll be exciting to see it done. How's the rest of your tray coming along?

I've just come in from starting to put a new furnace in mine. The little Wave 6 Cat heater I tried to get by with wasn't cutting it. The 18,000 btu Atwood should make it a lot more comfy. Funny, I remember back when getting to use a 4 season tent for winter camping was a big deal.
 

Carlyle

Explorer
You can see the rest of the tray in the background, upper right corner. They are "mating" the two halves next week and doing all the electrical then.

Congrats on the new furnace, it is nice to be warm. Yes, I remember the days of living out a bivvy sack for weeks. I guess our sense of ruggedness changes as we get older.
 
Last edited:

Forum statistics

Threads
185,902
Messages
2,879,575
Members
225,581
Latest member
vertical.dan
Top