You are using an out of date browser. It may not display this or other websites correctly.
You should upgrade or use an alternative browser.
You should upgrade or use an alternative browser.
AND YET AGAIN: Paul and Mike Try to Build a Hard-Sided Do-It-All ADV Trailer
- Thread starter mhiscox
- Start date
mhiscox
Exp. Leader Emeritus
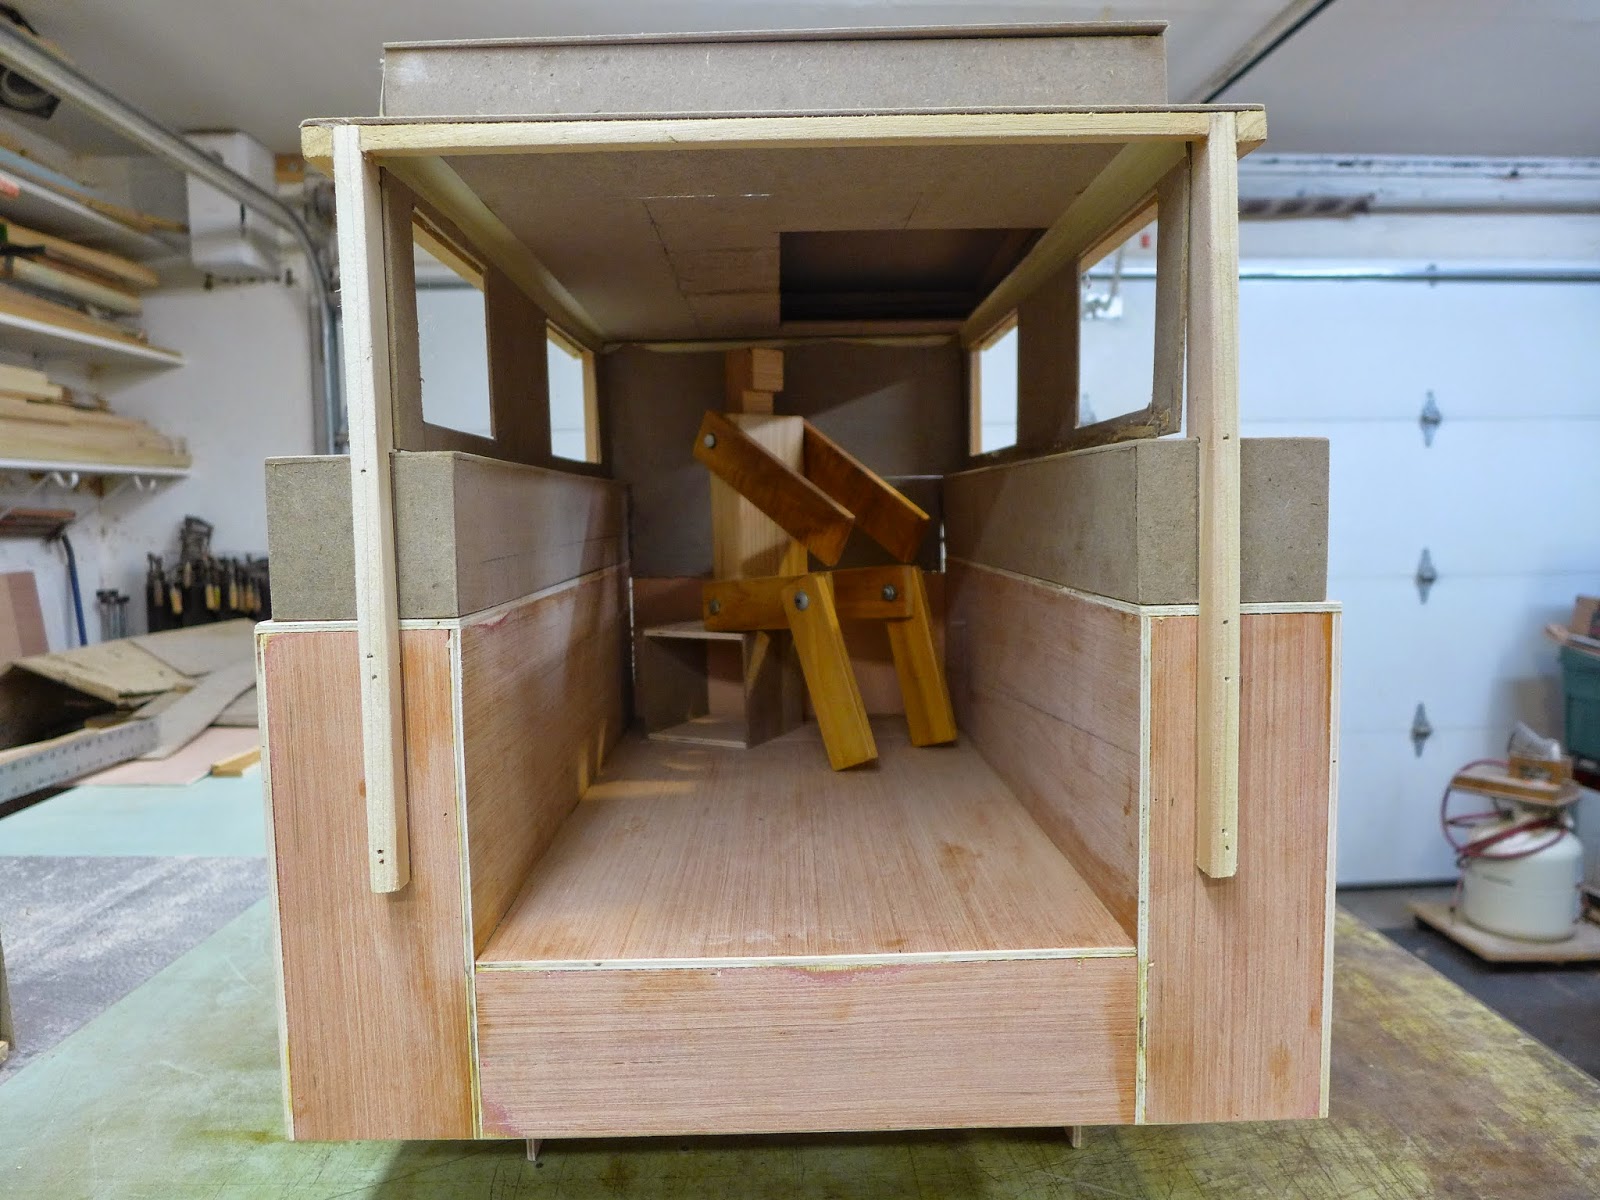
Ah! I see, well that is too bad about a lifting roof, when I looked at this image, if the sides came down lower and the roof was wider it would be fairly easy to mount some actuators on the outside of the box for the lift, with the sides of the roof meeting the sides of the service body it would give the lateral and longitudinal support for the whole roof structure.
Yeah, I was kind of faked out by that photo, too. Figure this is more like what will need to happen. I originally was going to have the sidewalls placed right at the inner edge of the pods, so that they'd be 24" wide to close to cover the trailer bed, but this model shows Paul's thought that we're better hinging the sidewalls a ways back onto the pods. Putting them, say, 6" back makes each sidewall 30", which makes the whole thing even higher but makes the interior considerably more spacious. No decision yet on that. (Though getting both sidewalls out of a single 4x8 sheet is a good thing.)
Maybe in version 2.0?
I don't know, since nothing is set in stone yet. Can you point me to your suggestion for the actuators that you'd use if you were doing this project? As I say, a lifting roof was in the first draft. Tempt us with some cheap but good actuators, since your point about it being fairly easy is a good one.
What will you use to keep water from entering the hinge area of the side walls? As a trailer it will be wallowing in the spray from the vehicle towing and I imagine the whole trailer will need to be well waterproofed?
I haven't looked for it yet, but I'm hopeful that there weatherstripping I can find with a big compressible bulge so that when the sides are folded in, it'll squish to make things completely tight. And I think the can find something, even if it's just a waterproof flap, to handle the joint where the sidewalls lock together. The bigger issue will be on the front and rear, I think, where there's less surface area.
Thanks for the help.
Heifer Boy
Adventurer
The fiberglass over wood method has me thinking of the work of Anderson Boats in California...Friends have custom work done there, I see lots of pictures of their work and try to follow how they do it... One difference is I use epoxy resin, they use polyester... Epoxy is stronger and more flexible... Less toxic too...
I'm a bit fan of firbeglass over wood and it's cool seeing you guys doing the same. It make for a very durable, lightweight and waterproof finish. Those pods should last forever. At least you would have had an easier time rolling the pods around to do all the faces. I had a battle rolling a whole camper around during my build.
Things are progressing nicely...
Yes they certainly are.
HB
PaulJensen
Custom Builder
06
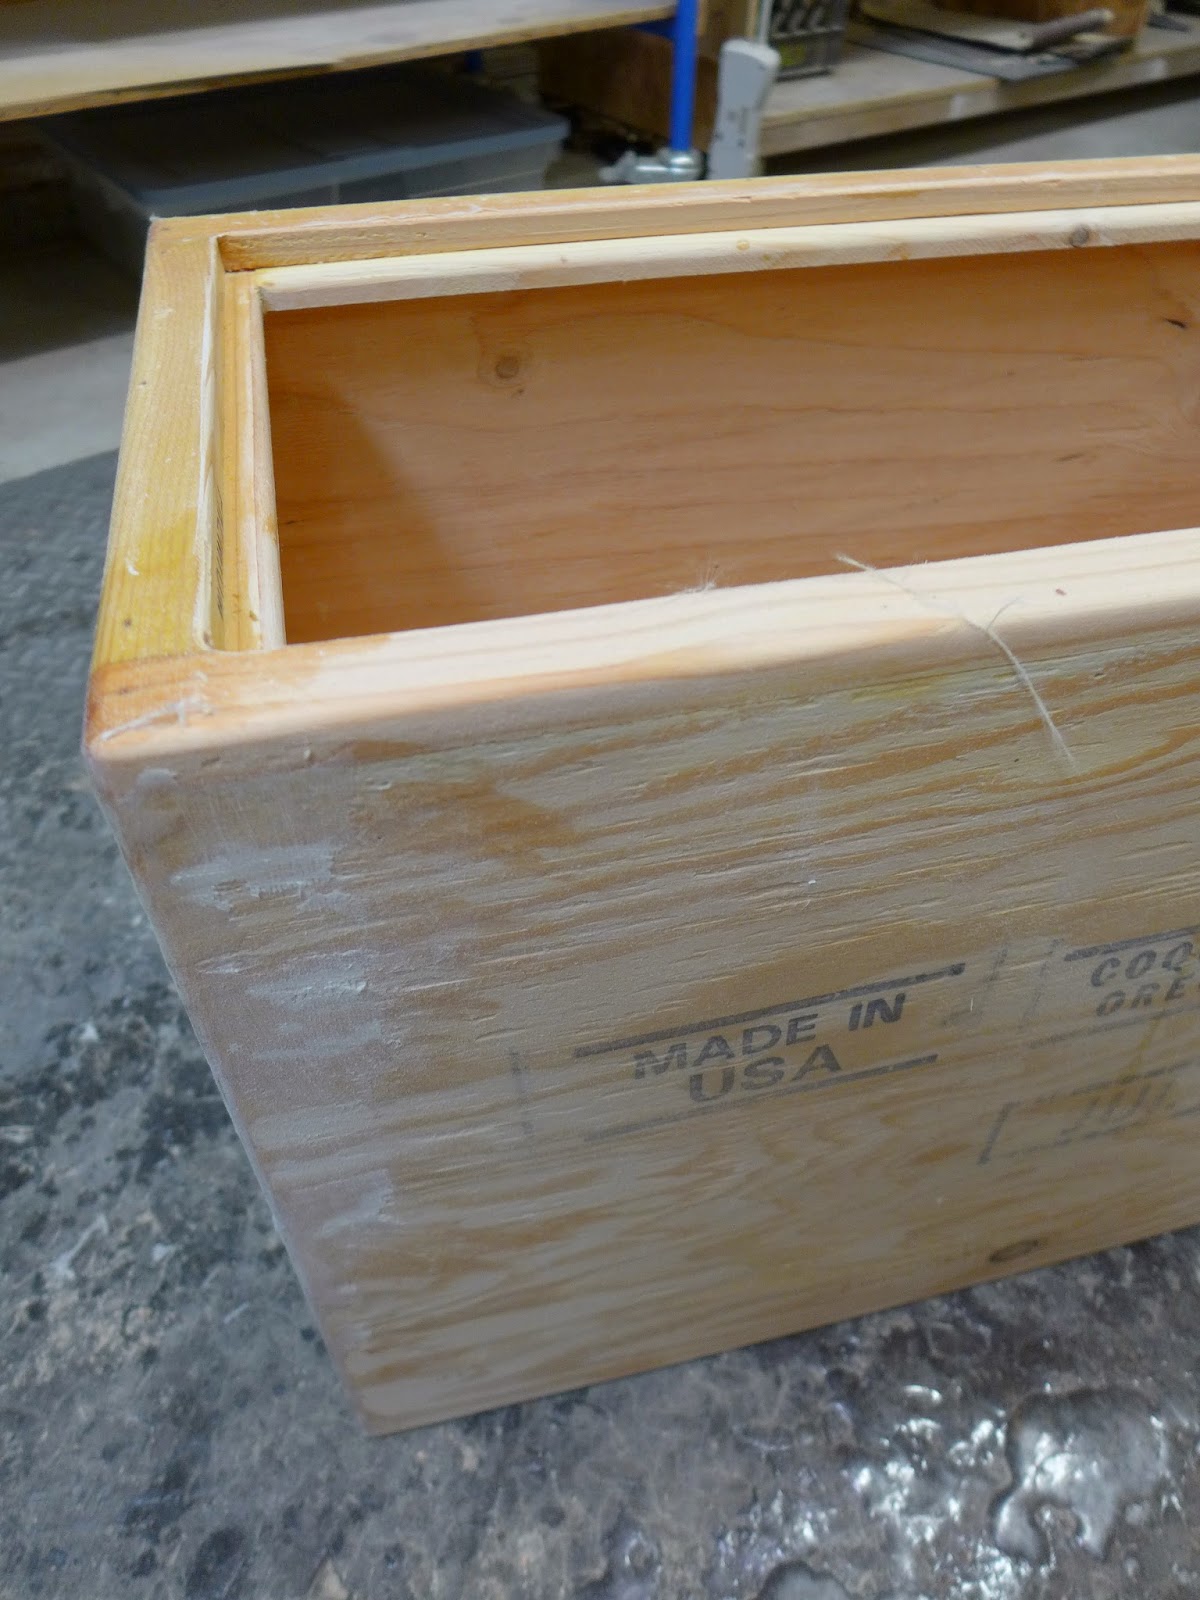
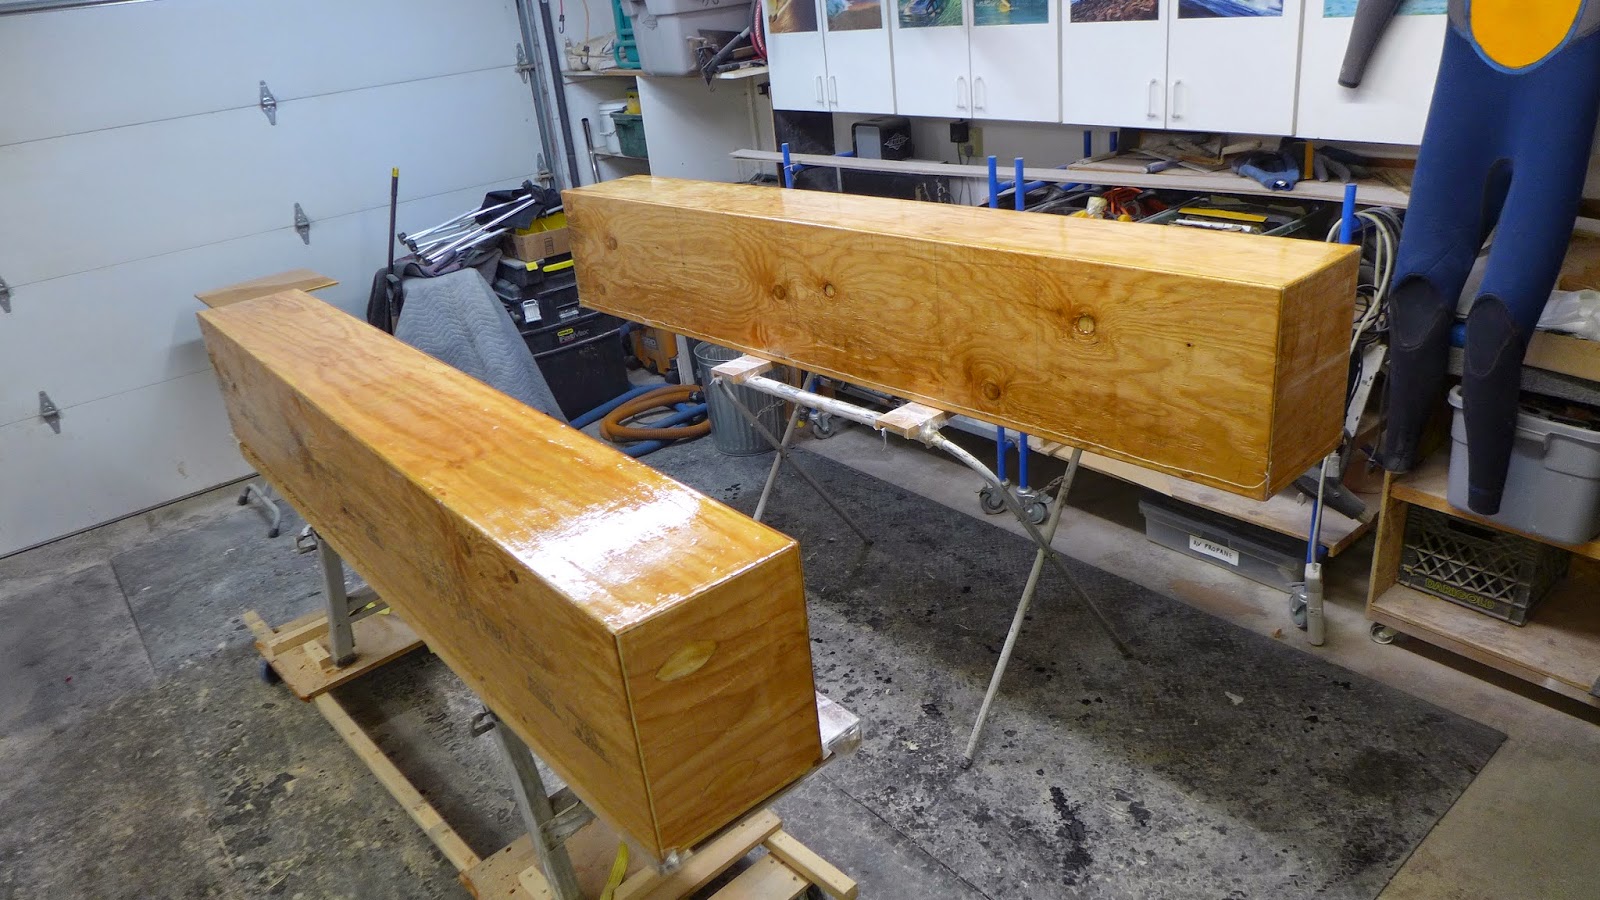
(above) With the epoxy dry, the case gets a fast sanding, then the face frame and inside get the epoxy treatment...
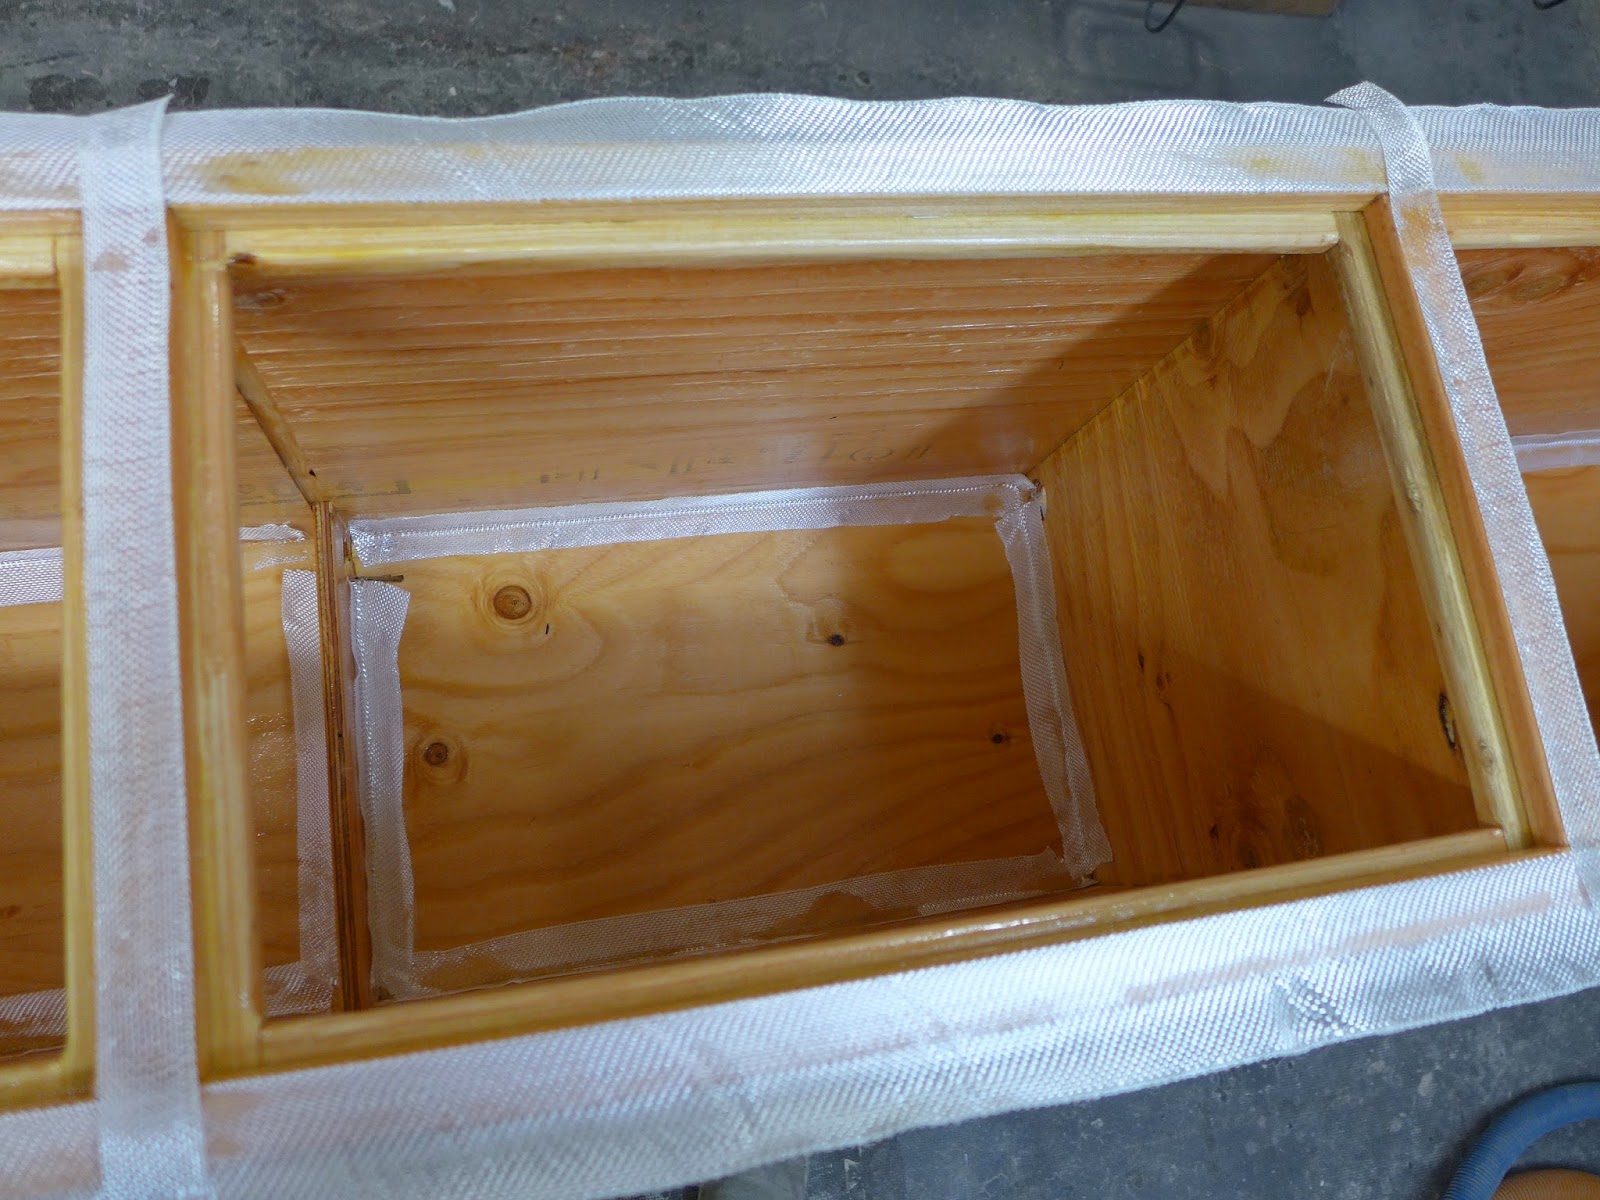
(above) A denatured alcohol thinned out coat of epoxy is brushed over the entire inside, working the horizontal surfaces then rotating the case...With the epoxy still wet, fiberglass tape is laid into the epoxy for structural enhancement... Next another coat of epoxy is brushed onto the glass...
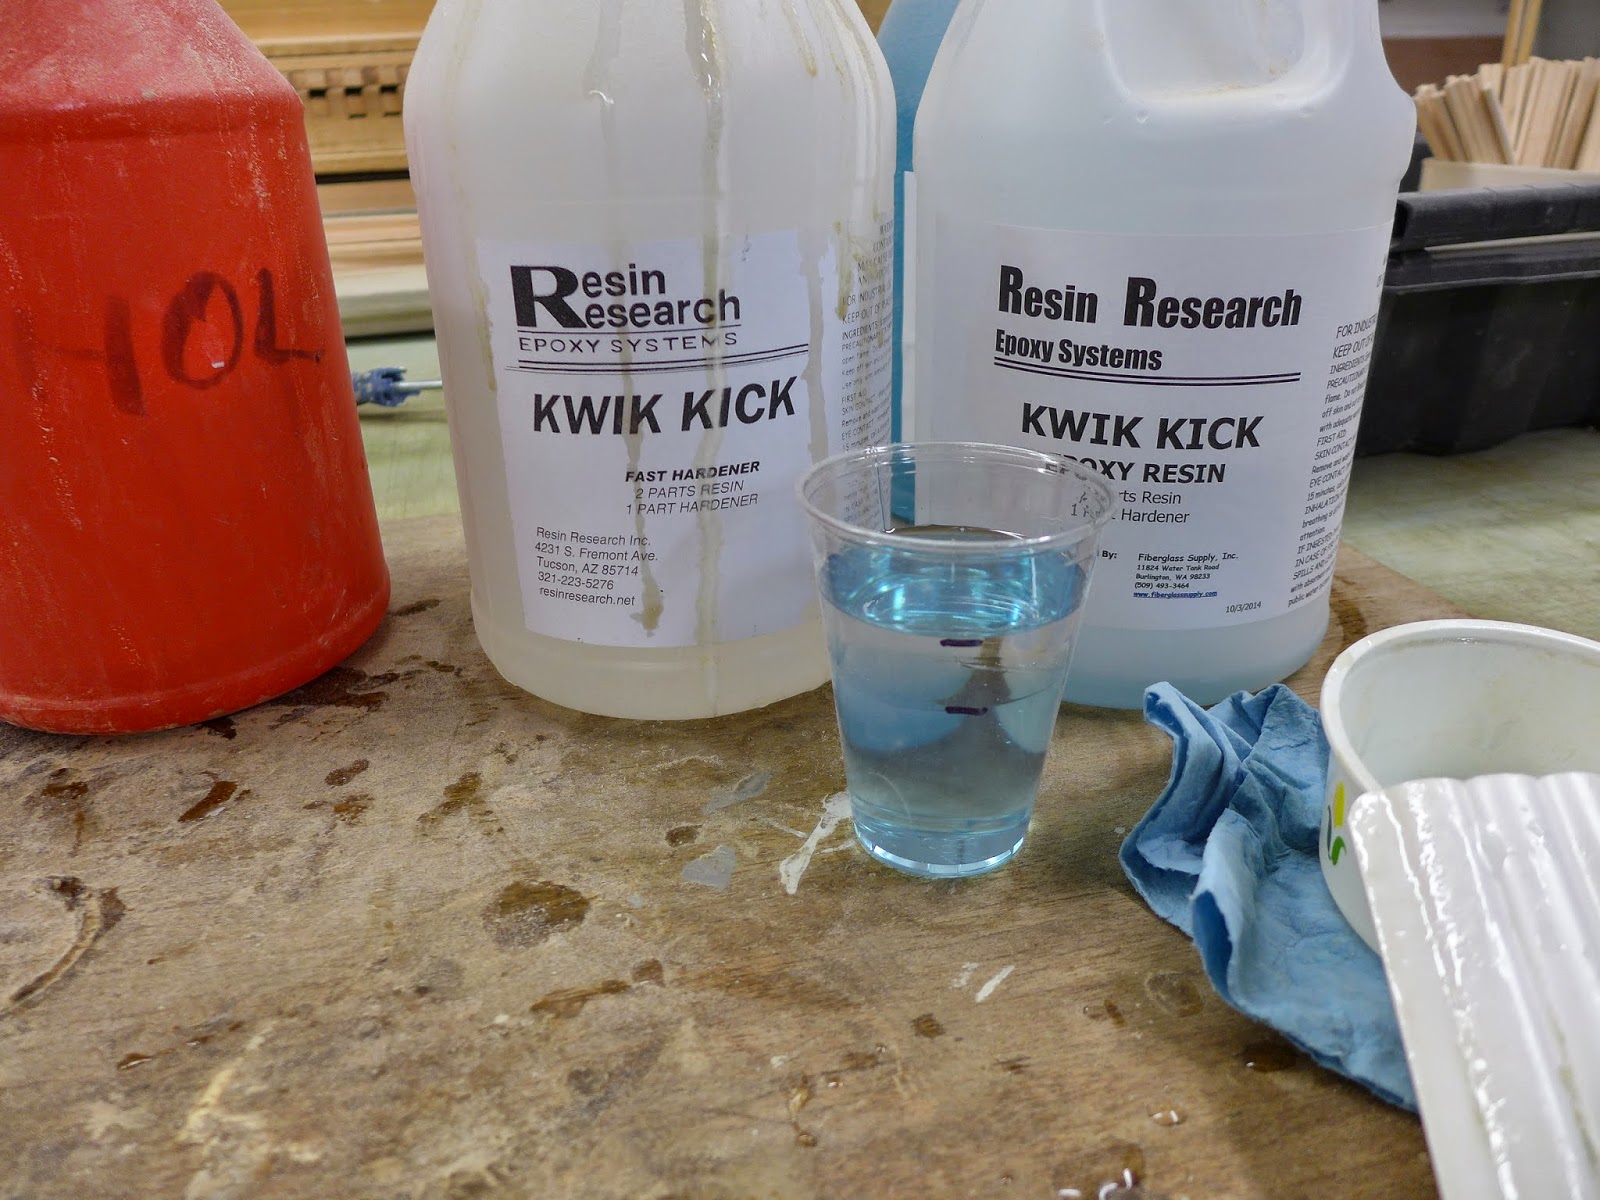
(above) The only epoxy i'll use...

(above) After folding down the loose fiberglass it looks like this...
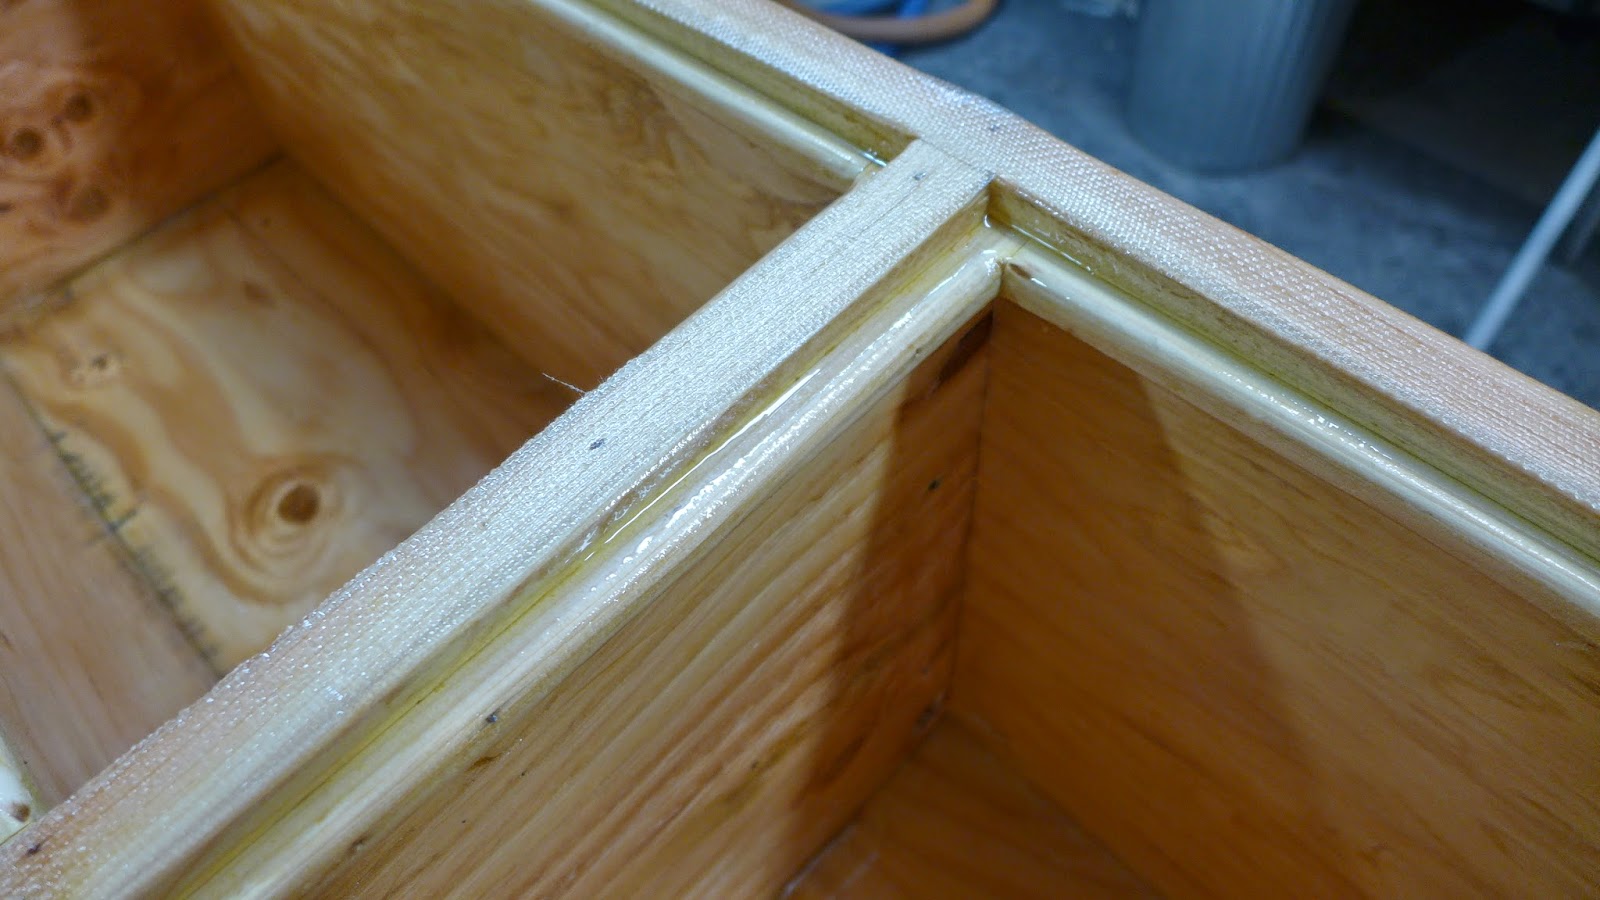
(above) The face frame 'back-lip' detail is intended to add a measure of waterproofness to the doors and drawers...
(above) Finally the cases get rotated and another 'weave-fill' coat is rolled on...
(above) With the epoxy dry, the case gets a fast sanding, then the face frame and inside get the epoxy treatment...
(above) A denatured alcohol thinned out coat of epoxy is brushed over the entire inside, working the horizontal surfaces then rotating the case...With the epoxy still wet, fiberglass tape is laid into the epoxy for structural enhancement... Next another coat of epoxy is brushed onto the glass...
(above) The only epoxy i'll use...
(above) After folding down the loose fiberglass it looks like this...
(above) The face frame 'back-lip' detail is intended to add a measure of waterproofness to the doors and drawers...
(above) Finally the cases get rotated and another 'weave-fill' coat is rolled on...
PaulJensen
Custom Builder
"The only epoxy i'll use..."
That statements caught my attention. What do you like so well about this particular brand? Given your vast experience I'd love to hear your opinion. System Three is the only brand I've used to date.
Predictability... Mix it for three minutes, nothing goes wrong...
Additionally, it's UV stable, not so important when it gets painted as this will, but on surfboards it does not turn to an amber color when exposed to light... Before Resin Research came onto the market, the UV stability was the deal breaker to using epoxy when colorfastness of the wood was concerned... I've had horrible ambering with System Three and West Systems...
Resin Research epoxies are low VOC compared to many other brands I've used... And I've use a bunch: System Three, West System, Super Sap, Bote Kote and a many more across Europe and throughout Australia while teaching surfboard workshops there... Most of the other epoxies I've used are either way too amber to start, or are horribly toxic smelling...
And since Resin Research is the only epoxy I use in my shop, I've learned the tricks to accelerating curing and extending curing... Those are done with heat guns, refrigerators and adding alcohol to the mix... You can get a lot done in a day with a bit of knowledge and adequate temperature... It's not rocket science but being aware of the temperature in the cup is very important...
Pinnacle Campers
Chateau spotter
Yeah, I was kind of faked out by that photo, too. Figure this is more like what will need to happen. I originally was going to have the sidewalls placed right at the inner edge of the pods, so that they'd be 24" wide to close to cover the trailer bed, but this model shows Paul's thought that we're better hinging the sidewalls a ways back onto the pods. Putting them, say, 6" back makes each sidewall 30", which makes the whole thing even higher but makes the interior considerably more spacious. No decision yet on that. (Though getting both sidewalls out of a single 4x8 sheet is a good thing.)
I don't know, since nothing is set in stone yet.
An option I didn't see explored was the two lower sleepers actually sleep ON the side pods with the upper side walls all the way to the outside of the box. Somehow sleeping on the floor just after the motorcycles got pulled out doesn't sound appealing. I see Pinocchio sitting on a box in the center but he could be using the top of the side pod like a chaise lounge.
Also, if it were me, with a setup like this potentially being support for a group (or not), I would want access to the kitchen from the outside, access from in and out would be ideal. Hinge up the bed and there is the sink and stove, go outside open the side door and slide stove/sink out. Or a inside/out slide, maybe in the front over the tongue?
Looking forward to this build.
")
PaulJensen
Custom Builder
...if it were me, with a setup like this potentially being support for a group (or not), I would want access to the kitchen from the outside, access from in and out would be ideal. Hinge up the bed and there is the sink and stove, go outside open the side door and slide stove/sink out. Or a inside/out slide, maybe in the front over the tongue?
Looking forward to this build.
Pretty close to what I envisioned at the start, but I defer to Mike, it's his after all... They make double-sided drawer slides now too... Maybe next time...
Heifer Boy
Adventurer
How did BoteKote compare to Resin Research in your opinion?
I used it my build for the same reason you use yours. 2:1 mix is very reliable even with minor ratio change so easy to work with, no blush, UV stable-ish and it's doesn't stink (too much) and important for me at least, Australian, so shipping wasn't problem. Others are available here but some like West Systems are horribly expensive.
I used it my build for the same reason you use yours. 2:1 mix is very reliable even with minor ratio change so easy to work with, no blush, UV stable-ish and it's doesn't stink (too much) and important for me at least, Australian, so shipping wasn't problem. Others are available here but some like West Systems are horribly expensive.
mhiscox
Exp. Leader Emeritus
Thanks for the useful discussion. A couple of things that led to the current proposal . . . they'll be a 48" "sofa" at the bow end, along with a folding backrest, and the current plan is to make the backrest (let's say it's 15" high) unfold and attach sideways to the 28" deep sofa bench. This gives a 15 x 2 =30" wide bed that is 48 + 28 = 75" long bed as the primary sleeping area. So it's a nice primary sleeping position, and there's a scheme to make it also extend full width for two people who (like Paul) can sleep in 48". The whole thing will be off the floor by the height of the sofa base.An option I didn't see explored was the two lower sleepers actually sleep ON the side pods with the upper side walls all the way to the outside of the box. Somehow sleeping on the floor just after the motorcycles got pulled out doesn't sound appealing. I see Pinocchio sitting on a box in the center but he could be using the top of the side pod like a chaise lounge.
The second thing is that as it stands now, the sidewalls fold down to cover the bed and raise up to become cabin walls. The trailer bed is 48" wide, so if they're hinged right at the inside of the pod, that's two 24" sidewalls. If we use Paul's idea of hinging them about 6" outboard of the inside pod edge, that's a 30" sidewall. If hinged to the outside of the pods (which are 15" wide"), that yields a 39" sidewall, which would make the already tall trailer 15" taller than it strictly needs to be, and make the tent even further off the ground.
But I sort of liked the concept of sleeping on the pods, largely because you'd have better access to the cabin (kitchen area, potti) with the bed still up. Initially it seemed like there probably was a way to sleep on top of the pods by hinging an extension piece to each sidewall--this build may keep the piano hinge industry solvent for years--that stores against the ceiling. You could thus have the 39" wide pieces necessary to cover the bed when hinged at the outside of the pods, but make the sidewall in a 24" part for reduced vertical height hinged to a 15" part hinged that stores against the ceiling.
The problem with that, though, is that you couldn't sit up in bed unless the sidewalls were three feet high or better, so we're back to the height issue. Sitting up wouldn't be strictly necessary--the Navy had bunks with 18" of overhead--but it seems like a valuable feature.
Long story short: I'm going back to re-examine whether there's a better sleeping arrangement. Though the original plan doesn't put anyone on the floor, I'll still investigate the "on the pods" idea. I owe Paul the drawings for the bed arrangement anyway, so your idea came at a good time.
Paul had this idea when we first did the layout (and was justifiably enthusiastic) but something like the cook stove coming out of the pod to the outside would have the cooking surface roughly 5 feet in the air. (The trailer surface on which the wooden pods sit is 54.17" off the ground.) That means that you'd barely be able to see what you are coooking. But if you put the cook stuff at the right level for cooking outside, sliding it inside would have you cooking around your ankles. (The floor of the trailer is 28.79" of the ground.) So in spite of how trick it would be to use the double-direction slides and have the kitchen serve both inside and outside, I suspect the more practical alternative is to use the outside horizontal compartment on curbside to house a secondary/outside kitchen. There's room and the drop-down compartment door would make a good work surface. And it would be fairly easy to put a propane connection there.Also, if it were me, with a setup like this potentially being support for a group (or not), I would want access to the kitchen from the outside, access from in and out would be ideal. Hinge up the bed and there is the sink and stove, go outside open the side door and slide stove/sink out. Or a inside/out slide, maybe in the front over the tongue?
Thanks again for the help.
PaulJensen
Custom Builder
07
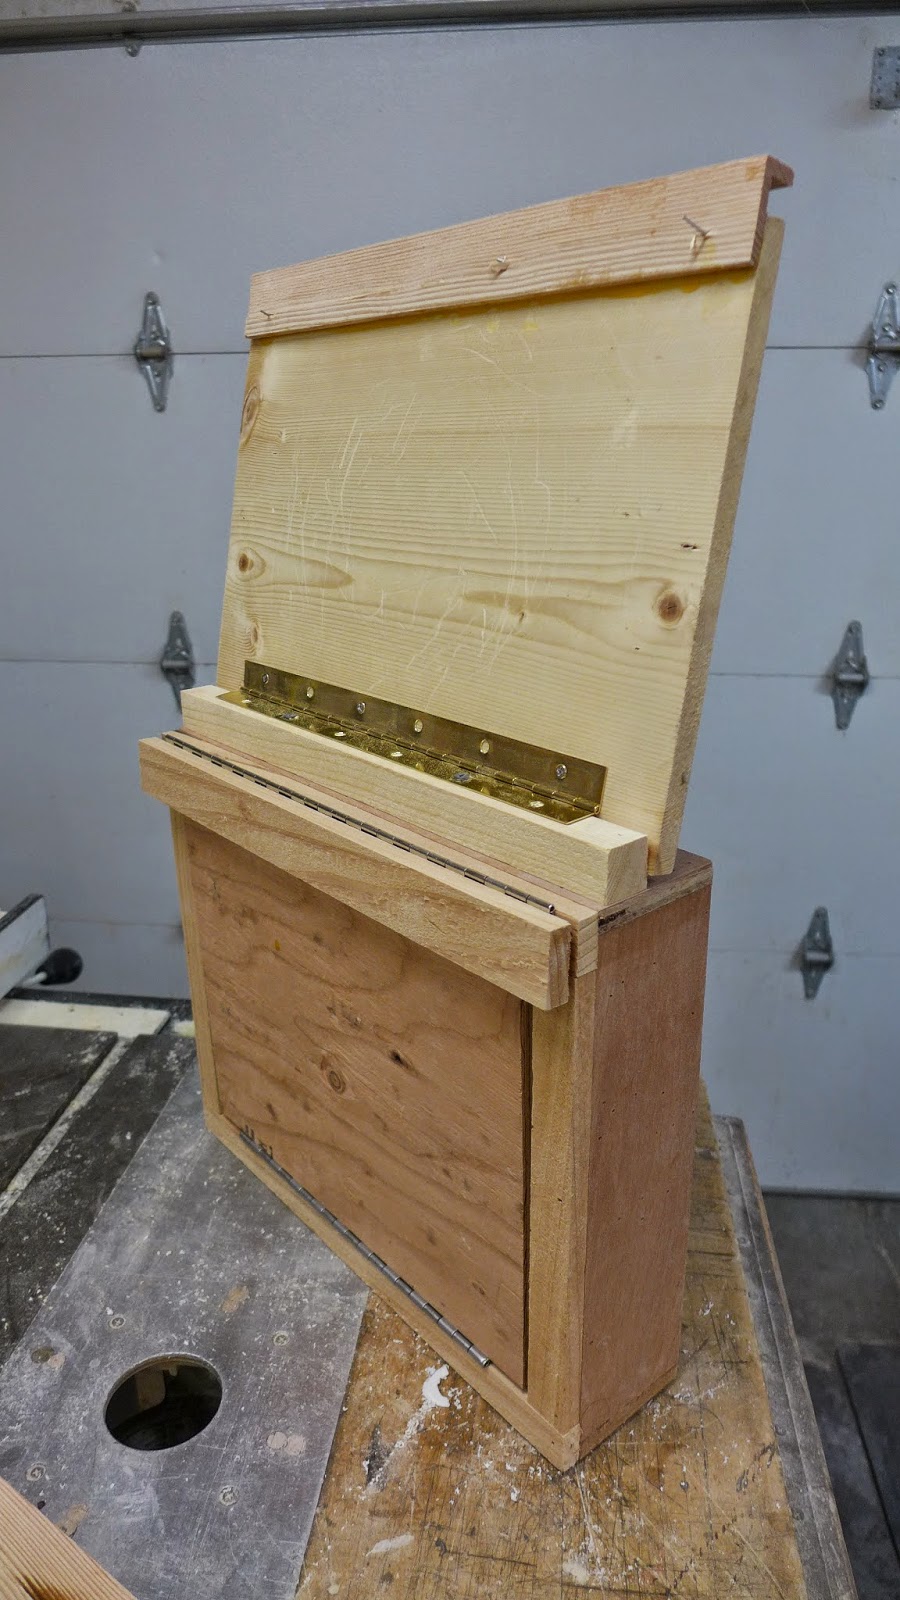
(above) Sunday morning I came up with this mock-up of the sidewall details...A full 1x1 as part of the 'pod' cases, glassed and epoxied...That is the foundation for the piano hinge / sidewall... The lipped overhang adresses most of the water intrusion issues I could live with...
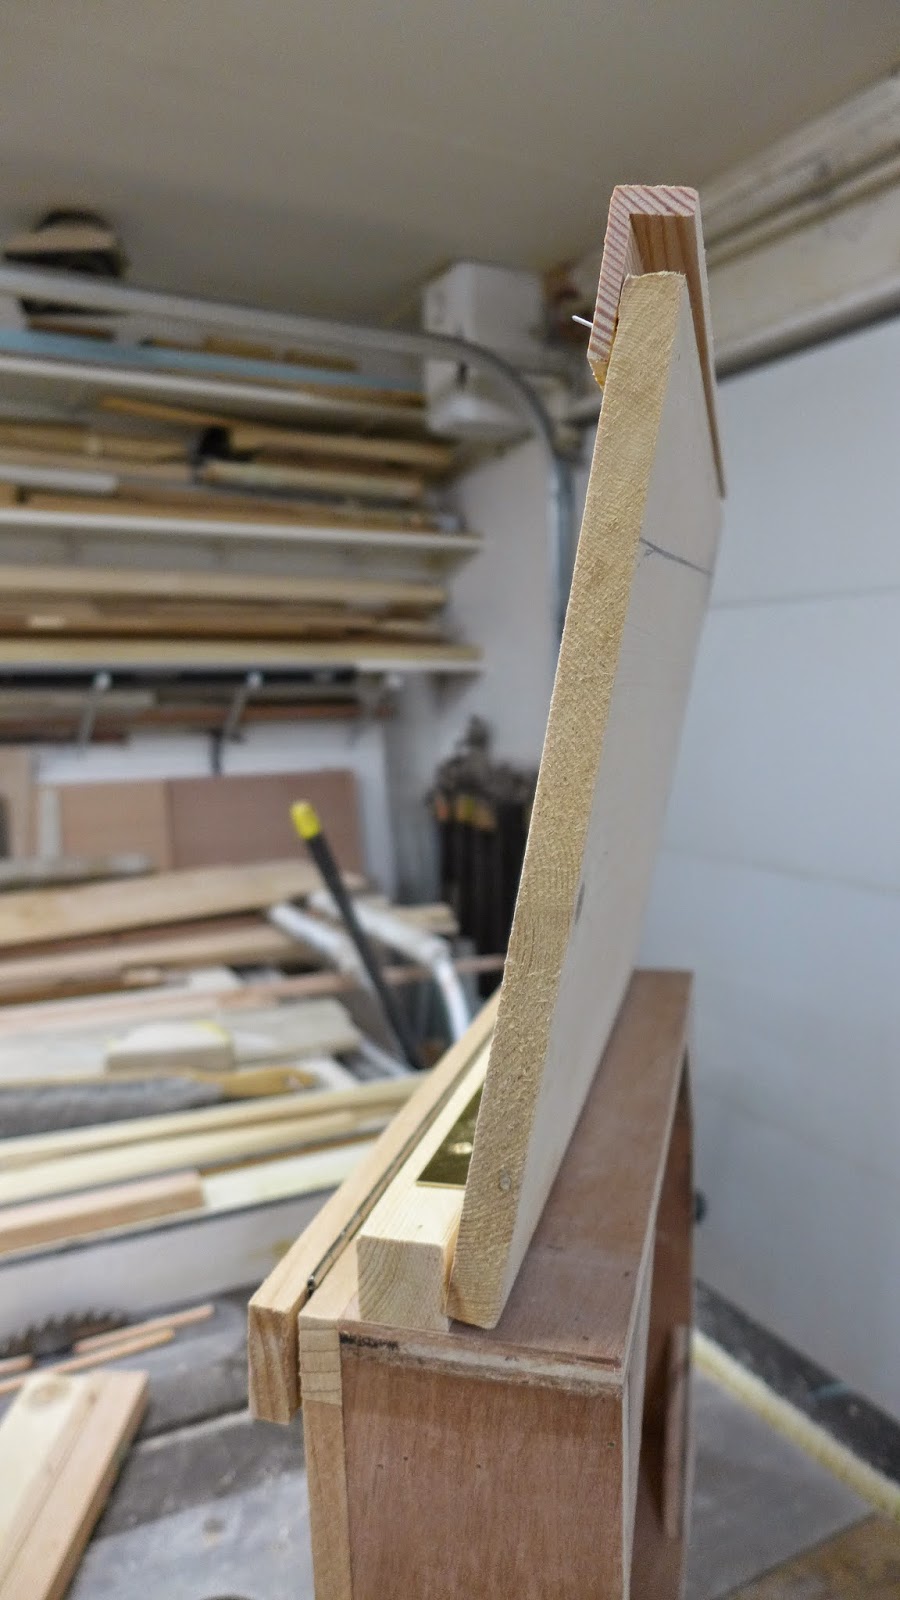
(above) Imagine you are rainfall...???... How are you going to get in...???...

(above) At the center I'm thinking of something like this...Elevated ridge with minimal water intrusion....Overhang at the hinge end... Without going crazy, this should be good enough...
(above) Sunday morning I came up with this mock-up of the sidewall details...A full 1x1 as part of the 'pod' cases, glassed and epoxied...That is the foundation for the piano hinge / sidewall... The lipped overhang adresses most of the water intrusion issues I could live with...
(above) Imagine you are rainfall...???... How are you going to get in...???...
(above) At the center I'm thinking of something like this...Elevated ridge with minimal water intrusion....Overhang at the hinge end... Without going crazy, this should be good enough...
PaulJensen
Custom Builder
Is there a plan to cover the "Lipped Overhang" hinge with a rubber flap? I can imagine water seeping in through the hinge itself.
If I were rainfall I would simply wait until nobody was looking and steal the keys...
Hi Papaduc...
Every build is an endless series of compromises... Given the multiple moving large panels, this ain't gonna be a Rolex Oyster...
After the foundational structure is complete, gasketing will be looked at... I prefer to let simple gravity fed overlaps to have precedence over other methods of waterproofing...