Battleship Jones: 2015 Tacoma DCLB Build Thread

Adventurous

Explorer
I live in North Conway NH. Not much for off rd trails in this area but we do have many miles of dirt roads all throughout the north country.

Congrats to the Broncos, I look forward to watching them in the Super Bowl. I've been a Broncos fan since I was a little kid. I spent my early childhood in LaPort just outside of Fort Collins. I'm always a little torn when I watch the Patriots play the Broncos. If you have to watch your local team loose, it might as well be to your childhood heroes. I met John Elway once, I'll never forget it.

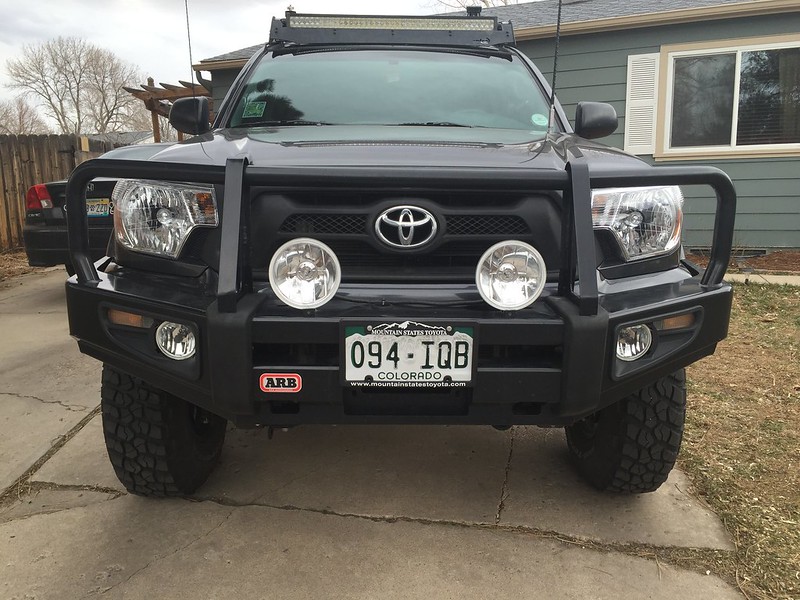
I really like your truck. I just bought a 2015 dclb sport with 6500 miles. I haven't done much to it yet, my wife is a little to practical to understand mods. I slid in the TRD exhaust as part of the sale (she wasn't impressed). Maybe if I add a half an inch to the suspension each year I can get to 3 inches under the wife's radar.

Really it's a good thing she keeps me in check, otherwise I would have a truck like yours and no money to buy beer.


That's funny, sounds like we have moved in opposite directions. Both my wife and I are Pats fans but I have to hand it to the Broncos defense, they played to win and came away with a well deserved win.

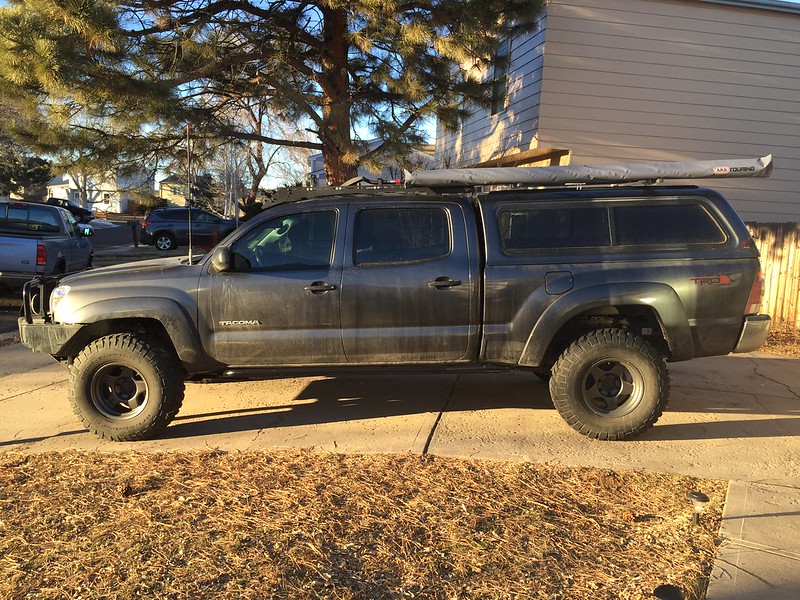
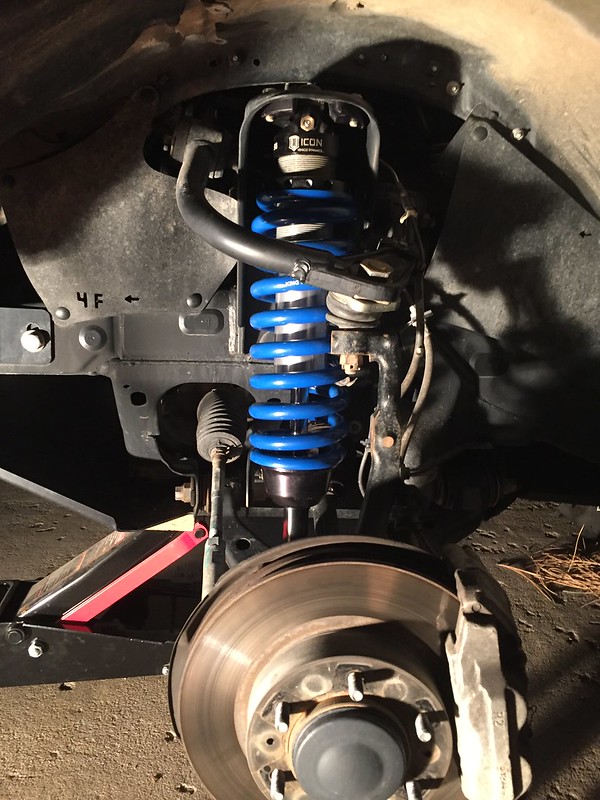
I was having that conversation with my older brother the other day regarding the practicality of having a truck built like mine is now back east. In my opinion, if I am being perfectly honest with myself, it wouldn't be practical. The truck in stock form, other than the POS Dunlops it came with was perfectly adequate. I can imagine throwing on a topper, some 265/75 BFG all-terrains, and maybe a mild lift via Icons and calling it a day.
 

brianjwilson

Some sort of lost...
Interesting. I contacted them to see what they would recommend for a setup and they replied with the following:

"Our maximum recommended preload setting for those coilovers is 1.75” of threads showing above the adjuster nut. So at this point I think that upgrading to the 700 pound coils would probably be your best bet. With the new coils your baseline preload setting will be .25” of threads showing with a max setting of 1.13”."

That said, I'll be purchasing some 700lb coils in the near future. Probably going to get King branded ones because they are blue and I'm vain. That and they are ~$40 a coil cheaper, so it's a practical vain-ness. Now to prepare myself for the joys of working with a spring compressor...

Lol there you go, depends on who you talk to I guess. Like I said I have absolutely no issues with my setup. However I still think yours is heavier up front and the 700lb coils are a good call. If I added a bumper I certainly would have swapped springs as well.
 

Jerseytaco

Observer
Awning pics

So I spent a little bit of time tonight putting together a crude bracket to mount the awning to my Thule bars on the topper. Just something temporary to get up and running and make sure it works up there. It is made of some 3" x 3" x 1/4" angle iron and will be fastened to the bars with 2 square u-bolts. ARB supplies 4 6mm bolts for the entire 40lb or so assembly which seemed a bit light duty for me so I decided to go with 4 6mm bolts per bracket! Double time baby! The plan is to have two total brackets. And the requisite picture.

ARB%20awning%20bracket_zpswiqacvca.jpg

Just read through whole build thread. Very nice rig. I'm looking at the 8x8 awning as well. Do you have any pictures of it on your rig. Thanks.
 

Adventurous

Explorer
Just read through whole build thread. Very nice rig. I'm looking at the 8x8 awning as well. Do you have any pictures of it on your rig. Thanks.

I can get a picture this evening. Make no mistake, the 8'x8' is a healthy sized awning. That being said, if you are looking for maximal shelter it's the ticket. That and it doesn't look too out of place on the DCLB, a little long, but not absurdly so.
 

Adventurous

Explorer
Thanks to my good friends at Downsouth Motorsports I now have a set of 3" x 14" x 700lb King springs to install. Perhaps I'll do the swap this weekend if I'm feeling up to it; still nursing a cold I picked up the other day. If anyone is interested in the 650lb Icon springs I'll be selling those shortly.

Also, for future reference, if anyone buggers up a spring collar, they are Icon PN #257501 and can be ordered through any Icon dealer.

Picture lost! :(
 
Last edited:

Adventurous

Explorer
The wife is out of town for the week so when the cat is away the mice will play! Spent ~4 hours or so tonight installing the 700lb springs. Did it all solo and have to admit that I am pretty beat after all that. With all the ratcheting necessary to compress the springs I feel like I have a healthy case of tennis elbow.

Anyway, I borrowed the following spring compressors from O'Reily's Auto Parts.

IMG_1142 by Tim Souza, on Flickr

IMG_1143 by Tim Souza, on Flickr

It was my first time using spring compressors and although it went smoothly, it was a bit of a nerve wracking procedure. The 700lb springs are significantly thicker and required more compression than the 650 pounders due to their additional length. Needless to say I am very, very glad to be done with this job. Just FYI, there is not enough of a gap after assembly to slide the compressor out as a whole unit. I had to disassemble it and remove the arms individually. Not a deal breaker, but it was a bit of a surprise to see that it wouldn't come out the same way it went in.

Side by side shot of the two coils.

IMG_1145 by Tim Souza, on Flickr

Tada! The assembled product. I Scotch brited the shock bodies while I had them apart to remove some of the discoloration and filth that had accumulated. Much shinier now.

IMG_1146 by Tim Souza, on Flickr

While I had everything apart I also took a few minutes to slice and beat back the pinch weld. The tires don't rub, but they are pretty damned close. They catch the plastic, so I did the clearancing more as a preventative measure.

Currently the driver's side is set at 1" of thread showing and the passenger side has 7/8". I'll wait to see how the springs settle in before adjusting them any further; at the present they sit a little high for my tastes with only ~2" of down travel.

Quick spin around the block showed that they are a much better match for not only the configuration of the vehicle but also the feel of the rear suspension. I bombed over a few speed humps and it was firm enough to feel controlled but still smooth enough not to feel jarring. Initial impressions are that it was a completely worthwhile upgrade.
 
Last edited:

brianjwilson

Some sort of lost...
Nice! No way I would have messed with that without an impact though, you're nuts. Haha
My electric impact has paid for itself over and over again. I only used hand tools for YEARS and finally bought it after doing some things on the truck. Even the simple things like rotating the tires, it just saves SO much time.

Good news is you can easily back the collars off 1/2" and get a better ride height. Your comment about feeling the suspension better matched to rear is exactly how I felt after installing my new leaf springs. Sometimes you just don't realize how much better a setup can be until you spend the money and try it! Opinions are so subjective when you ask around on a forum.
 

Adventurous

Explorer
Nice! No way I would have messed with that without an impact though, you're nuts. Haha
My electric impact has paid for itself over and over again. I only used hand tools for YEARS and finally bought it after doing some things on the truck. Even the simple things like rotating the tires, it just saves SO much time.

Good news is you can easily back the collars off 1/2" and get a better ride height. Your comment about feeling the suspension better matched to rear is exactly how I felt after installing my new leaf springs. Sometimes you just don't realize how much better a setup can be until you spend the money and try it! Opinions are so subjective when you ask around on a forum.

So true. I am doing my best to limit acquisition of new tools and belongings, but an impact would be a welcomed addition to the stable. I would say that you are right in that this is a job that should probably not be done without one. Otherwise you are just subjecting yourself to cruel and unusual punishment. I may end up backing off the collars some. I cried a little on the inside with the passenger one. The collar holes were so buggered up that I just had to insert a punch and hammer the thing in circles. If it could have been saved before it certainly could not have after.

After a bit more time on the new coils I will echo their better matching the rear statement. Less wallow in corners, firm but still still plush. Just a better overall ride.

I decided to tackle the bumper trim and install for the ARB today. After living with the unsightly gap for the past year and a half convincing myself that it doesn't matter to me I finally owned up to the fact that it does and just looks sloppy. I did my damndest to sell it and buy an aftermarket one to chop up or trade it for someones that was all dinged up but to no avail. So I got to it today. It was hard to cut up what I'm sure is a $500 bumper assembly for the top 1/4 of it but whatever. I had resigned myself to taking the bumper off but with a bit of clever manipulation, lots of cursing, and taking off the grill, I was able to get the bumper slice in there and attached without having to even loosen a single bolt on the bumper itself. Phew. I think it looks much better now.

IMG_1154 by Tim Souza, on Flickr
 
Last edited:

Adventurous

Explorer
Great looking truck! I love the big awnings.


Thanks! I couldn't justify getting anything smaller. If I'm going to be setting up some covered shelter and have the ability to carry it why not go big?

Got a Prinsu rack coming for the topper here in the next few months so I'll see what the best way to attach it is. I may be hitting you up for some of those sweet sweet brackets.
 

Adventurous

Explorer
After having almost ate it multiple times standing on the sliders to get to something on the roof, I went ahead and put some 3M Safety-Walk ladder grip tape on the tops. Install was a breeze, though it took a bit of finessing and several pieces of tape to build the curve at the kick out. Time will tell how durable it ends up being.

IMG_1164 by Tim Souza, on Flickr
 
Last edited:

Forum statistics

Threads
186,049
Messages
2,881,390
Members
225,825
Latest member
JCCB1998
Top