You are using an out of date browser. It may not display this or other websites correctly.
You should upgrade or use an alternative browser.
You should upgrade or use an alternative browser.
Casper's Xterra Build
- Thread starter Casper
- Start date
Inc
Observer
Yep, I want to get louvers in before the summer. As I can't remember where you said to get them, can you remind me :coffeedrink:
Cheers
Josh
&
Porthos
:smiley_drive:
Mine are made by Genright, you can also look at run cool. gen Right has a better variety, but the run cool are larger. It all depends on what will work on your Nissan I guess.
Noxious007
Observer
I want to make babies with that Xterra. :wings: I have an 02 that is still in it's off-roading infancy. If it turns out half as nice as yours I will consider it a huge success.
Casper
Adventurer
Sorry if I missed it but stock motor? How does it handle the 35's, equipment and hauling the trailer?
Yea, still the stock motor for now. Only addition is the Volant CAI. As far as how it does, not bad. The 5.13's in the axles help. Hills tend to slow me down. If it's a big enough hill I can get down to 40-45 mph, that's fully loaded with the trailer. I am use to it by now. Gas millage is also ok. Not on hills and driving "nicely" I get around 17mpg.
Cheers,
Josh
&
Porthos
Casper
Adventurer
Ok, time for some updates. It's been a busy winter, and I had to fix a few issues with the X, and upgrade a few things. I don't have photos of everything, but I will post what I have. First off, as the truck sat pretty high, I have been having an issue with the front drive line angle, and as such I have burned up 3 of them last summer. There are lots of fixes for this, ranging from almost no cost to a complete redisign of the front suspention at a very high cost. I have opted for the "free" cost option for now. So what does that intale, well the X now sits almost 2 inches lower than before. For the front it just meant re-adjusting the front coil-overs to sit a tad lower, for the back it meant pulling out some of the AAL's. As I had a small issue with my rear springs last year I went ahead and replaced the set.


I am now running a set of springs off a 2wd Frontier with only one AAL and the Calmini shackles. Sorry, no pics of the new ride highth. I think it looks good, but short. One of my friends says she can't tell I lowered it.
Next, axle shafts. The stock D44 shafts are good, but I broke 2 last year. So time to upgrade. Full chromoly inners and outers. These things are huge compared to stock. :wings:
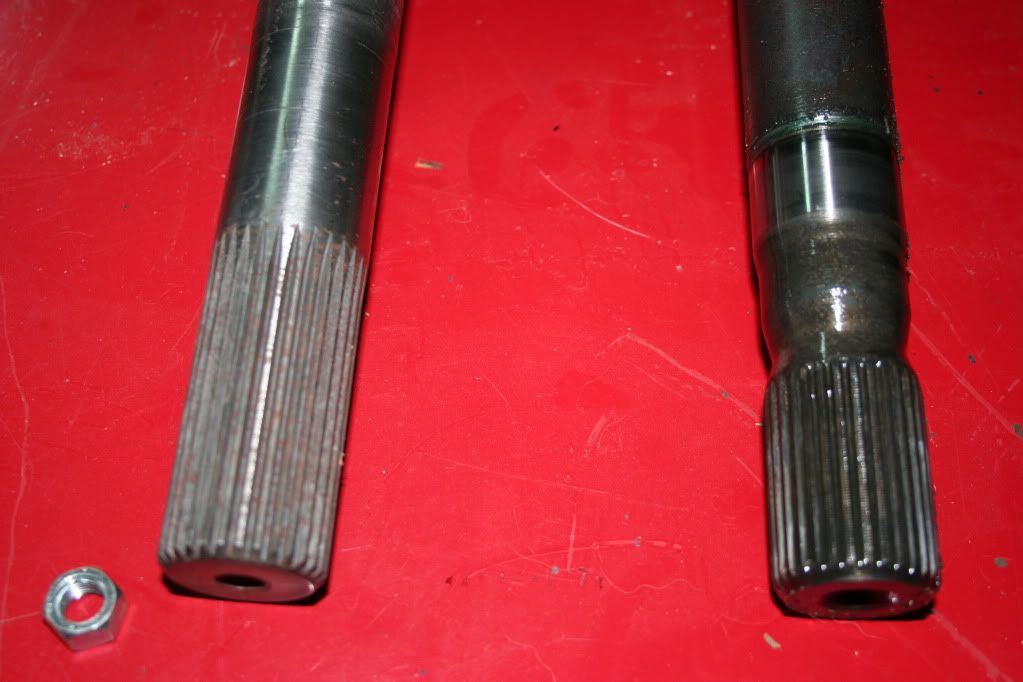
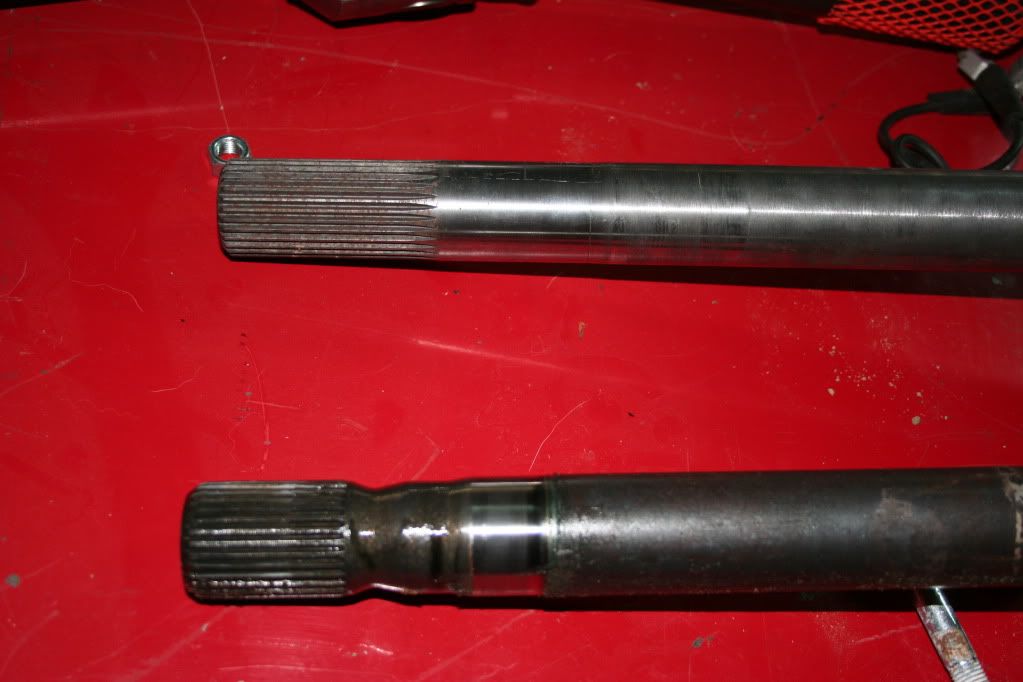
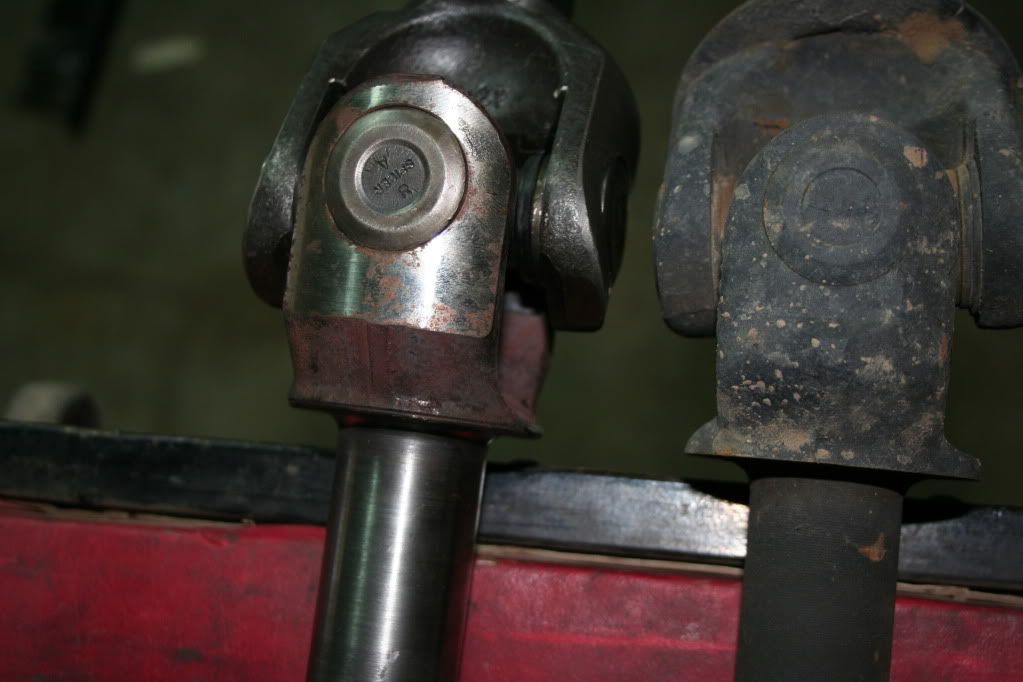
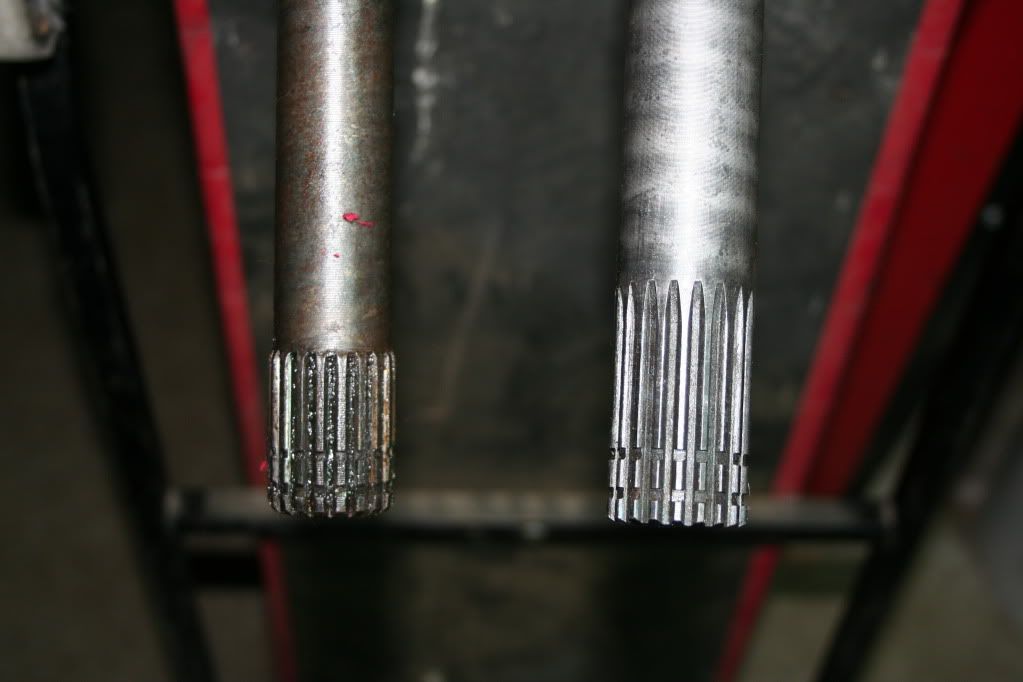
These should be a tad stronger. This also solved another problem I had. The front end had a vibration when the hubs were locked that I thought was the drive shaft. Turns out one of my shafts was slightly bent. :Wow1:
More to come.
Cheers,
Josh
&
Porthos
:smiley_drive:
I am now running a set of springs off a 2wd Frontier with only one AAL and the Calmini shackles. Sorry, no pics of the new ride highth. I think it looks good, but short. One of my friends says she can't tell I lowered it.
Next, axle shafts. The stock D44 shafts are good, but I broke 2 last year. So time to upgrade. Full chromoly inners and outers. These things are huge compared to stock. :wings:
These should be a tad stronger. This also solved another problem I had. The front end had a vibration when the hubs were locked that I thought was the drive shaft. Turns out one of my shafts was slightly bent. :Wow1:
More to come.
Cheers,
Josh
&
Porthos
:smiley_drive:
Last edited:
Casper
Adventurer
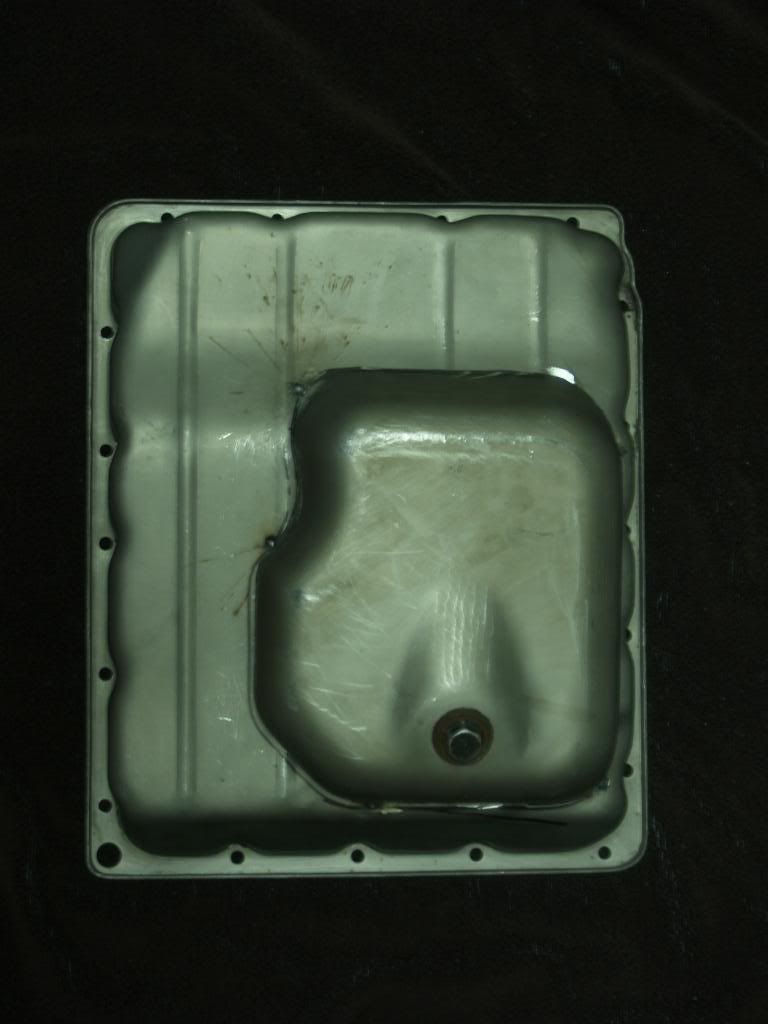
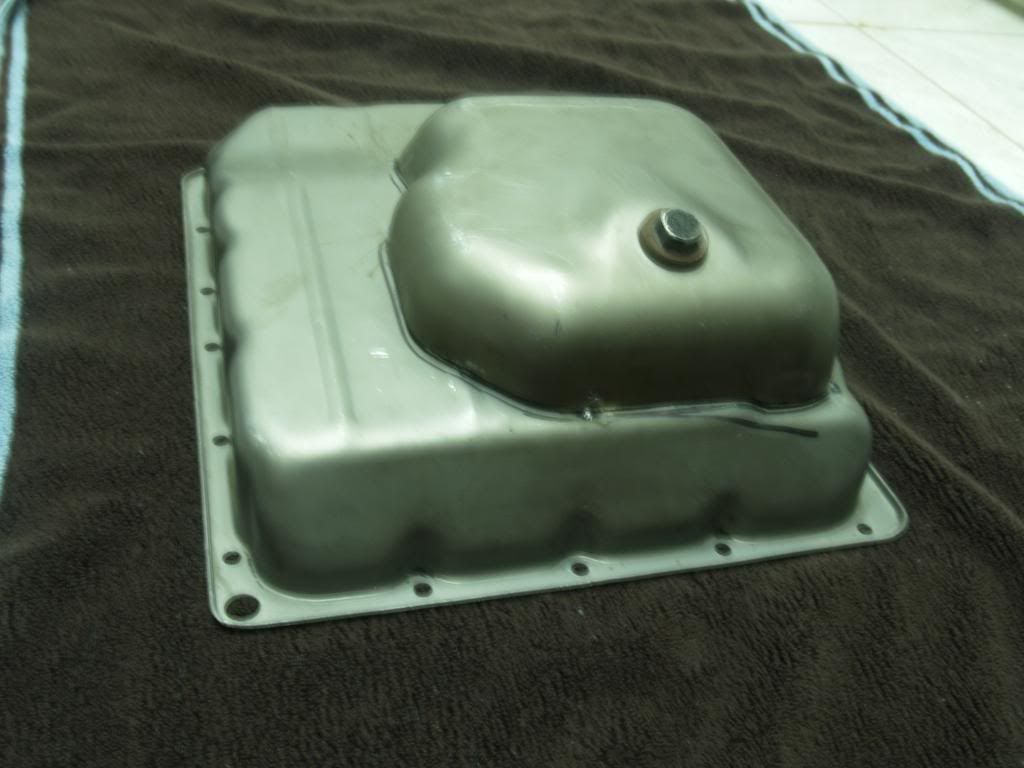
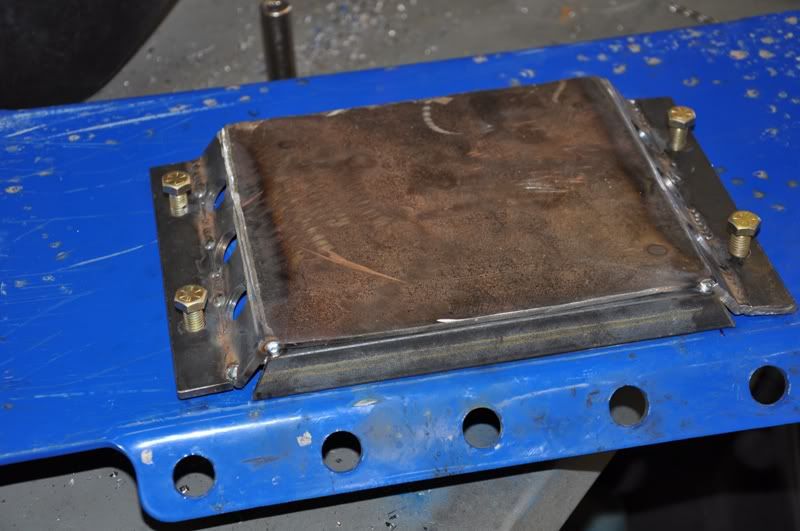
Ok, so next issue. As some of you know the Xterra with an auto tranny has a small issue. When climbing a steep angle that is quite long the tranny can sometimes get starved on fluid as it all runs to the back of the pan. With the help of a fellow Nissan friend (thanks again penski) I hope we have sovled this problem. He came up with the idea to make the pan deaper and extend the pickup tube. So, off to the junckyard he went. A dodge engine oil pan seamed to fit the bill. Trim it down, cut a hole in the stock Xterra trans pan and weld the two together. Volla, deaper pan.
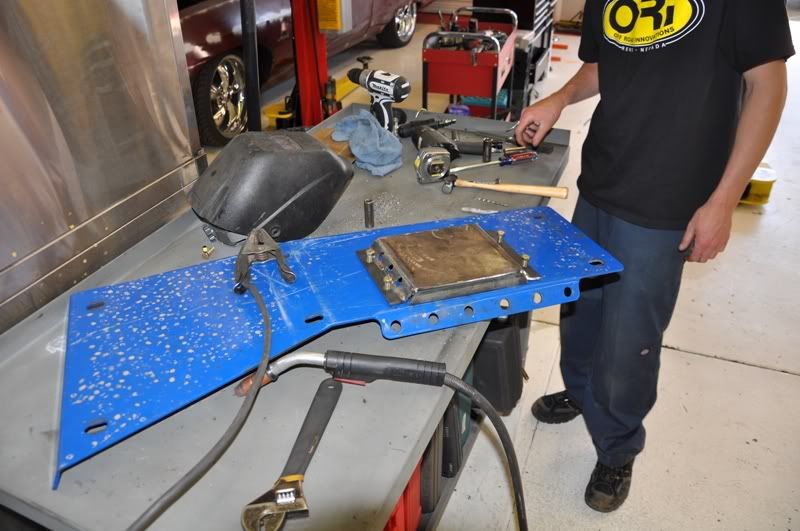
Next, the pickup tub. Of course Nissan could not make this one easy. The dam thing is square and not a standard size. So, off the the steel shop for some scrapp metal and then to ORI to have them weld it up for me. (no, I still can't weld, but am going to learn this summer) This is what we came up with.
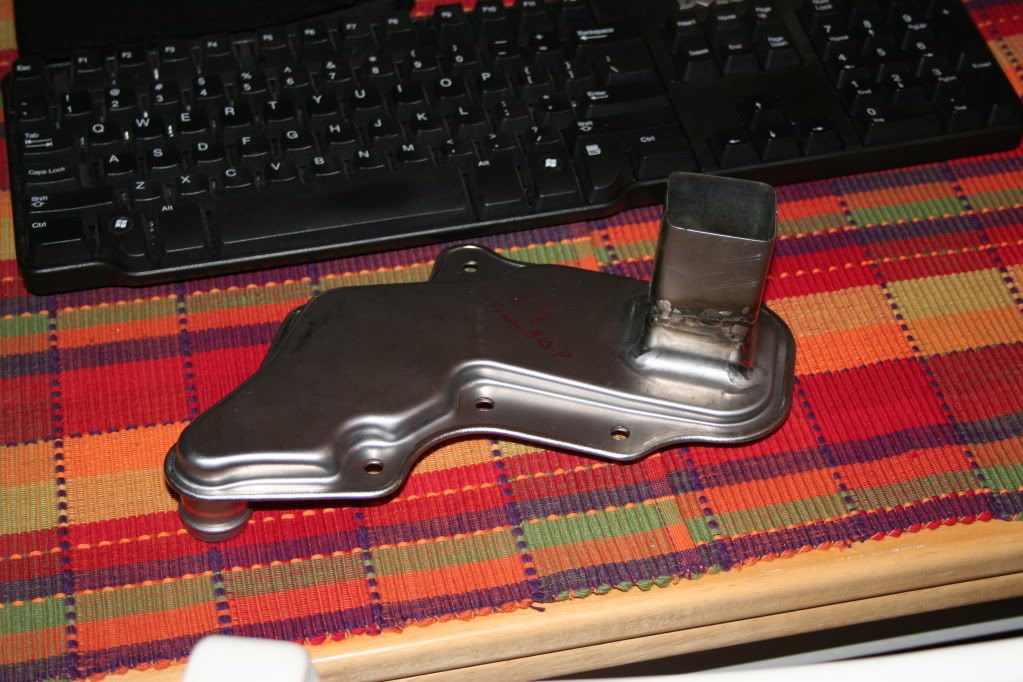
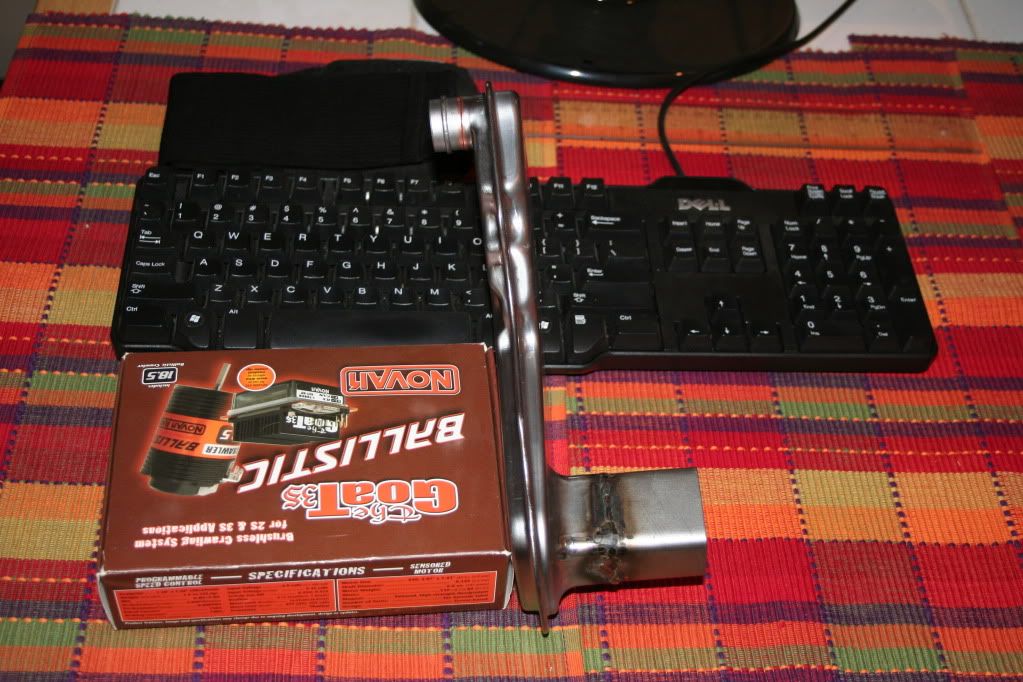
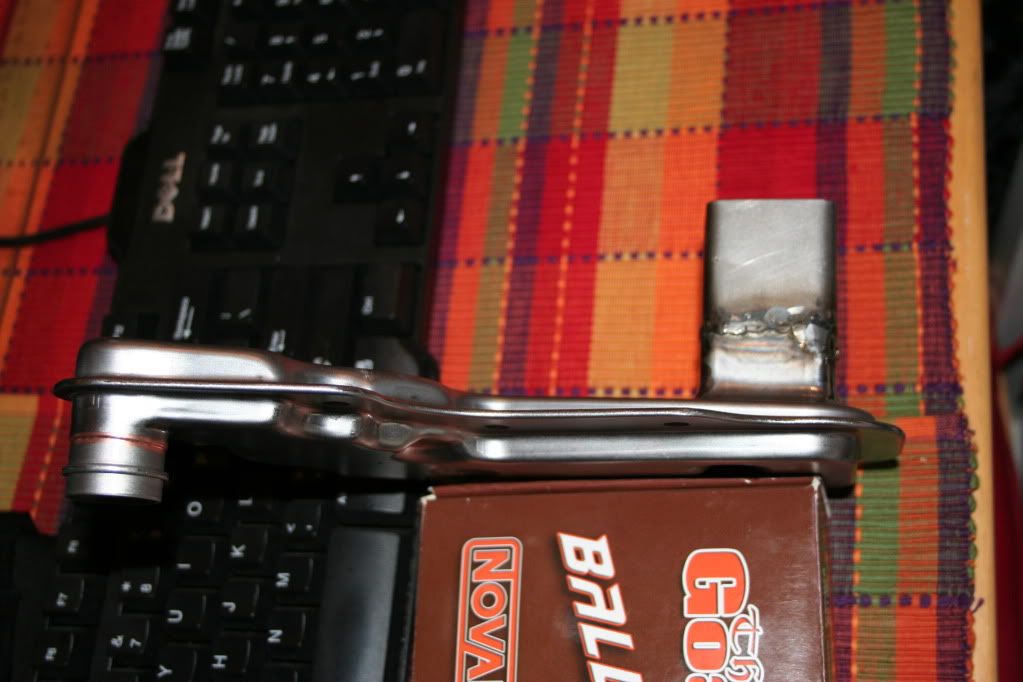
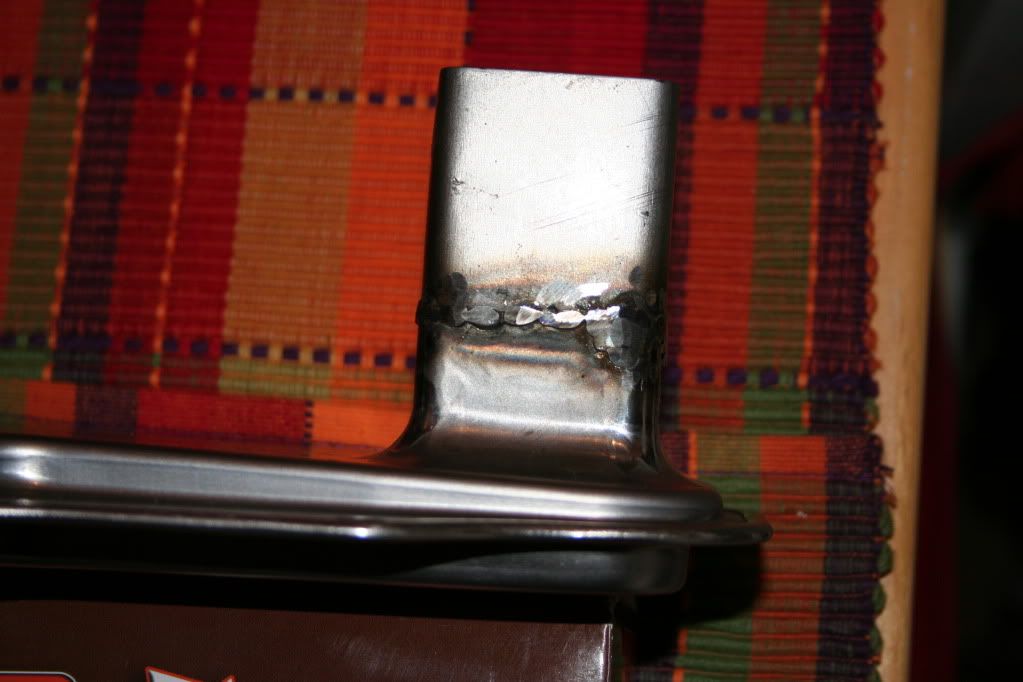
It now sits just shy of 1/2 an inch off the bottom of the pan. Same as when it had the stock pan. Hope this works. If not I am not into the mod for that much $$, and adding coolant capacity is always good. Of course, one project always seems to lead to the next, and with the deeper trans pan my skid plate no longer fit. So, got out the grinder and sawzall and this happened.
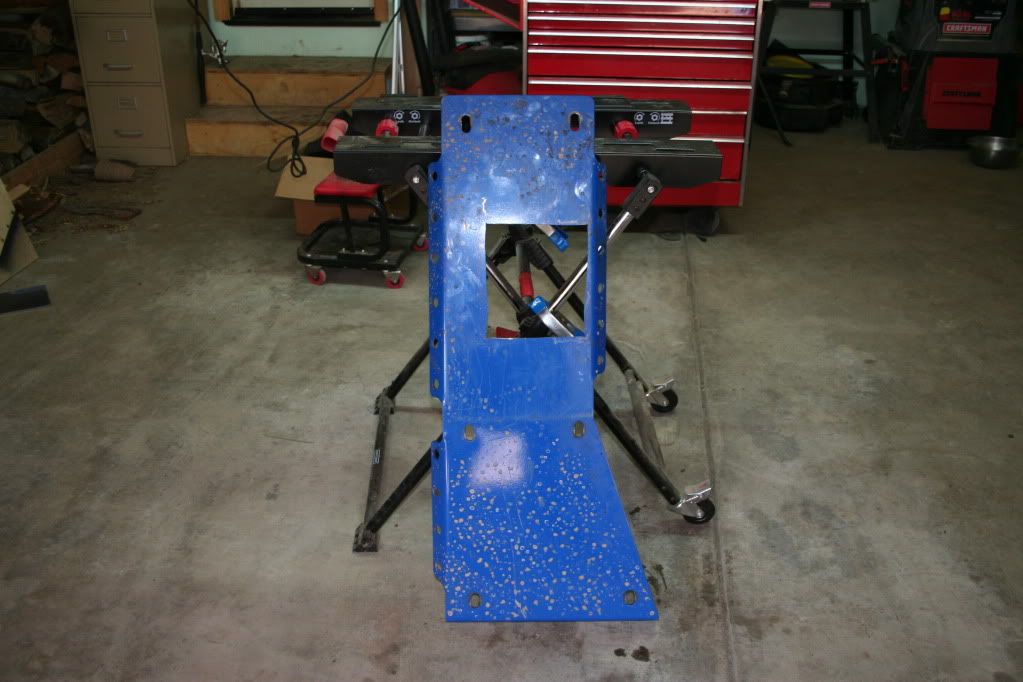

The boys at ORI are finishing up the rest. (yes, I know, the lack of welding again, it's a dam good thing they sponsor me) New skid addition added, with cooling holes. Nuts welded to the backside so I can remove it to change out the fluid.
So, I think that is it for now. Sorry for the lack of photos. When I work on the truck I just get so excited to get things done that I forget to take them.
Next up will be changes to the trailer. New tent gets picked up this week, and the nose box is going under the knife... but more on that towards the end of the week.
Cheers,
Josh
&
Porthos
Next, the pickup tub. Of course Nissan could not make this one easy. The dam thing is square and not a standard size. So, off the the steel shop for some scrapp metal and then to ORI to have them weld it up for me. (no, I still can't weld, but am going to learn this summer) This is what we came up with.
It now sits just shy of 1/2 an inch off the bottom of the pan. Same as when it had the stock pan. Hope this works. If not I am not into the mod for that much $$, and adding coolant capacity is always good. Of course, one project always seems to lead to the next, and with the deeper trans pan my skid plate no longer fit. So, got out the grinder and sawzall and this happened.
The boys at ORI are finishing up the rest. (yes, I know, the lack of welding again, it's a dam good thing they sponsor me) New skid addition added, with cooling holes. Nuts welded to the backside so I can remove it to change out the fluid.
So, I think that is it for now. Sorry for the lack of photos. When I work on the truck I just get so excited to get things done that I forget to take them.
Next up will be changes to the trailer. New tent gets picked up this week, and the nose box is going under the knife... but more on that towards the end of the week.
Cheers,
Josh
&
Porthos
Last edited:
Casper
Adventurer
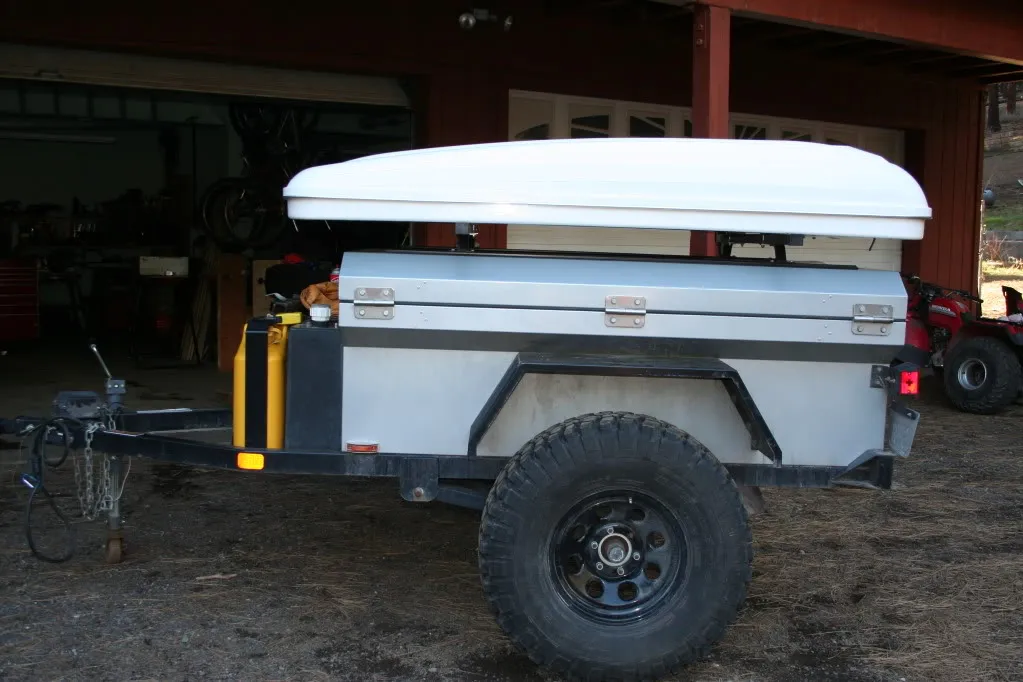
So, on to a few trailer mods.
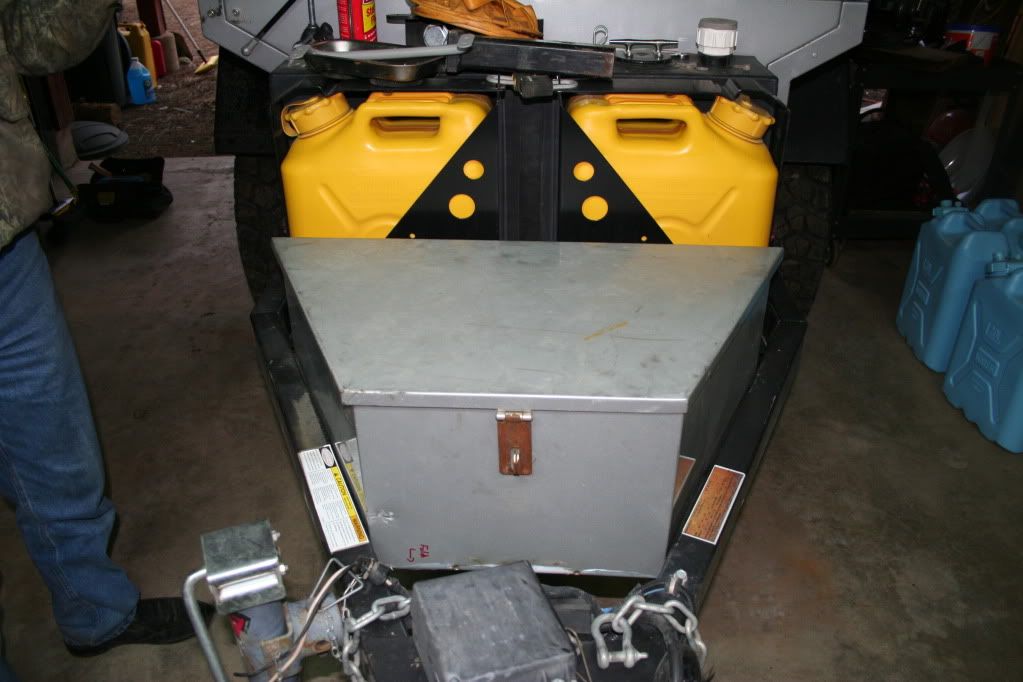
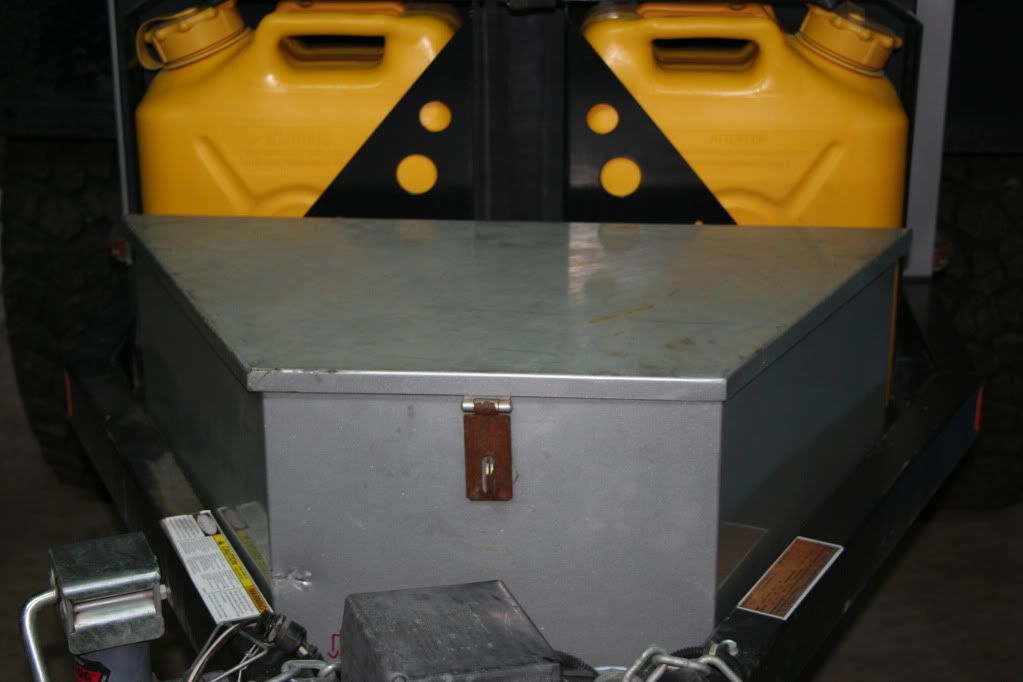
I love my rear bumper design, but it has an issue. When off road the fuel can holders can come in contact with the nose box of the trailer. So time to fix that. I have been going over in my head how to do it. I looked for new boxes, thought of maybe no box and the decided on this idea. Since I will not be using the original nose box with any of these ideas, and I really don't think its worth anything used, I decided to see if I could modify it to work. Another no cost solution.
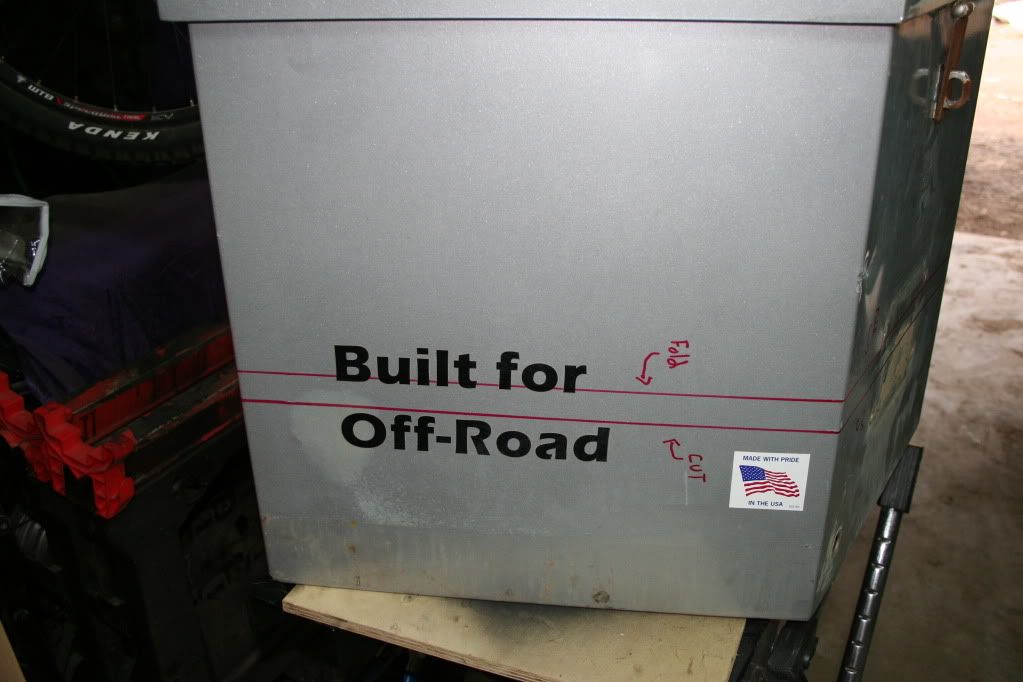
First off, deciding how short to make it. Easy enough, the only thing I really need to keep in here is the battery. So after some measuring I came up with 11 inches. Next mark the box.
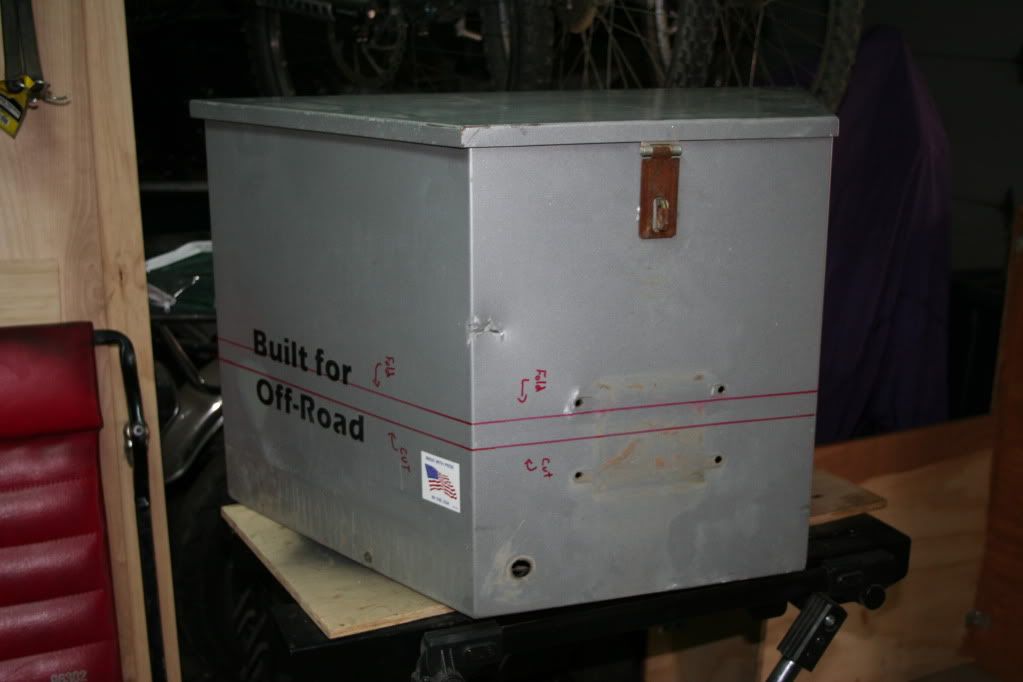
The box then sat this way for a few days, as I remeasured everything several times. Then, last night this happened
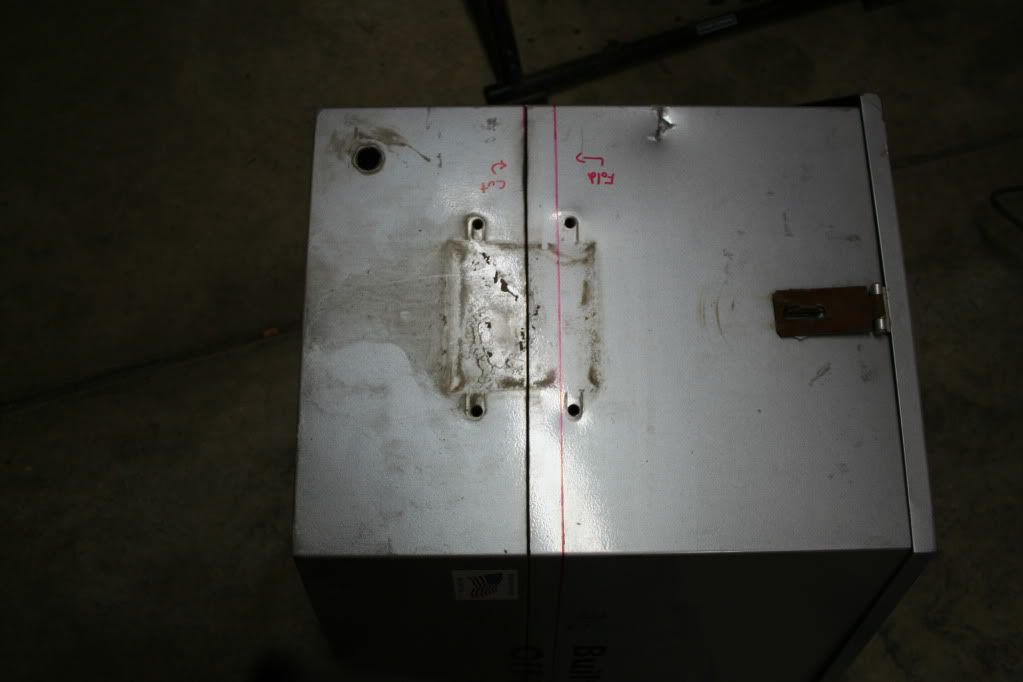

Well, no turning back now.


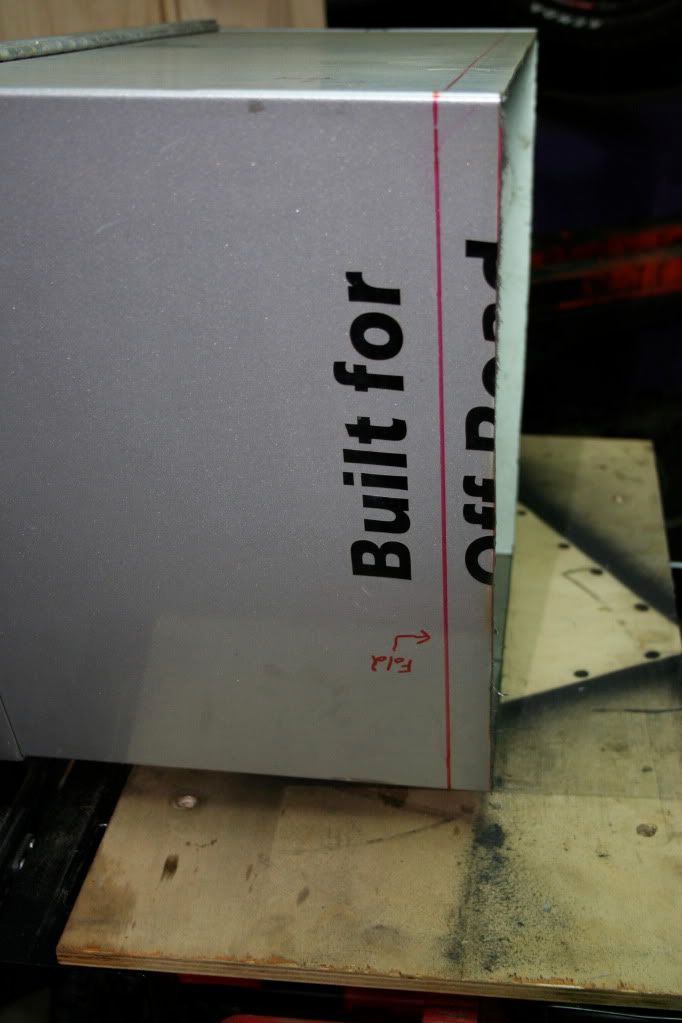
Side note, Martyn or Mario is you see this, I need some new "Built for Offroad" stickers.
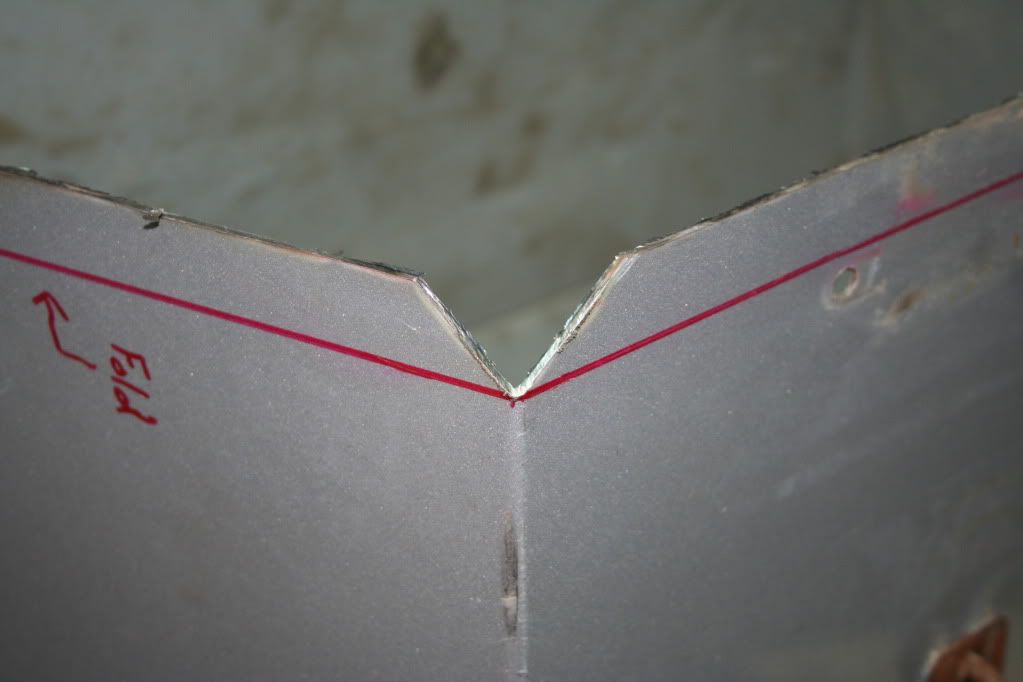
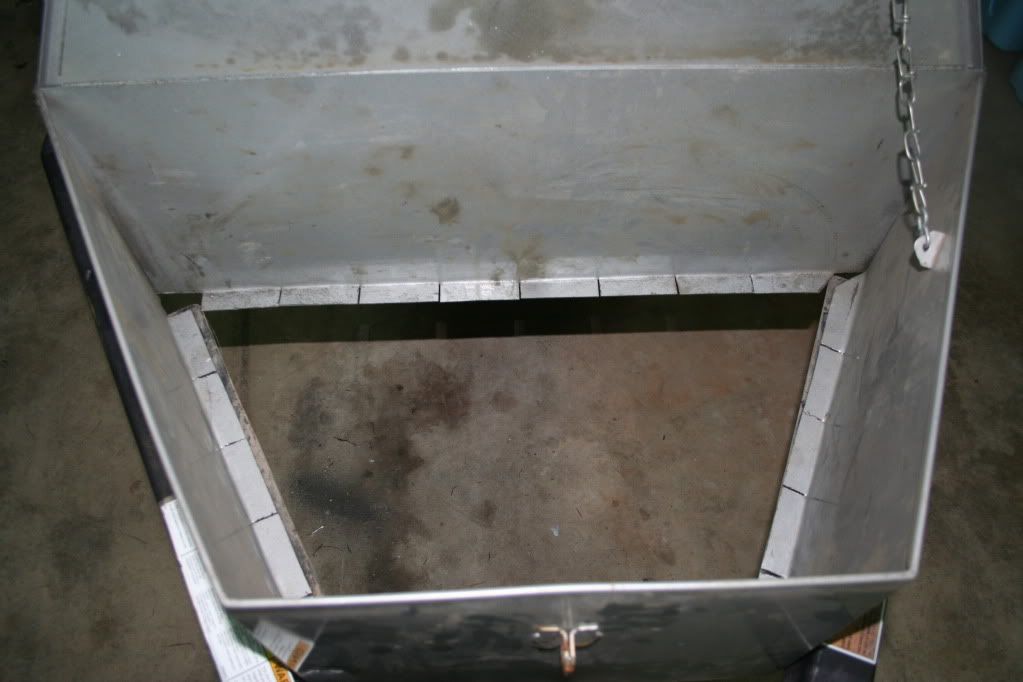
Ok, next was to cut some notches in the corners to make bending it easier.

Next post soon.
Cheers,
Josh
&
Porthos
I love my rear bumper design, but it has an issue. When off road the fuel can holders can come in contact with the nose box of the trailer. So time to fix that. I have been going over in my head how to do it. I looked for new boxes, thought of maybe no box and the decided on this idea. Since I will not be using the original nose box with any of these ideas, and I really don't think its worth anything used, I decided to see if I could modify it to work. Another no cost solution.
First off, deciding how short to make it. Easy enough, the only thing I really need to keep in here is the battery. So after some measuring I came up with 11 inches. Next mark the box.
The box then sat this way for a few days, as I remeasured everything several times. Then, last night this happened
Well, no turning back now.
Side note, Martyn or Mario is you see this, I need some new "Built for Offroad" stickers.
Ok, next was to cut some notches in the corners to make bending it easier.
Next post soon.
Cheers,
Josh
&
Porthos
Last edited:
Casper
Adventurer
Ok, next up was bending. I bought a set of sheet metal Visegrips. The front panel I tryed to bend the way it was. This worked ok, but not perfect. The corner came out a tad "rounded" and it was hard to do with the small sheet metal visegrips. I decided to make "releaf" cuts along the edge about 6 inches apart. This worked much better, allowing me to bend each smaller piece in one shot. Again, I got a tad excited, so I only got photos of the finished product.
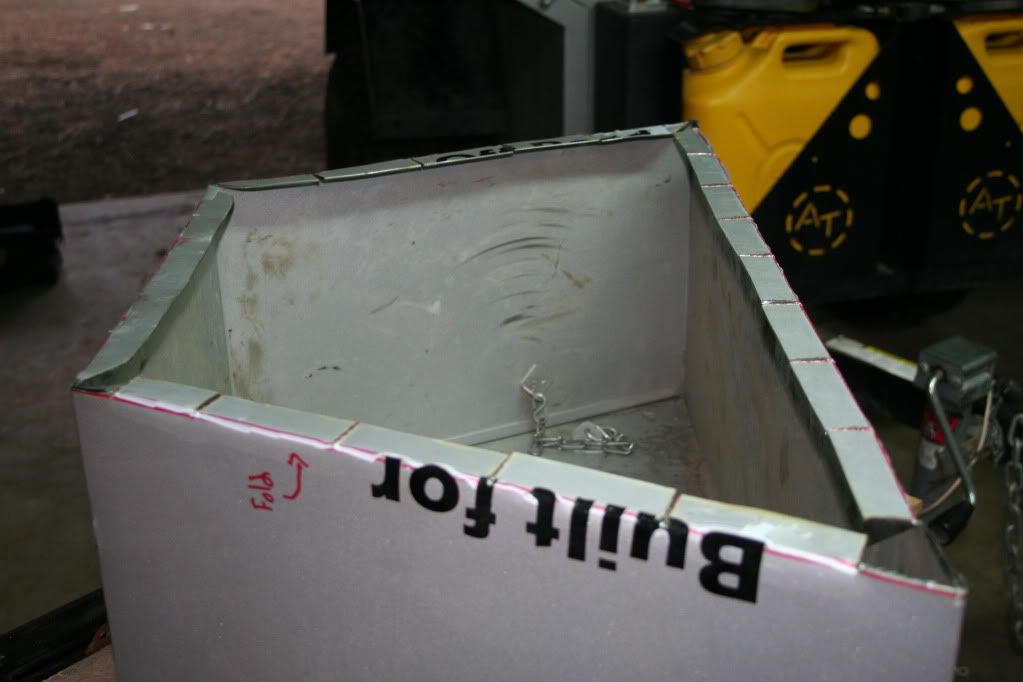
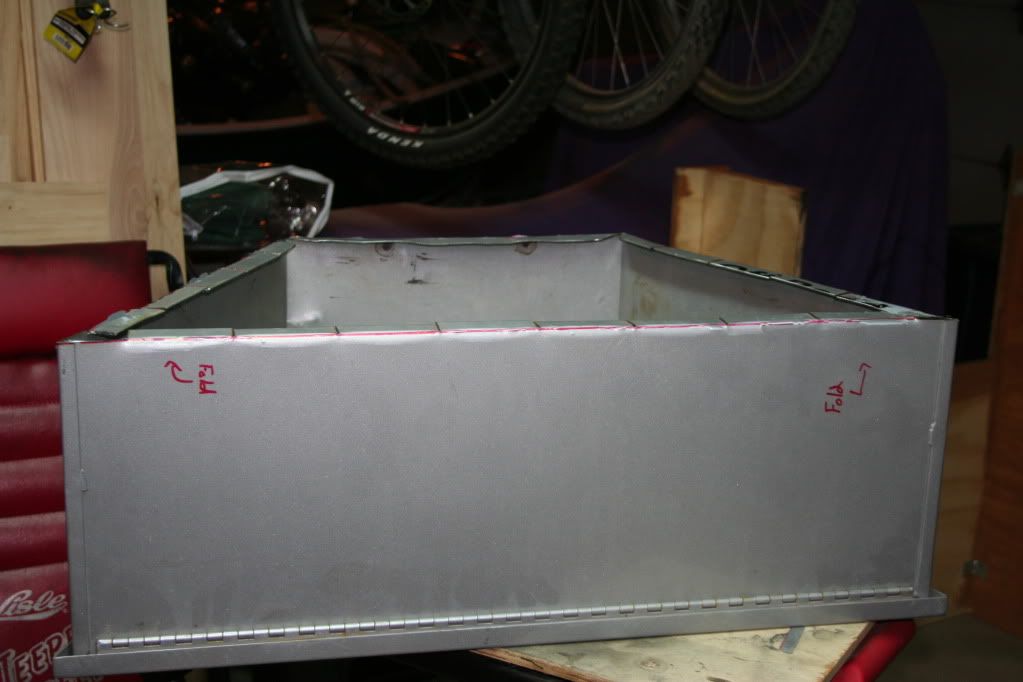
Valla, shortend nose box. It came out pretty darn good I think.
Ummm, oops. Might have forgot one small part. :Wow1:
The box is now down at ORI getting a bottom welded in. Once done I can mount it and mount the battery inside.
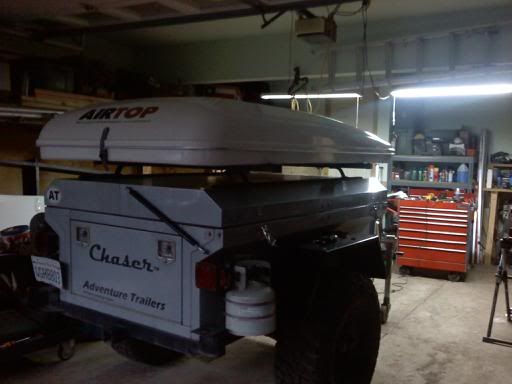
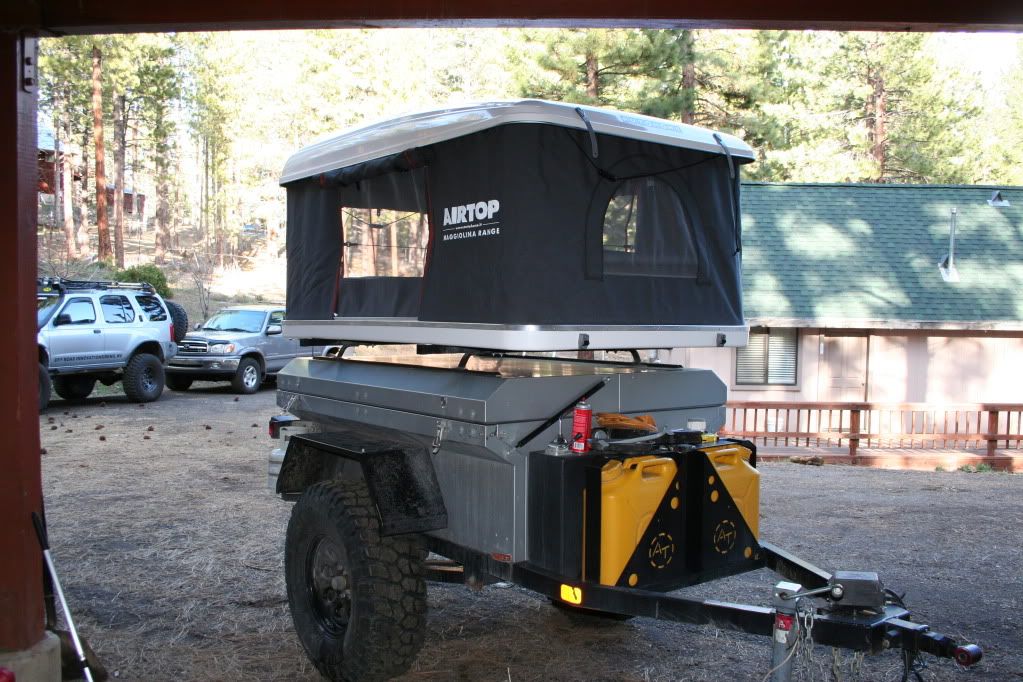
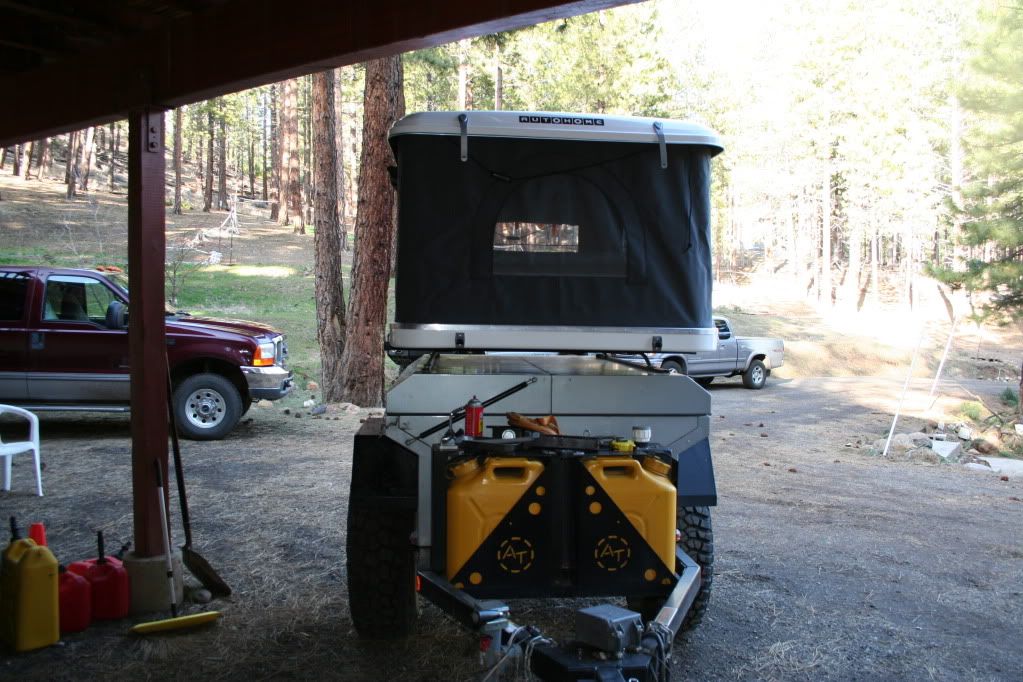
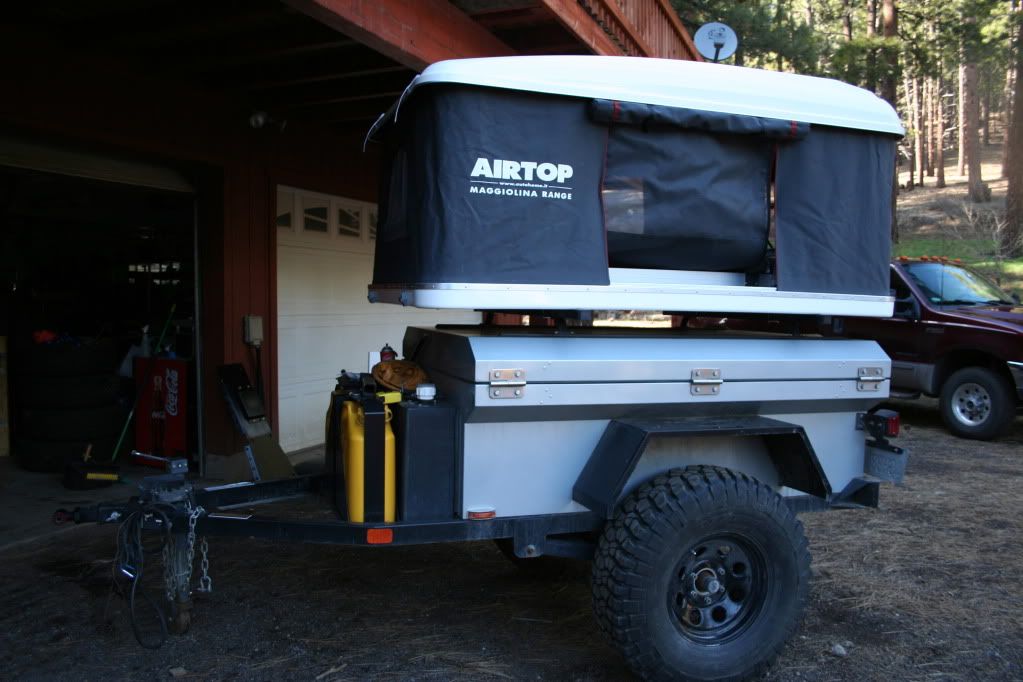
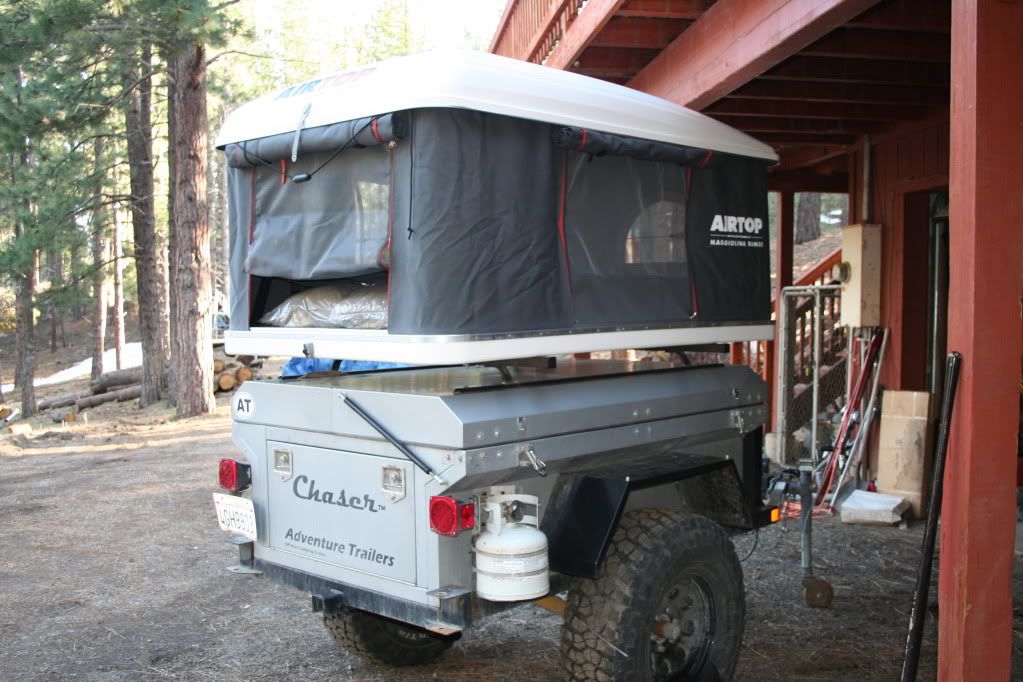
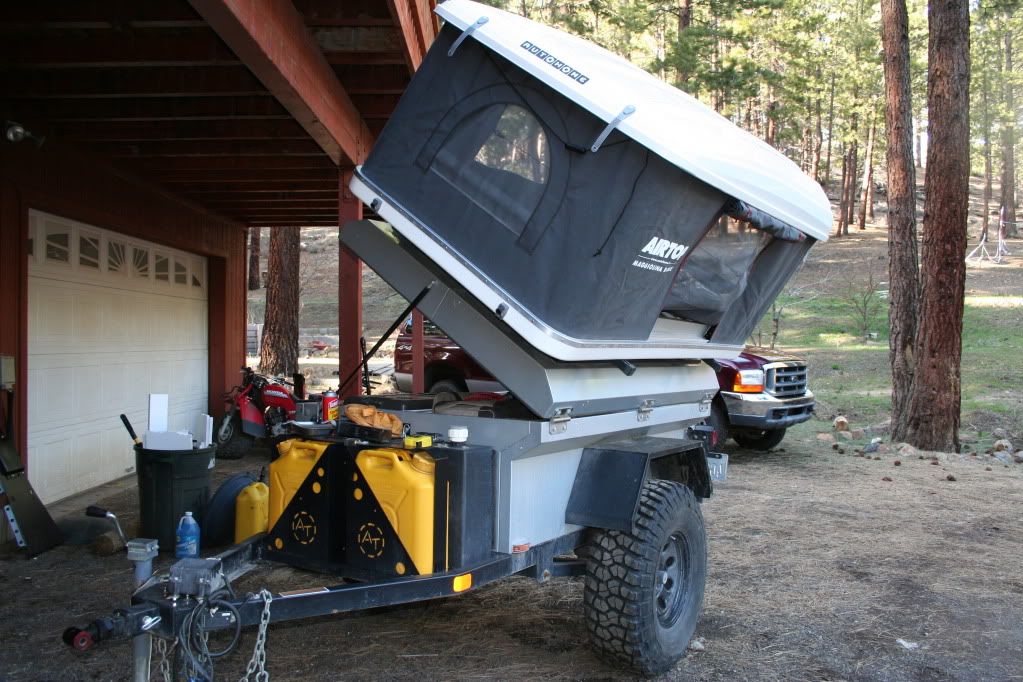
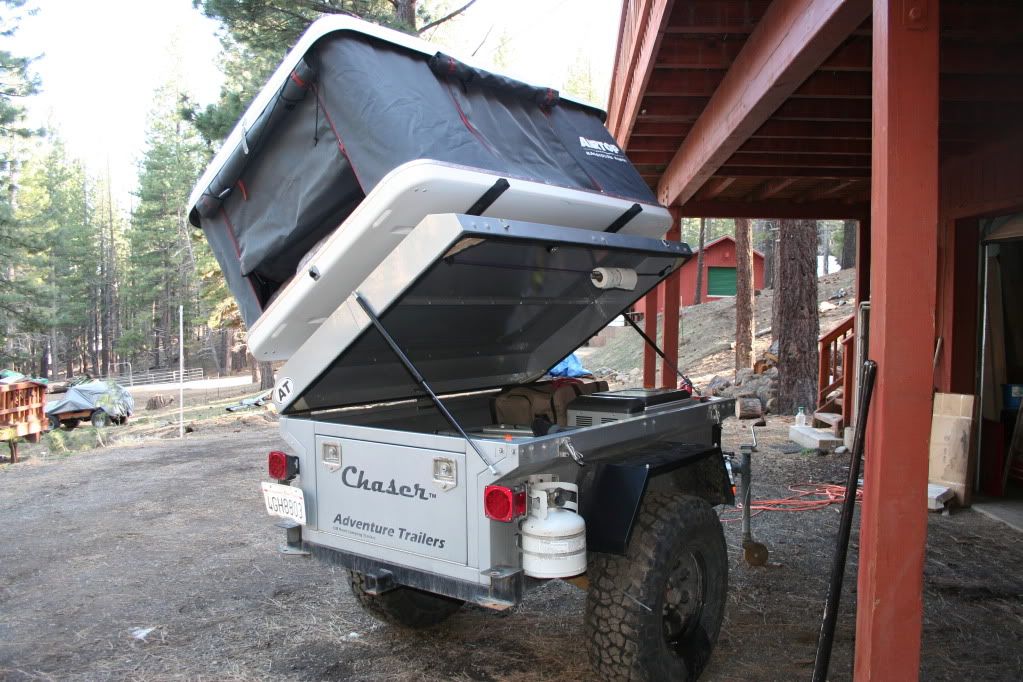
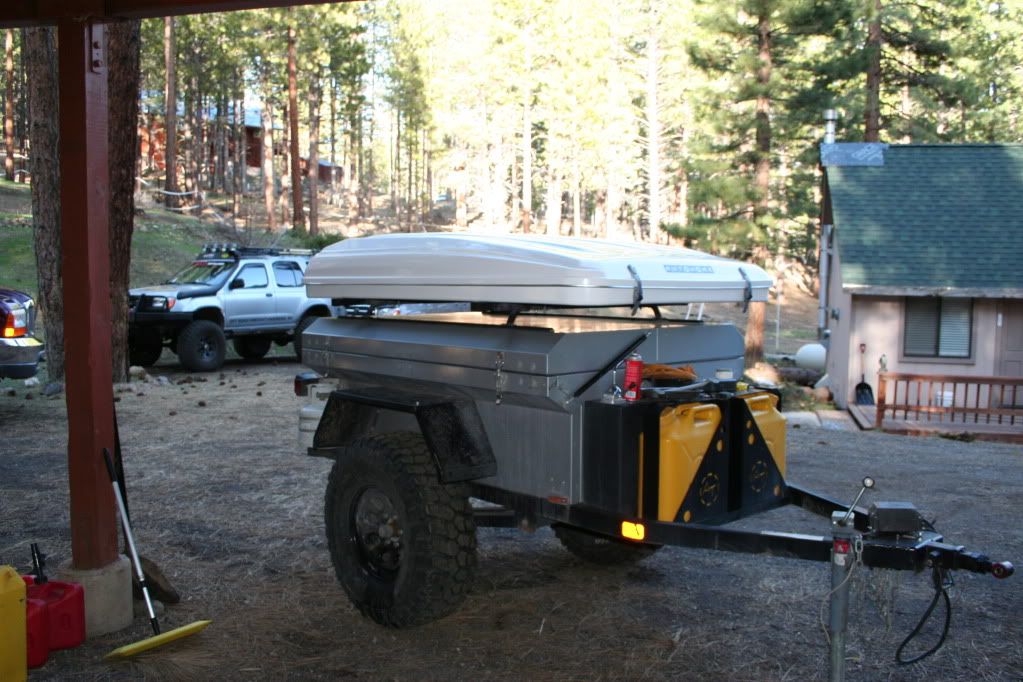
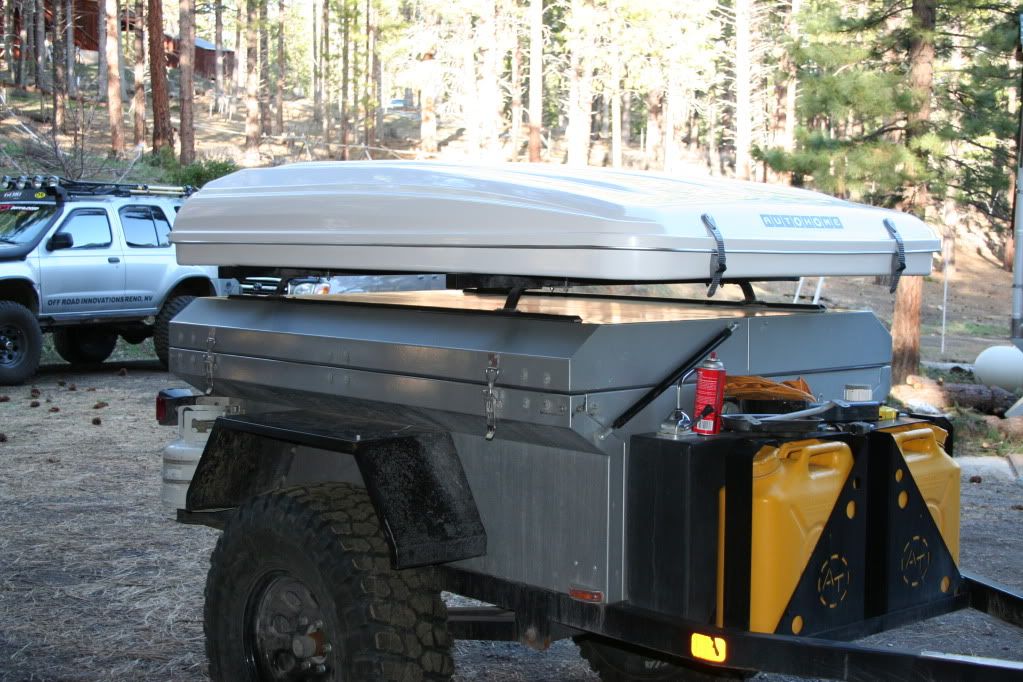
Next mod some of you might have seen in another thread. I love my Overland tent. Nice and big, and comfortable. However I have been wanting one of the Maggiolina's for awhile. Easier to set up, and even more comfortable. Well, after talking with Mike I ordered one. Finally got it yesturday. Only one photo right now, but I will get more in teh next few days.
Thats it for now, but more to come later.
Cheers,
Josh
&
Porthos
:smiley_drive:
Valla, shortend nose box. It came out pretty darn good I think.
Ummm, oops. Might have forgot one small part. :Wow1:
The box is now down at ORI getting a bottom welded in. Once done I can mount it and mount the battery inside.
Next mod some of you might have seen in another thread. I love my Overland tent. Nice and big, and comfortable. However I have been wanting one of the Maggiolina's for awhile. Easier to set up, and even more comfortable. Well, after talking with Mike I ordered one. Finally got it yesturday. Only one photo right now, but I will get more in teh next few days.
Thats it for now, but more to come later.
Cheers,
Josh
&
Porthos
:smiley_drive:
Last edited:
Casper
Adventurer
Updates, finally.
So, as most know I broke a few things in Moab this year. Passenger side radius arm short part and the driver's side radius arm mount. As we know this seems to be the next week link in the Calmini design. From the research I have done, this seems to be more a problem with me pushing the kit past what it was designed for then a problem with their design. When you flex a radius arm setup like this to (or past) it's binding point one of two (or both) things will happen. Since the binding stress is all on the short side of the radius arm, you will either break it, or the mount. Hmmm, go figure.
Anyway, I don't want to have this problem again, so I dropped the X off at the shop. Unfortunately being sponsored has a down side (yea, I know. Who would have thought?) They have been so busy with customers that they didn't have a chance to work on it until now. However, as usual the guys at ORI came through with flying colors. When I dropped it off I talked with Lance, the lead fab guy, told him my problem, and that I didn't want to be fixing this again. He said he had just the perfect idea. So I let him come up with the design, and I have to say I like it.
He kept the main radius arm tubes, but removed the shorter arm. He then got the upper arms from a Rubicon Express long arm kit, made some mounts on my radius arms and welded them up.

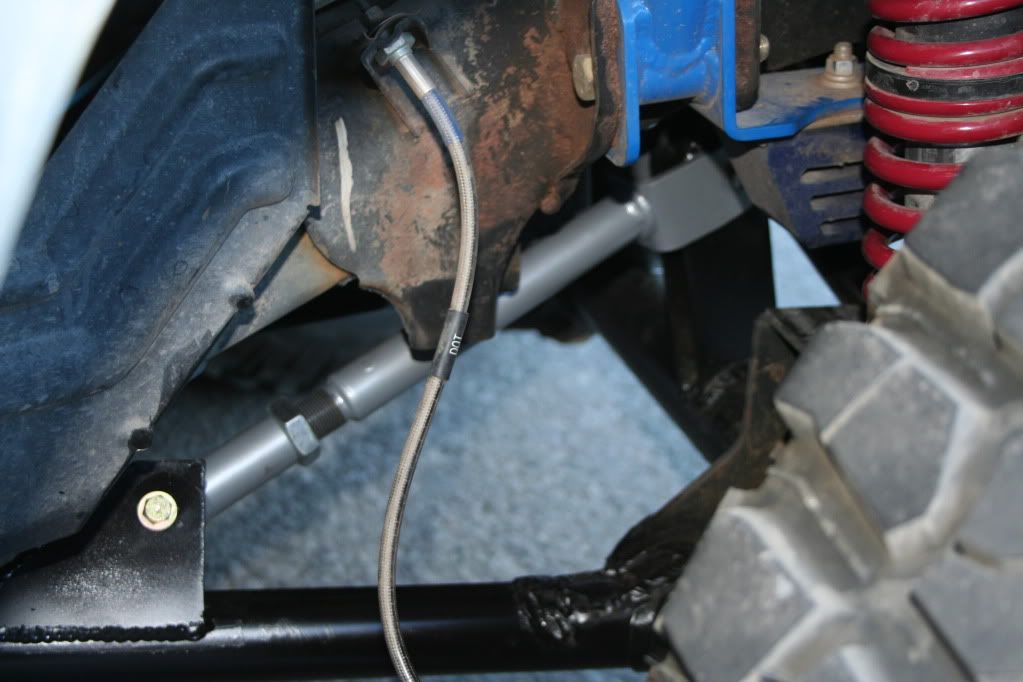
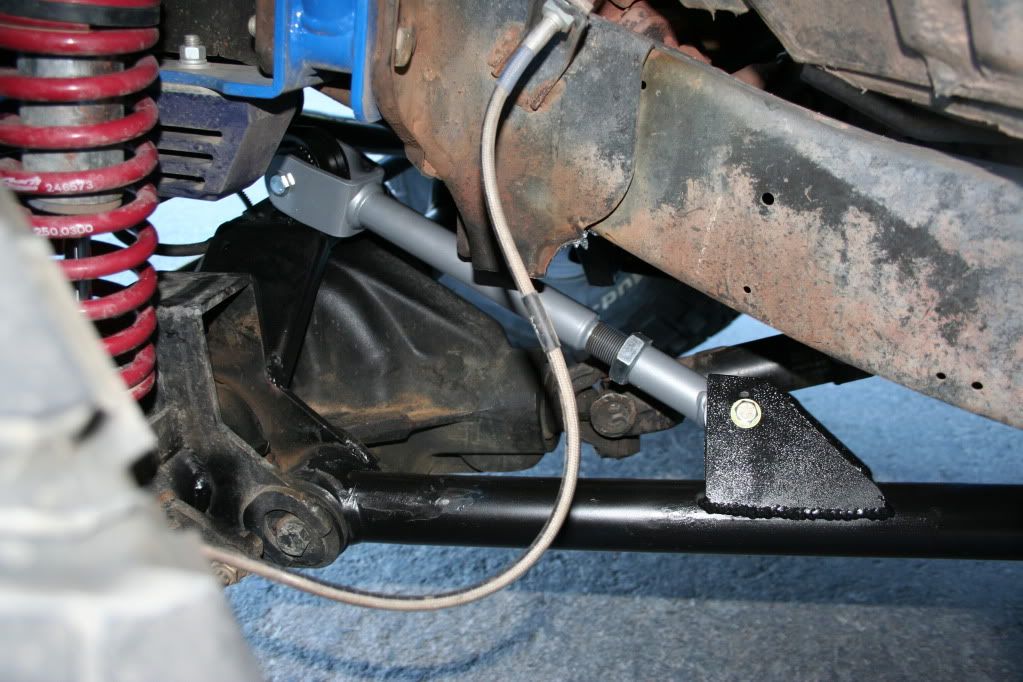
He also ordered the axle mounts for the arms from Rubicon Express. The drivers side is a truss that goes over the pumkin, and the passanger side is a tall straight one to match the hiegth of the drivers side. We also moved the axle forward by about an 1 1/2 inches or so. It seems to flex great, even better than before.
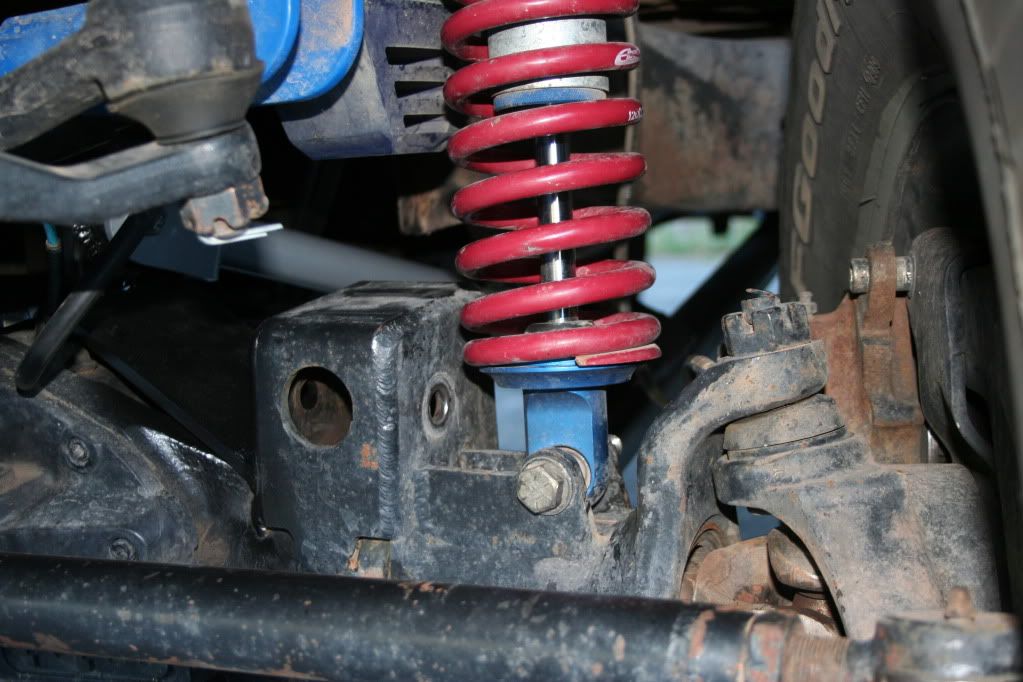
And with the new setup I don't get the binding anymore. Sweeeeeet. The down sides, no more front sway bar. Just ain't enough room. It does however still drive nice, just can't take the round-abouts in town very fast. Perfect timing as well, since the Camp WAMP trip is this weekend.
Cheers,
Josh
&
Porthos
:bannana:
So, as most know I broke a few things in Moab this year. Passenger side radius arm short part and the driver's side radius arm mount. As we know this seems to be the next week link in the Calmini design. From the research I have done, this seems to be more a problem with me pushing the kit past what it was designed for then a problem with their design. When you flex a radius arm setup like this to (or past) it's binding point one of two (or both) things will happen. Since the binding stress is all on the short side of the radius arm, you will either break it, or the mount. Hmmm, go figure.
Anyway, I don't want to have this problem again, so I dropped the X off at the shop. Unfortunately being sponsored has a down side (yea, I know. Who would have thought?) They have been so busy with customers that they didn't have a chance to work on it until now. However, as usual the guys at ORI came through with flying colors. When I dropped it off I talked with Lance, the lead fab guy, told him my problem, and that I didn't want to be fixing this again. He said he had just the perfect idea. So I let him come up with the design, and I have to say I like it.
He kept the main radius arm tubes, but removed the shorter arm. He then got the upper arms from a Rubicon Express long arm kit, made some mounts on my radius arms and welded them up.
He also ordered the axle mounts for the arms from Rubicon Express. The drivers side is a truss that goes over the pumkin, and the passanger side is a tall straight one to match the hiegth of the drivers side. We also moved the axle forward by about an 1 1/2 inches or so. It seems to flex great, even better than before.
And with the new setup I don't get the binding anymore. Sweeeeeet. The down sides, no more front sway bar. Just ain't enough room. It does however still drive nice, just can't take the round-abouts in town very fast. Perfect timing as well, since the Camp WAMP trip is this weekend.
Cheers,
Josh
&
Porthos
:bannana:
Last edited:

Casper
Adventurer
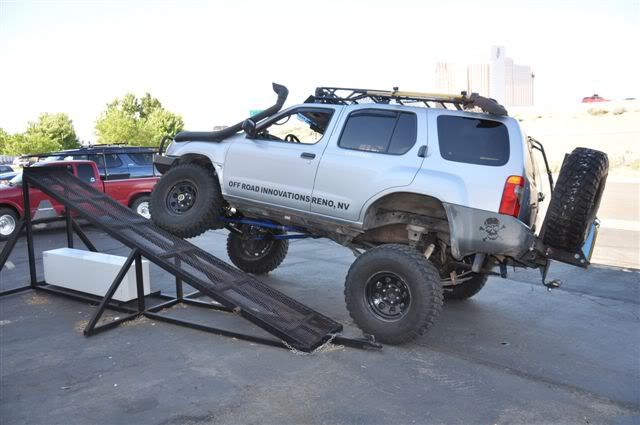
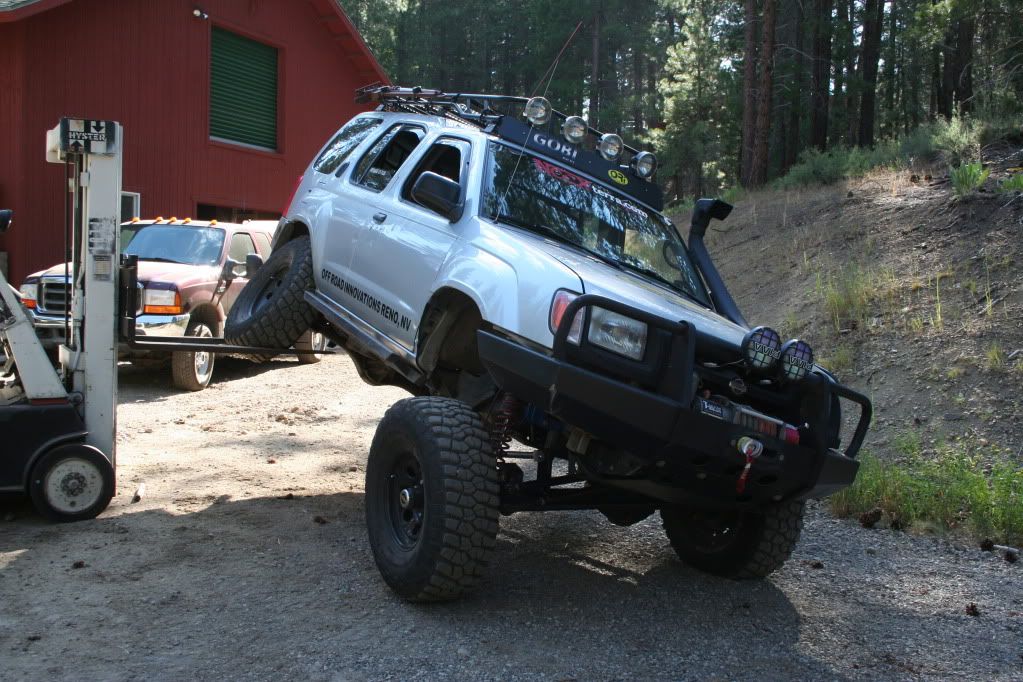
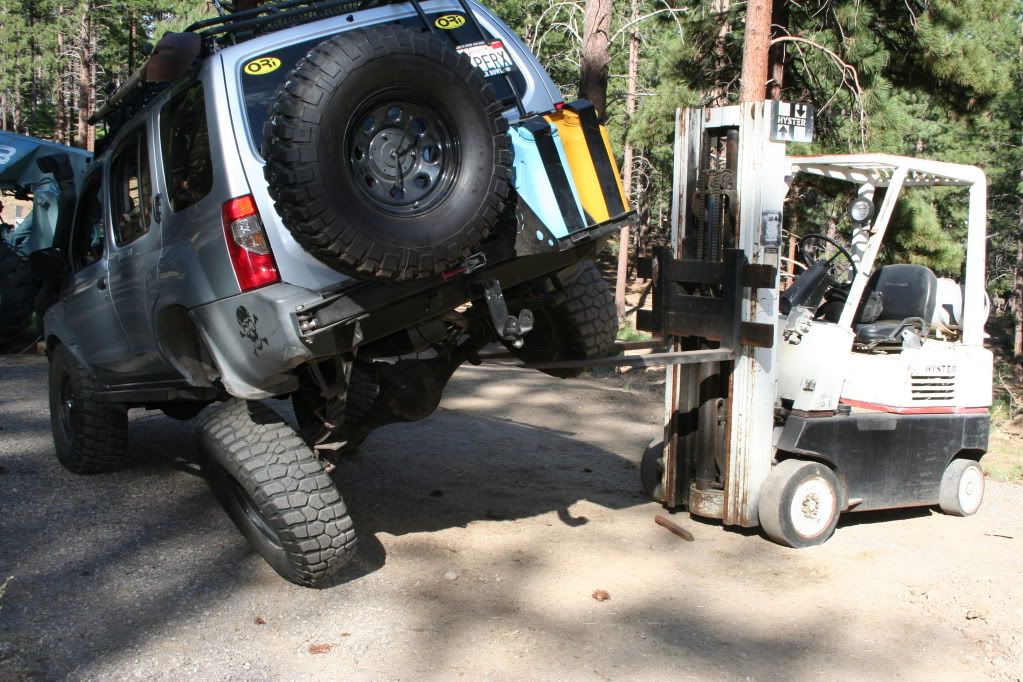
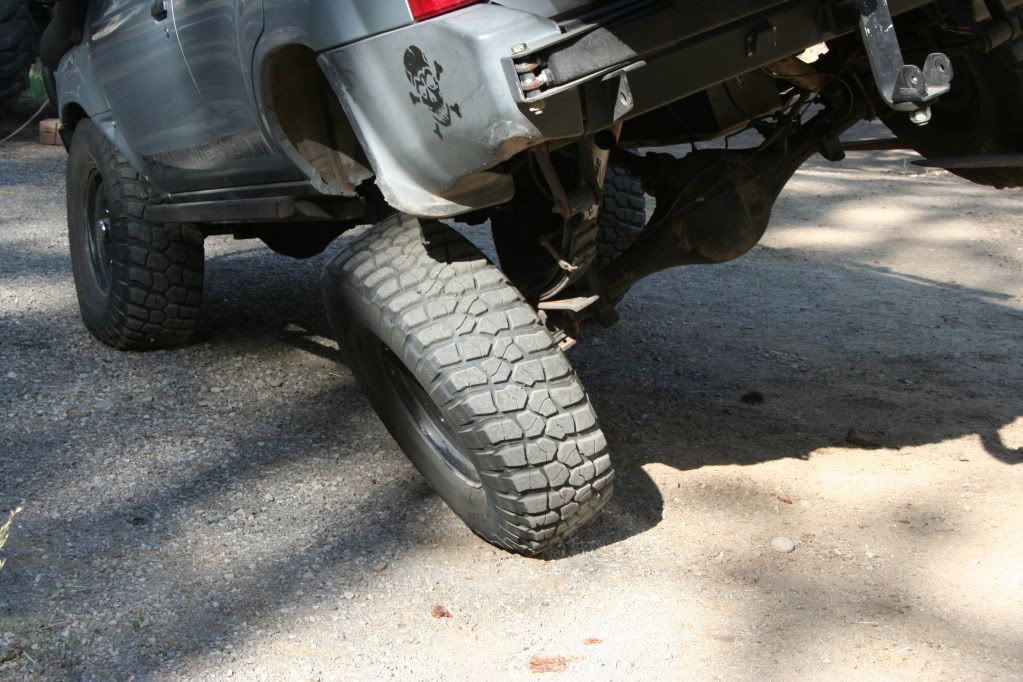
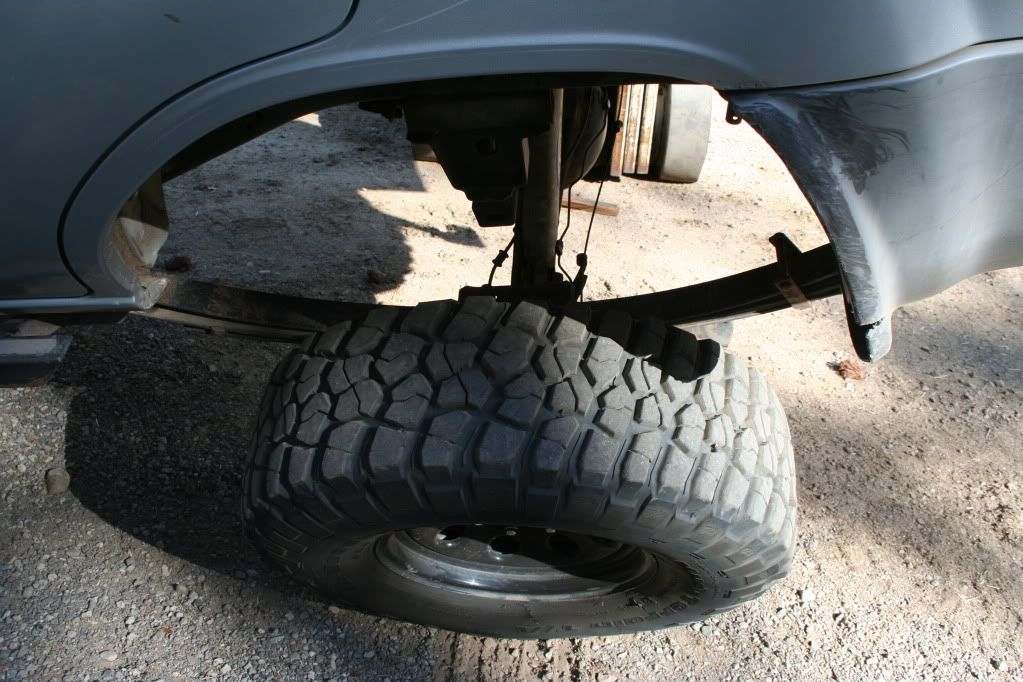
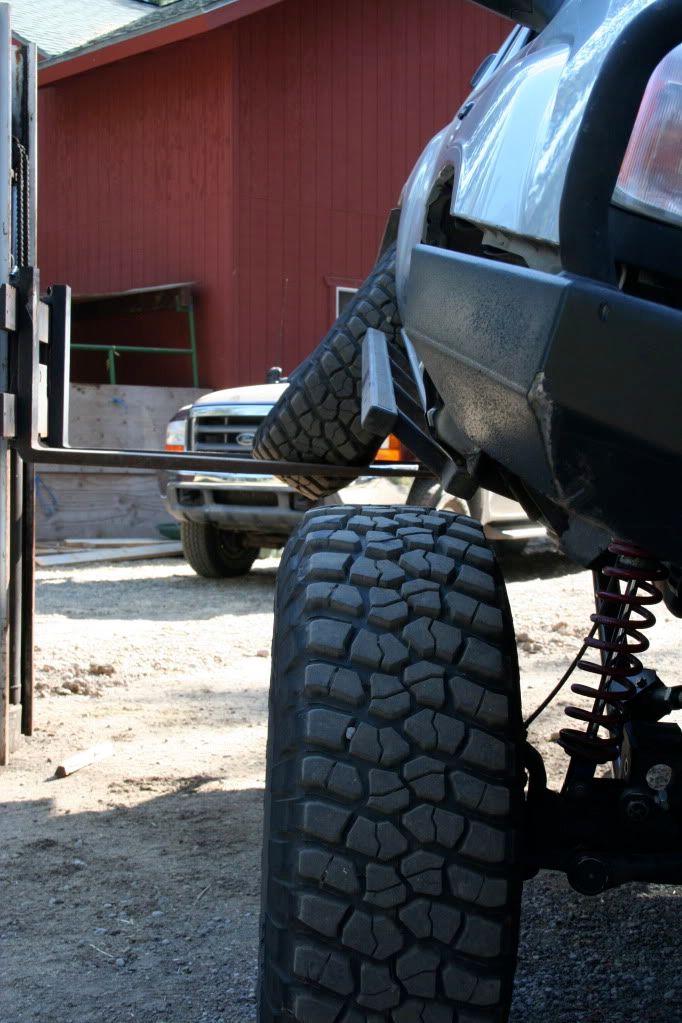
So, the last photos did not do it justice. You can "kinda" see the flex, and "kinda" see the brackets, but that just ain't good enough. So when I got home tonight I decided I owed you more and needed to flex it out better. So here you go.
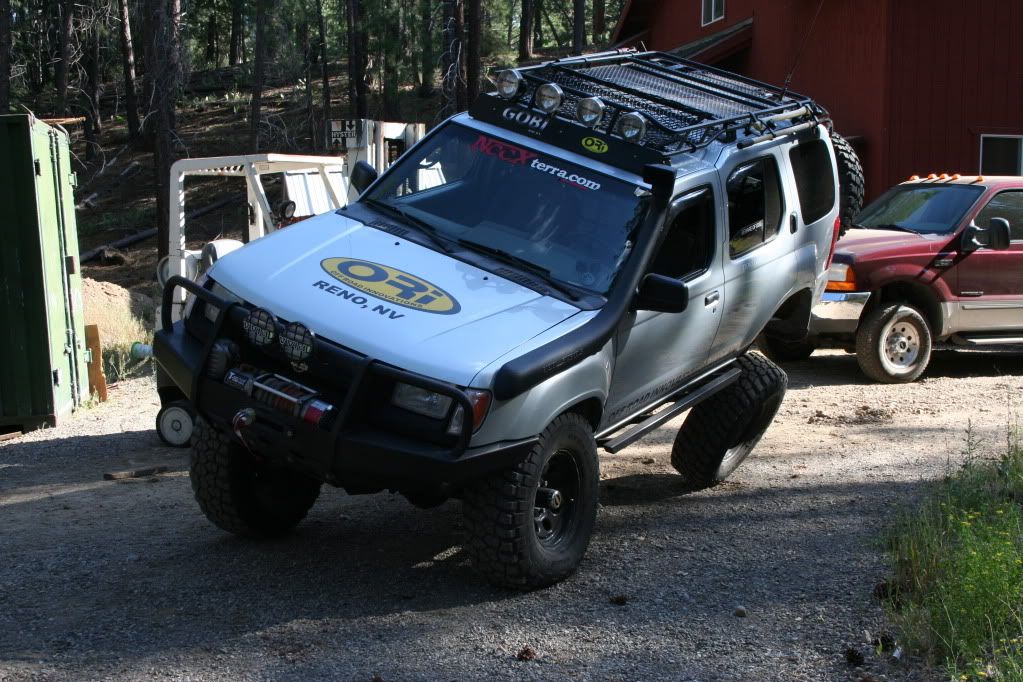
Ok, ok so it's not flexin on rocks and suuch, but hey, you work with what you got right.
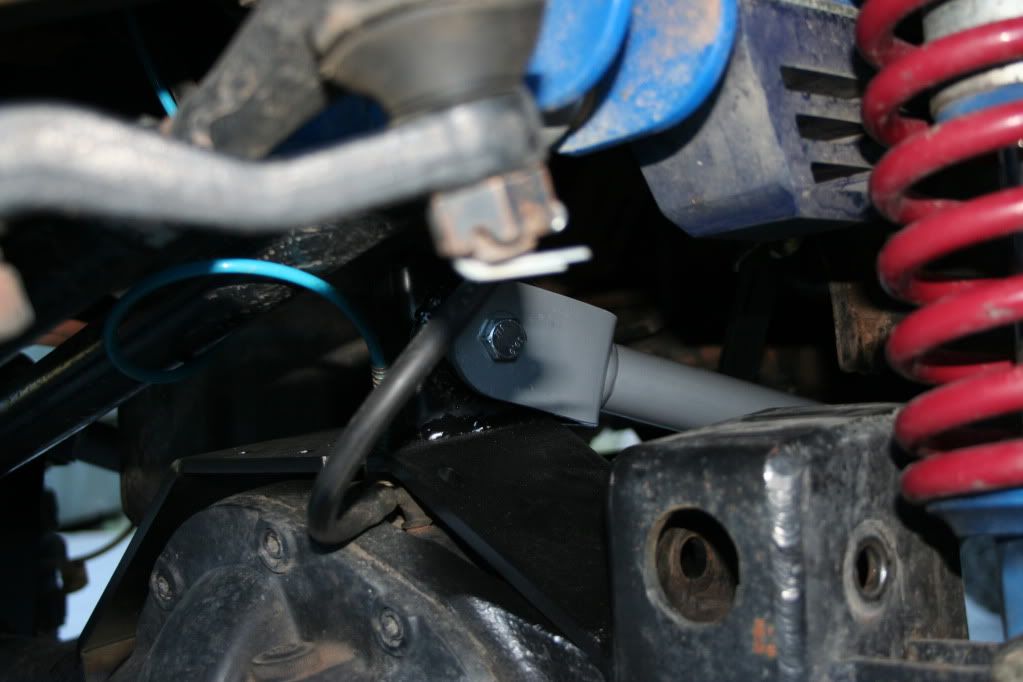
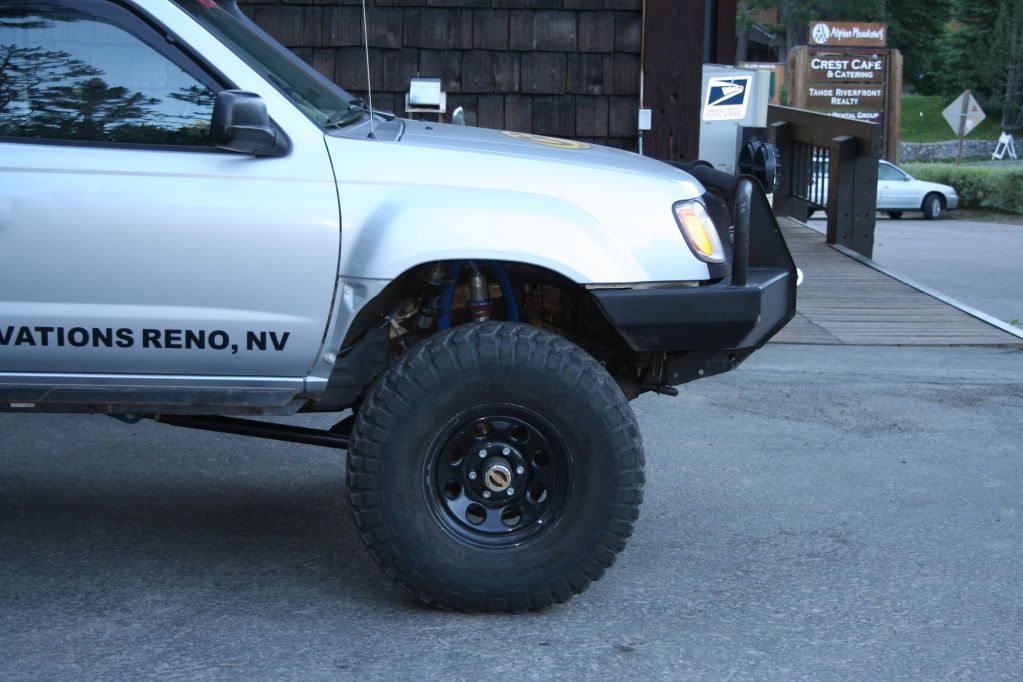
Nice shot of the passenger side setup

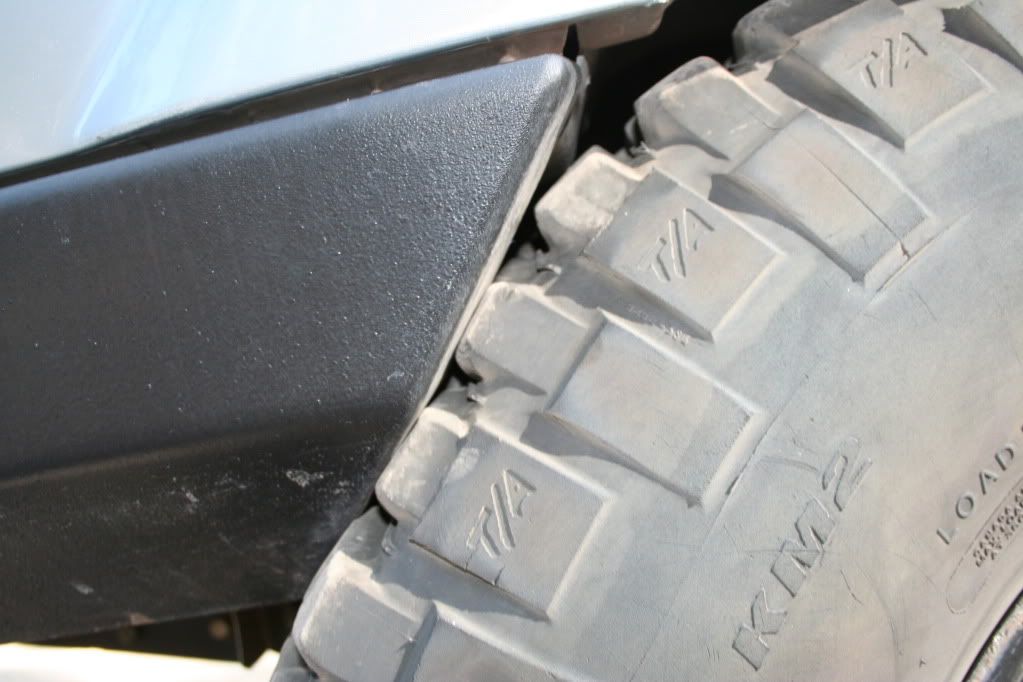
Good clearance behind the drivers side front tire.
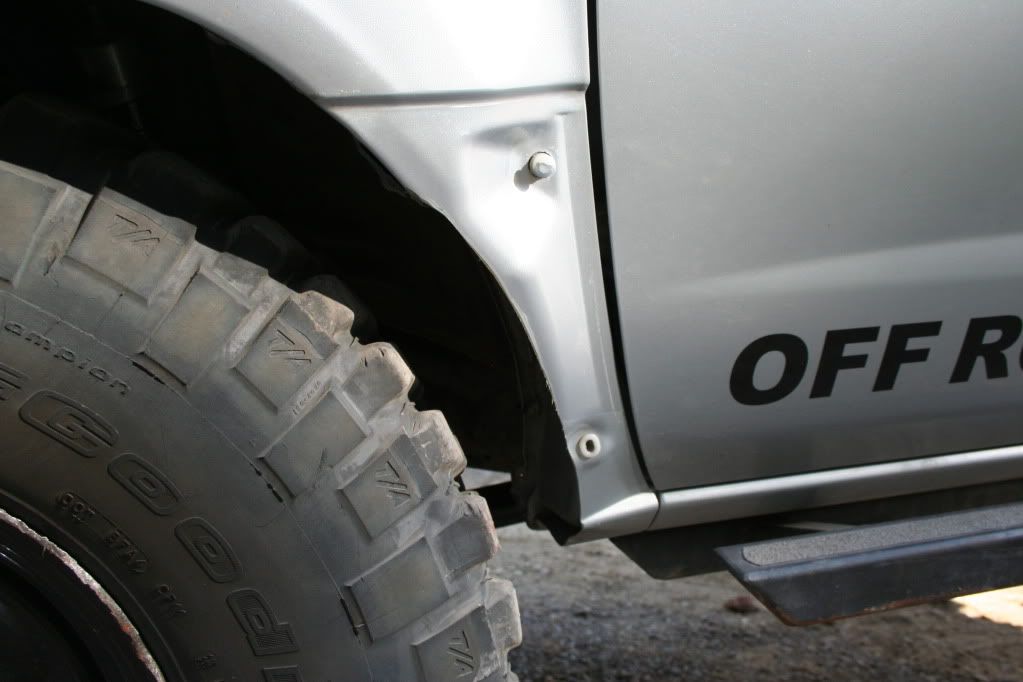
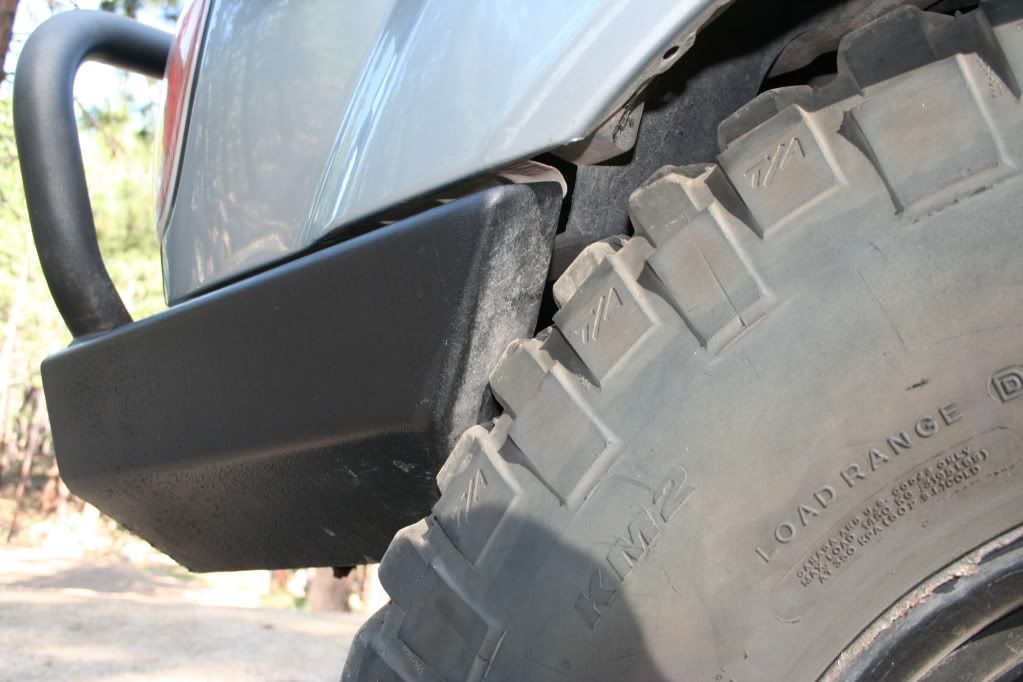
Hmmm, not so good clearance in front on the same tire though. Gonna has to fix that.
Good flex out of the rear.
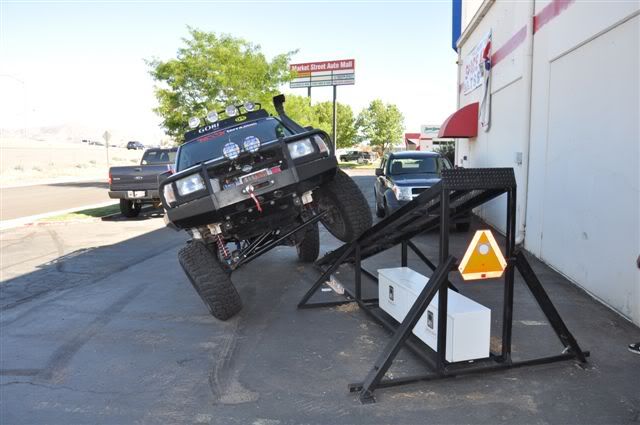
And a few more.
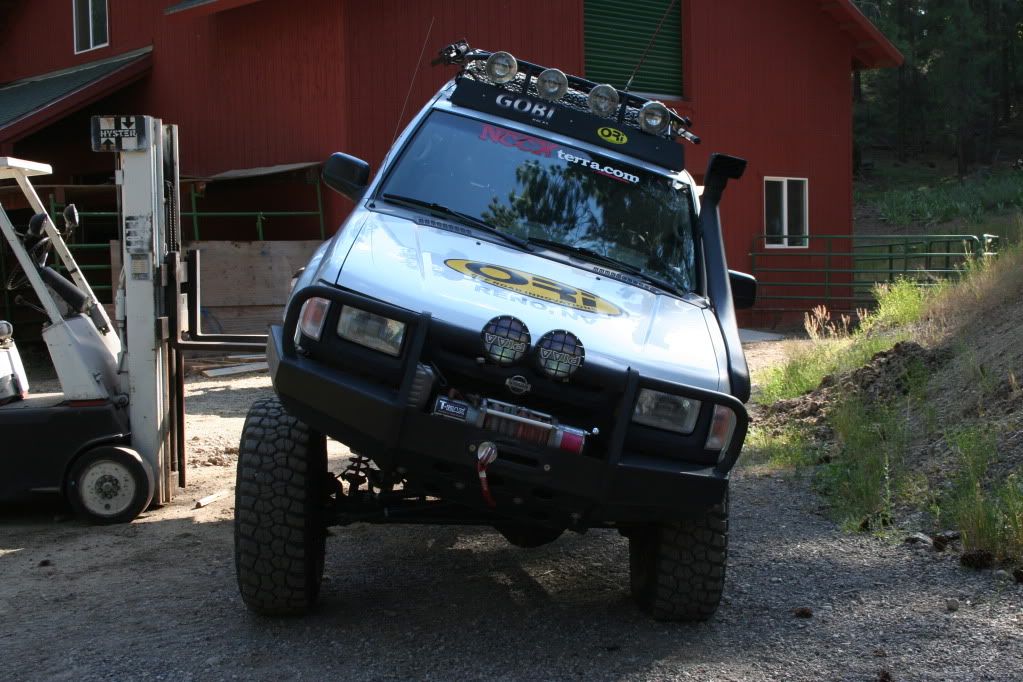

And one of my two favorites.
Lance and the guys at ORI know there **** and did one hell of a job.
More to come.
Josh
&
Porthos
Ok, ok so it's not flexin on rocks and suuch, but hey, you work with what you got right.
Nice shot of the passenger side setup
Good clearance behind the drivers side front tire.
Hmmm, not so good clearance in front on the same tire though. Gonna has to fix that.
Good flex out of the rear.
And a few more.
And one of my two favorites.
Lance and the guys at ORI know there **** and did one hell of a job.
More to come.
Josh
&
Porthos