You are using an out of date browser. It may not display this or other websites correctly.
You should upgrade or use an alternative browser.
You should upgrade or use an alternative browser.
CYi5's '99 4Runner Buildup
- Thread starter CYi5
- Start date

rdgt4r
New member
Hey I thought it was the Oil Pump but according to the manual that is up front.
The oil cooler line runs on the D/side of the block check all of that.
A valve cover gasket failure wont cause this much of a mess.
http://www.ncttora.com/fsm/1996/SIL...2rmsour/2002/024runne/em5vzfe/cylblo/comp.pdf
http://www.ncttora.com/fsm/1996/SIL...2rmsour/2002/024runne/lu5vzfe/oilpum/comp.pdf
http://www.ncttora.com/fsm/1996/SIL...2rmsour/2002/024runne/lu5vzfe/oilcoo/comp.pdf
Try these locations out.
CYi5
Explorer
Thanks Alex, I try to keep it somewhat presentable. It is mall rated afterall.
I snugged up the oil pan bolts and bought the parts for the valve cover gasket job (gaskets, spark plug tube seals, and pcv plug) tonight. Tomorrow i'll tackle tearing it down following these writeups: My situation, another.
I snugged up the oil pan bolts and bought the parts for the valve cover gasket job (gaskets, spark plug tube seals, and pcv plug) tonight. Tomorrow i'll tackle tearing it down following these writeups: My situation, another.
xcmountain80
Expedition Leader
The valve cover portion will not take long, just stick you upper manifold hardware in one ziplock and lower manifold in another. Tape off the intake plenum before you start moving the wires around (the plastic wire housings are brittle and will crack and fall into the intake, but it isn't the end of the world if you do). Pay careful attention to the round areas under the valve cover and sand them scrape them with a razor to make certain you remove the old gasket, use brake cleaner to clean the area and let it dry prior to new gasket and liquid gasket. As for the oil pan that one is way easy! If you have any questions I did mine about 10k ago and the images are fresh in my mind. Ohhh you will likely need new intake gaskets (2) @ $17 @ Toyota they are not reusable per say and for the money you mine as well not chance and air leak later.
Aaron
Aaron
CYi5
Explorer
Passenger side

Valve cover removed, condition after 150,000 miles. The old valve cover gasket is still in place and later came off easily.

Removed and applied new gasket material to semi-circle plugs.

Applied new gasket to the corners where they are known to leak after removing old glob in corner.

New spark plug tube seals hammered in. Remove the old ones by using a flat head screwdriver to pound the metal ring inwards, then punch out from the outside.

New gasket in place. The felpro brand fit very snugly, I had no issues with it falling out.

Put in a new PCV grommet as well while I had the cover off. PCV valve was still operating correctly.
Worth noting is that a major leaking spot on the 3.4's is the housing plug to the rear of the camshaft. It is covered by the rear plate. To access this you must unbolt (2) the rear plate from the back of the engine as well as unbolt the last bracket holding the plate in. From there, just grab the plate and wiggle it out. I put gasket material all around this and then bolted it down tightly. Big thanks to YellowTT (yotatech) for bringing this to light, it will definitely need to be done on the opposite side when my intake plenum gaskets arrive. (Will update with pics of those components at that time.)

Valve cover removed, condition after 150,000 miles. The old valve cover gasket is still in place and later came off easily.
Removed and applied new gasket material to semi-circle plugs.
Applied new gasket to the corners where they are known to leak after removing old glob in corner.
New spark plug tube seals hammered in. Remove the old ones by using a flat head screwdriver to pound the metal ring inwards, then punch out from the outside.
New gasket in place. The felpro brand fit very snugly, I had no issues with it falling out.
Put in a new PCV grommet as well while I had the cover off. PCV valve was still operating correctly.
Worth noting is that a major leaking spot on the 3.4's is the housing plug to the rear of the camshaft. It is covered by the rear plate. To access this you must unbolt (2) the rear plate from the back of the engine as well as unbolt the last bracket holding the plate in. From there, just grab the plate and wiggle it out. I put gasket material all around this and then bolted it down tightly. Big thanks to YellowTT (yotatech) for bringing this to light, it will definitely need to be done on the opposite side when my intake plenum gaskets arrive. (Will update with pics of those components at that time.)
xcmountain80
Expedition Leader
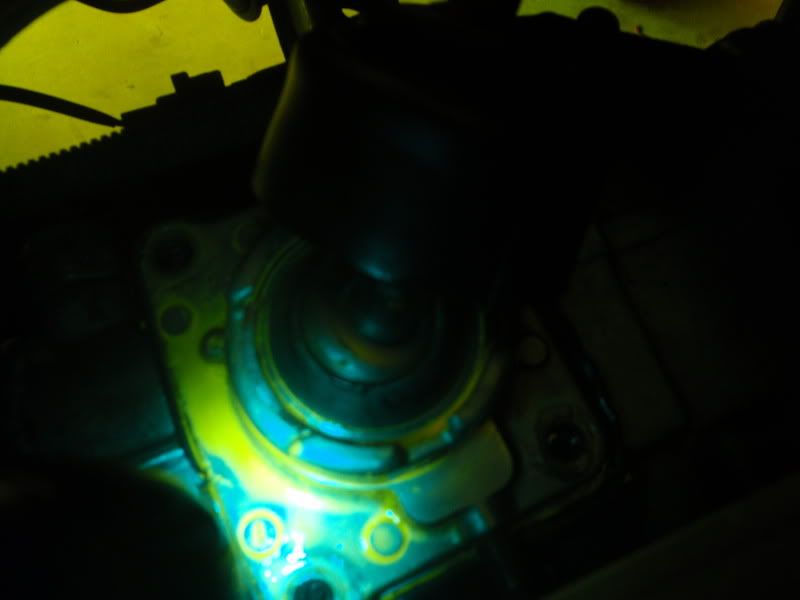
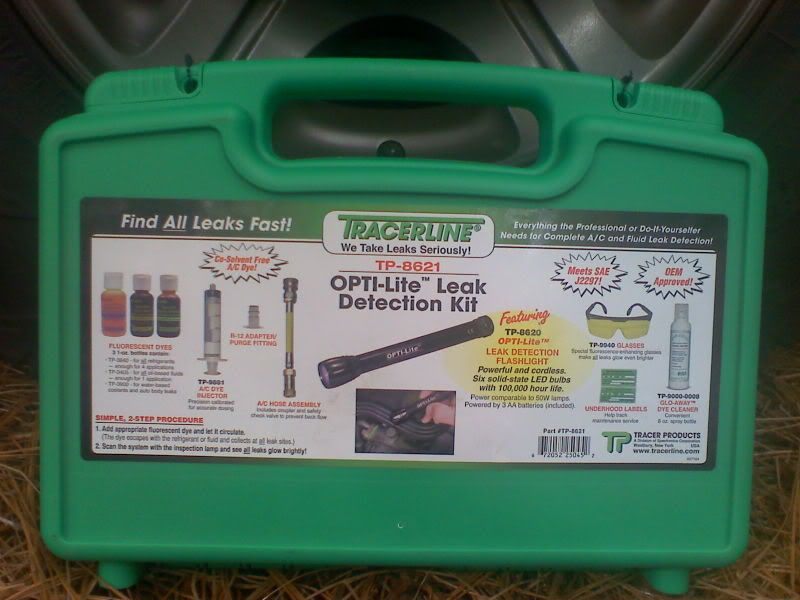
Naw just look at it like preventative maint. Eventually you will leak there. If all elses fails and my new personal fav. way to source a leak use the prof version of leak detection. kit. This sourced my ever annoying t-case leak in 1 day. I had been searching for it for 2 years. Ended up being a shift seat (sourced from MarlinCrawler "Blue seat") and two razor washers that were replaced with RTV.
Aaron
Aaron
97kurt
Adventurer
Aaron
I just bought a similar kit yesterday. Trying to track down a small leak on mine thats been bugging me for 2 years.
CYi5
Explorer
You're wasting no time fixing that leak
The valve cover gaskets aren't even the fast leak..That one is underneath somewhere...I'm hoping it's the rear of the oil pan gasket..Otherwise i'm tempted to throw a 5 speed behind my 3.4 if I have to change the rear main seal...
red87
Adventurer
The valve cover gaskets aren't even the fast leak..That one is underneath somewhere...I'm hoping it's the rear of the oil pan gasket..Otherwise i'm tempted to throw a 5 speed behind my 3.4 if I have to change the rear main seal...
But your fancy AWD...
xcmountain80
Expedition Leader
But your fancy AWD...
Theres no AWD in these things. Thats a early FFZJ80.
red87
Adventurer
Theres no AWD in these things. Thats a early FFZJ80.
The Limited 4Runners of the same era as CYi5's do have a center diff. They are the only ones that do.
Forum statistics
Members online
- tkiesling
- Rebuilder
- tmrgv
- lemontero
- svmaple
- MatttheHatt
- Todd n Natalie
- Greydog
- mmth_ski_bum
- jmt82331
- Retired Buckeye
- vaprpig
- alanymarce
- kmg65
- clemnation
- troopy37
- Skinhyfish
- yota man
- heinphoto
- Rd929
- Groverland
- dizzydom
- asafk
- NatersXJ6
- kmh
- ahenry00
- driller
- nakarsten
- Kleavers
- sdmtber
- KruegerB
- YukonMontanaTannerTrapper
- hdas
- Fadeagray
- Tysc
- Meadowlark
- DCH109
- Copperhead14
- brimstone_
- osukj04
- mep1811
Total: 467 (members: 44, guests: 423)