Expedition TrailBlazer Project

cronk

Observer
It'd take a little fab work, but you could replace the factory rails with some square tubing welded up to mount and resemble your factory rails. This would keep the OEM look and still be low profile, just want to make it a bit longer to accommodate your basket mounts. You could put some rubber snubbers under the front to protect your pant in case it flexes under load. This way you can use the factory mounts and still have some strength.
 

JamesDowning

Explorer
Good thought Cronk. I had a similar suggestion given on another forum. My worry about adding more channel is being able to curve it properly to the roof curve. Also, if I add more channel, I'll still run into the same challenge of securing it to the roof itself. Not sure I would want to weld channel directly to the roof top.

Since this is the 'documentation' thread, I replaced the fuel pump as a maintenance item the other day. Dropping a tank is a pain, but the peace of mind is worth it I think.

fuel-pump-1.jpg


fuel-pump-2.jpg
 
Last edited:

JamesDowning

Explorer
In the picture above, that's pure rust. On top of the rust there was about 1/2" of mud that I cleaned off with a bucket of water.
 

Tahoe Diesel

Observer
Maybe you could slap some Gorilla duct tape over that install, might hold off the mud and rust a while longer - Just a thought.
 

JamesDowning

Explorer
Possibly, instead I just smeared some oil on it, hoping that will slightly deter the rust. At this point it's impossible to reach anyways as it's sandwiched against the body.
 

RU55ELL

Explorer
Heck I would have connected everything and then spray with rubber undercoating. The oil should be better than nothing though.
 

JamesDowning

Explorer
On Board ... Water?

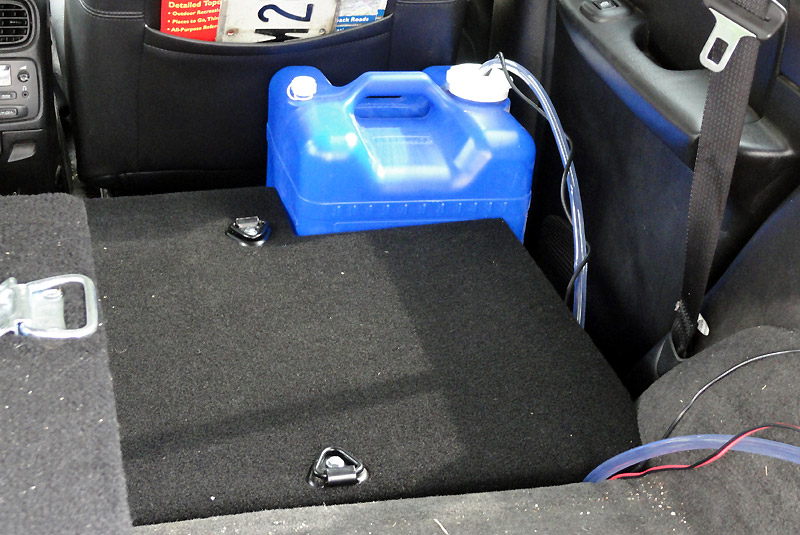
As I pictured before, I built in a spot for the water tank near the front of the cargo area, behind the passenger seat. I still need to create a tie-down for it... it's in the works. The water tank has a drop in pump.
1.jpg


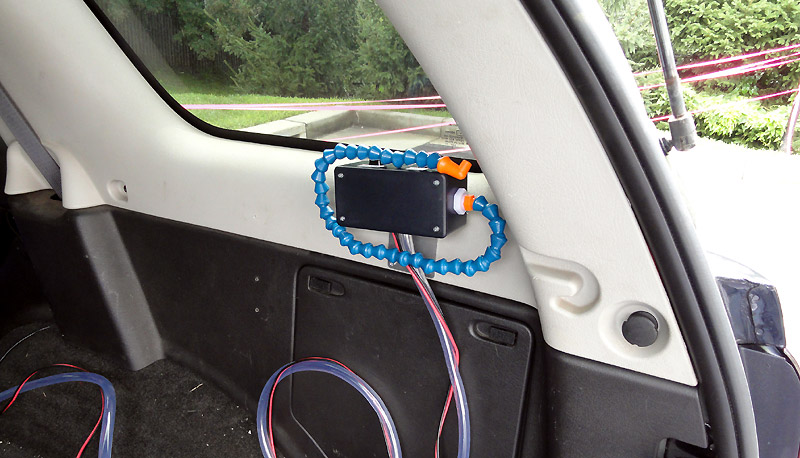
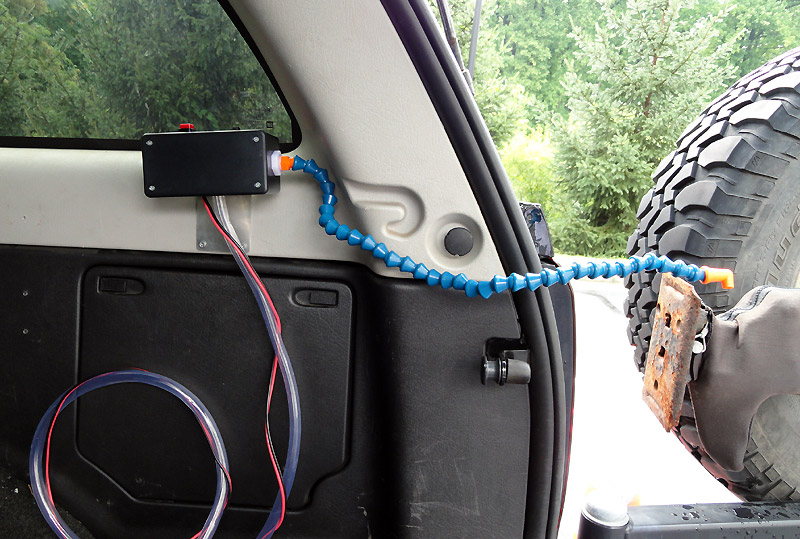
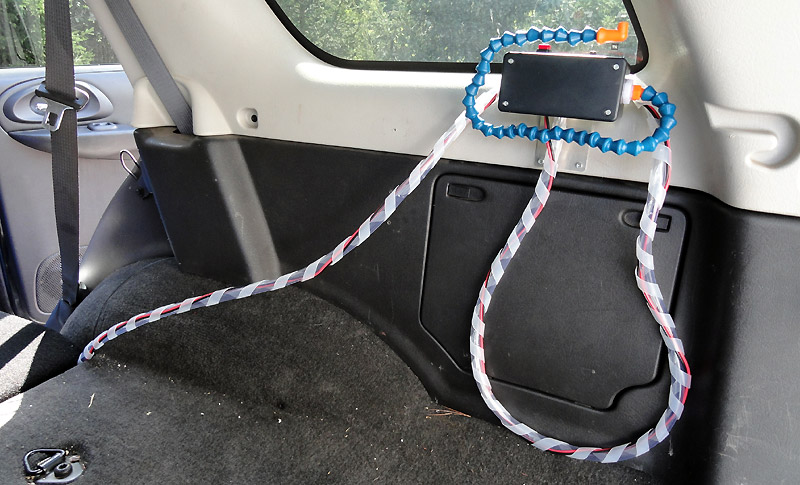
The 'control' box mounts back near the tailgate.
2.jpg


The flexible spout can reach out the back of the truck.
3.jpg


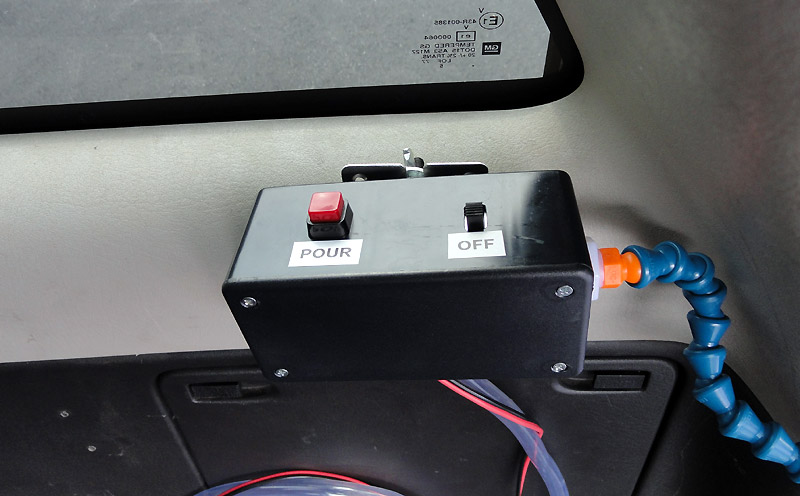
Closeup of the controls. At right is the safety, to prevent accidentally turning on the pump if cargo hits the 'pour' trigger, on left.
4.jpg


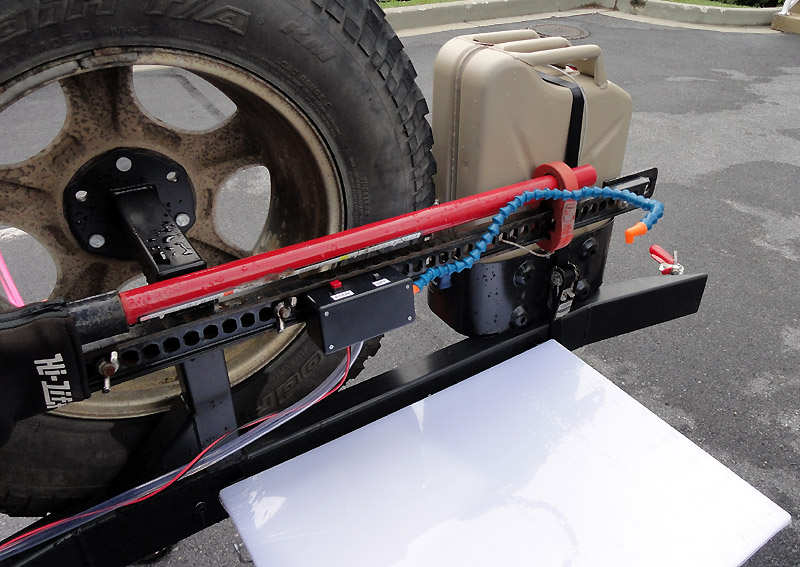
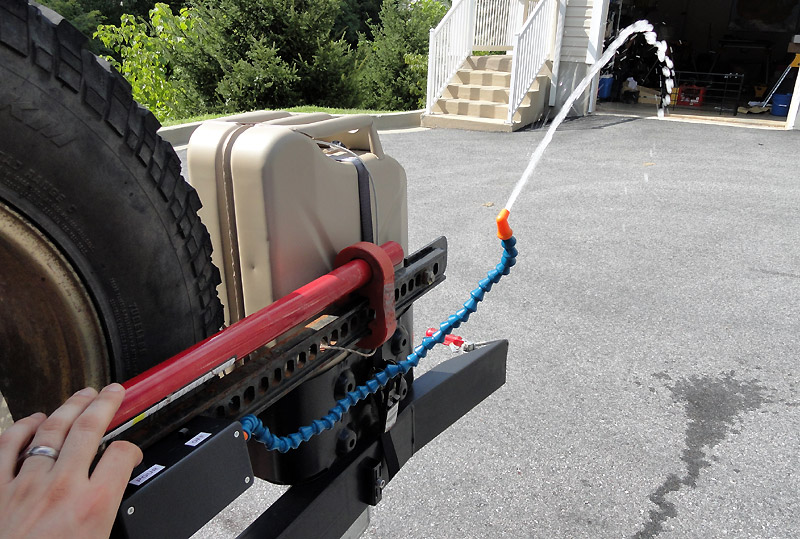
The control box also remote mounts onto the hilift on the swingout, so we can easily pour water at the "kitchen counter". Oh yeah, got some cutting board material to make a better counter than I had before.
5.jpg


I still need to clean up the wires a bit... I think I'll just tape it to the hose. I also need to get two more electrical connectors to complete the wiring. I'll probably post up more pictures when I finally get it all tucked in properly.
 

JamesDowning

Explorer
It's ALIVE!! My only wish is that there was a low setting, that pump is more powerful than I expected.
6.jpg


Also cleaned up the hose and wires with a wire wrap... vast improvement I think.
7.jpg
 

AA1PR

Disabled Explorer
I spent an hour reading this informative thread on your Trail Blazer, very nice build in all aspects. Time well spent!

I guess this is the route I will have to go with my Yukon as most items are not readily available either

I am new to this forum, after being a hiker with ultra light gear I have to wonder if I will go gear crazy :)
 

4x4x4doors

Explorer
To reduce the volume of flow, could you swtch to a smaller diameter output hose?
I was working through some type of recirc like a modern fuel pump when it hit me that there was a simpler way...

~Keith
 

JamesDowning

Explorer
If I revisit it after my big upcoming trip, I'll probably create a hi/lo switch, with the lo side putting a resistor in series with the pump. I have enough room in the housing for that, it will just be a matter of finding the right resistor.
 

Forum statistics

Threads
186,356
Messages
2,884,886
Members
226,303
Latest member
guapstyle
Top