You are using an out of date browser. It may not display this or other websites correctly.
You should upgrade or use an alternative browser.
You should upgrade or use an alternative browser.
Expedition TrailBlazer Project
- Thread starter JamesDowning
- Start date
onelow1ton
Adventurer
The tb and tent are looking real good man
JamesDowning
Explorer
Thanks for the suggestions Pedro. And thanks for the words of encouragement guys!
---------------------------
300 yards of thread later... the fabric portion of the tent is done:
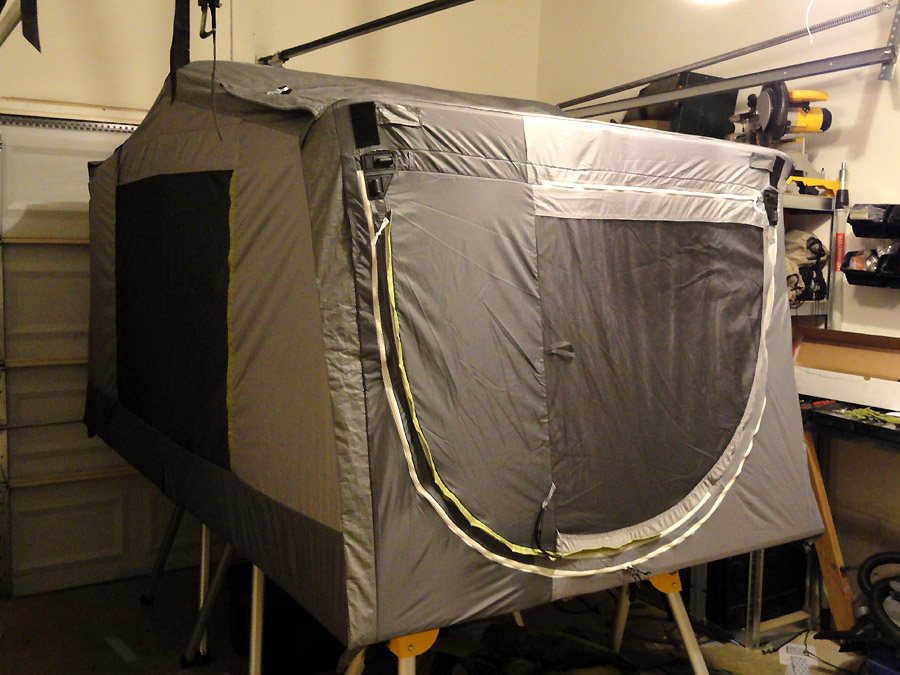

Still a lot to do, but it's looking much more like a tent now.
I need to get a strong friend to come over and help me mount this thing to the truck again.
---------------------------
300 yards of thread later... the fabric portion of the tent is done:
Still a lot to do, but it's looking much more like a tent now.
I need to get a strong friend to come over and help me mount this thing to the truck again.
JamesDowning
Explorer
So close to being done!
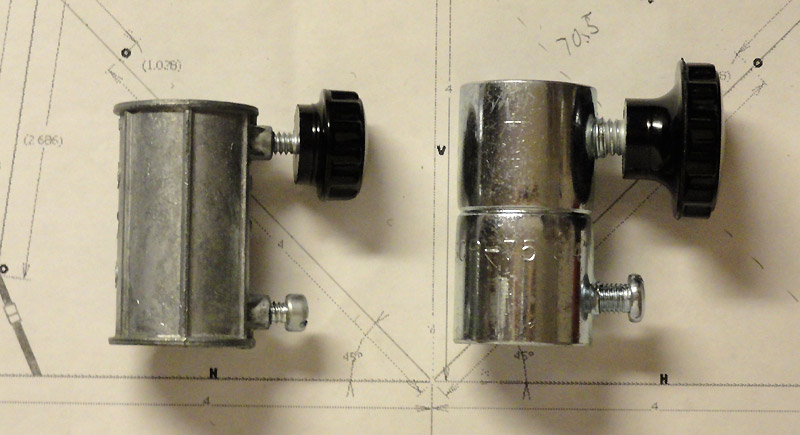
I got worried about the long term durability of the old cast zinc extension hardware (left) so I replaced it with a steel one (right) with a much larger thread and knob.
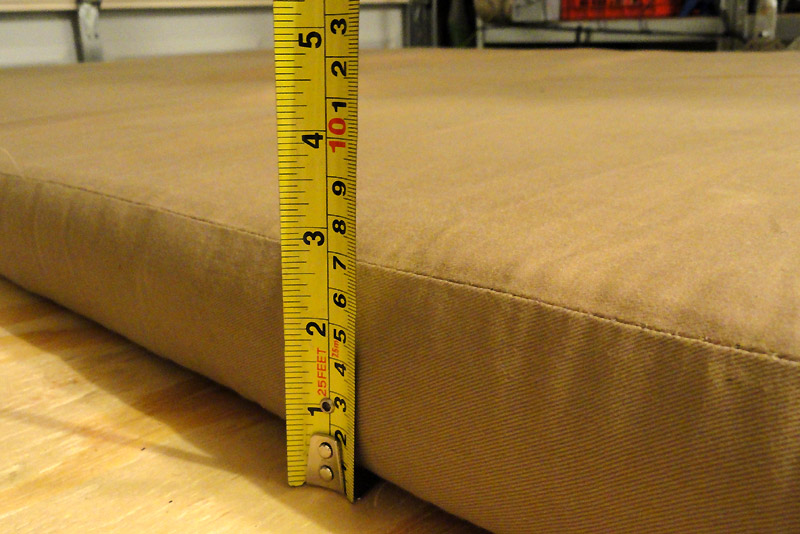
Foam mattress mounted. I used Velcro to attempt to keep it from moving around. (Don't mind my extremely curvy thread line... running the mattress through the sewing machine proved harder than I thought.)
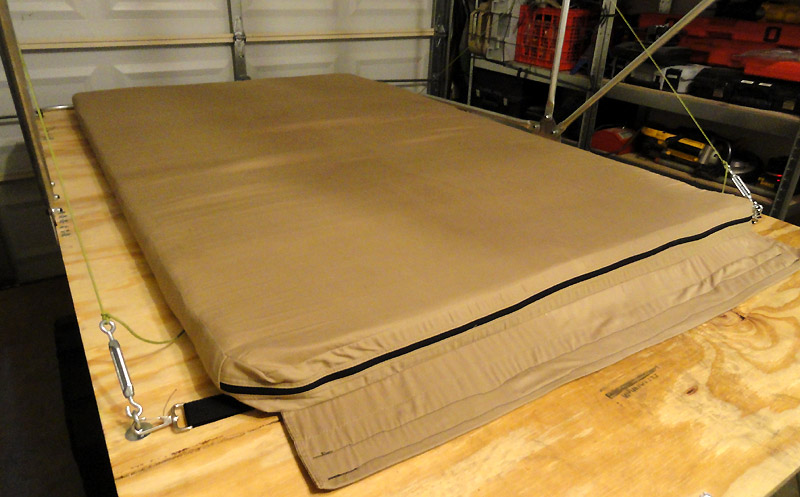
About 3" thick in the middle... 2.5 or so where the cover compresses it at the edges. The cover is a polyester/cotton blend so it doesn't seem to make funny noises against synthetic sleeping bag material (seemed to be a concern in the latest OJ RTT review). The mattress seems quite comfortable.
Some of the strap details. 1' polyester webbing, superloc adjusters, and steel footman loops.
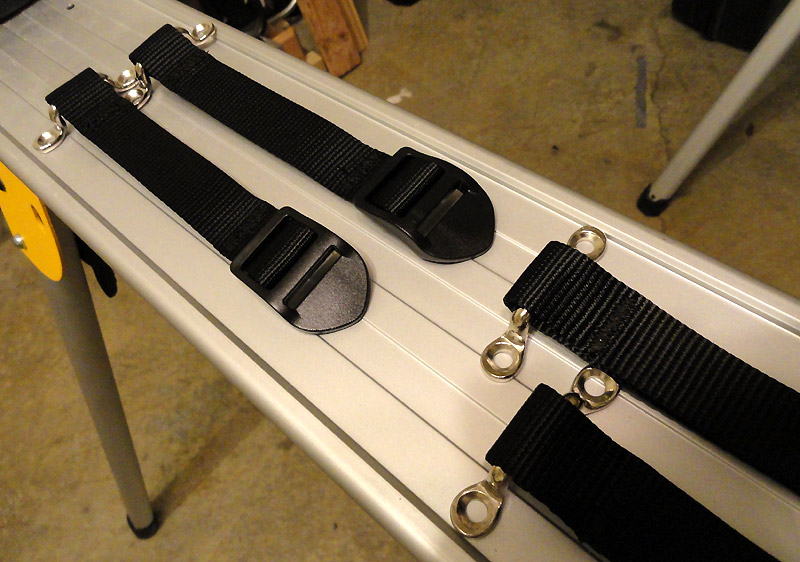
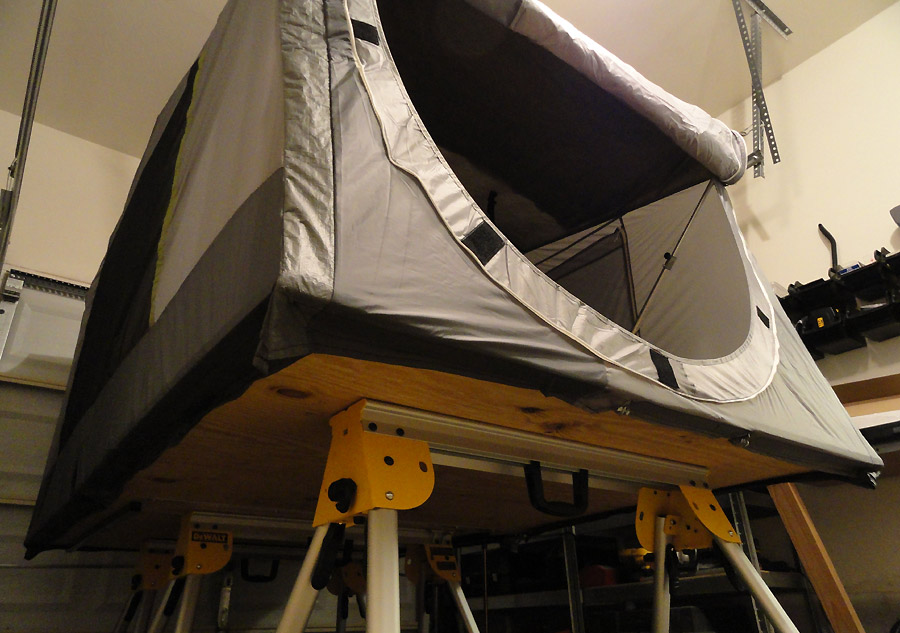
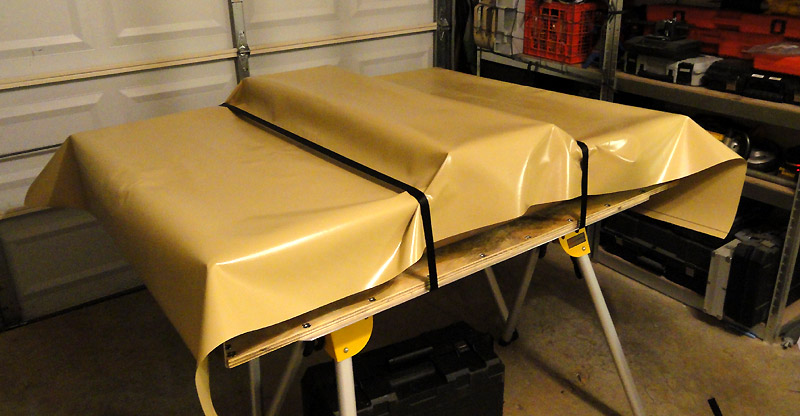
The first set of straps will help compress the bedding. Below shows how even a pillow can be left in the tent when it folds up.
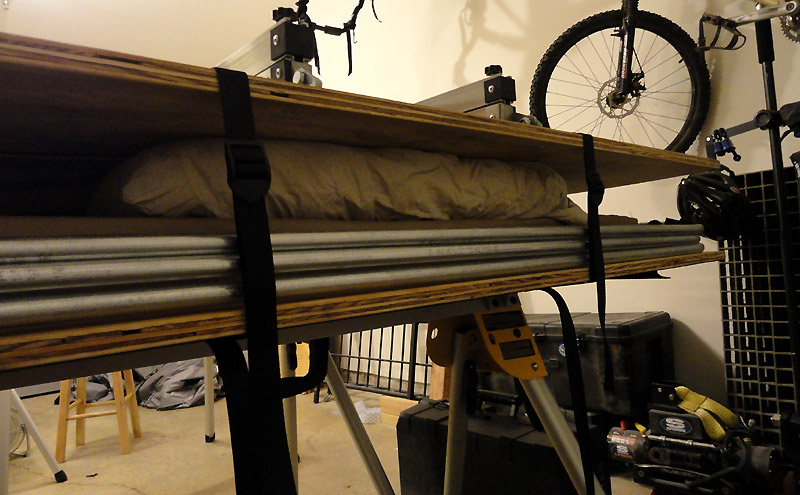
Then two long straps will go over the waterproof cover to further cinch things down, and keep the cover from billowing.
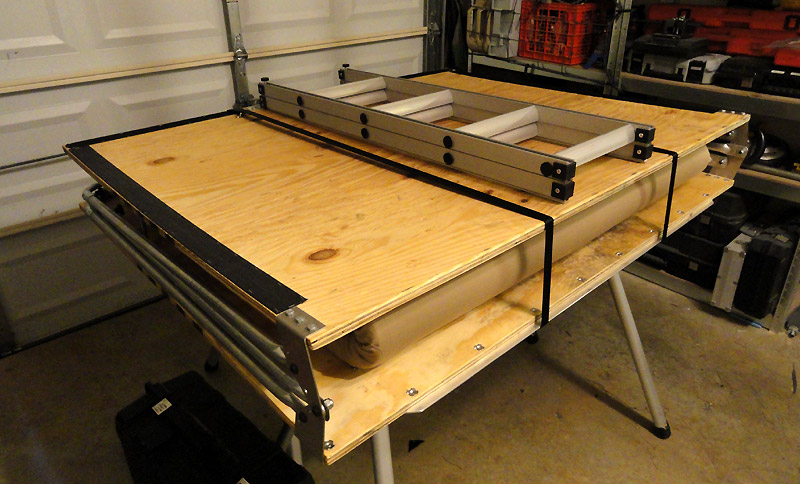
Here's my current stopping point... I didn't order enough of the cover fabric, so I'm playing the waiting game now...
I got worried about the long term durability of the old cast zinc extension hardware (left) so I replaced it with a steel one (right) with a much larger thread and knob.
Foam mattress mounted. I used Velcro to attempt to keep it from moving around. (Don't mind my extremely curvy thread line... running the mattress through the sewing machine proved harder than I thought.)
About 3" thick in the middle... 2.5 or so where the cover compresses it at the edges. The cover is a polyester/cotton blend so it doesn't seem to make funny noises against synthetic sleeping bag material (seemed to be a concern in the latest OJ RTT review). The mattress seems quite comfortable.
Some of the strap details. 1' polyester webbing, superloc adjusters, and steel footman loops.
The first set of straps will help compress the bedding. Below shows how even a pillow can be left in the tent when it folds up.
Then two long straps will go over the waterproof cover to further cinch things down, and keep the cover from billowing.
Here's my current stopping point... I didn't order enough of the cover fabric, so I'm playing the waiting game now...
BorntoVenture
Adventurer
Good call on replacing the cast fittings, they would have broken quite quickly. I was an Industrial Electrician for a little over 10 years and probably saw a few million cast fittings break under normal conditions. I never used them and still advise anyone that asks to pay the extra $ for steel fittings.
Back on topic the RTT is looking great! I'm definitely taking a ton of notes!
Back on topic the RTT is looking great! I'm definitely taking a ton of notes!
RocKrawler
Supporting Sponsor
Dont know if I missed it but what sewing machine.are you using, and is it a regular or commercial upholstery style?
Sent from my HTC Thunderbolt.
Sent from my HTC Thunderbolt.
Wow! What a fantastic build. By far, the nicest Trailblazer I've seen. You have certainly taken a mediocre vehicle and transformed it into a very capable one. I may apply some of what I've seen to my Colorado as I work on it in the future.
I only have one concern about your rig that I didn't already see mentioned elsewhere. On your air system, do you have a way to drain accumulated moisture from your bumper/receiver? Most air receivers have a drain valve at the bottom for getting rid of moisture, but I didn't see any such thing mentioned in your writeup.
I only have one concern about your rig that I didn't already see mentioned elsewhere. On your air system, do you have a way to drain accumulated moisture from your bumper/receiver? Most air receivers have a drain valve at the bottom for getting rid of moisture, but I didn't see any such thing mentioned in your writeup.
JamesDowning
Explorer
They are Destaco pull-action clamps (http://www.destaco.com/products.asp...ts=Clamps&Category_1=Pull+Action+Latch+Clamps). Pretty standard in many industries. Look around until you find the configuration you're looking for, lots of industry retailers carry Destaco so it shouldn't be too hard to find. Plus, they make toggle clamps in just about every style. Check Grainger.com.Do you happen to have a link to where you got the bumper safety latch from? For security I want to mount one on my swing away.
I haven't used it in a while - I'm a mirror user too from my days of driving an ambulance. However I've found it really handy when needing to get the tailgate close to something (tree / car). I'll be reconfiguring it soon because I'll be cutting up my bajarack.I really hate backup camera's (I guess it comes from so many years driving semi's and backing with mirror's only), but I really like your idea especially for trail use.
I forget exactly. I think it's a pretty basic consumer grade Kennmore. It has a few stitch settings on a big dial, but nothing really special.Dont know if I missed it but what sewing machine.are you using, and is it a regular or commercial upholstery style?
I only have one concern about your rig that I didn't already see mentioned elsewhere. On your air system, do you have a way to drain accumulated moisture from your bumper/receiver? Most air receivers have a drain valve at the bottom for getting rid of moisture, but I didn't see any such thing mentioned in your writeup.
Thanks for the compliments. There is a drain bung welded into the bottom of the bumper tank, directly below the receiver. There's a flush stainless steel allen-key plug in there so it can't get sheared off by a rock or in a fender bender.
Thanks for the compliments. There is a drain bung welded into the bottom of the bumper tank, directly below the receiver. There's a flush stainless steel allen-key plug in there so it can't get sheared off by a rock or in a fender bender.
Great idea. I figured with all the thought you put into everything else, you probably didn't overlook the drain plug either, but since I didn't see anything about it, I thought I'd ask. Just don't lose your allen wrench!
JamesDowning
Explorer
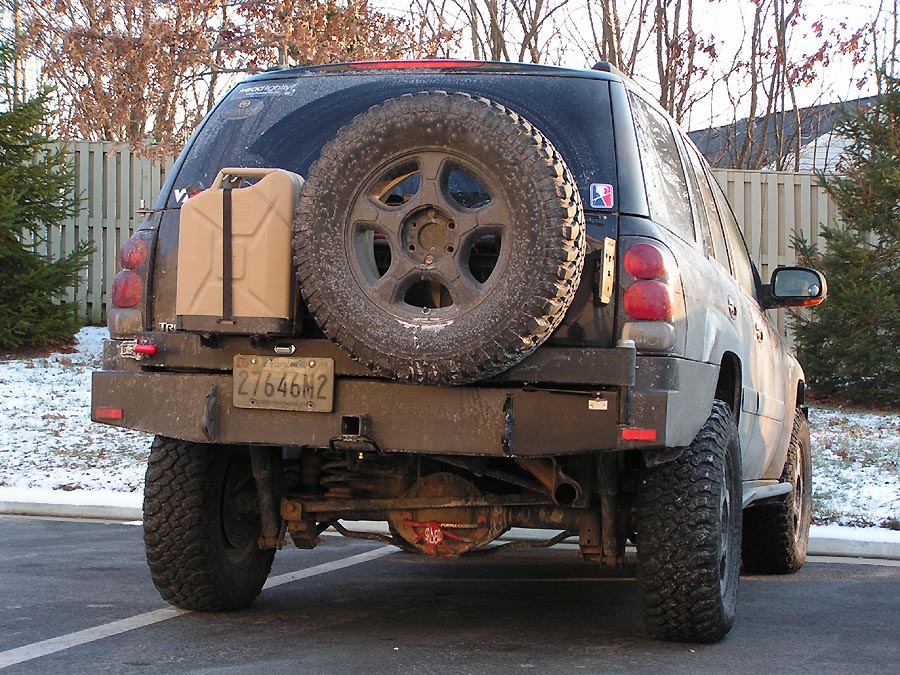
Actually, here's an image where a twist drain plug is visible. I started getting worried about it hanging down like that, so I replaced it with the allen plug.
JamesDowning
Explorer
Finally some more progress. The pic below was as of 10 last night, but I put a few more hours into it after that. All of the seams in the cover are done, inside is cleaned up and the bottom hemmed. I used a super tough fabric by TriVantage called "Coverlight". Here's the excerpt from the retailer:
Being that the fabric was extra tough, it provided more than a few frustrating moments with the sewing machine.
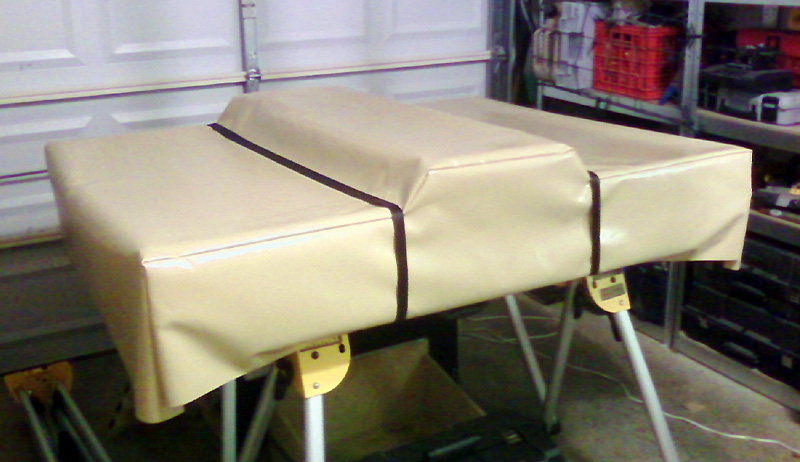
I'm thinking 2 or 3 more hours of work and I'll be done. Last steps are finishing the cinching system for the cover and mounting the interior tent light. Hoping to get it mounted to the truck this weekend for some road and wind trials.
Coverlight is a vinyl-coated nylon fabric. Excellent tear, puncture, abrasion resistance and overall durability. Coverlight is a great waterproof marine vinyl and is resistant to fungicidal growth. Unaffected by extreme temperature changes, will not become stiff due to volatility loss.
Being that the fabric was extra tough, it provided more than a few frustrating moments with the sewing machine.
I'm thinking 2 or 3 more hours of work and I'll be done. Last steps are finishing the cinching system for the cover and mounting the interior tent light. Hoping to get it mounted to the truck this weekend for some road and wind trials.
JamesDowning
Explorer
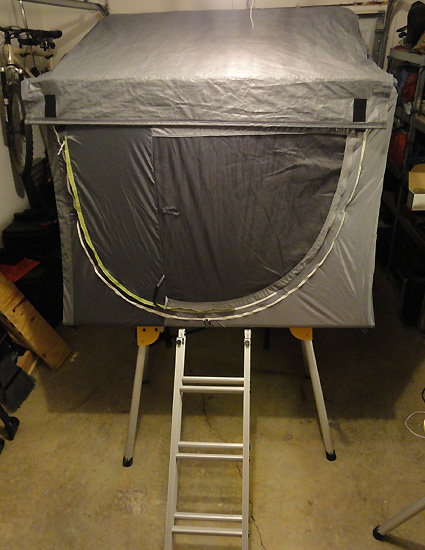
I think I can call it done for now. I can see a few minor changes that I may still do. But it's at the point where I'm going to mount it to the truck and try it out a bit. I am planning to coat it all with some nikwax solar and waterproofer to add some additional protection against the elements.
Interior. Note the slim LED light mounted to the middle cross bar.
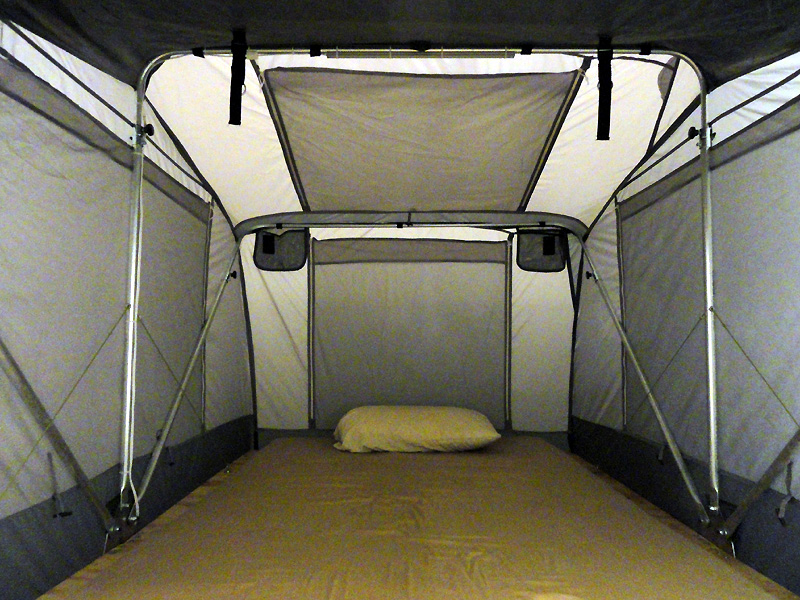
Exterior. Not exactly happy with how the rain fly is sitting... I think one of my measurements was off a little bit. I need to play with it a little more before I do anything to it. I may be fussing over minor details though. We'll see how it looks once it's all mounted.
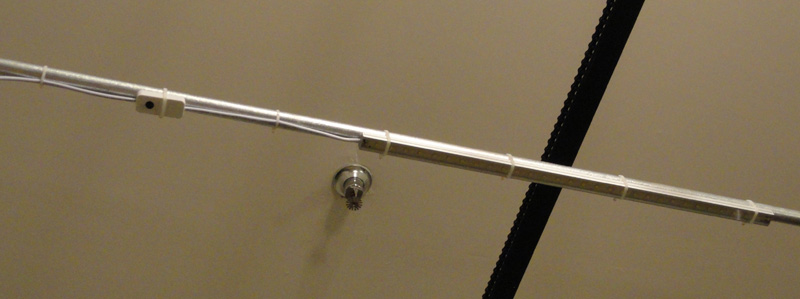
Detail of the overhead light and the switch. I may change the orientation of the zip ties though... I'm worried that they may try to wear the tent material when it's all folded up.
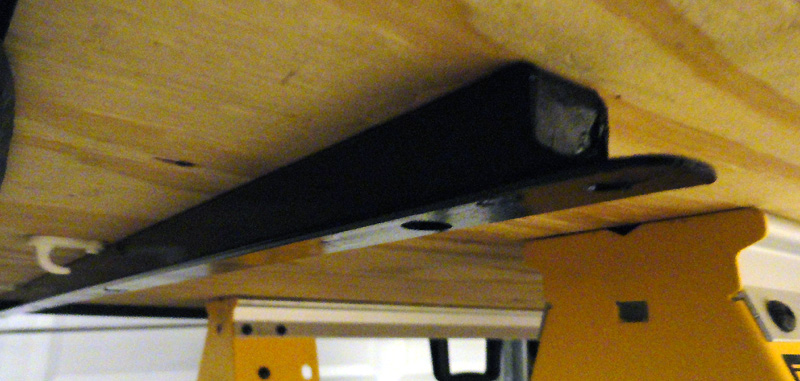
Detail of the mounting bar. The bolts that mount into the wood are recessed into the rail to ease in loading the tent on the roof. The bar was plastic dipped on either end, and filled with a foam. I designed the mounting system to be as slimline as possible. I don't think it can get much thinner.
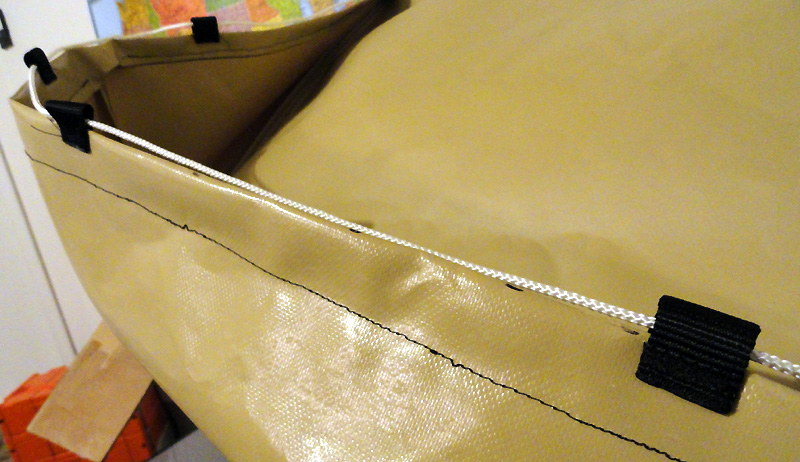
Detail of the cinch system on the cover. There's a little more to it but not much, I wanted to keep it simple so it's just a poly-nylon rope that feeds through some webbing loops. It won't be completely sealed like some of the RTTs with a zip-on cover, but I am hoping it will be a little easier to use and a bit more robust while keeping out the elements (the zipper is one of the few complaints I hear of from RTT owners). Only time will tell I guess
Hoping to have some pictures of it mounted this weekend or early next week.
Interior. Note the slim LED light mounted to the middle cross bar.
Exterior. Not exactly happy with how the rain fly is sitting... I think one of my measurements was off a little bit. I need to play with it a little more before I do anything to it. I may be fussing over minor details though. We'll see how it looks once it's all mounted.
Detail of the overhead light and the switch. I may change the orientation of the zip ties though... I'm worried that they may try to wear the tent material when it's all folded up.
Detail of the mounting bar. The bolts that mount into the wood are recessed into the rail to ease in loading the tent on the roof. The bar was plastic dipped on either end, and filled with a foam. I designed the mounting system to be as slimline as possible. I don't think it can get much thinner.
Detail of the cinch system on the cover. There's a little more to it but not much, I wanted to keep it simple so it's just a poly-nylon rope that feeds through some webbing loops. It won't be completely sealed like some of the RTTs with a zip-on cover, but I am hoping it will be a little easier to use and a bit more robust while keeping out the elements (the zipper is one of the few complaints I hear of from RTT owners). Only time will tell I guess
Hoping to have some pictures of it mounted this weekend or early next week.
Last edited: