You are using an out of date browser. It may not display this or other websites correctly.
You should upgrade or use an alternative browser.
You should upgrade or use an alternative browser.
Los Angeles -Class Attack Sub(urban), Build / Collected Werks topic - '02 k1500 Z71
- Thread starter rayra
- Start date
rayra
Expedition Leader
Been reading and seeing quite a bit about Dallas commuting traffic, been watching it live on sigalert.com occasionally. Early on I was imaging I could live rural and work in Dallas, but that hope faded. I'm no stranger to long and lengthy commutes, living and working in and around Los Angeles the last 20yrs+, but that mess in north / northeast Dallas, fuggedaboutit. That's what got me thinking about the multi-stage thing. Live/work in Dallas while I get a semi-rural property established. But that's the work of years. But I can't take enough money out of CA to just flat retire and parachute right into rural east TX.
I've been doing 'World According to Garp' sort of research on a the region for a while, every factor I can think of which can impact my plans. Economic growth patterns, census and crime info, annual precipitation, heat index, geology maps, soil maps, water table and average well depths, Ag planting zones, employment indices, historic tornado tracks, hurricane tracks, flood maps. I started looking at all those maps and factors and started lopping off chunks of TX trying to find my 'Goldilocks Zone'. Which turned out the be roughly that arc centered on Tyler.
ON topic, I finally got around to injecting the poly-safe lube I got thru Spohn for the new lower control arms, but there wasn't any detectable noise from them before that. No change in handling or performance, pretty much what I expected. Just wanted the sturdier part before I drive thru any more high desert boulder fields. Pretty sure I'm finally going to make my winter road trip up the 395 / east side of the Sierras. Pretty much everything is in place and I just got my spiffy first 'beginner' DSLR, too..
No progress (except pencil-whipping design work) on the roof-mounted solar setup, but that comes late Jan / Feb, have a lot of household projects I have to complete first.
Last edited:
Nathaniel0712
Observer
I really like the tablet mount you designed for above the radio. I have a 7 tablet and would love to mount it somewhere like that in my 03 Silverado however all mounts on the shelf wont accomplish that goal without interfering with the windshield view. Nice build BTW
Retired Tanker
Explorer
I grew up in Ft. Worth and spent many summers on my Granddad’s farm south of Minneola. Y’all are making me homesick!!
Sent from my iPhone using Tapatalk
Sent from my iPhone using Tapatalk
tbisaacs
Adventurer
I grew up in Ft. Worth and spent many summers on my Granddad’s farm south of Minneola. Y’all are making me homesick!!
Sent from my iPhone using Tapatalk
We’re spending Christmas at Lake Fork!
Sent from my iPhone using Tapatalk
rayra
Expedition Leader
I really like the tablet mount you designed for above the radio. I have a 7 tablet and would love to mount it somewhere like that in my 03 Silverado however all mounts on the shelf wont accomplish that goal without interfering with the windshield view. Nice build BTW
I'm 6' and sit with a pretty upright posture and it only projects about 1" above my hood sight line. Doesn't impair anything. Heck the placement of the rear view mirror impacts my forward vision much more.
Take a piece of thin cardboard cut to your tablet dimension and tape it to your dashboard bezel where you want it to fit and see how it is for you. I'll make you a mount for the cost of materials / shipping, if you decide you want such a thing. I really enjoy the placement of mine, makes it fairly easy to use all the apps, nav, vehicle monitoring etc.
eta and another road report on the 40k trans cooler performance. As well as the inadvertent 160F thermostat install. I cruised home from Vandenberg / Lompoc Monday night after a weekend of remodeling labor, drove thru Santa Barbara in lashing rain about 6hrs before the huge killer mudslide blew thru. 70mph, ambient temp about 60F, engine temp 173F, trans temp 103F
rayra
Expedition Leader
Reposted from another topic about replacement headlights
partly inspired by this topic, the work needed doing anyway. I buff-polished the headlights when I first bought this vehicle 3yrs+ ago. Then about 18mos ago I tried that 'as seen on TV' wipe on clear coat. Looked great for about 3-4mos and then much worse, as that clear paint broke down. So I was due anyway. Had a well rated pair of replacement headlight lenses in my Amazon bucket for $55, but I had the time and wanted to try another process.
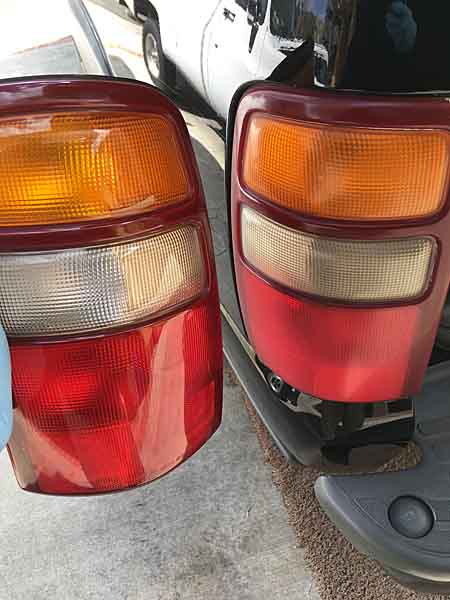
So I spent a couple hours the last two days. I cleaned up the headlights with a 3-stage wetsanding process, 800grit, 1500, 2000. Followed by a buffing with some Meg ultimate polishing goop. Just 2000 and polishing on the tail lights and I shirked the sanding on the front signal lights, they're still a little foggy.
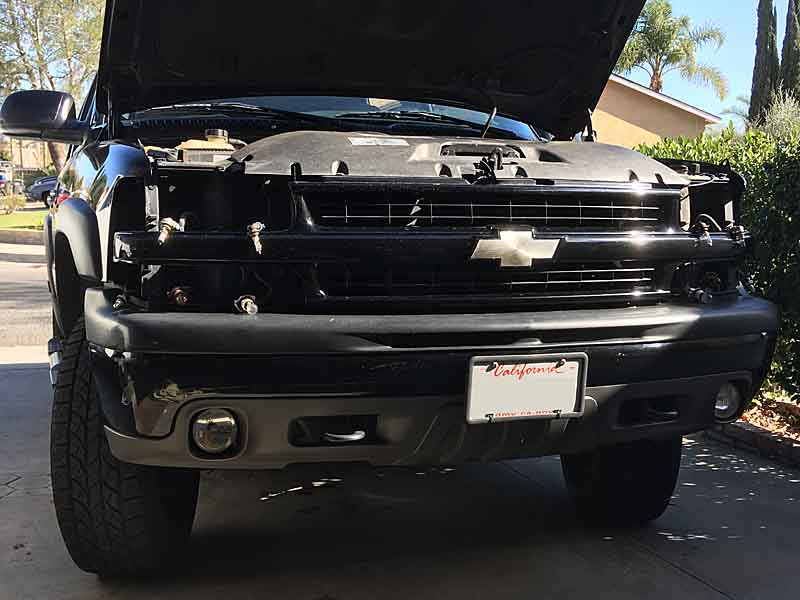

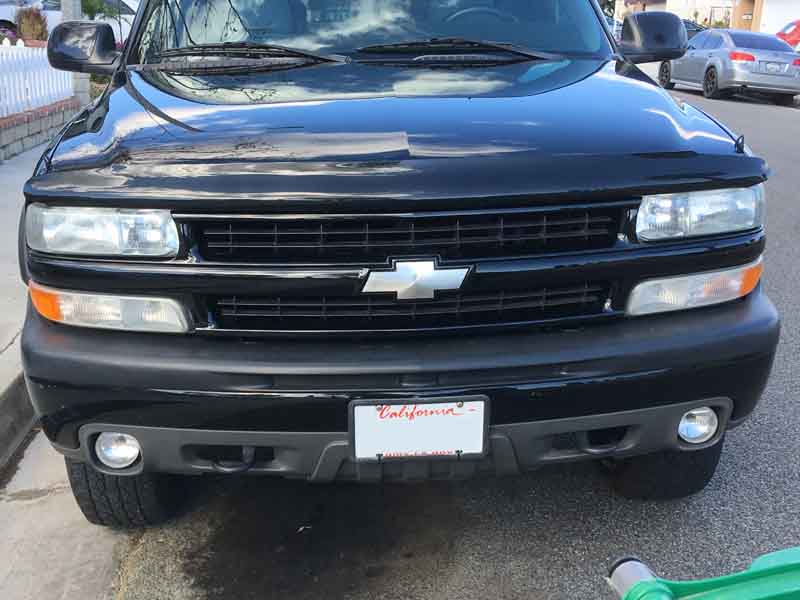
Relatively easy to do, if you have the ability, place and tools. But no real savings if you value your time highly. Me, I've got more time than money, and I like doing things myself.
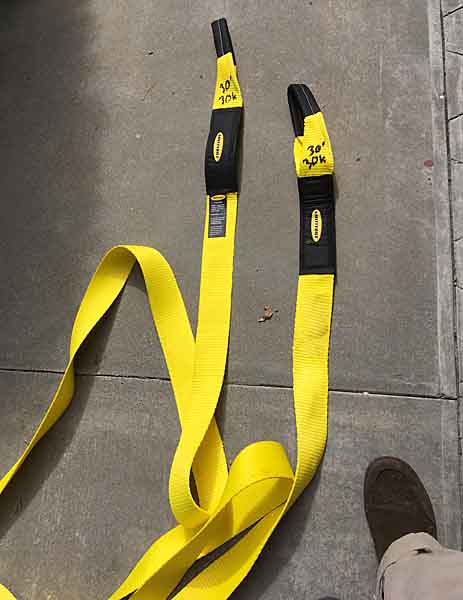
-------
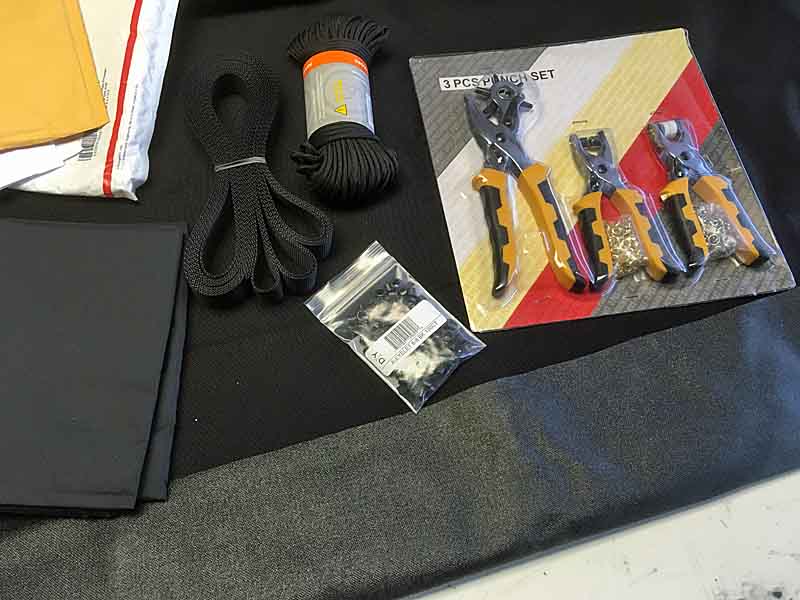
I've also been farting around with a few Christmas sale bargains, picked up a 3"x30' / 30,000-lbs Smittybuilt Recovery Strap and a Smittybuilt forged receiver hitch insert / shackle to go with (and to replace the cheap Harbor Freight setup I had)
I also mistakenly bought a BlueSea add-on fuse block, intending to hang it on the battery post locations on my Aux battery so I could have some clean direct power for my CB and Ham radio installs, as well as some re-wiring to put my center console and rear factory 'Power Ports' on the Aux battery. I say mistakenly as I forgot how I had rigged the expansion 1/0 power cabling to my rear cargo area. The way the cables are arranged there's little room to add the Aux fuse block. And certainly no 'clean' way to do so. Going to have to re-arrange things, possibly. And I still want to run yet another heavy positive and negative cable on there as well, leading to a front end power plug for the future winch setup.
And this weekend I did some figuring for the experimental Catamaran-style 'trampoline' fabric deck / shade for the roof rack. This is a proof of concept for pappawheely. We've been discussing a fabric top deck to shade the vehicle, but make it semi-permanent and road-worthy. So I'm making a test article and lacing it to my Suburban roof rack as I tear-*** around SoCal freeways. Sewing it as soon as the 1000D (cordura) fabric arrives. If my cheap sewing machine can even handle it.

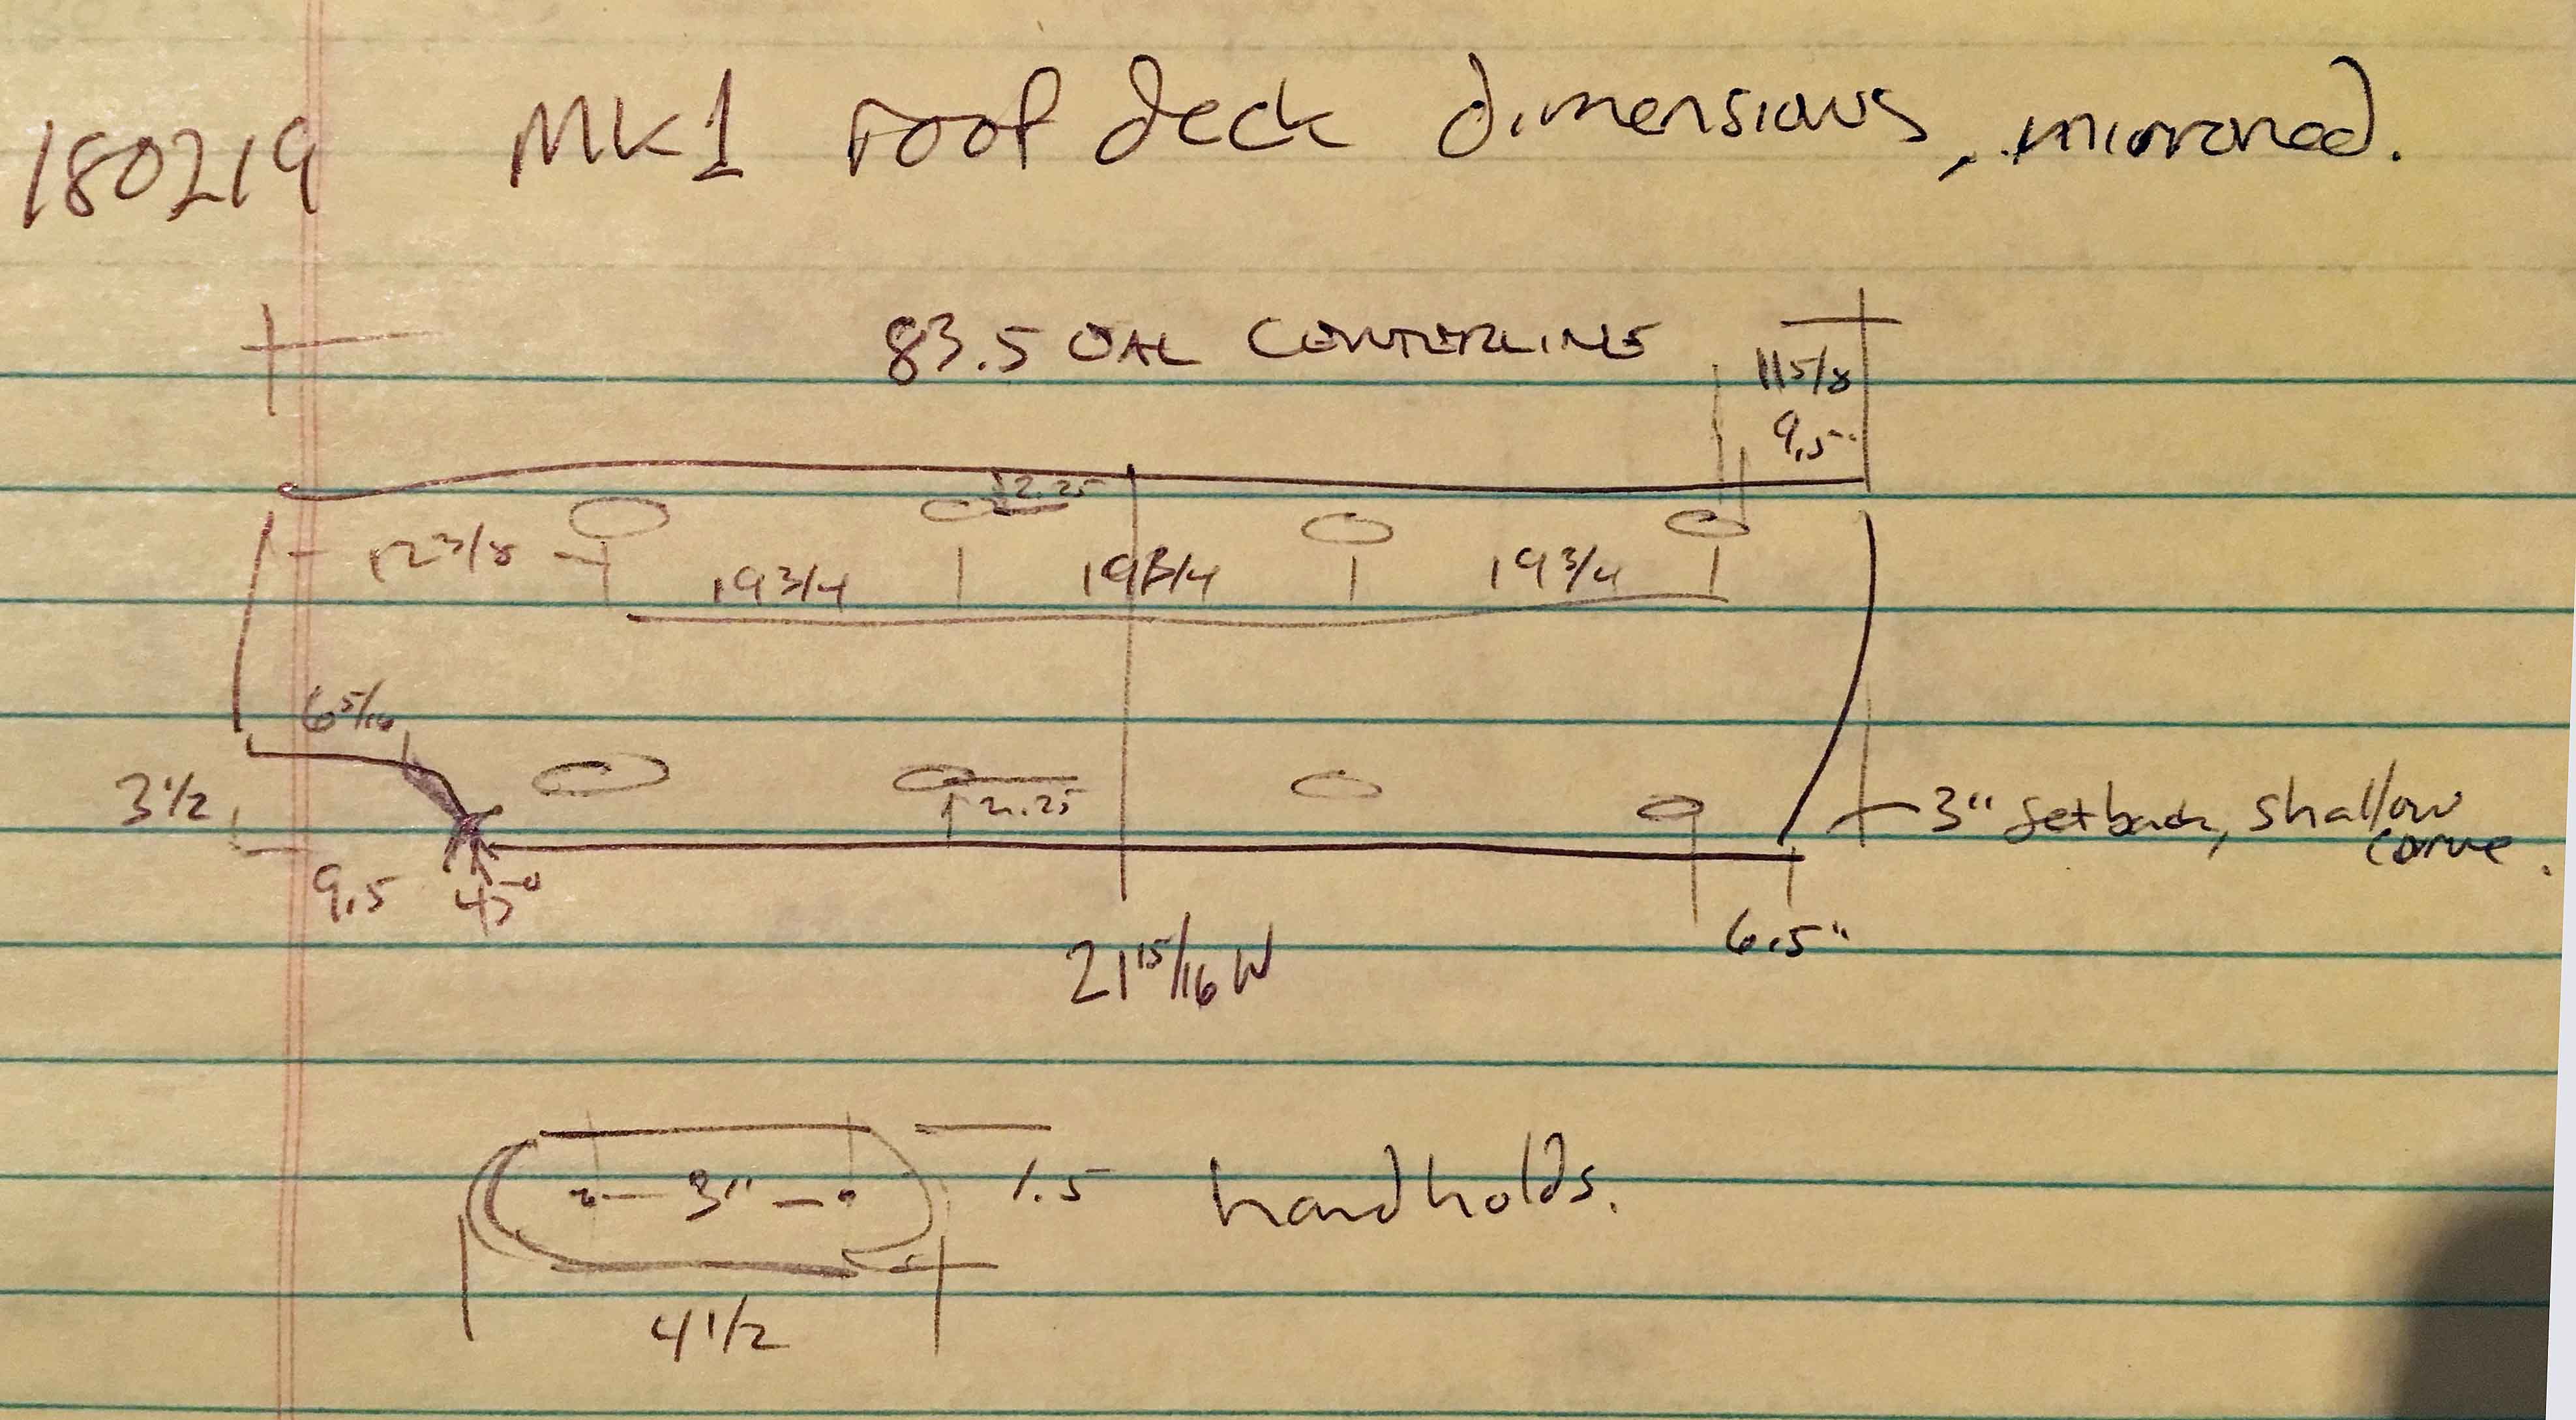
And took a good set of measurements off of Roof Deck Mk1, before scrapping it. Roof Deck MkII deck is already made and painted, waiting on my to build some new more rigid metal mounting brackets. And for me to do the trampoline fabric tests.
partly inspired by this topic, the work needed doing anyway. I buff-polished the headlights when I first bought this vehicle 3yrs+ ago. Then about 18mos ago I tried that 'as seen on TV' wipe on clear coat. Looked great for about 3-4mos and then much worse, as that clear paint broke down. So I was due anyway. Had a well rated pair of replacement headlight lenses in my Amazon bucket for $55, but I had the time and wanted to try another process.
So I spent a couple hours the last two days. I cleaned up the headlights with a 3-stage wetsanding process, 800grit, 1500, 2000. Followed by a buffing with some Meg ultimate polishing goop. Just 2000 and polishing on the tail lights and I shirked the sanding on the front signal lights, they're still a little foggy.
Relatively easy to do, if you have the ability, place and tools. But no real savings if you value your time highly. Me, I've got more time than money, and I like doing things myself.
-------
I've also been farting around with a few Christmas sale bargains, picked up a 3"x30' / 30,000-lbs Smittybuilt Recovery Strap and a Smittybuilt forged receiver hitch insert / shackle to go with (and to replace the cheap Harbor Freight setup I had)
I also mistakenly bought a BlueSea add-on fuse block, intending to hang it on the battery post locations on my Aux battery so I could have some clean direct power for my CB and Ham radio installs, as well as some re-wiring to put my center console and rear factory 'Power Ports' on the Aux battery. I say mistakenly as I forgot how I had rigged the expansion 1/0 power cabling to my rear cargo area. The way the cables are arranged there's little room to add the Aux fuse block. And certainly no 'clean' way to do so. Going to have to re-arrange things, possibly. And I still want to run yet another heavy positive and negative cable on there as well, leading to a front end power plug for the future winch setup.
And this weekend I did some figuring for the experimental Catamaran-style 'trampoline' fabric deck / shade for the roof rack. This is a proof of concept for pappawheely. We've been discussing a fabric top deck to shade the vehicle, but make it semi-permanent and road-worthy. So I'm making a test article and lacing it to my Suburban roof rack as I tear-*** around SoCal freeways. Sewing it as soon as the 1000D (cordura) fabric arrives. If my cheap sewing machine can even handle it.
And took a good set of measurements off of Roof Deck Mk1, before scrapping it. Roof Deck MkII deck is already made and painted, waiting on my to build some new more rigid metal mounting brackets. And for me to do the trampoline fabric tests.
rayra
Expedition Leader
Nothing noticeable really. I can feel things engage, but there's no chunk. More a case of the slack being taken up in the drivetrain. In fact that's one of the reasons I just bought some new u-joints. (AC Delco Pro, all four delivered for $48, all four locations use the same part). Hoping to do the install in the next week or so.
I changed all my axle and xfer fluids not long after I bought it, and haven't really used it hard in 4wd, so I don't know how applicable what I'm (not) hearing actually is.
I did think maybe things were sticking in 4wd after my last use, steering felt tight / binding, back on the pavement. Went so far as to put the vehicle up on jackstands and put it in drive to see if the fronts would spin, they did not. Paranoia I guess.
rayra
Expedition Leader
Starting a testbed project, making a fabric 'trampoline' deck for the roof rack, like the deck on a catamaran. I'm in between the MkI and MkII plywood roof decks, MkII is built and painted but I'm in the middle of a drawn out process of creating a roof deck mount for my folding solar panel kit. In the meantime I'm making his testbed of a design idea for Pappawheely's off-roading photo studio.
Got the 1000D (cordura) material the other day, last thing needed. Doing the final material sizing and prep for sewing tomorrow. Trying to get it sewn up and laced on the roof before an upcoming road trip, to torture test it on the freeway. Worried my cheap basic plastic-gear-train sewing machine won't be up to the task.
Started laying out the trampoline fabric but decided I needed to remount the roof rack factory cross-braces first to double check measurements before I cut the fabric.
I figure to lay out the eyelets on a 3-4" spacing and with the thickness of the rack side rails and the small gap I'm engineering between their inner faces and the reinforced edge of the trampoline, it should give me something close to an equilateral triangle pattern in the lacing. And that means I need cordage a bit over double the circumference of the trampoline / rack area. The trampoline is roughly 20' around its edges. So call it 40'+ of paracord (have a 100' bundle) and 20' of the webbing (came in 25' rolls).
The cordura is treated / waterproofed, too, which I wasn't expecting. Might be extra drag on the sewing needle.
PA-MinuteMan
Member
I'm 6' and sit with a pretty upright posture and it only projects about 1" above my hood sight line. Doesn't impair anything. Heck the placement of the rear view mirror impacts my forward vision much more.
Take a piece of thin cardboard cut to your tablet dimension and tape it to your dashboard bezel where you want it to fit and see how it is for you. I'll make you a mount for the cost of materials / shipping, if you decide you want such a thing. I really enjoy the placement of mine, makes it fairly easy to use all the apps, nav, vehicle monitoring etc.
eta and another road report on the 40k trans cooler performance. As well as the inadvertent 160F thermostat install. I cruised home from Vandenberg / Lompoc Monday night after a weekend of remodeling labor, drove thru Santa Barbara in lashing rain about 6hrs before the huge killer mudslide blew thru. 70mph, ambient temp about 60F, engine temp 173F, trans temp 103F
Could you make me a tablet mount in the future?
I plan on picking a ipad mini up soon and love how you set it up, I don't know if it's different for you but my Burbs are a different gen.
I'll IM you sometime in the future when I finally pick one up (if thats all right with you)
rayra
Expedition Leader
Sure, it would be fairly easy. Just pay the costs and I'll shape it up and ship it.
I amended mine later, previously it was stuck to both the dash top and the bezel with 'extra strength two-sided tape. Repeated fiddling with mounting a 2 DIN entertainment unit in a 1.5 DIN dash space was a PITA. So I cut down the back portion of the mount so it is ONLY attached to the bezel and it has worked fine. Been thru several washboard roads without trouble. That said, there shouldn't be very much difference in making a mount for yours. Just mock it up with some cardboard to get the mounted height / location you want and send me some dimensions and photos of the placement and I can bend up some kydex for you. You just cover the material and shipping.
/I'll do this for a couple folks, but if there's more than that you'll start paying for my time, too. First couple with different devices, I'm willing to do it just to create the different pattern bucks. That's the more laborious part. Cutting and bending the kydex is easy.
rayra
Expedition Leader
This whole power thing is starting to get ridiculous.
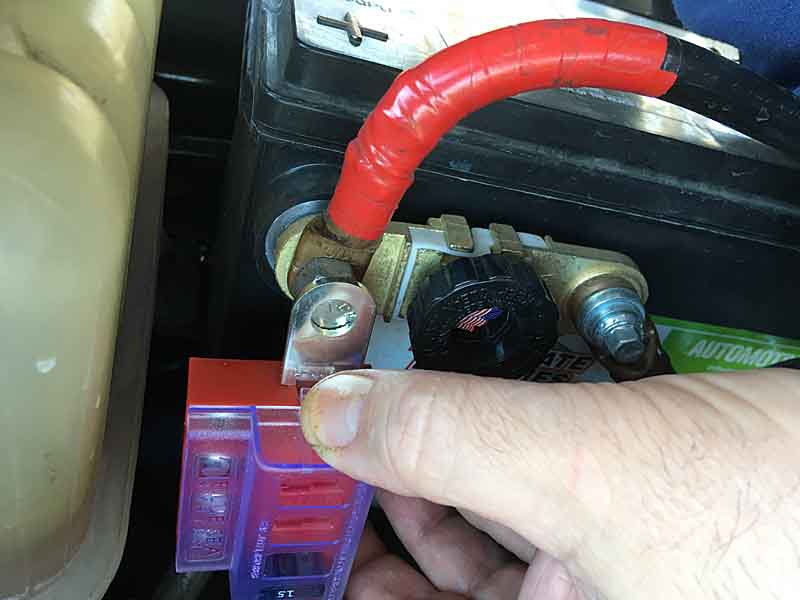
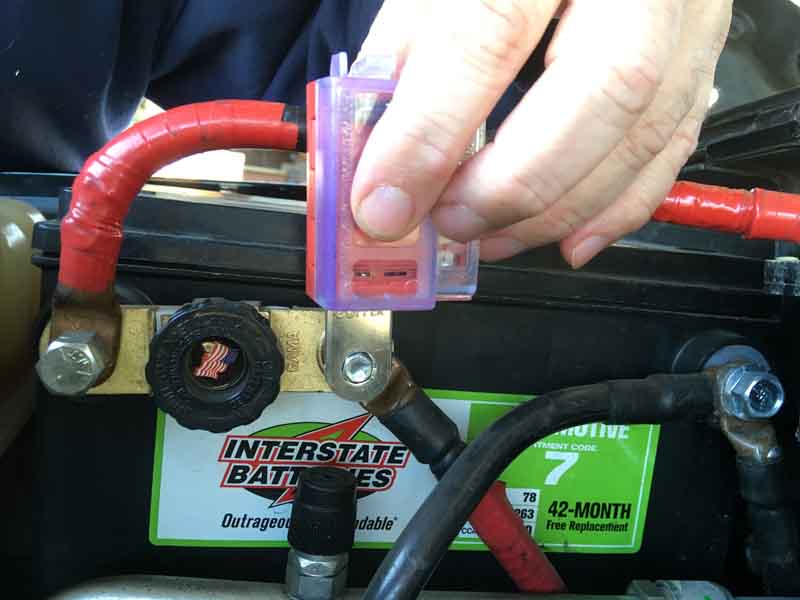
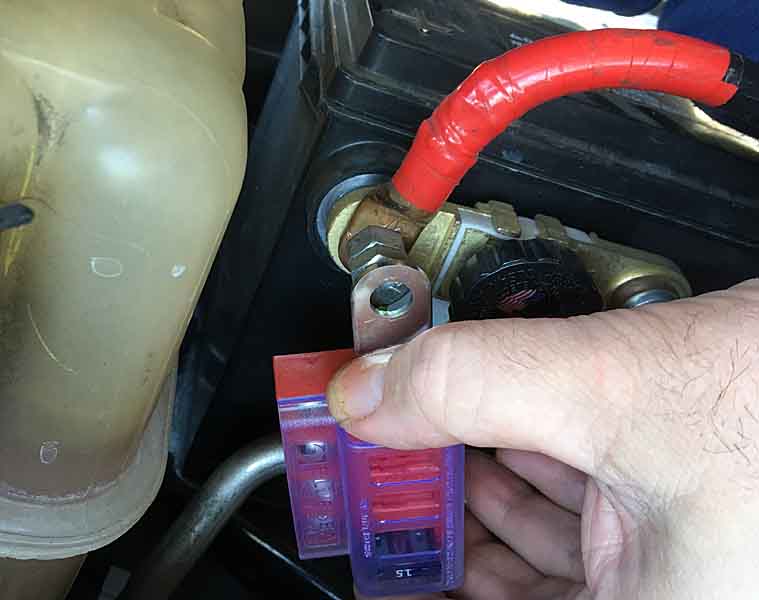
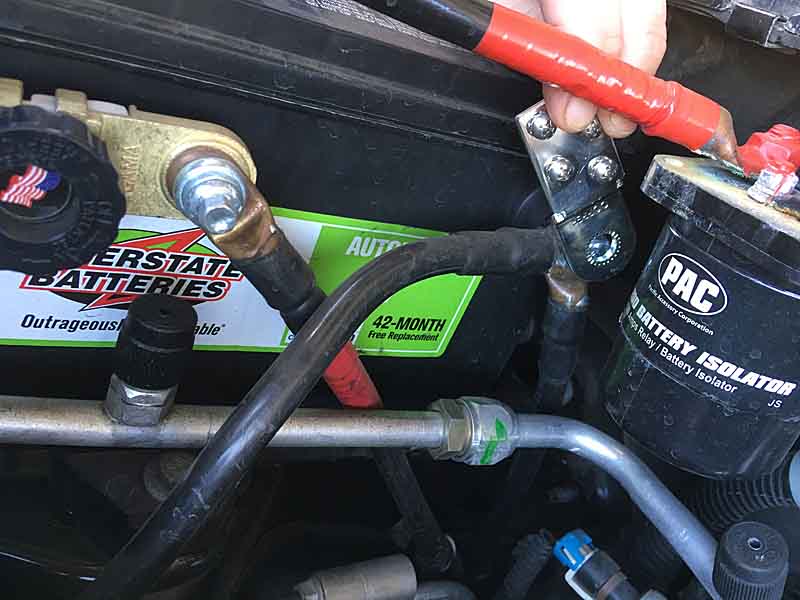
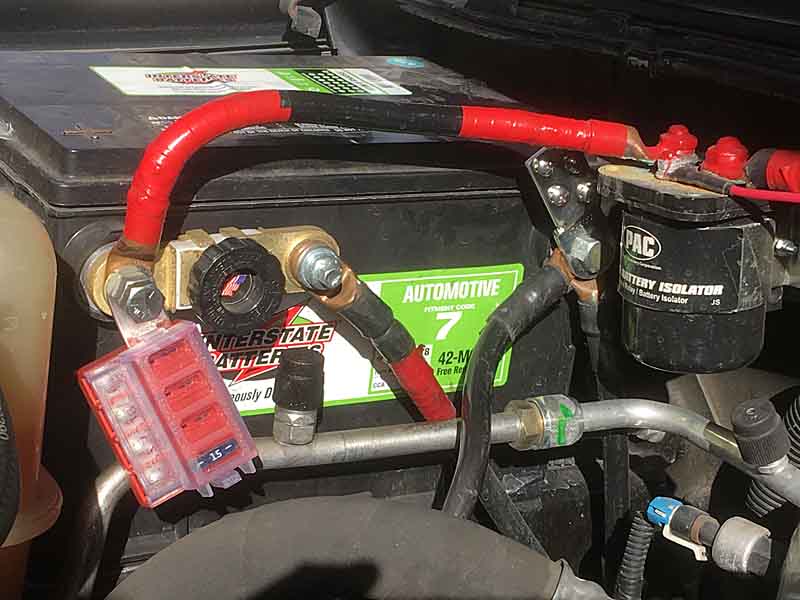
I was looking for ways to add / rewire some things to my Aux battery, especially after killing my starter battery by leaving my electric six-pack cooler plugged in and running for a couple days. I found a nice kit from BlueSea which was meant for side-connection batteries, has a small four slot ATO-size fuse block and a negative terminal plate with four screw locations. I wanted to run some dedicated power lines for CB and Ham radios, as well as a feeder line for some switched relays for future lights. AND a dedicated line to re-wire the vehicle interior 12v 'PowerPort' receptacles at the dash, center console and rear cargo. That way they are all on the Aux and the next time I kill a battery by leaving something plugged in, it won't be my starter battery. Too, once I have the rooftop solar panel integrated, it will be charging the Aux battery.
Anyway, I poked around with the fuse block kit and had some trouble getting things rigged, due to the heavy cabling I'd already added to the Aux battery, to feed the rear power options. Had to bend and angle a few things, and will have to re-visit those connections to add some conductive grease, I found some corrosion between the various disparate fittings, will have to do something about that. I might even hunt up some copper terminal bolts.
This is how it sits right now -
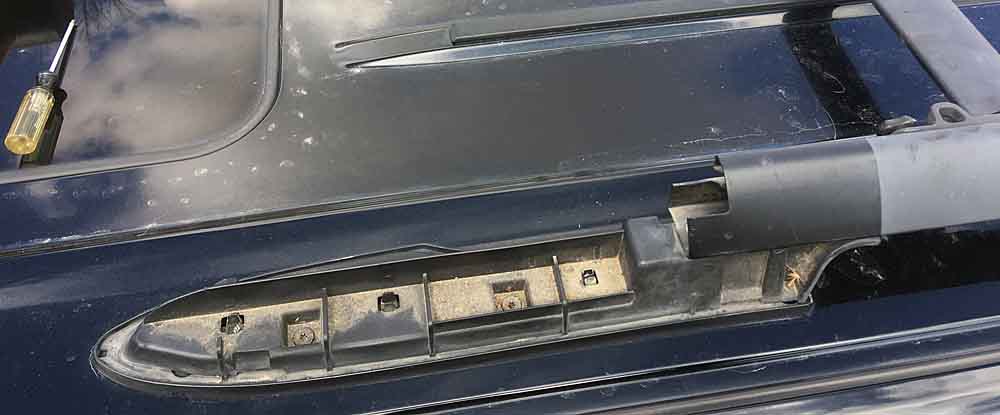
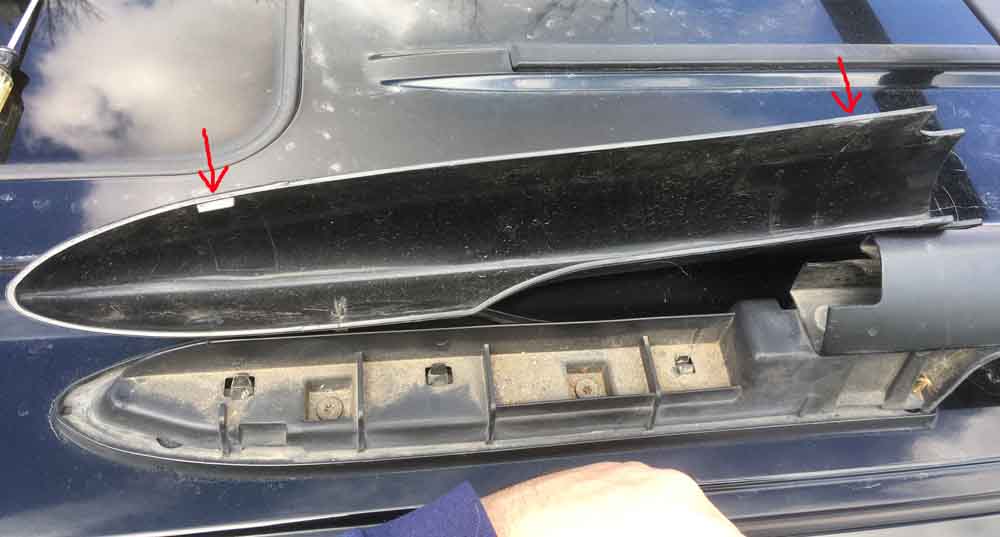
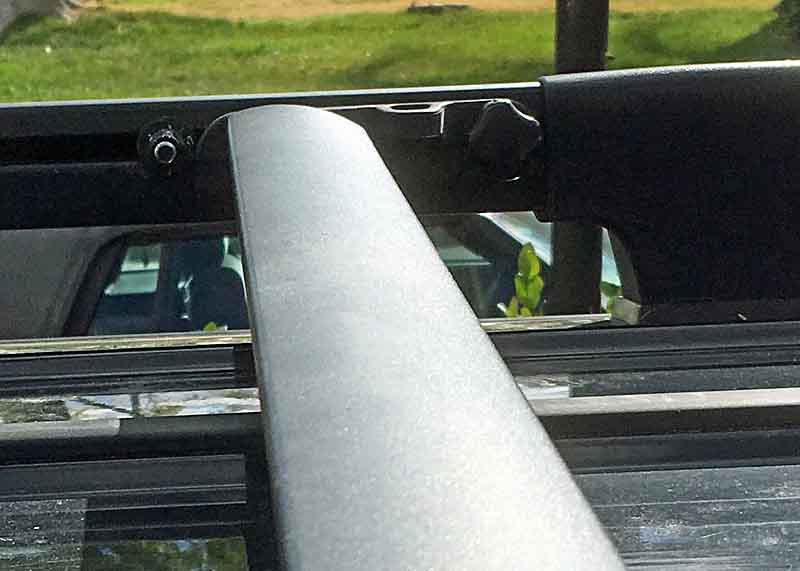
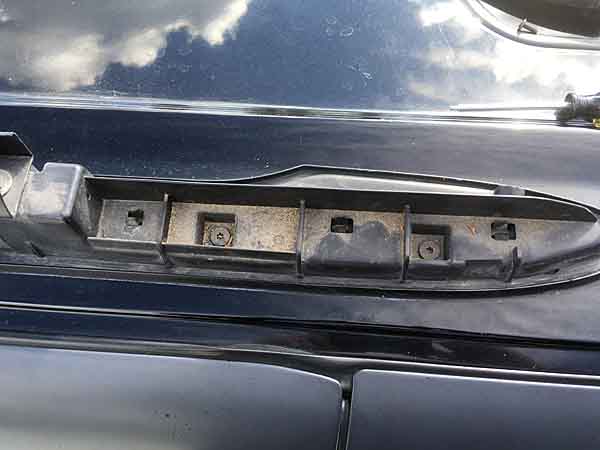
More progress on the roof deck trampoline. Hurried to beat the incoming rainstorm, re-mounting the factory roof rack cross braces. Not happy with their placement, at the end, as their mounting bracket and airfoil design coupled with the very lengthy front footers of the rack all combine to put the front-most brace a full 45" behind the top of the windshield.
Additionally, the space between the rearmost airfoil brace and the foremost is just 69". Or less than 60% of the whole roof length will be covered by this fabric shade panel. Too, with my sunroof the thing couldn't cover the whole roof anyway. call that adjusted area ~84" IIRC. So this panel will cover ~80% of the reachable roof. A good bit better.
Sort of moot in my case as this is an experiment for a much larger shade area / vehicle project. I will eventually be installing the MkII plywood roof deck, which will reach within 2" of my sunroof opening and reach further back and sideways than the fabric.
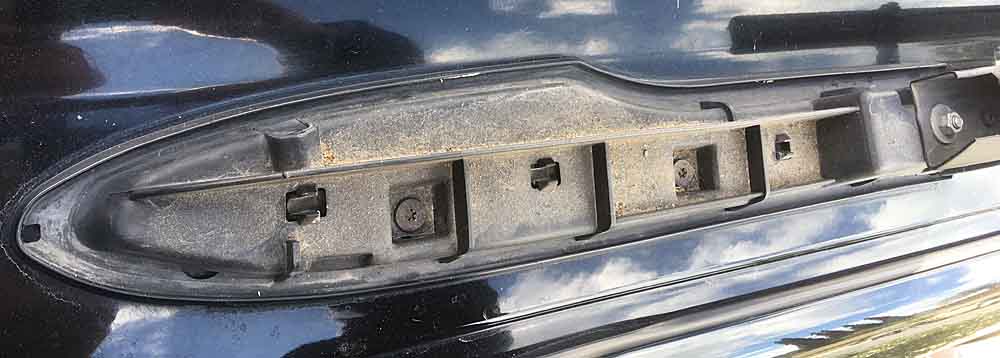
Another issue re the fabric panel come to mind, as I intend to lace it to the perimeter of the roof rack. The crossbraces are held in place by a hand-turned knob, a 1/4"-20 stud into a clamping suare washer / bracket inside the roof rack side channel. Since at highway speeds there will be a strong rearward pull on the front brace, I pulled it back out and re-inserted the plywood deck cross bracket bolts / nuts in the channel, so they'd be to the rear of the front brace. When I re-assembled it all I pulled the front brace as far forward as it would go, tightened it, then moved the other bolts / nuts hard up against the front brace and tightened those in place too. Hopefully that will be sturdy enough. Otherwise a more permanent solution would require some sort of eyebolt thru the rack rails, so the anchor can't move.
Anyway, here's a few detail pics of the the above and of the anchoring structure of the roof rack. Eventually I'm going to route some roof light wiring thru these and solar connections thru the rear footing and possible some outlets / sockets on the outer side to plug in some side lights.
After getting the cross braces set I re-took some measurements and next I figure the actual cuts on my fabric. And figure ow I'm going to wrap the edge of the fabric around a flat 1" webbing reinforcement and make that work in the corners and angles. I've got a swatch of the fabric and a foot of the webbing on my desk right now to experiment with and try some machine sewing on. Got a few sewing tips to try out and some stronger thread at the fabric store yesterday. Already have some heavy duty needles. Slower speeds, longer stitches are recommended. We'll see if I can do the sample without breaking my cheap machine.
I was looking for ways to add / rewire some things to my Aux battery, especially after killing my starter battery by leaving my electric six-pack cooler plugged in and running for a couple days. I found a nice kit from BlueSea which was meant for side-connection batteries, has a small four slot ATO-size fuse block and a negative terminal plate with four screw locations. I wanted to run some dedicated power lines for CB and Ham radios, as well as a feeder line for some switched relays for future lights. AND a dedicated line to re-wire the vehicle interior 12v 'PowerPort' receptacles at the dash, center console and rear cargo. That way they are all on the Aux and the next time I kill a battery by leaving something plugged in, it won't be my starter battery. Too, once I have the rooftop solar panel integrated, it will be charging the Aux battery.
Anyway, I poked around with the fuse block kit and had some trouble getting things rigged, due to the heavy cabling I'd already added to the Aux battery, to feed the rear power options. Had to bend and angle a few things, and will have to re-visit those connections to add some conductive grease, I found some corrosion between the various disparate fittings, will have to do something about that. I might even hunt up some copper terminal bolts.
This is how it sits right now -
More progress on the roof deck trampoline. Hurried to beat the incoming rainstorm, re-mounting the factory roof rack cross braces. Not happy with their placement, at the end, as their mounting bracket and airfoil design coupled with the very lengthy front footers of the rack all combine to put the front-most brace a full 45" behind the top of the windshield.
Additionally, the space between the rearmost airfoil brace and the foremost is just 69". Or less than 60% of the whole roof length will be covered by this fabric shade panel. Too, with my sunroof the thing couldn't cover the whole roof anyway. call that adjusted area ~84" IIRC. So this panel will cover ~80% of the reachable roof. A good bit better.
Sort of moot in my case as this is an experiment for a much larger shade area / vehicle project. I will eventually be installing the MkII plywood roof deck, which will reach within 2" of my sunroof opening and reach further back and sideways than the fabric.
Another issue re the fabric panel come to mind, as I intend to lace it to the perimeter of the roof rack. The crossbraces are held in place by a hand-turned knob, a 1/4"-20 stud into a clamping suare washer / bracket inside the roof rack side channel. Since at highway speeds there will be a strong rearward pull on the front brace, I pulled it back out and re-inserted the plywood deck cross bracket bolts / nuts in the channel, so they'd be to the rear of the front brace. When I re-assembled it all I pulled the front brace as far forward as it would go, tightened it, then moved the other bolts / nuts hard up against the front brace and tightened those in place too. Hopefully that will be sturdy enough. Otherwise a more permanent solution would require some sort of eyebolt thru the rack rails, so the anchor can't move.
Anyway, here's a few detail pics of the the above and of the anchoring structure of the roof rack. Eventually I'm going to route some roof light wiring thru these and solar connections thru the rear footing and possible some outlets / sockets on the outer side to plug in some side lights.
After getting the cross braces set I re-took some measurements and next I figure the actual cuts on my fabric. And figure ow I'm going to wrap the edge of the fabric around a flat 1" webbing reinforcement and make that work in the corners and angles. I've got a swatch of the fabric and a foot of the webbing on my desk right now to experiment with and try some machine sewing on. Got a few sewing tips to try out and some stronger thread at the fabric store yesterday. Already have some heavy duty needles. Slower speeds, longer stitches are recommended. We'll see if I can do the sample without breaking my cheap machine.