You are using an out of date browser. It may not display this or other websites correctly.
You should upgrade or use an alternative browser.
You should upgrade or use an alternative browser.
Mstudt's 01 Toyota 4runner SR5
- Thread starter MStudt
- Start date
Extending the rear brake lines isn't absolutely necessary, unless you've already purchased the extended lines, I would say you could go without. Just bend the bracket that holds the line before it separates above the rear axle. I've been offroading for years in my 02 4Runner w/o extending the rear lines and have been fine.
New Adventure
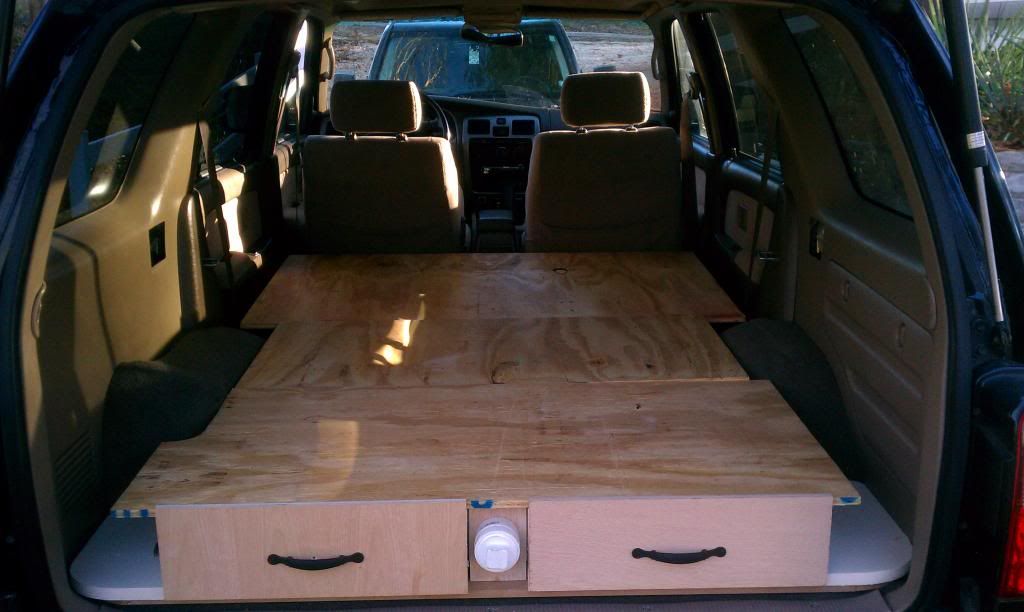
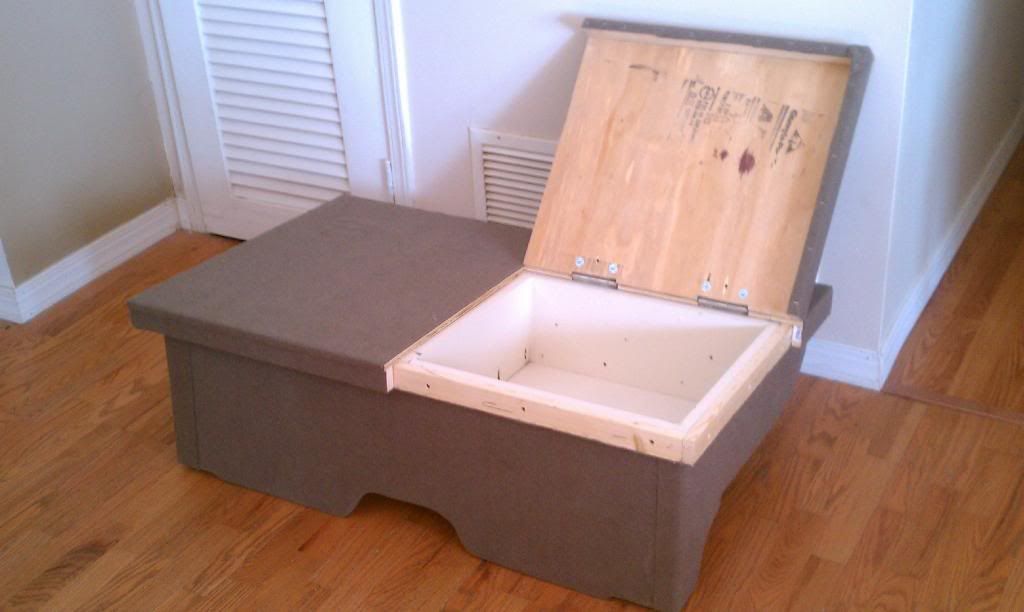
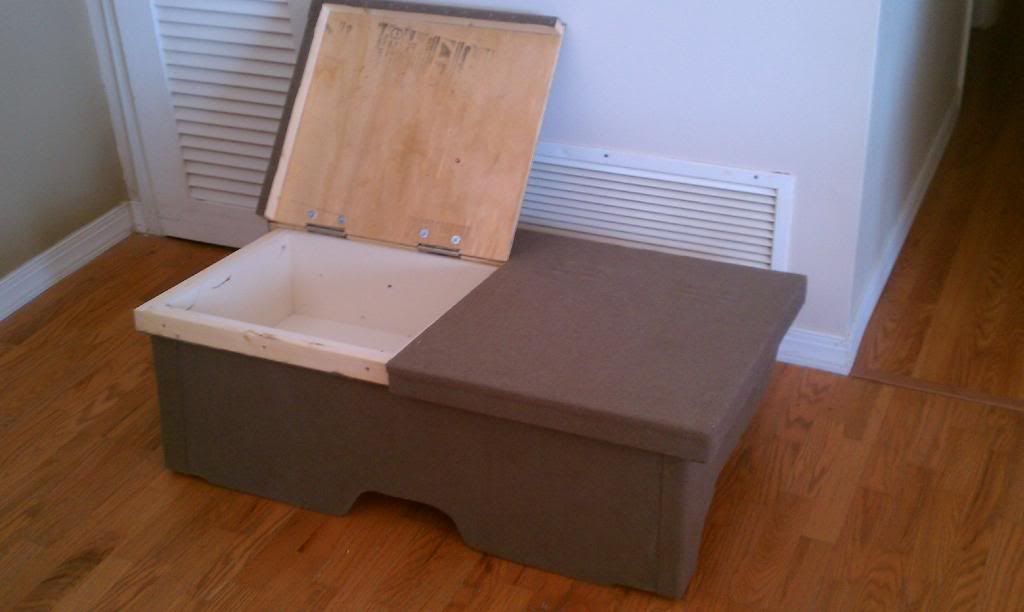
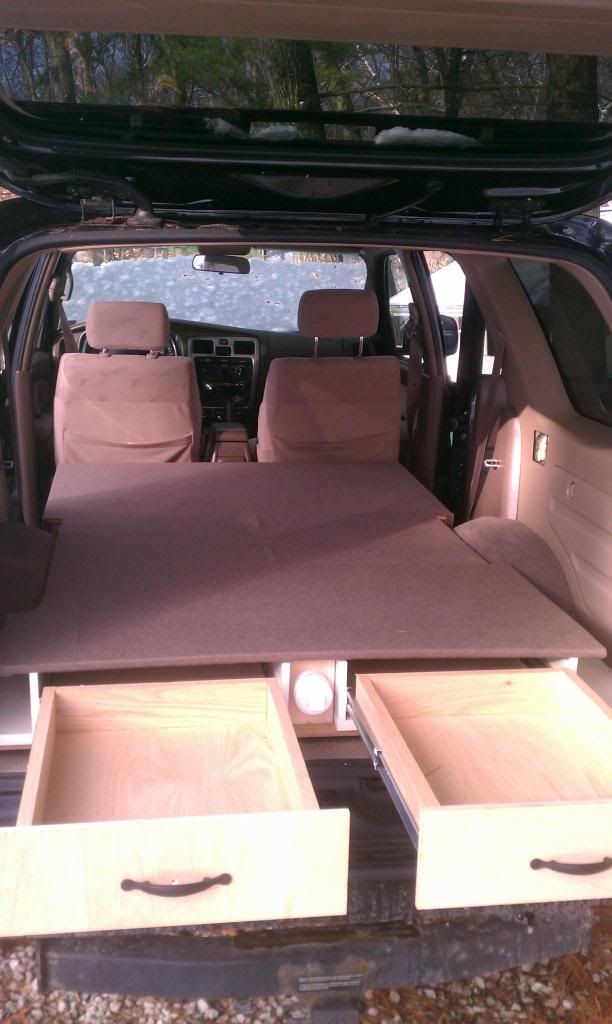
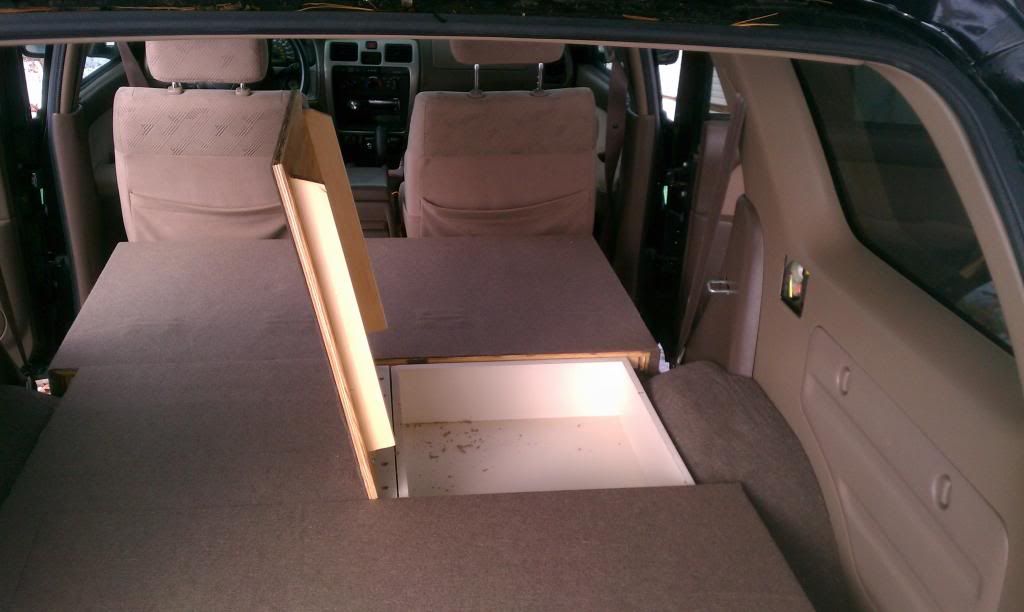
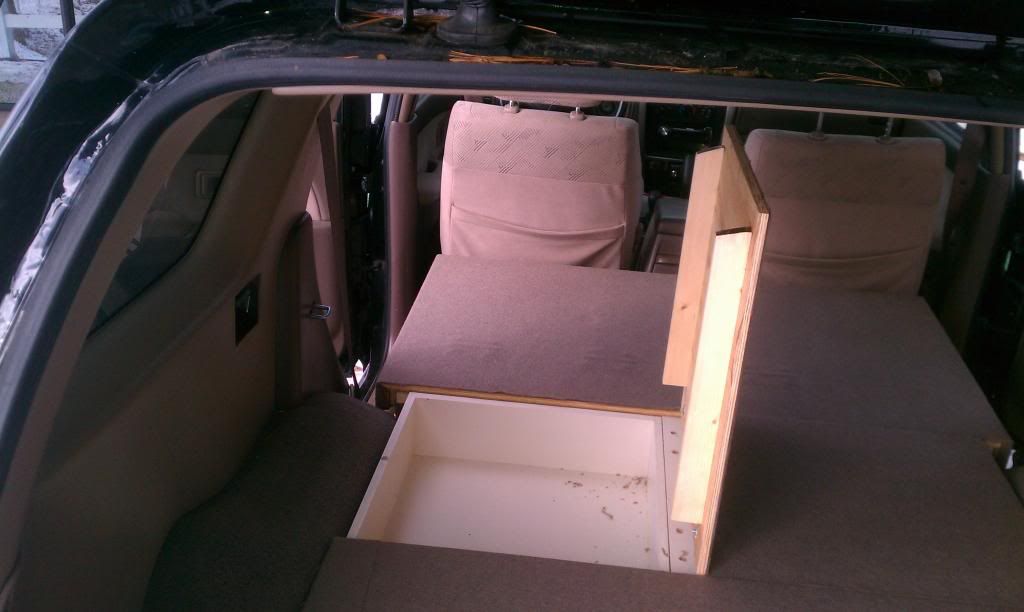
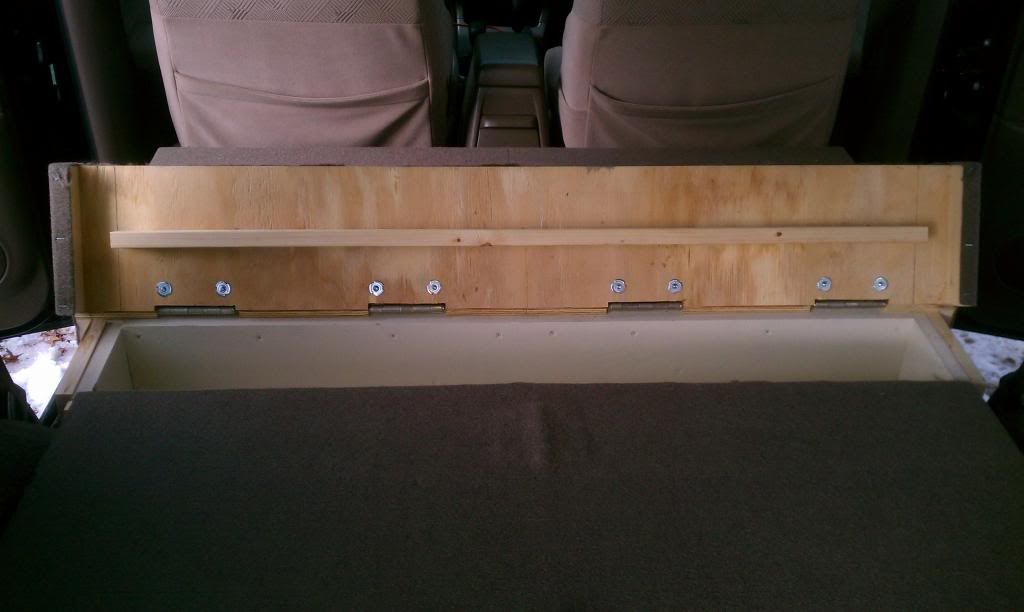
Alright, so I haven't been working on the 4runner to much lately since we have a lot going on right now (more later). This weekend I'll finally be trying to finish up the platform so we can actually use it. The platform has been completely painted and sealed, and now just needs the top put on. I'm still trying to figure out the best way to make the lids for the areas that I need access to. I can't figure out if I should hinge them or put in a finger hole to just lift the lids off? I'll try to get this figured out by the weekend so I can get the top finished and hopefully the carpet too!
On to whats been taking up a lot of our time. About a month we decided to put future plans in effect now, or a year from now to be exact. We've started our blog, Facebook page, and are working on sponsors for this adventure. My wife and I are big backpackers, campers, hikers, and paddlers. So it only makes sense to attempt our adventure while we're still somewhat young. My wife had spinal surgery for scoliosis when she was in fifth grade, but hasn't let that stop her from enjoying things she loves.
We're teaming up with the National Scoliosis Foundation, Scoliosis Research Society, and Curvy Girls Support Groups in effort to spread awareness of scoliosis. Coming Christmas 2014 we'll be leaving for Georgia in an attempt to thru-hike the Appalachian Trail NOBO to Maine. Our journey is going to start about 2 months before most consider starting the thru-hike. We'll deal with colder temperatures, greater chance for snow, and shorter days. This is all fine by us since we absolutely love hiking in the cold and the snow. Although, I get to a point where snow gets old, but not the cold. We've been section hiking the AT over Christmas week for the past 6 years, so we have an idea of what to expect. We're hoping the early start will gradually get us our trail legs. We'll have the luxury of hiking at our own place since the trail will be mostly empty of thru-hikers at that point. We're planning on taking anywhere from 5-7 months to complete our hike. We're walking away from our jobs, our house, and our lives in St. Louis. I have a lot more information that I could type, but I don't want to bore you.
Feel free to follow us!
Boots and Backpacks- blog Facebook
I've been slow on updating things on here, so I'll play catch up now.
CB Install:
Tonight I started on my CB install; nothing to hard about this.
Of course pull the center counsel off.
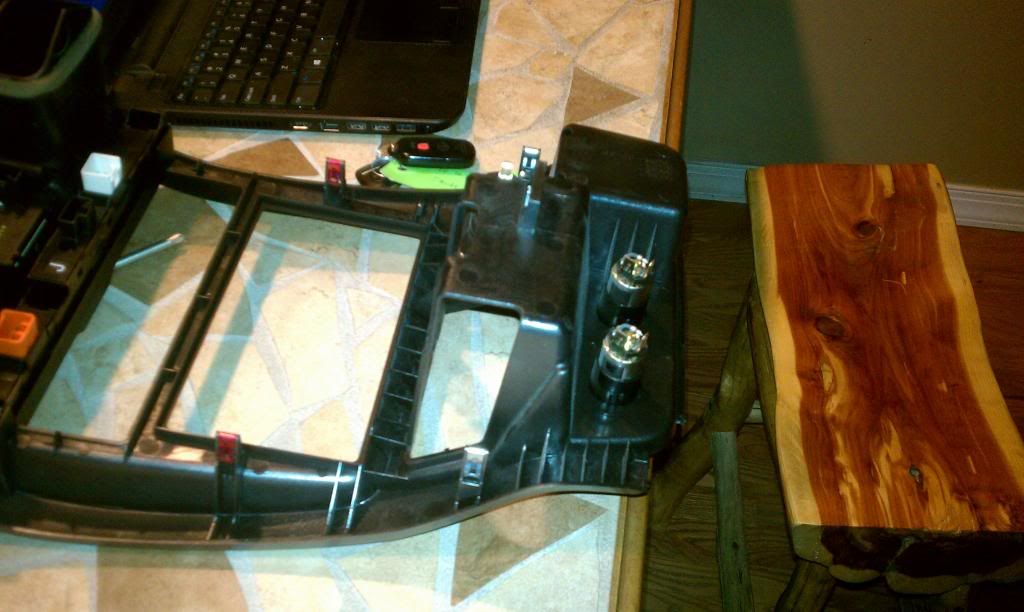
Next I removed the ashtray and cut out the back of the ashtray mount.
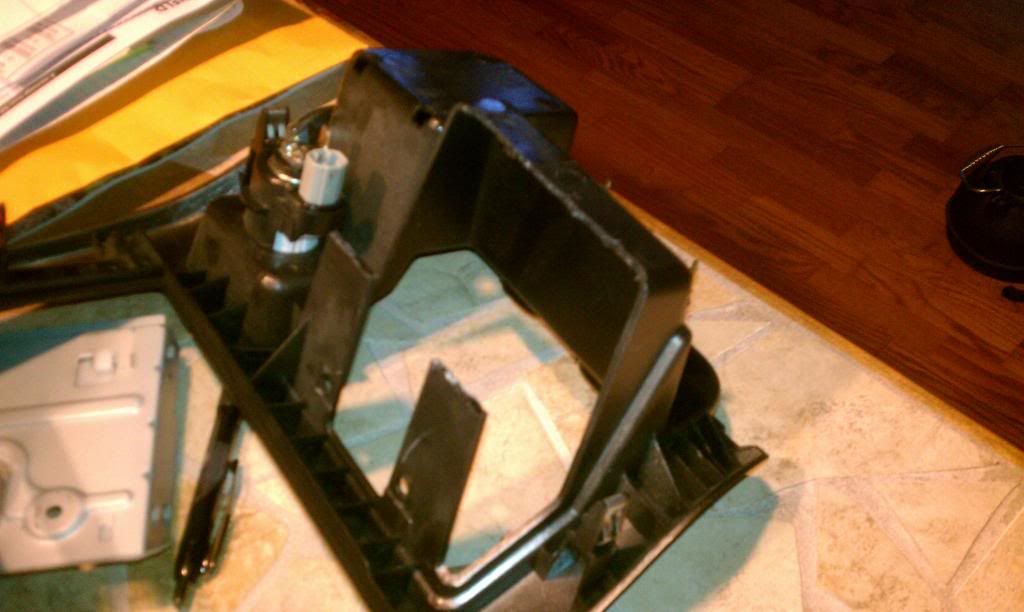
This step is what most opt not to do. I removed to the top of the CB housing and drill a couple holes in it. The holes on the housing are matched with the screw holes for the ashtray mount.
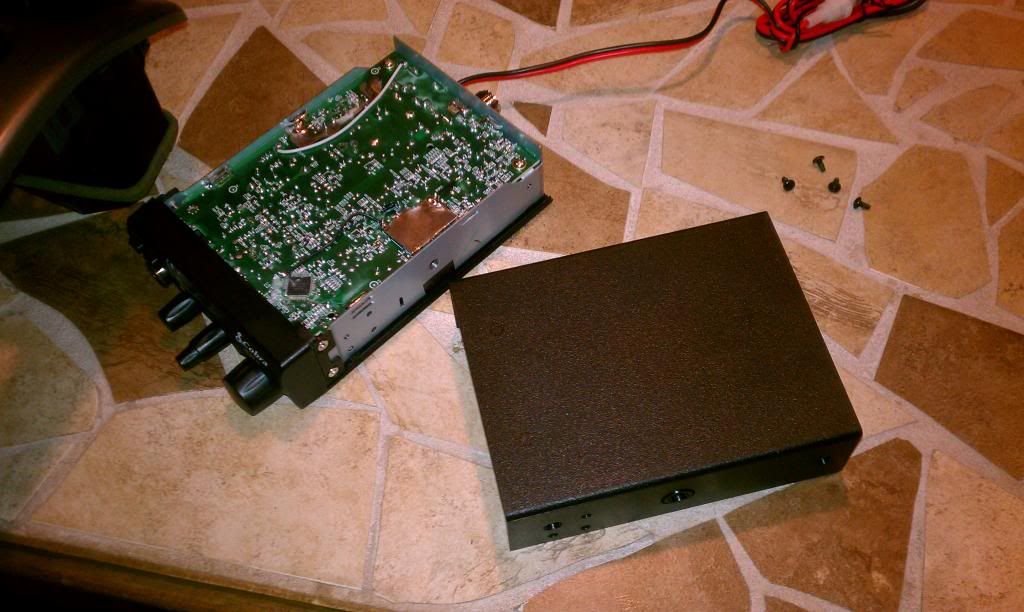

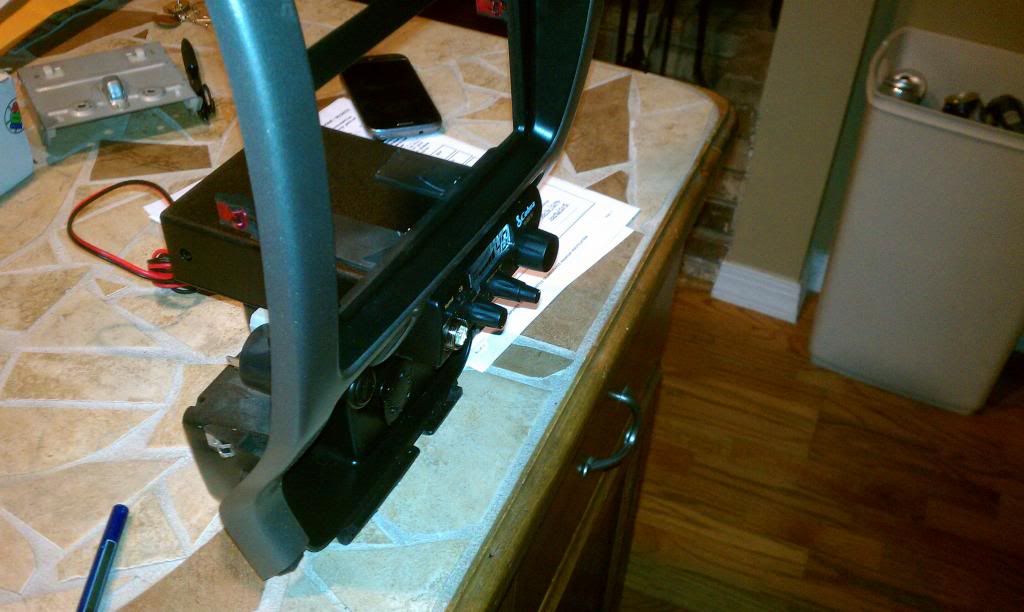
Finally, use the ashtray screws to mount the top CB housing. Carefully slide the CB into the open, and screw back together.
I'll have the install done this Sunday and will post up some pictures then. I'm also replacing the stock dash lights with LED's as I do this install.
Instrument Cluster lights:
I was just able to finish up the instrument panel area of the install. I'll get some pictures when it's a little darker out.
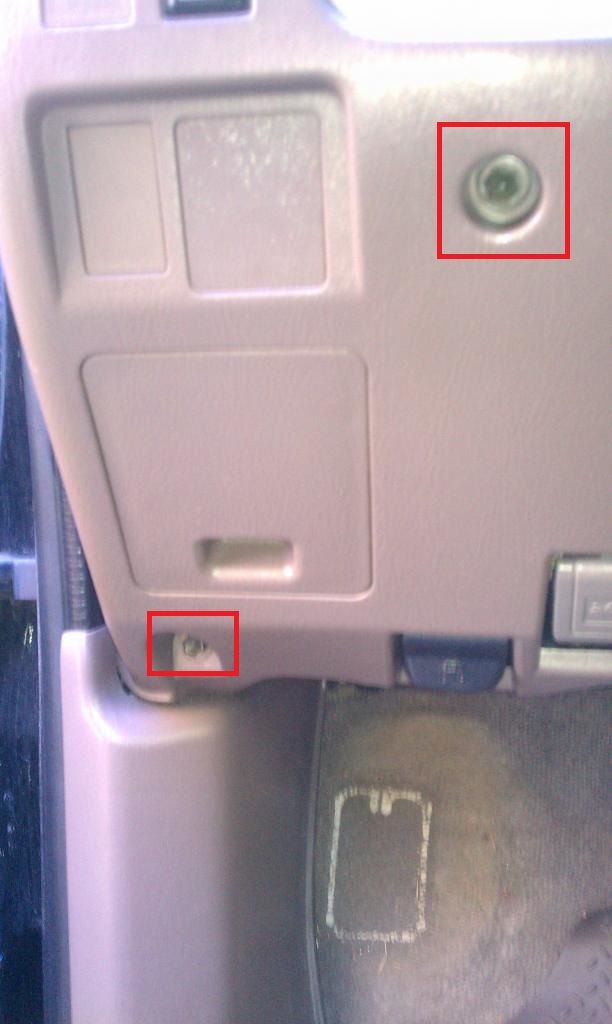
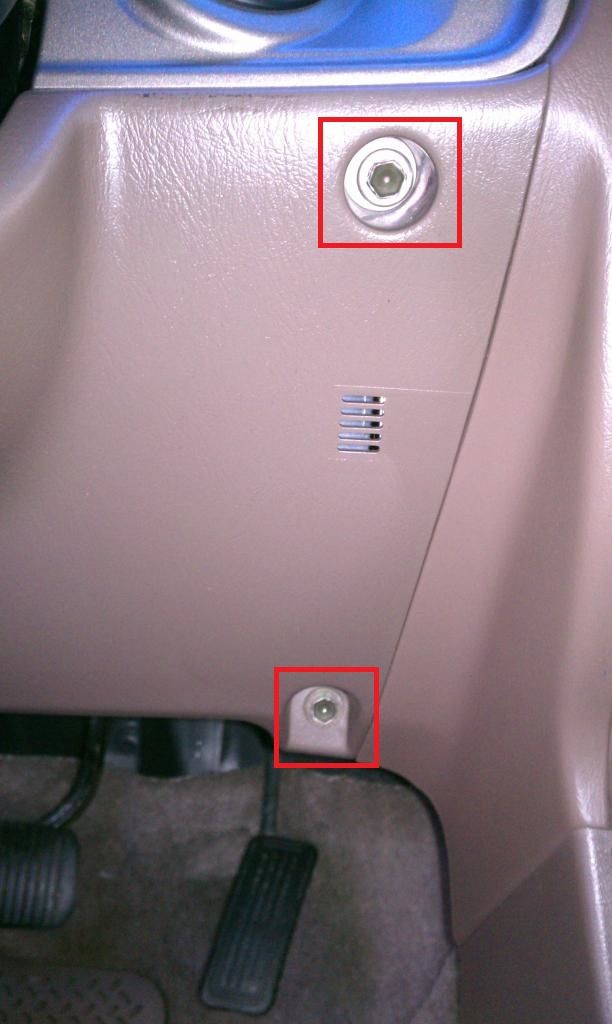
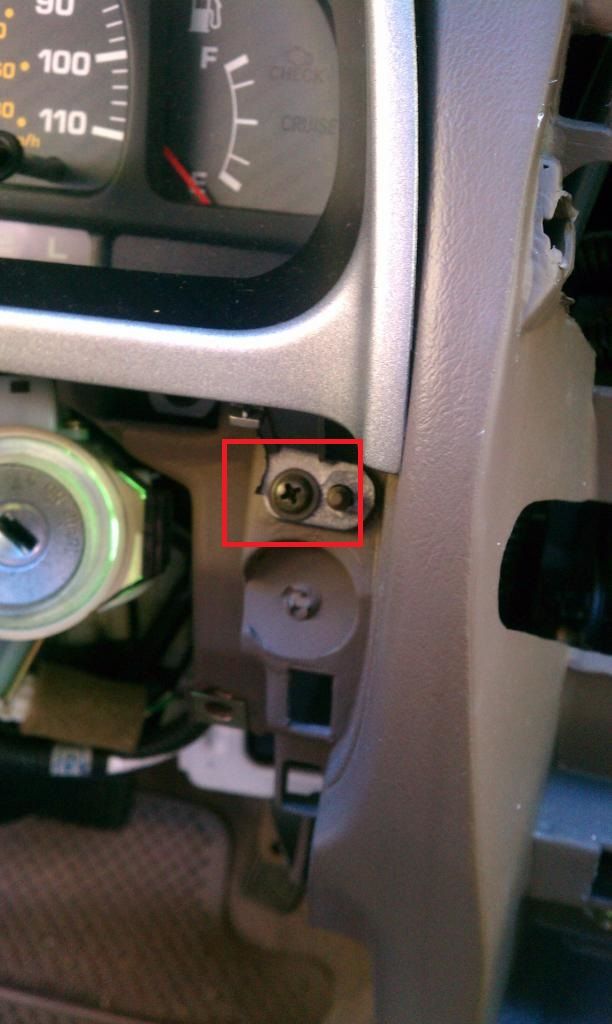
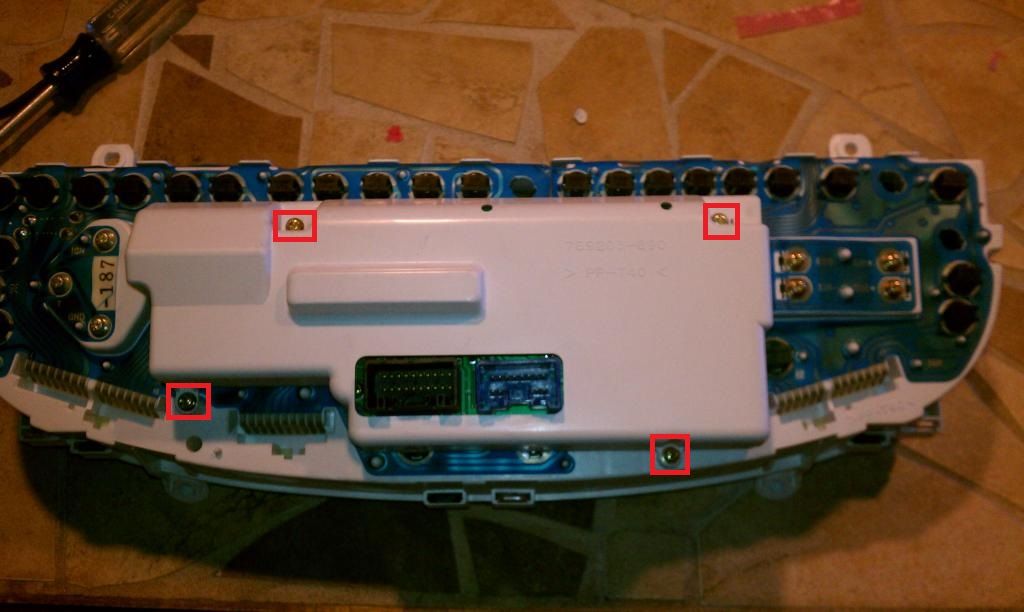
I started by removing the lower part of the dash. The screws I had to remove are marked in red.
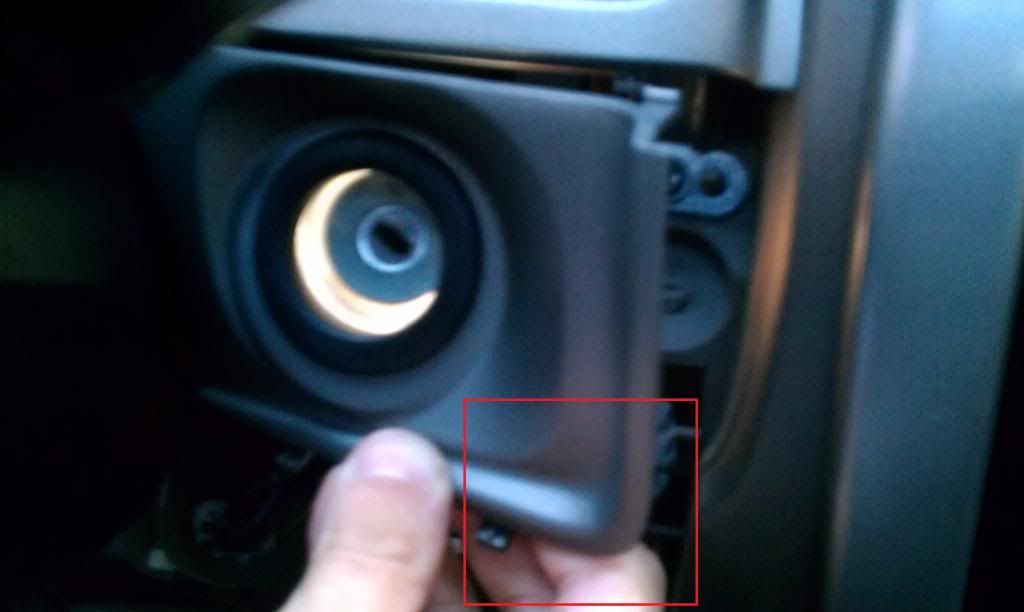
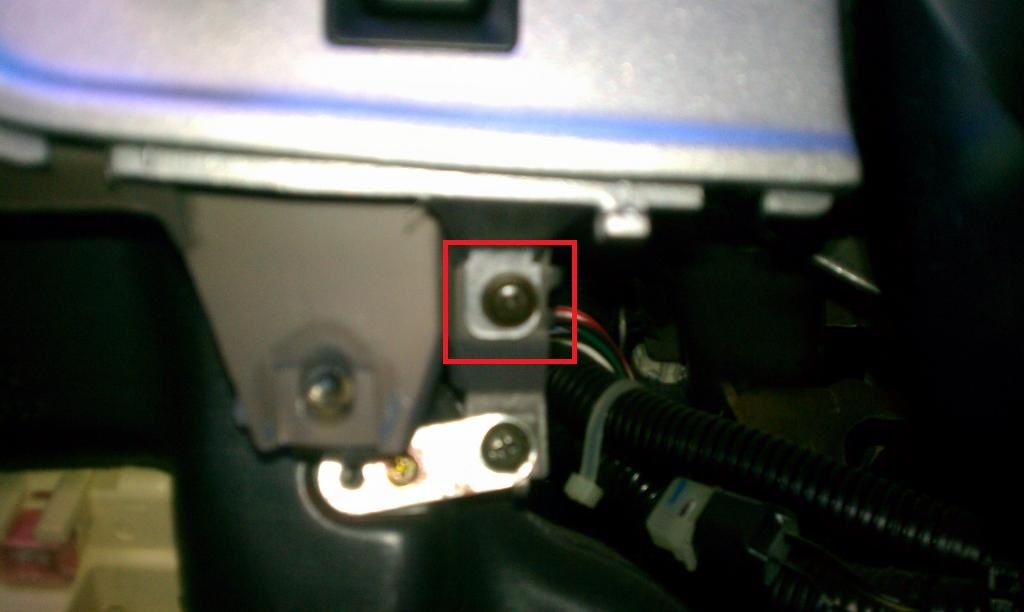
Next I removed the section that's covering the key ring. I gently pulled in te bottom right corner to get it loose.
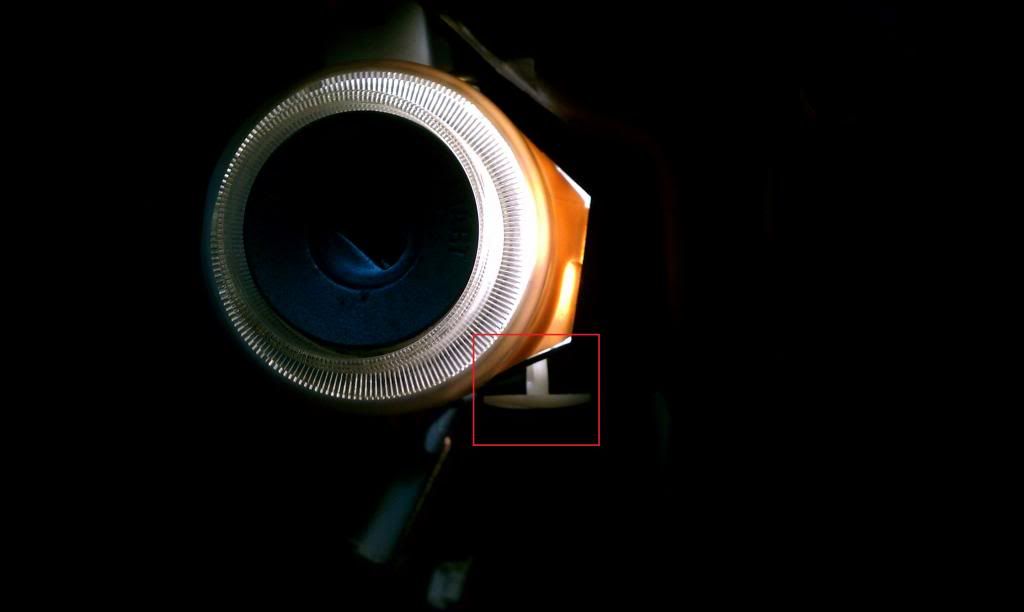
Once the cover is off there is a small white plastic pin thingy that holds the surround on, pull it out. Once it is removed you can slide the surround off and change the bulb (sorry no picture). (#74 LED)
Remove these two screws to loosen the trim around the instrument panel itself. Pull aside.
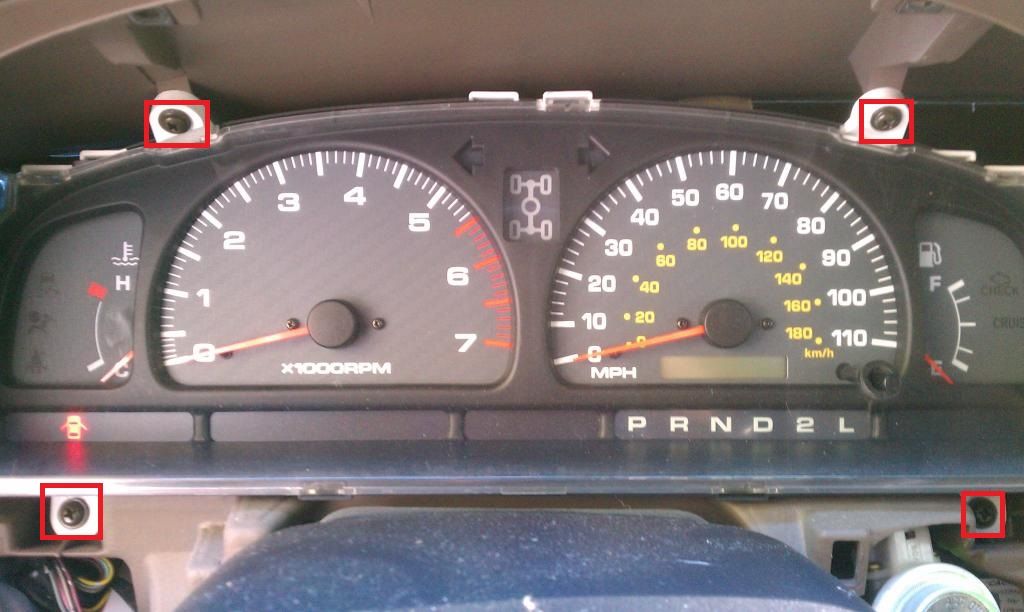
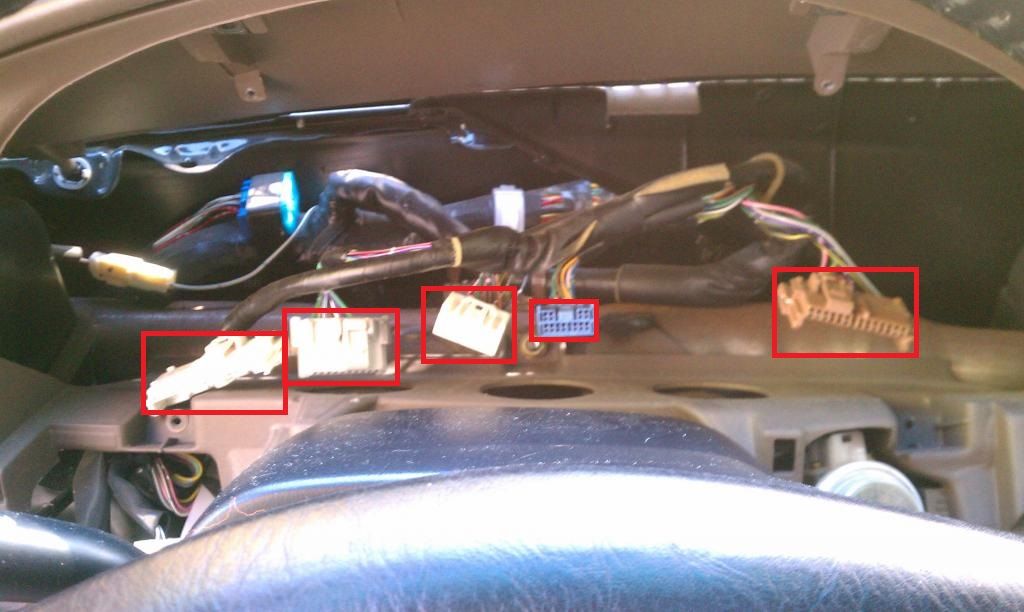
Remove the four screws and disconnect plugs to remove the instrument panel.
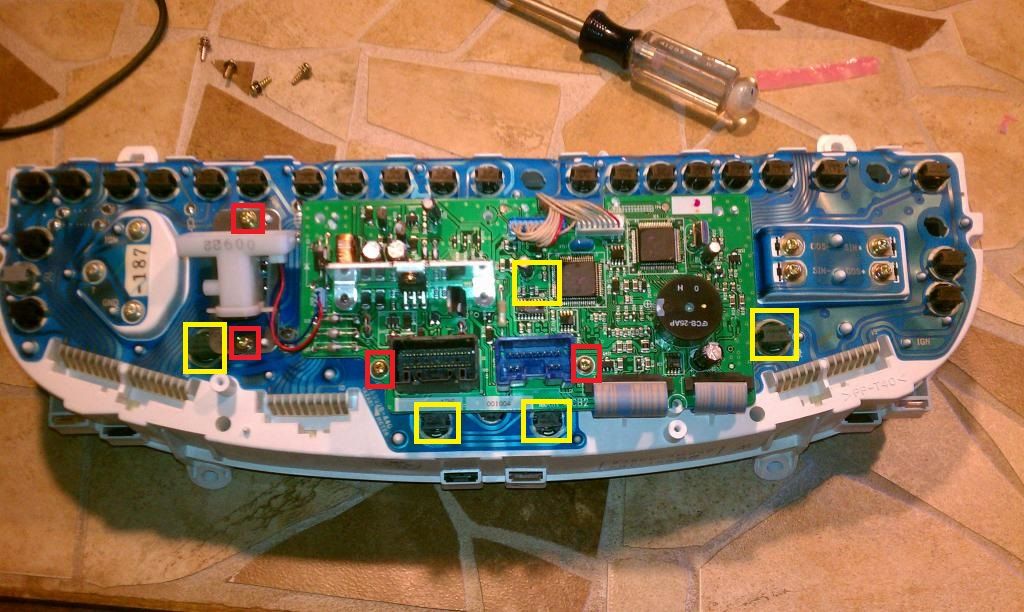
Now remove these six screws to be able to access the bulbs (bulbs are in yellow). I used #74 bulbs for the 2 blinker bulbs.
The two lower yellow squares are for the blinkers. (#74 LED)
The far left, far right, and upper middle yellow squares are for the speedo, tach, and 4wd. (#24 LED)
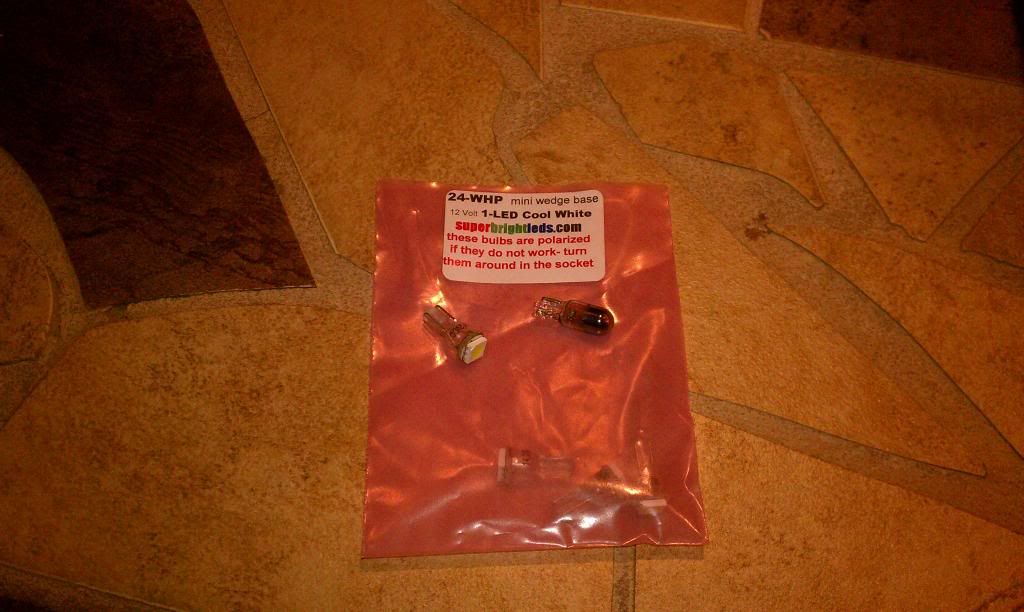
Used these for the speedo and tach bulbs.
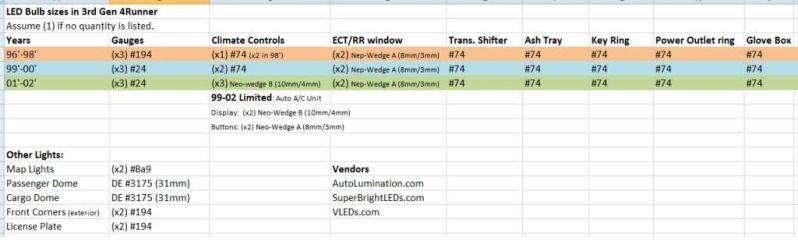
LED bulb chart I wish I had when I started this swap.
Have any questions feel free to ask.
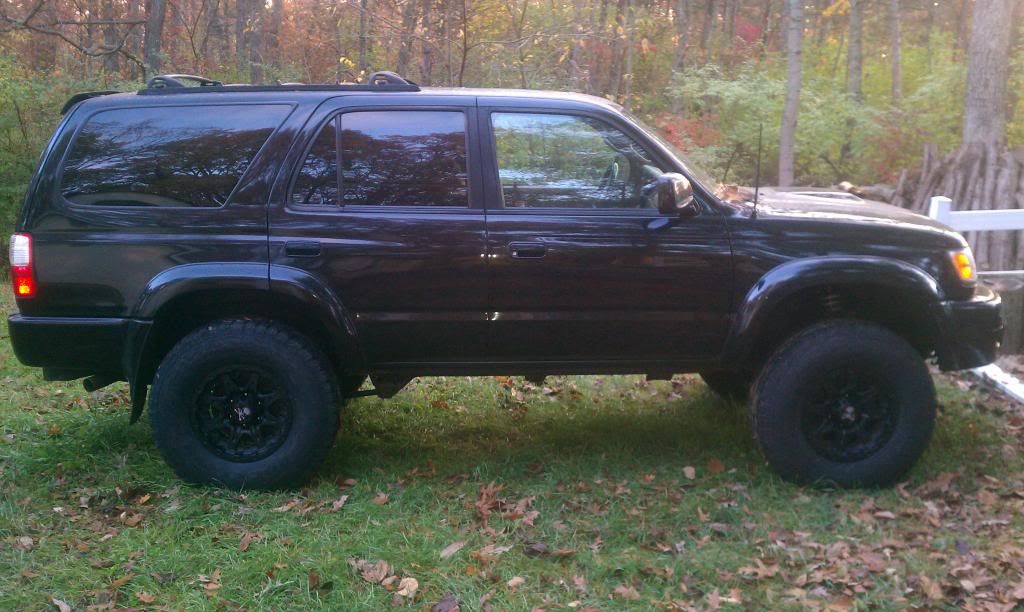
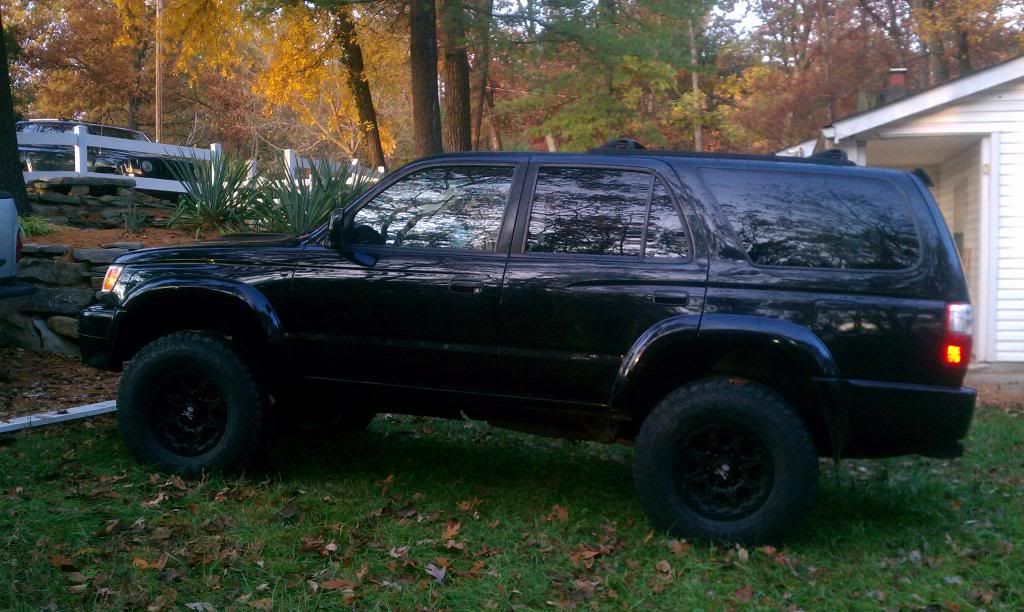
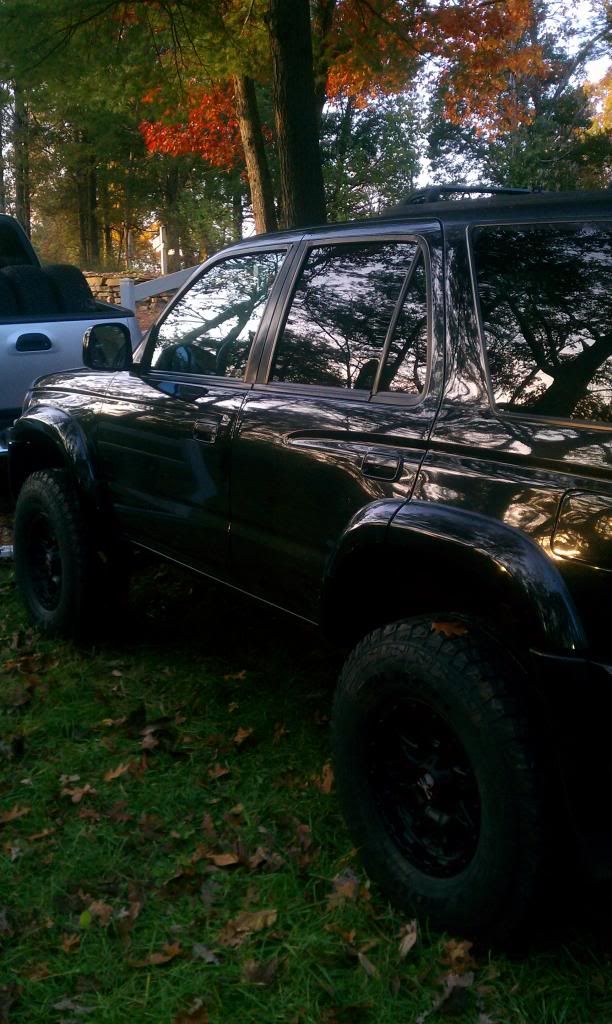
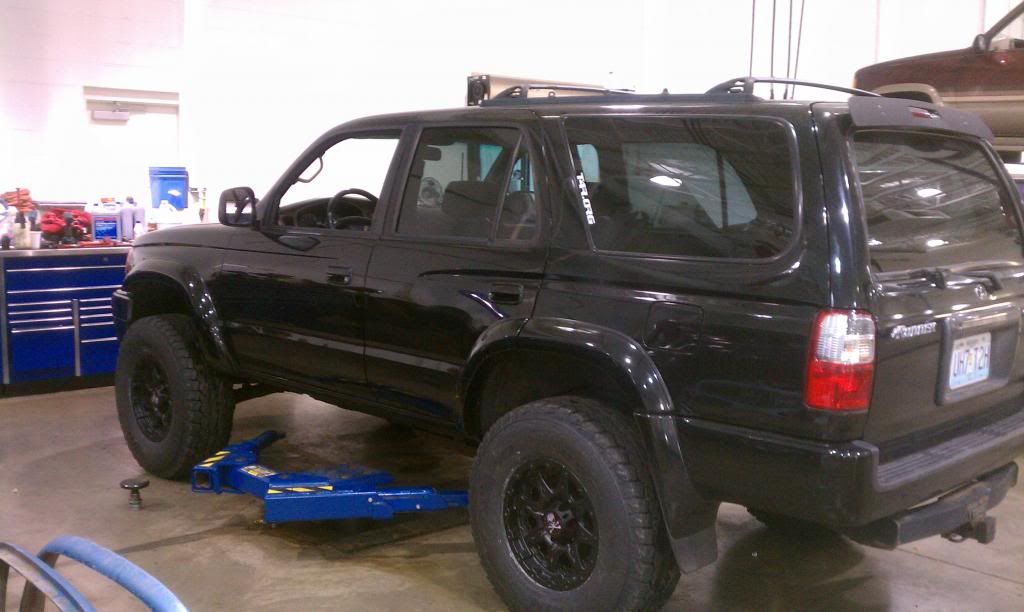
New Wheels and Tires:
Finally the rain stopped and I was able to get the tires on. These are Falken Rocky Mountain ATS II tires (same as WIld Peak), on American Outlaw Buckshot wheels.
Platform Finished:
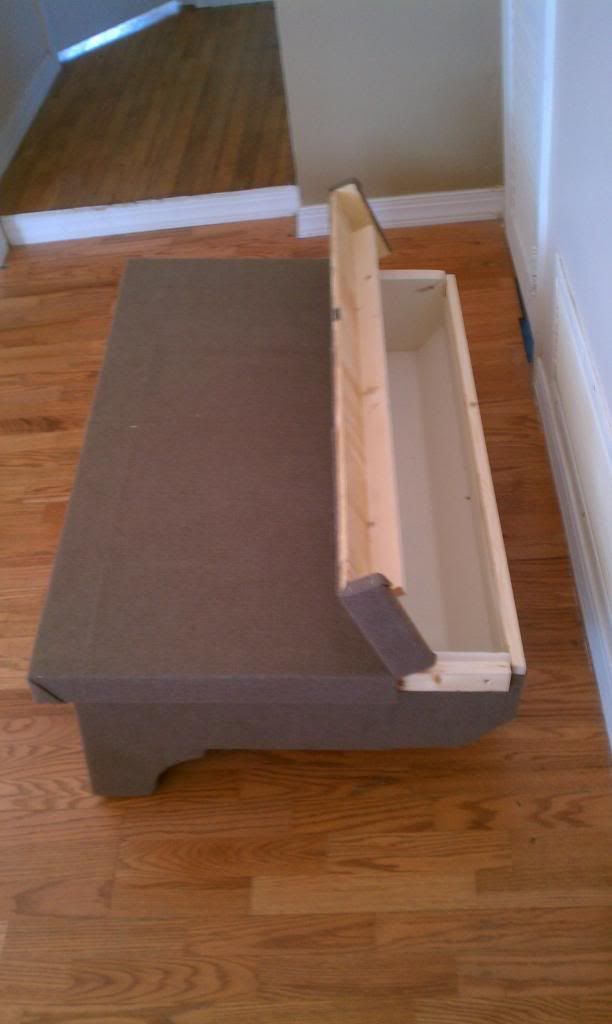
I was able to get all the plywood for the top of the platform cut over the weekend. Now hopefully I'll be able to get everything hinged together and carpeted by the end of this coming weekend.
CB Install:
Tonight I started on my CB install; nothing to hard about this.
Of course pull the center counsel off.

Next I removed the ashtray and cut out the back of the ashtray mount.

This step is what most opt not to do. I removed to the top of the CB housing and drill a couple holes in it. The holes on the housing are matched with the screw holes for the ashtray mount.


Finally, use the ashtray screws to mount the top CB housing. Carefully slide the CB into the open, and screw back together.

I'll have the install done this Sunday and will post up some pictures then. I'm also replacing the stock dash lights with LED's as I do this install.
Instrument Cluster lights:
I was just able to finish up the instrument panel area of the install. I'll get some pictures when it's a little darker out.
I started by removing the lower part of the dash. The screws I had to remove are marked in red.


Next I removed the section that's covering the key ring. I gently pulled in te bottom right corner to get it loose.

Once the cover is off there is a small white plastic pin thingy that holds the surround on, pull it out. Once it is removed you can slide the surround off and change the bulb (sorry no picture). (#74 LED)

Remove these two screws to loosen the trim around the instrument panel itself. Pull aside.


Remove the four screws and disconnect plugs to remove the instrument panel.


Now remove these six screws to be able to access the bulbs (bulbs are in yellow). I used #74 bulbs for the 2 blinker bulbs.

The two lower yellow squares are for the blinkers. (#74 LED)
The far left, far right, and upper middle yellow squares are for the speedo, tach, and 4wd. (#24 LED)

Used these for the speedo and tach bulbs.

LED bulb chart I wish I had when I started this swap.

Have any questions feel free to ask.
New Wheels and Tires:
Finally the rain stopped and I was able to get the tires on. These are Falken Rocky Mountain ATS II tires (same as WIld Peak), on American Outlaw Buckshot wheels.


Platform Finished:
I was able to get all the plywood for the top of the platform cut over the weekend. Now hopefully I'll be able to get everything hinged together and carpeted by the end of this coming weekend.

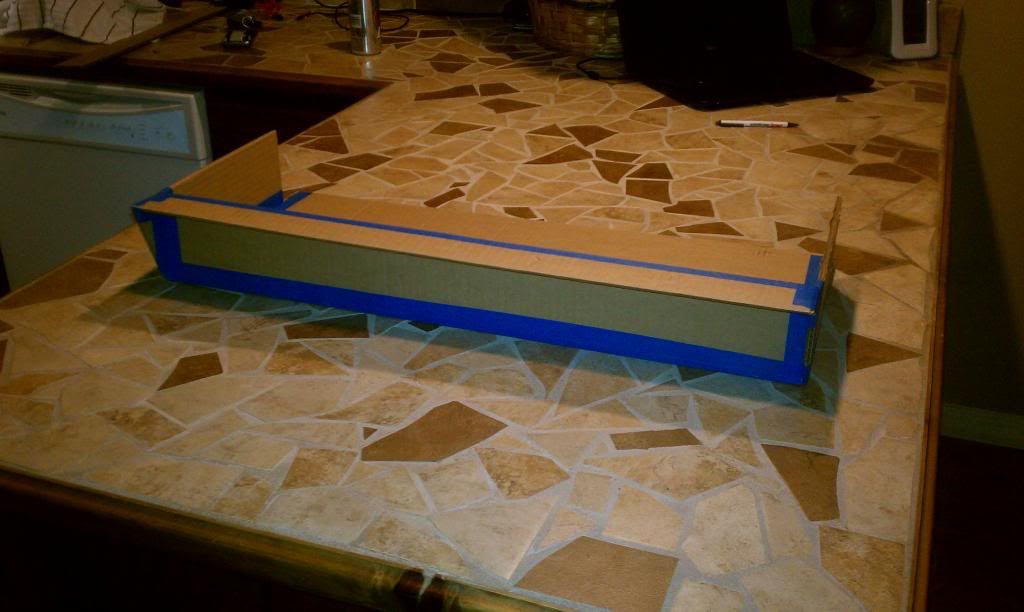
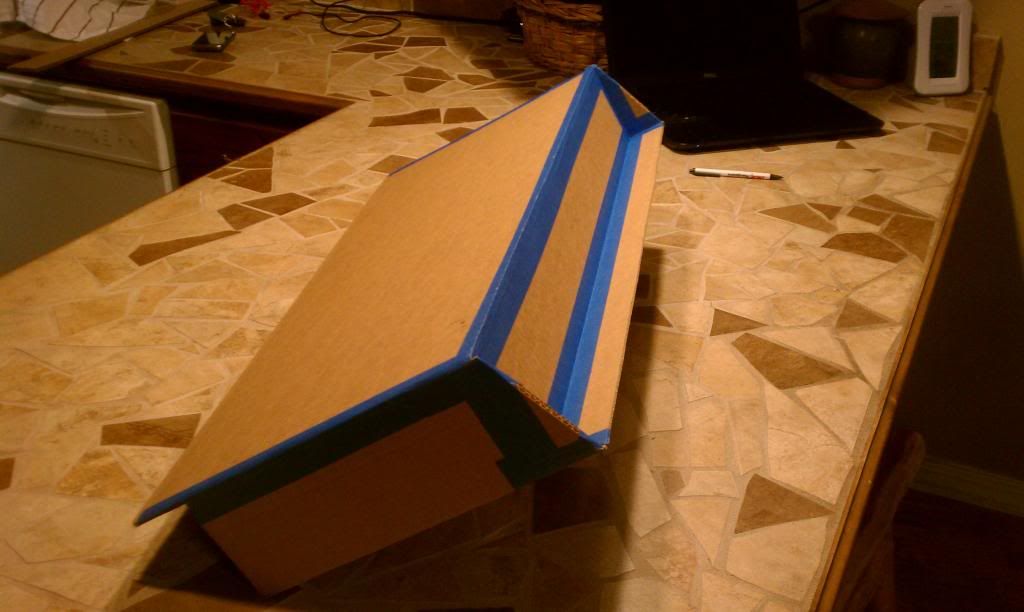
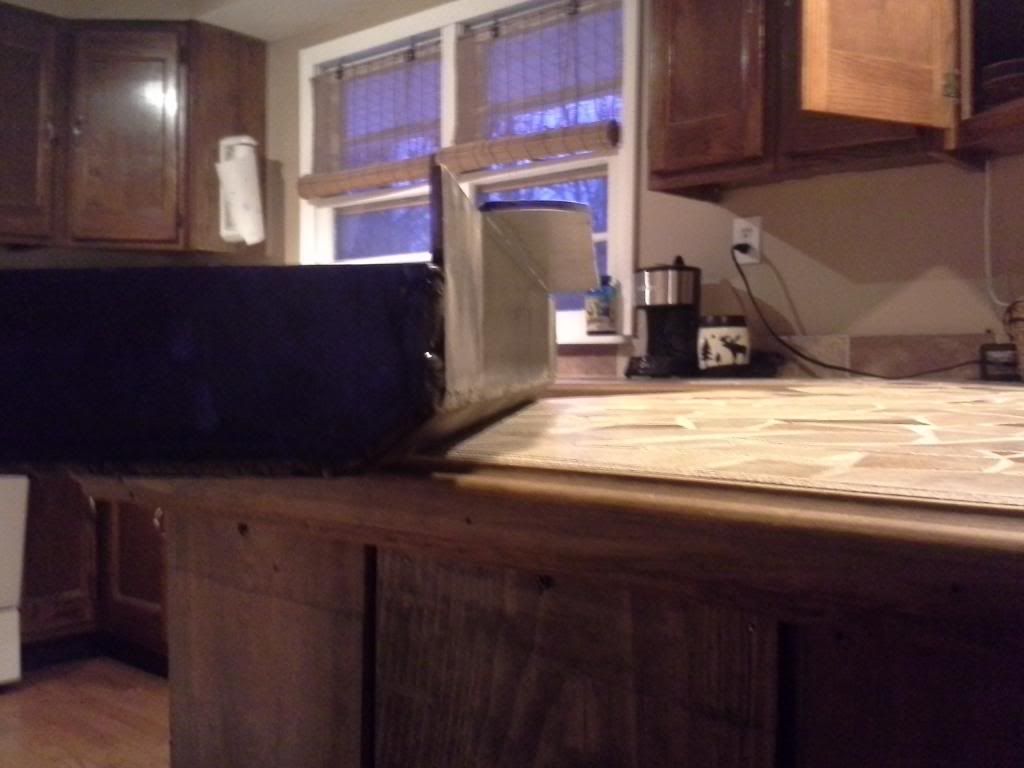
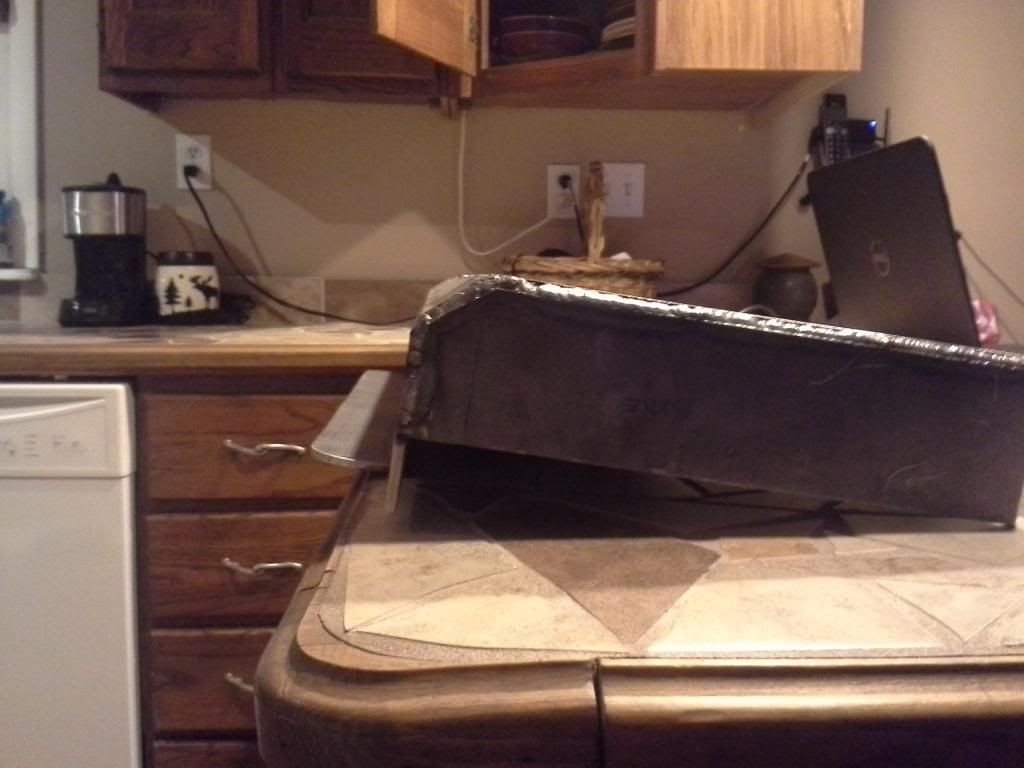
Skid Plate mock up:
Spent some time this afternoon mocking up my own skid plate. I really like the Savage Off-Road skids, but really don't want to pay that kind of money. Take a few measurements and test fit. Did a little trim and fit it again. Fits like a glove!
I plan an doing some more trimming to drop a little weight.

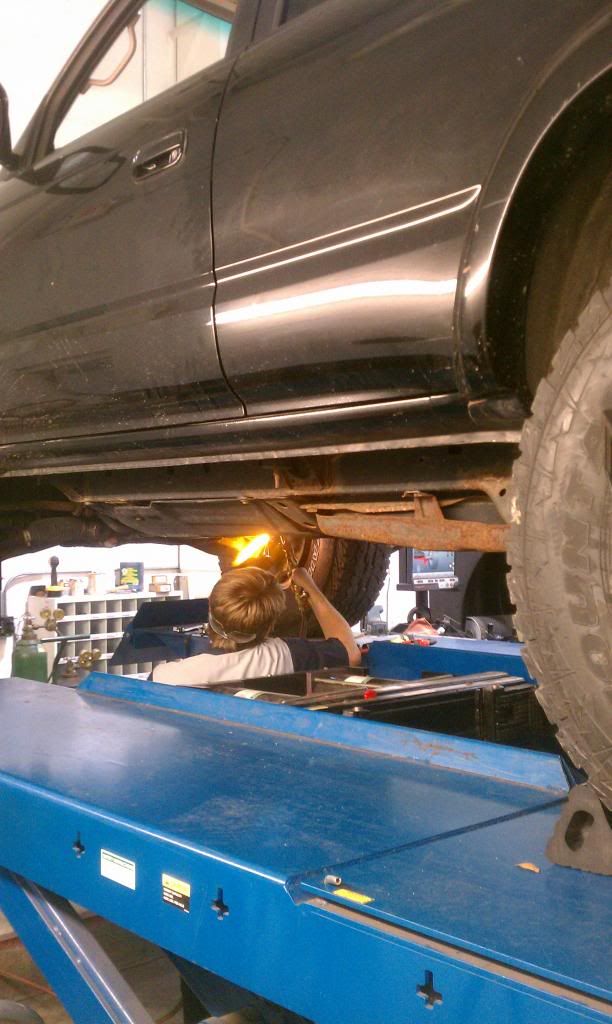
Alignment:
Had a much needed alignment tonight, wheel spacers removed, and new battery put in. This weekend I'll be getting the sleeping platform finished, hopefully building some sway bar links, and chasing down an annoying clanking sounds coming from the rear.

A little heat was needed to get the tie rod ends to budge.
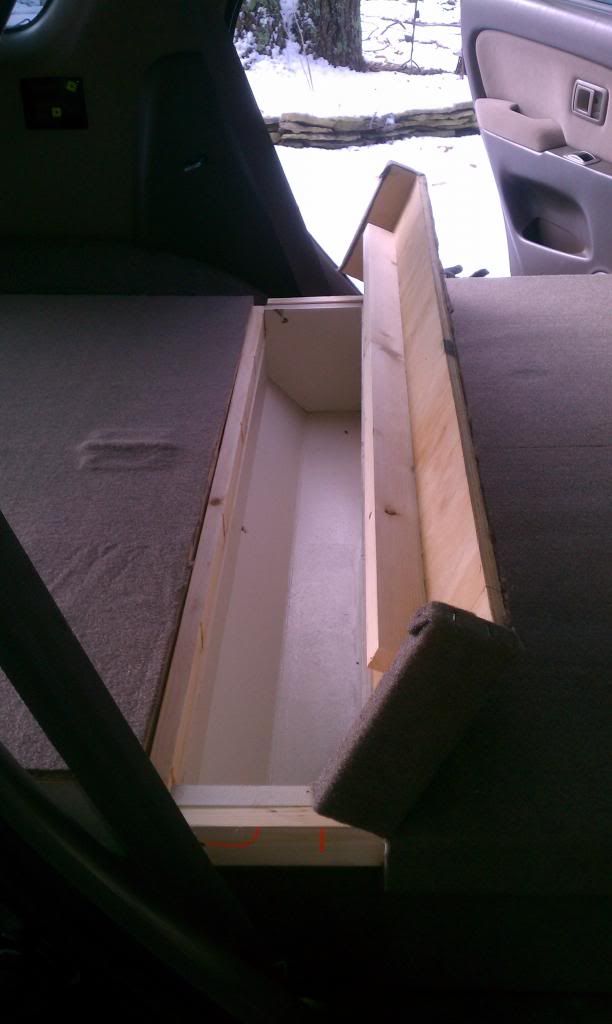
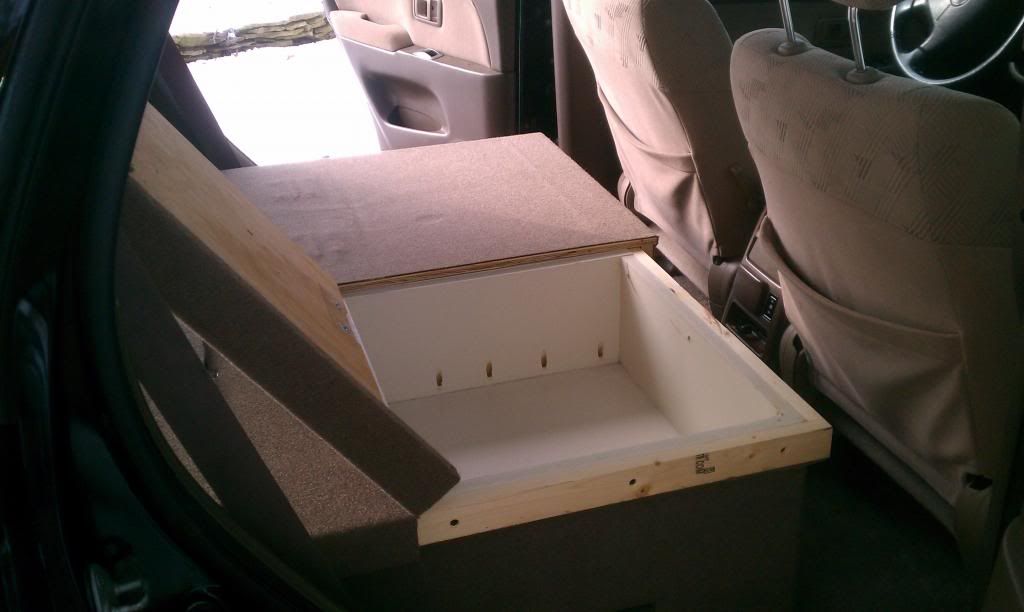
Carpeting:
I have about 2 weeks to get everything finished up on the 4runner before we head to Utah for Christmas. With all the snow on the ground right now, that kind of limits me to what I can do on the exterior. So, I've been working on carpeting the sleeping platform today. I must tell you, that carpeting this platform is really bringing back my speaker box building days.


I've been working hard on everything this weekend, in order to get things ready for Utah in about 6 days. I've actually only been working today since I decided to act like a kid again and go sledding all day yesterday. ;D
The sway bar links are finished and installed on the rear so far today. I'll try to get the fronts finished as well, but no promises there. The biggest area for body is the rear and my new links should take care of that. The links are overkill to say the least. Everything I used was 1/2" rather than 3/8". That meant I had to drill out the bushings just a little, and drill out the sway bar itself a little as well.


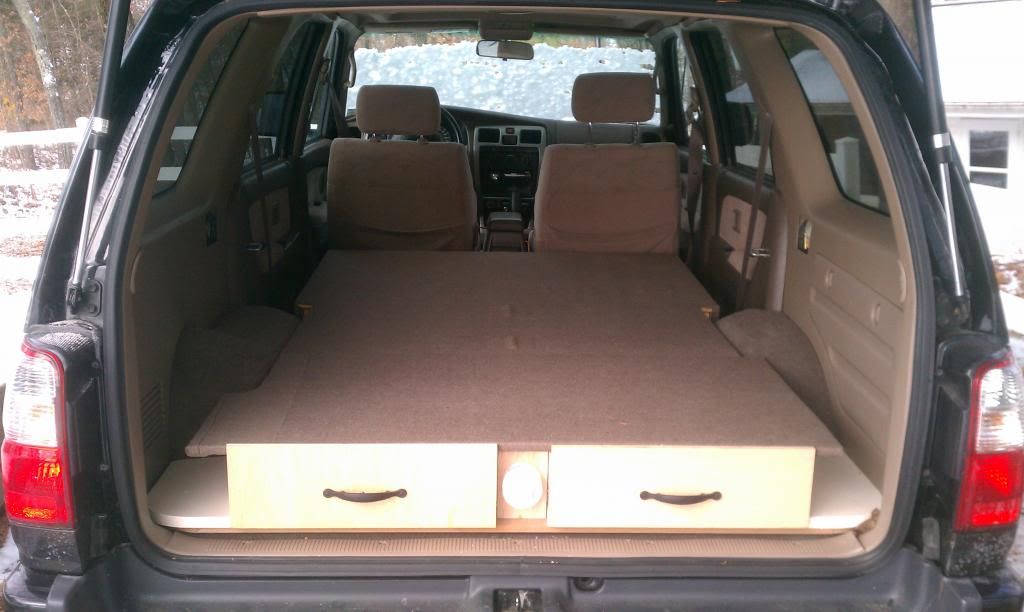
I also got the platform finished and my new sleeping pads in.

The sway bar links are finished and installed on the rear so far today. I'll try to get the fronts finished as well, but no promises there. The biggest area for body is the rear and my new links should take care of that. The links are overkill to say the least. Everything I used was 1/2" rather than 3/8". That meant I had to drill out the bushings just a little, and drill out the sway bar itself a little as well.


I also got the platform finished and my new sleeping pads in.


Nice Runner. Quite a few things that I have been wanting to do to mine, although it won't be a dedicated camping vehicle and I will usually have 2 little elves riding in the back.
Subscribed and looking forward to more mods! (love how well you document everything)
Sent from my SAMSUNG-SM-N900A using Tapatalk
Subscribed and looking forward to more mods! (love how well you document everything)
Sent from my SAMSUNG-SM-N900A using Tapatalk
Thanks guys! I've got quite the pile of parts gathering at the house. I seem to be buying more parts than I have time to put on. My list of parts waiting to be installed looks something like this.
- 6-3/4" front speakers
- 5-1/4" rear speakers
- Battery powered interior LED lights
- Power inverter
- B&M transmission cooler
- Single pillar pod
- Transmission temp gauge
- Wiring for gauge and power inverter
- Fix frame rust
- Build rock sliders
- Build front skid plate
tip
Adventurer
Great build so far, love the sleeping platform!
You have the exact suspension I'm going to run, Toytec-Eibach/5100 in front, OME 891/5100 in rear. Are you running Tundra or Tacoma 5100's? How do you like it so far?
It looks like the rear of your 4runner is slightly lower than the front, or is it just the photos? I'd like a 'slight' rake on mine, maybe I should get some OME trim packers.
Great build so far, love the sleeping platform!
You have the exact suspension I'm going to run, Toytec-Eibach/5100 in front, OME 891/5100 in rear. Are you running Tundra or Tacoma 5100's? How do you like it so far?
It looks like the rear of your 4runner is slightly lower than the front, or is it just the photos? I'd like a 'slight' rake on mine, maybe I should get some OME trim packers.
Thanks!
With the suspension questions. I'm running the Bilstein 5100's that are for the 4runner, which are the same as the Tacoma's. The Tundra's are pretty much the exact same thing except they offer 5 adjustment settings rather than 3 like the Tacoma's. Overall with the front suspension, I'm pretty happy with how everything turned out with it. It was a PITA to get the everything on the first time, but I think I could swap out springs in about 20 minutes per side now. The rear is a different story, since I'm not impressed at all with the 891's. These were suppose to be heavy duty rated springs for carrying extra weight. I went this route due to the weight of the sleeping platform, and with the anticipation of having a rear bumper/tire carrier. I noticed quite a bit of sag after only 2k miles, and I'm not happy about this. I'm thinking about getting different springs for the front or adding airbags, not sure yet though. If I get new springs for the rear, I'll most likely go with either some LC8's (4") or LC9's (5"). I'm actually talking with Toytec about the spring issues. I took some measurements and it seems that I've lost close to 2" of lift on the rear. I would stay clear of them honestly, and go with some Land Cruiser springs.
Last edited:
Skid Plate
I started on my Savage like skid plates this weekend. At this point I'm almost done with the first section. I still need to grind everything done, and make another pass so I can round over the edges. I also need to drill the mounting holes and the holes on the side. I'm also going to add some gussets on the front lip since I've heard that is a spot that likes to bend.
This is what I was going for.

Is this is what I have so far.
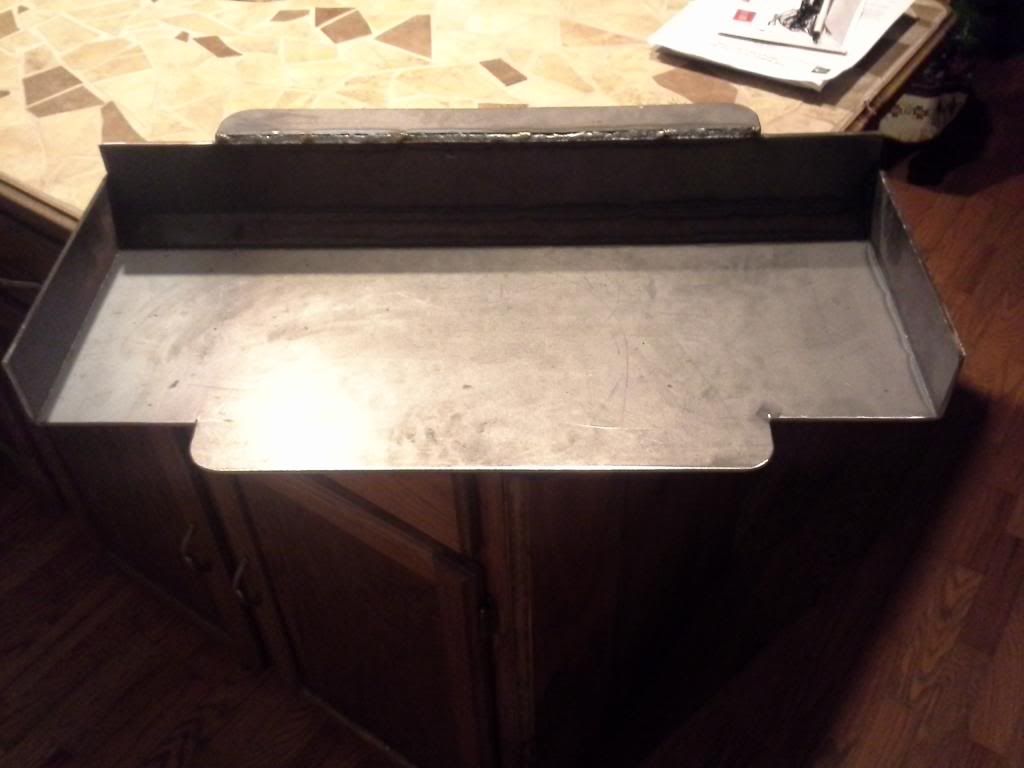
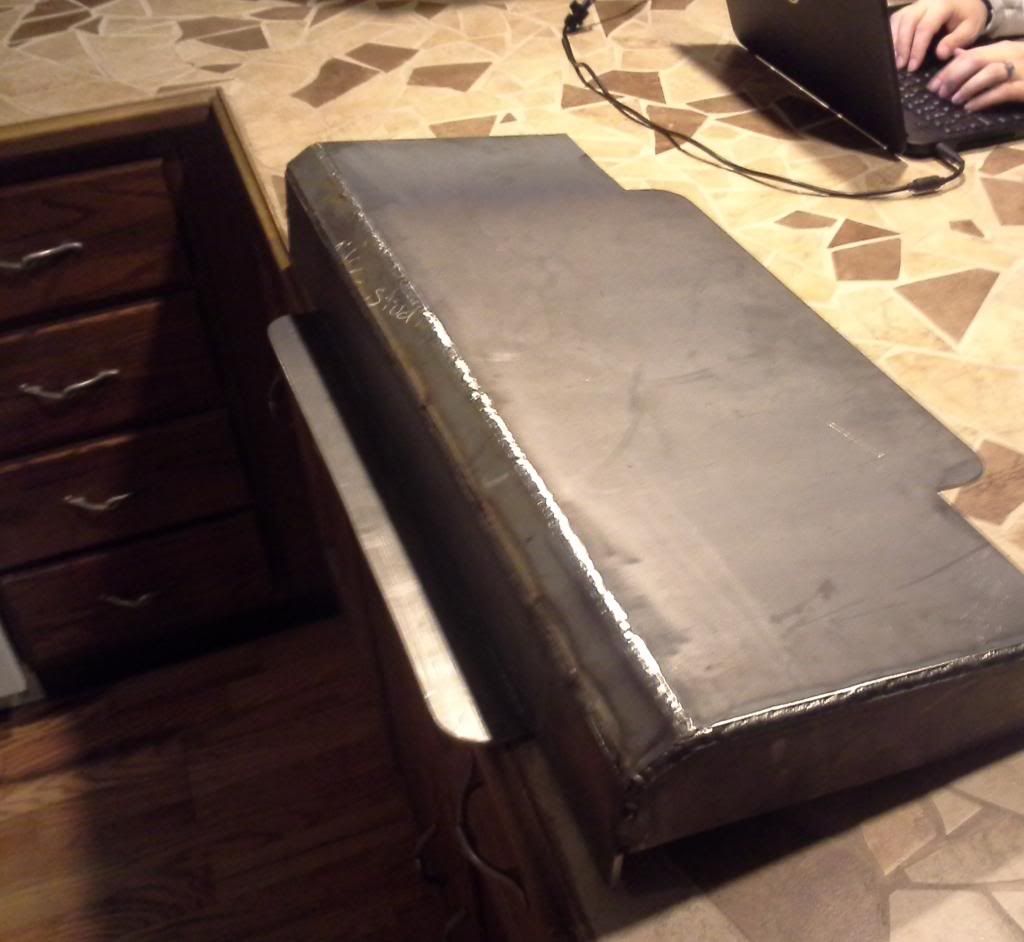
I used 3/16" hot rolled sheet for this. I used a grinder to cut about 90% of the way through, and then I was able to bend the metal by hand. I think it turned out pretty good, and can't wait to get it finished.
Forum statistics
Members online
- 2.ooohhh
- TexasSixSeven
- Hoghead
- NOPEC
- Kingsize24
- ITTOG
- TouringSedan
- YukonMontanaTannerTrapper
- Battered_Travels
- danielhfranks
- plh
- 2auroras
- Hegear
- Hoov
- aaldape
- pwjohns
- ExpoMike
- Long Rifle
- JoeRidesBikes
- Power Wagon Family
- Antwon412
- hdas
- Willys3b
- OVRLNDFX4
- MR. ED
- TheNorm
- runandcycle
- 180out
- wwwllw
- Todd n Natalie
- pkung
- Mac95
- WideOpenThrottle
- buyrovers
- StenchRV
- aadecktor
- bmw635
- Ozarker
- Randall Dee
- cycleman4
- webfoots
- southwest1
- JayOtheMountains
- mmth_ski_bum
- simple
- spon
- JackW
- Ryan Matthes
- craig333
- crystalclear
Total: 670 (members: 58, guests: 612)